Table of Contents
Advertisement
Quick Links
Advertisement
Table of Contents

Related Manuals for FujiFilm X-Pro3


Summary of Contents for FujiFilm X-Pro3
- Page 1 Owner’s Manual BL00005035-204...
-
Page 2: Introduction
For the Latest Information The latest versions of the manuals are available from: http://fujifilm-dsc.com/en/manual/ The site can be accessed not only from your computer but also from smartphones and tablets. It also contains information on the software license. - Page 3 Chapter Index Menu List Before You Begin First Steps Basic Photography and Playback Movie Recording and Playback Taking Photographs The Shooting Menus Playback and the Playback Menu The Setup Menus Shortcuts Peripherals and Optional Accessories Connections Technical Notes...
-
Page 4: Menu List
Menu List Camera menu options are listed below. Shooting Menus Adjust settings when shooting photos or movies. See page 97 for details. H IMAGE QUALITY SETTING G AF/MF SETTING IMAGE SIZE FOCUS AREA IMAGE QUALITY AF MODE RAW RECORDING AF-C CUSTOM SETTINGS FILM SIMULATION STORE AF MODE BY ORIENTATION 120 1⁄3... - Page 5 Menu List A SHOOTING SETTING B MOVIE SETTING SPORTS FINDER MODE MOVIE MODE FULL HD HIGH SPEED REC PRE-SHOT sN F FILM SIMULATION SELF-TIMER SAVE SELF-TIMER SETTING F MONOCHROMATIC COLOR 1⁄ 4 1⁄ 4 1⁄3 1⁄3 INTERVAL TIMER SHOOTING F WHITE BALANCE INTERVAL TIMER SHOOTING F DYNAMIC RANGE EXPOSURE SMOOTHING...
-
Page 6: The Playback Menu
The Playback Menu Adjust playback settings. See page 173 for details. C PLAY BACK MENU C PLAY BACK MENU SWITCH SLOT RED EYE REMOVAL RAW CONVERSION VOICE MEMO SETTING ERASE RATING SIMULTANEOUS DELETE COPY 2⁄3 2⁄3 1⁄3 1⁄3 (RAW SLOT1/JPG SLOT2) IMAGE TRANSFER ORDER CROP WIRELESS COMMUNICATION... -
Page 7: Setup Menus
Menu List Setup Menus Adjust basic camera settings. See page 193 for details. D USER SETTING D SCREEN SETTING FORMAT EYE SENSOR SETTING DATE/TIME EVF BRIGHTNESS TIME DIFFERENCE EVF COLOR EVF COLOR ADJUSTMENT Qa 1⁄3 1⁄3 LCD BRIGHTNESS MY MENU SETTING LCD COLOR SENSOR CLEANING LCD COLOR ADJUSTMENT... - Page 8 Menu List D BUTTON/DIAL SETTING D SAVE DATA SETTING FOCUS LEVER SETTING FRAME NO. EDIT/SAVE QUICK MENU SAVE ORG IMAGE Q MENU BACKGROUND EDIT FILE NAME FUNCTION (Fn) SETTING CARD SLOT SETTING (STILL IMAGE) 1⁄3 1⁄3 COMMAND DIAL SETTING SELECT SLOT(xSEQUENTIAL) SHUTTER AF SELECT SLOT(FSEQUENTIAL) SHUTTER AE...
-
Page 9: Table Of Contents
Table of Contents Introduction ......................ii For the Latest Information .................... ii Menu List........................ iv Shooting Menus ........................iv The Playback Menu ......................vi Setup Menus ........................vii Supplied Accessories ..................xix About This Manual ..................... xx Symbols and Conventions ..................xx Terminology ........................xx Before You Begin Before You Begin Parts of the Camera ..................... - Page 10 First Steps First Steps Attaching the Strap ...................28 Attaching a Lens ....................30 Inserting the Battery ..................31 Inserting Memory Cards ..................33 Using Two Cards ......................34 Compatible Memory Cards ..................35 Charging the Battery ..................36 Turning the Camera On and Off ..............38 Checking the Battery Level................39 Basic Setup ......................40 Choosing a Diff erent Language................42 Changing the Time and Date ..................42...
- Page 11 Table of Contents Exposure Compensation .................82 C (Custom) ..........................83 Focus/Exposure Lock ..................84 Other Controls ........................85 Bracketing ......................86 W ISO BKT ..........................86 V WHITE BALANCE BKT ....................86 s BKT............................87 Continuous Shooting (Burst Mode) ............90 HDR .........................91 Multiple Exposures ....................93 Advanced Filters ....................95 Advanced Filter Options .....................96 The Shooting Menus The Shooting Menus...
- Page 12 AF/MF SETTING ....................114 FOCUS AREA ........................114 AF MODE ........................... 115 AF-C CUSTOM SETTINGS ..................116 STORE AF MODE BY ORIENTATION ..............120 AF POINT DISPLAY yz ..................120 NUMBER OF FOCUS POINTS ................. 120 PRE-AF ..........................121 AF ILLUMINATOR ......................121 FACE/EYE DETECTION SETTING ................
- Page 13 Table of Contents FLASH SETTING ....................149 FLASH FUNCTION SETTING ................... 149 RED EYE REMOVAL ...................... 149 TTL-LOCK MODE ......................150 LED LIGHT SETTING ....................150 MASTER SETTING ......................151 CH SETTING ........................151 MOVIE SETTING ....................152 MOVIE MODE ........................152 FULL HD HIGH SPEED REC ..................
- Page 14 Playback and the Playback Menu Playback and the Playback Menu The Playback Display ..................168 The DISP/BACK Button ..................... 169 Viewing Pictures ....................171 Playback Zoom ......................172 Multi-Frame Playback ....................172 The Playback Menu ..................173 SWITCH SLOT ........................173 RAW CONVERSION ......................
- Page 15 Table of Contents SOUND SETTING ....................199 AF BEEP VOL........................199 SELF-TIMER BEEP VOL....................199 OPERATION VOL......................200 SHUTTER VOLUME ....................... 200 SHUTTER SOUND ......................200 PLAYBACK VOLUME ....................200 SCREEN SETTING ..................... 201 EYE SENSOR SETTING ....................201 EVF BRIGHTNESS ......................
- Page 16 SHOOT WITHOUT LENS .................... 221 SHOOT WITHOUT CARD ..................221 FOCUS RING ........................221 FOCUS RING OPERATION ..................222 AE/AF-LOCK MODE ..................... 222 AWB-LOCK MODE ......................222 APERTURE RING SETTING (A) ................223 APERTURE SETTING ....................223 TOUCH SCREEN SETTING ..................224 LOCK.............................
- Page 17 MASTER(OPTICAL) ....................... 264 Connections Connections Wireless Connections (Bluetooth®, Wireless LAN/Wi-Fi) ............... 270 Smartphones and Tablets: FUJIFILM Camera Remote ......270 Tethered Shooting: Capture One Pro Fujifi lm/Adobe® Photoshop® Lightroom® Classic CC + FUJIFILM Tether Shooting Plug-in/ FUJIFILM X Acquire ....................272 xvii...
- Page 18 Lightroom® Classic CC + FUJIFILM Tether Shooting Plug-in/ FUJIFILM X Acquire ....................276 Copying Pictures to a Computer ................ 277 Converting RAW Images: FUJIFILM X RAW STUDIO ....... 278 Backing up and Restoring Camera Settings (FUJIFILM X Acquire)....................278 Connecting to Smartphones ................279 instax SHARE Printers ..................
-
Page 19: Supplied Accessories
Supplied Accessories The following are included with the camera: • NP-W126S rechargeable battery • USB cable • Body cap (comes attached to camera) • Metal strap clips (× 2) • Clip attaching tool • Protective covers (× 2) • Shoulder strap •... -
Page 20: About This Manual
About This Manual This manual contains instructions for your FUJIFILM X-Pro3 digital camera. Be sure you have read and understood its contents before proceeding. Symbols and Conventions The following symbols are used in this manual: Information that should be read to prevent damage to the product. -
Page 21: Before You Begin
Before You Begin... -
Page 22: Parts Of The Camera
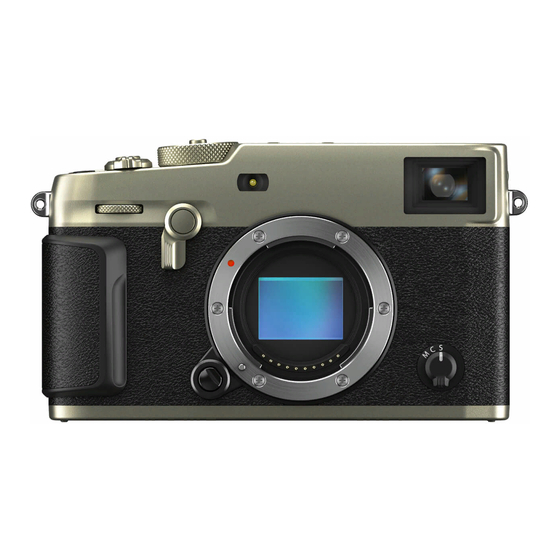
Parts of the Camera Fn1 button ............81 USB connector (Type-C) ....36, 54, 273 Shutter button ..........45 Microphone/remote release connector Exposure compensation dial ....8, 82 (⌀2.5 mm) ..........51, 63 Shutter speed dial/ Hot shoe cover ..........259 Sensitivity dial .........7, 79, 145 Body cap ............30 Dial lock release ..........7 Focus mode selector ........68... - Page 23 Parts of the Camera Viewfi nder window ......4, 6, 12, 17 PLAY (playback) button ........47 Eye sensor ............6 DISP (display)/BACK button ....17, 169 Sub monitor ........6, 11, 212 Cable channel cover for DC coupler ..286 Monitor panel Battery-chamber cover .........31 DRIVE button/DELETE (delete) button Battery-chamber cover latch ......31 ............8, 44, 48, 86...
-
Page 24: The Viewfi Nder Window
The Viewfi nder Window Use the viewfi nder selector to switch between the electronic viewfi nder (EVF) and the optical viewfi nder (OVF). In addi- tion, a small electronic rangefi nder (ERF) window can be displayed in the OVF. Switching Between the EVF and OVF To switch between the EVF and OVF, pull the viewfi nder selector to the right. - Page 25 Parts of the Camera Turning the ERF On and Off To turn the ERF on or off , pull the view- fi nder selector to the left while the OVF is displayed. ERF off ERF on 12800 12800 The ERF is available only when r SINGLE POINT is selected for AF mode.
-
Page 26: The Lcd Monitor And Sub Monitor
The LCD Monitor and Sub Monitor Shooting settings are displayed in the sub monitor when the monitor panel is closed. Opening the panel turns the main mon- itor (LCD) on and the viewfi nder (EVF) off . Sub monitor LCD monitor •... -
Page 27: The Focus Stick (Focus Lever)
Parts of the Camera The Focus Stick (Focus Lever) Tilt or press the focus stick to select the fo- cus area. The focus stick can also be used to navigate the menus. The Shutter Speed Dial/Sensitivity Dial Shutter speed can be adjusted by rotating the shutter speed dial/ sensitivity dial. -
Page 28: The Exposure Compensation Dial
The Exposure Compensation Dial Rotate the dial to choose an exposure compensation amount. Focusing the Viewfi nder Viewfi nder focus can be adjusted by ro- tating the diopter adjustment control. The DRIVE Button Pressing the DRIVE button displays the drive-mode menu. Mode Mode Mode... -
Page 29: The Command Dials
Parts of the Camera The Command Dials Rotate or press the command dials to: Front command dial Rear command dial • Highlight menu items • Choose the desired combina- • Select menu tabs or page tion of shutter speed and aper- through menus ture (program shift) •... -
Page 30: The Indicator Lamp
Parts of the Camera The Indicator Lamp Camera status is shown by the indicator lamp. Indicator lamp Indicator lamp Camera status Camera status Glows green Focus locked. Blinks green Focus or slow shutter speed warning. Pictures can be taken. • Camera on: Recording pictures. -
Page 31: Camera Displays
Camera Displays The following are displayed in the sub monitor, viewfi nder (OVF or EVF), and LCD monitor during shooting. For illustrative purposes, displays are shown with all indicators lit. The Sub Monitor The information displayed in the sub monitor includes the shutter speed, ap- erture, and sensitivity. -
Page 32: The Optical Viewfi Nder
The Optical Viewfi nder EF G H L M N 12800... - Page 33 Camera Displays Flash (TTL) mode .........261 Aperture ..........59, 64, 65 Out-of-frame indicators .......46 Distance indicator ........77 Flash compensation ........261 Shutter speed ........59, 60, 65 Boost mode ...........226 TTL lock .........150, 218, 250 IS mode ............144 AE lock ............85, 222 Control lock ..........224 Metering ............81...
-
Page 34: The Evf/Lcd Monitor
The EVF/LCD Monitor 12/31/2020 12:10 1000 12800... - Page 35 Camera Displays Sports fi nder mode ........132 Battery level ............39 Focus check ..........78, 125 Sensitivity ............79 Depth-of-fi eld preview ......64, 77 Exposure compensation .......82 Location data download status ..237, 270 Aperture ..........59, 64, 65 Bluetooth ON/OFF ........231 Time code ............163 Image transfer status ......231, 270 Shutter speed ........59, 60, 65 Movie mode...
-
Page 36: Adjusting Display Brightness
Adjusting Display Brightness The brightness and hue of the viewfi nder and LCD monitor can be adjusted using the items in the D SCREEN SET-UP menu. Choose EVF BRIGHTNESS or EVF COLOR to adjust viewfi nder brightness or hue, LCD BRIGHTNESS or LCD COLOR to do the same for the LCD monitor. -
Page 37: The Disp/Back Button
Camera Displays The DISP/BACK Button The DISP/BACK button controls the display of indicators in the viewfi nder and LCD monitor. Indicators for the EVF, OVF, and LCD must be selected separately. To choose the indi- cators displayed in the EVF and OVF, place your eye to the viewfi nder and press the DISP/BACK button. - Page 38 LCD Monitor Standard indicators No indicators Info display...
-
Page 39: Customizing The Standard Display
Camera Displays Customizing the Standard Display To choose the items shown in the standard indicator display: Display standard indicators. Use the DISP/BACK button to display standard indicators. Select DISP. CUSTOM SETTING. Select D SCREEN SET-UP > DISP. CUSTOM SETTING in the setup menu. - Page 40 Camera Displays Virtual Horizon Selecting ELECTRONIC LEVEL displays a virtu- al horizon. The camera is level when the two lines overlap. Note that the virtual horizon may not be displayed if the camera lens is pointed up or down. For a 3D display (shown), press the function button to which ELECTRONIC LEVEL Pitch Roll...
-
Page 41: Using The Menus
Using the Menus To display the menus, press MENU/OK. Shooting Shooting Playback Playback IMAGE QUALITY SETTING PLAY BACK MENU IMAGE SIZE SWITCH SLOT IMAGE QUALITY RAW CONVERSION RAW RECORDING ERASE FILM SIMULATION SIMULTANEOUS DELETE(RAW SLOT1/JPG SLOT2) MONOCHROMATIC COLOR CROP GRAIN EFFECT RESIZE COLOR CHROME EFFECT PROTECT... -
Page 42: Touch Screen Mode
Touch Screen Mode The LCD monitor also functions as a touch screen. Shooting Touch Controls To enable touch controls, select ON for TOUCH SCREEN SETTINGS D BUTTON/DIAL SETTING > TOUCH TOUCH SCREEN SETTING DOUBLE TAP SETTING SCREEN SETTING > x TOUCH SCREEN TOUCH FUNCTION TOUCH SCREEN SETTING SETTING. - Page 43 Touch Screen Mode LCD Monitor The operation performed can be selected by tapping the touch screen mode indica- tor in the display. Touch controls can be used for the following operations: Mode Mode Description Description Tap your subject in the display to focus and release the shutter. TOUCH TOUCH In burst mode, pictures will be taken while you keep your fi...
- Page 44 Muting Movie Controls Movie settings can be adjusted using touch-screen controls, preventing the sounds made by camera controls being recorded with the movie. When ON is se- lected for B MOVIE SETTING > MOVIE SILENT CONTROL in the shooting menu, F SET icon a F SET icon will be displayed in the LCD monitor;...
- Page 45 Touch Screen Mode Touch Function Functions can be assigned to the follow- ing fl ick gestures in much the same way as function buttons (P 246): • Flick up: T-Fn1 • Flick left: T-Fn2 • Flick right: T-Fn3 • Flick down: T-Fn4 •...
-
Page 46: Playback Touch Controls
Touch Screen Mode Playback Touch Controls When ON is selected for D BUTTON/DIAL SETTING > TOUCH SCREEN SETTING > a TOUCH SCREEN SETTING, touch controls can be used for the following playback operations: • Swipe: Swipe a fi nger across the display to view other images. -
Page 47: First Steps
First Steps... -
Page 48: Attaching The Strap
Attaching the Strap Attach the strap clips to the camera and then attach the strap. Attach a protective cover. Place a protective cover over the eye- let as shown, with the black side of the cover toward the camera. Protective cover Open a strap clip. - Page 49 Attaching the Strap Place the strap clip on an eyelet. Hook the strap eyelet in the clip opening. Remove the tool, using the other hand to keep the clip in place. Keep the tool in a safe place, as you will need it to open the strap clips when removing the strap.
-
Page 50: Attaching A Lens
Lenses and Other Optional Accessories The camera can be used with lenses and accessories for the FUJIFILM X-mount. Observe the following precautions when attaching or removing (ex- changing) lenses. -
Page 51: Inserting The Battery
Inserting the Battery Insert the battery in the camera as described below. Open the battery-chamber cover. Slide the battery-chamber latch as shown and open the battery-cham- ber cover. • Do not open the battery-chamber cover when the camera is on. Fail- ure to observe this precaution could damage image fi les or memory cards. - Page 52 Inserting the Battery Close the battery-chamber cover. Close and latch the cover. If the cover does not close, check that the battery is in the correct orienta- tion. Do not attempt to force the cov- er shut. Removing the Battery Before removing the battery, turn the camera off and open the battery-cham- ber cover.
-
Page 53: Inserting Memory Cards
Inserting Memory Cards Pictures are stored on memory cards (sold separately). The camera can be used with two cards, one in each of its two slots. Open the memory card slot cover. Unlatch and open the cover. Do not open the memory card-slot cover when the camera is on. Failure to observe this precaution could damage image fi les or memory cards. -
Page 54: Using Two Cards
Removing Memory Cards Before removing memory cards, turn the camera off and open the memory card slot cover. Press and release the card to eject it part way (to prevent the card falling from the slot, press the center of the card and release it slowly, without removing your fi nger from the card). -
Page 55: Compatible Memory Cards
• A list of supported memory cards is available on the Fujifi lm website. For details, visit: http://www.fujifilm.com/support/digital_cameras/compatibility/. • Do not turn the camera off or remove the memory card while the memo- ry card is being formatted or data are being recorded to or deleted from the card. -
Page 56: Charging The Battery
Charging the Battery The battery is not charged at shipment. Charge the battery before use. • An NP-W126S rechargeable battery is supplied with the camera. • Turn the camera off for charging. • The camera can be charged via USB. USB charging is available with computers with a manufacturer-approved operating sys- tem and USB interface. - Page 57 Charging the Battery Charge Status The indicator lamp shows battery charge status as follows: Indicator lamp Indicator lamp Battery status Battery status Battery charging Off Charging complete Blinks Battery fault • Do not affi x labels or other objects to the battery. Failure to observe this precaution could make it impossible to remove the battery from the camera.
-
Page 58: Turning The Camera On And Off
Turning the Camera On and Off Use the ON/OFF switch to turn the camera on and off . Slide the switch to ON to turn the camera on, or to OFF to turn the camera off . Fingerprints and other marks on the lens or viewfi nder can aff ect pic- tures or the view through the viewfi nder. -
Page 59: Checking The Battery Level
Checking the Battery Level After turning the camera on, check the battery level in the display. Battery level is shown as follows: Indicator Indicator Description Description Battery partially discharged. Battery about 80% full. Battery about 60% full. Battery about 40% full. Battery about 20% full. -
Page 60: Basic Setup
If you intend to pair the camera with a smartphone or tablet, install and launch the latest version of the FUJIFILM Camera Remote App on the smart device before proceeding. For more information, visit: http://app.fujifilm-dsc.com/en/camera_remote/... - Page 61 Basic Setup Check the time. When pairing is complete, you will be PAIRING REGISTRATION prompted to set the camera clock to PAIRING COMPLETE the time reported by the smartphone 12/31/2020 12:10 AM or tablet. Check that the time is cor- SET DATE/TIME FROM SMARTPHONE? rect.
-
Page 62: Choosing A Diff Erent Language
Basic Setup Choosing a Diff erent Language To change the language: Display language options. Select D USER SETTING > Qa. Choose a language. Highlight the desired option and press MENU/OK. Changing the Time and Date To set the camera clock: Display DATE/TIME options. Select D USER SETTING >... -
Page 63: Basic Photography And Playback
Basic Photography and Playback... -
Page 64: Taking Photographs (Mode P)
Taking Photographs (Mode P) This section describes how to take pictures using program AE (mode P). See pages 58–66 for information on S, A, and M modes. Press the DRIVE button and select STILL IMAGE in the drive-mode menu. Adjust settings for program AE. Setting Setting Shutter speed... - Page 65 Taking Photographs (Mode P) Check the shooting mode. Confi rm that P appears in the display. Ready the camera. • Hold the camera steady with both hands and brace your elbows against your sides. Shaking or un- steady hands can blur your shots. •...
- Page 66 Taking Photographs (Mode P) • If the subject is poorly lit, the AF-assist illuminator may light to assist the focus operation. • Focus and exposure will lock when the shutter button is pressed halfway. Focus and exposure remain locked while the button is kept in this position (AF/AE lock).
-
Page 67: Viewing Pictures
Viewing Pictures Pictures can be viewed in the viewfi nder or LCD monitor. To view pictures full frame, press the PLAY button. 100-0001 Additional pictures can be viewed by pressing the focus stick (fo- cus lever) left or right or rotating the front command dial. Press the focus stick or rotate the dial right to view pictures in the order recorded, left to view pictures in reverse order. -
Page 68: Deleting Pictures
Deleting Pictures Use the DELETE button to delete pictures. Deleted pictures cannot be recovered. Protect important pictures or copy them to a computer or other storage device before proceeding. With a picture displayed full frame, press the DELETE button and select FRAME. ERASE FRAME SELECTED FRAMES... -
Page 69: Movie Recording And Playback
Movie Recording and Playback... -
Page 70: Recording Movies
Recording Movies This section describes how to fi lm movies in auto mode. Press the DRIVE button and select MOVIE in the drive-mode menu. Adjust settings for program AE. Setting Setting Shutter speed A (auto) Sensitivity A (auto) Aperture A (auto) Focus mode S (single AF) To choose another shutter speed after selecting A (auto), hold the... - Page 71 Recording Movies Press the shutter button to start re- cording. A recording indicator (V) and the time remaining are displayed while recording is in progress. Press the button again to end recording. Recording ends automatically when the maximum length is reached or the memory card is full.
-
Page 72: Adjusting Movie Settings
Adjusting Movie Settings • Frame size and rate can be selected using B MOVIE SETTING > MOVIE MODE. • To choose the card used to store movies, use D SAVE DATA SET-UP > SELECT SLOT(FSEQUENTIAL). • Focus mode is selected using the focus mode selector; for con- tinuous focus adjustment, select C, or choose S and enable In- telligent Face Detection. - Page 73 Recording Movies • The indicator lamp lights while recording is in progress (the B MOVIE SETTING > TALLY LIGHT option can be used to choose the lamp— indicator or AF-assist—that lights during movie recording and whether the lamp blinks or remains steady). During recording, you can change exposure compensation by up to ±2 EV and adjust zoom using the zoom ring on the lens (if available).
-
Page 74: Viewing Movies
Viewing Movies View movies on the camera. 12/31/2020 12:10 AM In full-frame playback, movies are identi- fi ed by a W icon. Press the focus stick (fo- cus lever) down to start movie playback. PLAY PLAY +1.0 12800 The following operations can be per- formed while a movie is displayed: Focus stick Focus stick... - Page 75 Viewing Movies Playback Speed Press the focus stick (focus lever) left or right to 29m59s adjust playback speed during playback. Speed is shown by the number of arrows (M or N). Arrows...
- Page 76 MEMO...
-
Page 77: Taking Photographs
Taking Photographs... -
Page 78: P, S, A, And M Modes
P, S, A, and M Modes P, S, A, and M modes give you varying degrees of control over shutter speed and aperture. Mode P: Program AE Let the camera choose shutter speed and aperture for optimal exposure. Other values that produce the same exposure can be selected with program shift. - Page 79 P, S, A, and M Modes Program Shift If desired, you can rotate the rear command dial to select other combinations of shutter speed and aperture without altering exposure (pro- gram shift). Aperture Shutter speed Program shift is not available in any of the following circumstances: •...
-
Page 80: Mode S: Shutter-Priority Ae
Mode S: Shutter-Priority AE Choose a shutter speed and let the camera adjust aperture for optimal exposure. Setting Setting Shutter speed User-selected Aperture A (auto) Confi rm that S appears in the display. • If the correct exposure cannot be achieved at the selected shutter speed, aperture will be displayed in red. - Page 81 P, S, A, and M Modes Time (T) Choose a shutter speed of T (time) for long time-exposures. Use of a tripod is recommended to prevent the camera moving during the exposure. Set shutter speed to T. Rotate the rear command dial to choose a shutter speed.
- Page 82 Bulb (B) Choose a shutter speed of B (bulb) for long time-exposures in which you open and close the shutter manually. Use of a tripod is recommended to prevent the camera moving during the ex- posure. Set shutter speed to B. Press the shutter button all the way down.
- Page 83 P, S, A, and M Modes Using a Remote Release A remote release can be used for long time-ex- posures. When using an optional RR-100 remote release or an electronic release from third-party suppliers, connect it to the camera’s remote re- lease connector.
-
Page 84: Mode A: Aperture-Priority Ae
Mode A: Aperture-Priority AE Choose an aperture and let the camera adjust shutter speed for optimal exposure. Setting Setting Shutter speed A (auto) Aperture User-selected Confi rm that A appears in the display. • If the correct exposure cannot be achieved at the selected aperture, shutter speed will be displayed in red. -
Page 85: Mode M: Manual Exposure
P, S, A, and M Modes Mode M: Manual Exposure In manual mode, the user controls both shutter speed and aperture. Shots can be deliberately overexposed (brighter) or underexposed (darker), opening the door for a variety of individual creative ex- pression. - Page 86 P, S, A, and M Modes Exposure Preview To preview exposure in the LCD monitor, select an option other than OFF for D SCREEN SET-UP > PREVIEW EXP./WB IN MANUAL MODE. Select OFF when using the fl ash or on other occasions on which ex- posure may change when the picture is taken.
-
Page 87: Autofocus
Take pictures using autofocus. Rotate the focus mode selector to S or C (P 68). Choose an AF mode (P 70). Choose the position and size of the focus frame (P 72). Take pictures. For information on the autofocus system, visit: http://fujifilm-x.com/af/en/index.html... -
Page 88: Focus Mode
Focus Mode Use the focus mode selector to choose how the camera focuses. Choose from the following options: Mode Mode Description Description Single AF: Focus locks while the shutter button is pressed halfway. (AF-S) Choose for stationary subjects. Continuous AF: Focus is continually adjusted to refl ect changes in the distance to the subject while the shutter button is pressed halfway. - Page 89 Autofocus The Focus Indicator Focus status is shown by the focus indicator. Focus indicator Focus indicator Focus status Focus status Camera focusing. Subject in focus; focus locked (focus z (lights green) mode S). Subject in focus (focus mode C). Focus indicator (z) (lights green) Focus is automatically adjusted for changes in distance to subject.
-
Page 90: Autofocus Options (Af Mode)
Autofocus Options (AF Mode) Choose how the camera focuses in modes S and C. Press MENU/OK and go to the shooting menu. Select G AF/MF SETTING > AF MODE. Choose an AF mode. If ON is chosen for D BUTTON/DIAL SETTING > TOUCH SCREEN SETTING >... - Page 91 Autofocus Focus Mode C (AF-C) Focus Mode C (AF-C) Option Option Description Description Sample image Sample image Focus tracks subject at selected fo- cus point. Use for subjects moving SINGLE POINT toward or away from camera. Focus tracks subject in selected fo- cus zone.
-
Page 92: Focus-Point Selection
Focus-Point Selection Choose a focus point for autofocus. Viewing the Focus-Point Display Press MENU/OK and go to the shooting menu. Select G AF/MF SETTING > FOCUS AREA to view the fo- cus-point display. Use the focus stick (focus lever) and rear command dial to choose a focus area. - Page 93 Autofocus The Focus-Point Display The focus-point display varies with the option selected for AF mode. Focus frames are shown by small squares (), focus zones by the large squares. AF mode AF mode r SINGLE POINT y ZONE z WIDE/TRACKING SINGLE POINT ZONE WIDE/TRACKING...
- Page 94 Autofocus Checking Focus To zoom in on the current focus area for precise focus, press the center of the rear command dial. Use the focus stick (focus lever) to choose another focus area. Press the center of the rear command dial again to cancel zoom. Normal display Focus zoom •...
-
Page 95: Manual Focus
Manual Focus Adjust focus manually. Rotate the focus mode selector to M. j will appear in the display. Focus manually using the lens focus ring. Rotate the ring left to reduce the focus distance, right to increase. Take pictures. • Use D BUTTON/DIAL SETTING >... - Page 96 Quick Focus • To use autofocus to focus on the subject in the selected focus area, press the button to which focus lock or AF-ON has been assigned (the size of the focus area can be chosen with the rear command dial). •...
-
Page 97: Checking Focus
Manual Focus Checking Focus A variety of options are available for checking focus in manual focus mode. The Manual Focus Indicator The manual focus indicator indicates how closely the focus distance matches the distance to the subject in the focus brackets. - Page 98 Manual Focus Focus Zoom If ON is selected for G AF/MF SETTING > FOCUS CHECK, the camera will automatically zoom in on the selected focus area when the focus ring is rotated. Press the center of the rear com- mand dial to exit zoom. •...
-
Page 99: Sensitivity
Sensitivity Adjust the camera’s sensitivity to light. Sensitivity can be set by lifting and rotat- ing the sensitivity dial. Sensitivity Option Option Description Description Sensitivity is automatically adjusted in response to shooting conditions according to option chosen for A SHOOTING A (auto) SETTING ... -
Page 100: Auto Sensitivity (A)
Sensitivity Auto Sensitivity (A) Use A SHOOTING SETTING > ISO AUTO SETTING to choose the base sensitivity, maximum sensitivity, and minimum shut- ter speed for the A position on the sensitivity dial. Settings for AUTO1, AUTO2, and AUTO3 can be stored separately; the de- faults are shown below. -
Page 101: Metering
Metering Choose how the camera meters exposure. A SHOOTING SETTING > PHOTOMETRY off ers a choice of the following metering options: The selected option will only take eff ect when G AF/MF SETTING > FACE/EYE DETECTION SETTING is OFF. Mode Mode Description Description The camera instantly determines exposure based on an analysis of... -
Page 102: Exposure Compensation
Exposure Compensation Adjust exposure. Rotate the exposure compensation dial. • The amount of compensation available varies with the shooting mode. • Exposure compensation can be previewed in the shooting display, although the display may not accurately refl ect its eff ects if: the exposure compensation amount exceeds ±3 EV, W 200% or X 400% is selected for DYNAMIC RANGE, or STRONG or WEAK is selected for D RANGE PRIORITY. -
Page 103: C (Custom)
Exposure Compensation C (Custom) When the exposure compensation dial is rotated to C, exposure compensation can be adjusted by rotating the front com- mand dial. • The front command dial can be used to set exposure compensation to values between −5 and +5 EV. •... -
Page 104: Focus/Exposure Lock
Focus/Exposure Lock Focus and exposure lock when the shutter button is pressed halfway. Position the subject in the focus frame and press the shutter button halfway to lock focus and exposure. Focus and exposure will remain locked while the shutter button is pressed halfway (AF/AE lock). -
Page 105: Other Controls
Focus/Exposure Lock Other Controls Pressing the AE-L/AF-L button locks both focus and exposure. • While the assigned control is pressed, pressing the shutter button halfway will not end the lock. • If AE&AF ON/OFF SWITCH is selected AE-L/AF-L button for D BUTTON/DIAL SETTING > AE/ (AE/AF lock) AF-LOCK MODE, the lock can only be ended by pressing the control a second... -
Page 106: Bracketing
Bracketing Automatically vary settings over a series of pictures. Press the DRIVE button and select the desired bracketing option in the drive-mode menu. Take photographs. W ISO BKT Select a bracketing amount (±1⁄3, ±2⁄3, or ±1) in the drive mode display. -
Page 107: Bkt
Bracketing s BKT O AE BKT Use A SHOOTING SETTING > AE BKT SETTING to choose the bracketing amount, bracketing order, and number of shots. Each time the shutter button is pressed, the camera will take the spec- ifi ed number of shots: one using the metered value for exposure and the others over- or under-exposed by multiples of the select- ed bracketing amount. - Page 108 Z FOCUS BKT Each time the shutter button is pressed, the camera takes a se- ries of photos, varying focus with each shot. The A SHOOTING SETTING > FOCUS BKT SETTING item off ers a choice of MANUAL and AUTO bracketing. •...
- Page 109 Bracketing Focus on the farthest end of the sub- FOCUS BKT SETTING SET POINT B CONTROL THE FOCUS RING ject and press DISP/BACK. The selected focus distance (B) and focus range (A to B) appear on the SET POINT A focus distance indicator.
-
Page 110: Continuous Shooting (Burst Mode)
Continuous Shooting (Burst Mode) Capture motion in a series of pictures. Press the DRIVE button and select CONTINUOUS R or CONTINUOUS in the drive-mode menu. Before taking pictures in CONTINUOUS R mode, select s ELECTRONIC SHUTTER for A SHOOTING SETTING > SHUTTER TYPE. -
Page 111: Hdr
Each time the shutter button is pressed, the camera takes three shots, varying exposure each time, and combines them into a single picture. The resulting photograph pre- serves details in highlights and shadows. Press the DRIVE button and select HDR in the drive-mode menu. Choose the amount the brightnesses of the exposures vary. - Page 112 • Keep the camera steady. • The desired results may not be achieved in the subject moves or the composition or lighting changes during shooting. • The picture will be cropped a very small amount and the resolution will drop slightly. •...
-
Page 113: Multiple Exposures
Multiple Exposures Create a photograph that combines multiple exposures. Press the DRIVE button and select MULTIPLE EXPOSURE in the drive- mode menu. Take the fi rst shot. Press MENU/OK. The fi rst shot will be shown superimposed on the view through the lens and you will be prompted to take the second shot. - Page 114 Multiple Exposures Press MENU/OK. The combined exposures will be dis- played as a guide to composing the next shot. RETRY EXIT • To return to the previous step and retake the second shot, press the focus stick left. • To end shooting and create a multiple exposure from the shots taken to this point, press DISP/BACK.
-
Page 115: Advanced Filters
Advanced Filters Take photos with fi lter eff ects. Press the DRIVE button and select ADVANCED FILTER in the drive- mode menu. Choose a fi lter. Take photographs. -
Page 116: Advanced Filter Options
Advanced Filters Advanced Filter Options Choose from the following fi lters: Filter Filter Description Description G TOY CAMERA Choose for a retro toy camera eff ect. The tops and bottoms of pictures are blurred for a H MINIATURE diorama eff ect. I POP COLOR Create high-contrast images with saturated colors. -
Page 117: The Shooting Menus
The Shooting Menus... -
Page 118: Image Quality Setting
IMAGE QUALITY SETTING Adjust image quality settings. To display image quality settings, press IMAGE QUALITY SETTING IMAGE SIZE MENU/OK in the shooting display and se- IMAGE QUALITY RAW RECORDING lect the H (IMAGE QUALITY SETTING) FILM SIMULATION MONOCHROMATIC COLOR tab. GRAIN EFFECT COLOR CHROME EFFECT COLOR CHROME FX BLUE... -
Page 119: Image Quality
IMAGE QUALITY SETTING IMAGE QUALITY Choose a fi le format and compression ratio. Option Option Description Description FINE Low compression ratios are used for higher-quality images. Higher compression ratios are used to increase the number of NORMAL images that can be stored. FINE + RAW Record both RAW and fi... -
Page 120: Raw Recording
fi le size with no loss of image data. The images can be viewed in Capture One Express Fujifi lm LOSSLESS COMPRESSED (P 289), RAW FILE CONVERTER EX (P 289), FUJIFILM X RAW STUDIO (P 290), or other software that sup- ports “lossless” RAW compression. - Page 121 MONOCHROME+G FILTER: Produces pleasing skin tones in portrait. Shoots in sepia tone. SEPIA • Film simulation options can be combined with tone and sharpness settings. • Film simulation settings can also be accessed via shortcuts (P 240). • For more information, visit: http://fujifilm-x.com/en/x-stories/the-world-of-film-simulation-episode-1/...
-
Page 122: Monochromatic Color
MONOCHROMATIC COLOR Add a reddish or bluish tinge (warm or MONOCHROMATIC COLOR cool color cast) to the a ACROS and b MONOCHROME monochrome fi lm simulations. Color can be adjusted on the WARM–COOL and G (Green)–M (Magenta) axes. GRAIN EFFECT Add a fi lm grain eff ect. -
Page 123: Color Chrome Effect
IMAGE QUALITY SETTING COLOR CHROME EFFECT Increase the range of tones available for rendering colors that tend to be highly saturated, such as reds, yellows, and greens. Option Option Description Description STRONG Choose for a strong eff ect. WEAK Choose for a weak eff ect. Turn the eff... -
Page 124: White Balance
WHITE BALANCE For natural colors, choose a white balance option that matches the light source. Option Option Description Description AUTO White balance is adjusted automatically. k/l/m Measure a value for white balance. Choose a color temperature. For subjects in direct sunlight. For subjects in the shade. - Page 125 IMAGE QUALITY SETTING Fine-Tuning White Balance Pressing MENU/OK after selecting a white WB SHIFT balance option displays a fi ne-tuning dialog; use the focus stick (focus lever) to fi ne-tune white balance. • To exit without fi ne-tuning white balance, press DISP/BACK after se- lecting a white balance option.
- Page 126 k: Color Temperature Changing the color temperature changes overall hue. Color temperature can be adjusted to make pictures “warmer” or “cold- er” or deliberately produce colors that diff er radically from those in real life. Select k in the white balance menu. WHITE BALANCE A list of color temperatures will be displayed.
-
Page 127: Dynamic Range
IMAGE QUALITY SETTING Color Temperature Color temperature is an objective measure of the color of a light source, ex- pressed in Kelvin (K). Light sources with a color temperature close to that of direct sunlight appear white; light sources with a lower color temperature have a yellow or red cast, while those with a higher color temperature are tinged with blue. -
Page 128: D Range Priority
D RANGE PRIORITY Reduce loss of detail in highlights and shadows for natural-look- ing results when photographing high-contrast scenes. Option Option Description Description Contrast is adjusted automatically in response to lighting con- AUTO ditions. Adjust dynamic range by a large amount for very high-contrast STRONG scenes. -
Page 129: Color
IMAGE QUALITY SETTING COLOR Adjust color density. Choose higher values to increase saturation, lower values to reduce it. Options Options −4 −3 −2 −1 SHARPNESS Sharpen or soften outlines. Choose higher values for sharper out- lines, lower values for softer outlines. Options Options −4... -
Page 130: Clarity
CLARITY Increase defi nition while altering tones in highlights and shad- ows as little as possible. Choose higher values for increased defi - nition, lower values for a softer eff ect. Options Options −5 −4 −3 −2 −1 LONG EXPOSURE NR Select ON to reduce mottling in long time-exposures. -
Page 131: Pixel Mapping
IMAGE QUALITY SETTING PIXEL MAPPING Use this option if you notice bright spots in your pictures. Press MENU/OK in the shooting display and select the H IMAGE QUALITY SETTING tab. Highlight PIXEL MAPPING and press MENU/OK to perform pix- el mapping. •... -
Page 132: Edit/Save Custom Setting
EDIT/SAVE CUSTOM SETTING Save up to 7 sets of custom camera settings for commonly-en- countered situations. Saved settings can be recalled using H IMAGE QUALITY SETTING > SELECT CUSTOM SETTING. Select H IMAGE QUALITY SETTING in the shooting menu, then highlight EDIT/SAVE CUSTOM SETTING and press MENU/OK. - Page 133 IMAGE QUALITY SETTING Press MENU/OK to save changes to the selected item and re- turn to the menu item list. Adjust additional items as desired. Pressing DISP/BACK in the menu item SAVE CUSTOM SETTING CUSTOM 1 SET OK? list displays a confi rmation dialog. Highlight OK and press MENU/OK to save the settings to the selected CANCEL...
-
Page 134: Af/Mf Setting
AF/MF SETTING Adjust focus settings. To display focus settings, press MENU/OK AF/MF SETTING FOCUS AREA in the shooting display and select the AF MODE AF-C CUSTOM SETTINGS G (AF/MF SETTING) tab. STORE AF MODE BY ORIENTATION AF POINT DISPLAY NUMBER OF FOCUS POINTS PRE-AF AF ILLUMINATOR EXIT... -
Page 135: Af Mode
AF/MF SETTING AF MODE Choose the AF mode for focus modes S and C. Option Option Description Description The camera focuses on the subject in the selected focus point. The number of focus points available can be selected using G AF/MF SETTING >... -
Page 136: Af-C Custom Settings
AF-C CUSTOM SETTINGS Select focus-tracking options for focus AF-C CUSTOM SETTINGS SET 1 MULTI PURPOSE mode C. Choose from Sets 1–5 according to your subject or select Set 6 for custom focus-tracking options. TRACKING SENSITIVITY SPEED TRACKING SENSITIVITY ZONE AREA SWITCHING AUTO Option Option... - Page 137 AF/MF SETTING Focus Tracking Options The individual parameters that are part of a focus tracking set are described below. TRACKING SENSITIVITY TRACKING SENSITIVITY This parameter determines how long the TRACKING SENSITIVITY camera waits to switch focus when an QUICK LOCKED ON object enters the focus area behind or in front of the current subject.
- Page 138 ZONE AREA SWITCHING ZONE AREA SWITCHING This parameter determines the focus ZONE AREA SWITCHING area given priority in zone AF. CENTER AUTO FRONT SETS THE SWITCHING SENSITIVITY OF FOCUS FRAME IN ZONE AREA ADJUST SWITCH Option Option Description Description FRONT Zone AF assigns priority to the subjects closest to the camera.
- Page 139 AF/MF SETTING Custom Focus Tracking Options Follow the steps below to adjust settings for Set 6. Select AF-C CUSTOM SETTINGS > AF-C CUSTOM SETTINGS SET 6 CUSTOM SET 6 CUSTOM. TRACKING SENSITIVITY SPEED TRACKING SENSITIVITY AUTO ZONE AREA SWITCHING ADJUST SET DETAIL RESET Highlight items using the focus stick (focus lever) and rotate...
-
Page 140: Store Af Mode By Orientation
STORE AF MODE BY ORIENTATION Choose whether the focus mode and focus area used when the camera is in portrait orientation are stored separately from those used when the camera is in landscape orientation. Option Option Description Description The same settings are used in both orientations. FOCUS AREA ONLY The focus area for each orientation can be selected separately. -
Page 141: Pre-Af
AF/MF SETTING PRE-AF If ON is selected, the camera will continue to adjust focus even when the shutter button is not pressed halfway. The camera adjusts focus continuously, allowing it to focus faster when the shutter button is pressed halfway. Choosing this option helps prevent missed shots. -
Page 142: Face/Eye Detection Setting
FACE/EYE DETECTION SETTING Intelligent Face Detection sets focus and exposure for human faces anywhere in the frame, preventing the camera from focusing on the background in group portraits. Choose for shots that empha- size portrait subjects. You can also choose whether the camera detects and focuses on either the left or right eye when Intelligent Face Detection is on. - Page 143 AF/MF SETTING • The face selected by the camera is indicated by a green border. Any other faces detected by the camera are indicated by gray borders. To have the camera focus on a diff erent subject, tap inside the gray border.
-
Page 144: Af+Mf
AF+MF If ON is selected in focus mode S and focus has been locked (whether by pressing the shutter button halfway or by other means), focus lock can be ended and focus adjusted manually by rotating the focus ring. Options Options •... -
Page 145: Mf Assist
AF/MF SETTING MF ASSIST Choose how focus is displayed in manual focus mode. Option Option Description Description Focus is displayed normally (focus peaking, digital split image, and STANDARD digital microprism are not available). Displays a black-and-white (MONOCHROME) or color (COLOR) DIGITAL SPLIT split image in the center of the frame. -
Page 146: Interlock Spot Ae & Focus Area
INTERLOCK SPOT AE & FOCUS AREA Select ON to meter the current focus frame in focus mode S or C. Options Options INSTANT AF SETTING Choose whether the camera focuses using single AF (AF-S) or continuous AF (AF-C) when a button to which focus lock or AF-ON is assigned is pressed in manual focus mode. -
Page 147: Release/Focus Priority
AF/MF SETTING RELEASE/FOCUS PRIORITY Choose how the camera focuses in focus mode AF-S or AF-C. Option Option Description Description Shutter response is prioritized over focus. Pictures can be taken RELEASE when the camera is not in focus. Focus is prioritized over shutter response. Pictures can be only FOCUS taken when the camera is in focus. -
Page 148: Touch Screen Mode
TOUCH SCREEN MODE Choose the shooting operations performed using touch controls. Still Photography Mode Mode Description Description Tap your subject in the display to focus and release the shutter. TOUCH TOUCH In burst mode, pictures will be taken while you keep your fi nger SHOOTING SHOOTING on the display. - Page 149 AF/MF SETTING Movie Recording Mode Mode Description Description Instead of pressing the shutter button, you can tap your subject in the display to focus and start recording. During recording, you TOUCH TOUCH can tap the display to focus as described below. To end record- SHOOTING SHOOTING ing, press the shutter button.
- Page 150 Touch Controls for Focus Zoom Diff erent touch controls are used during focus zoom (focus check enabled). Central Area Central Area Tapping the center of the display performs the operations below. Mode Mode Still Photography Still Photography Movie Recording Movie Recording AF-S: AF TOUCH SHOOTING TOUCH SHOOTING...
-
Page 151: Corrected Af Frame
AF/MF SETTING CORRECTED AF FRAME View a guide to the actual focus position when framing shots in the OVF with the subject close to the camera. When ON is selected, the camera will display the fo- cus position for objects approximately 50 cm from the camera ( B ) in addition to the standard AF frame ( A ). -
Page 152: Shooting Setting
SHOOTING SETTING Adjust shooting options. To display shooting options, press SHOOTING SETTING SPORTS FINDER MODE MENU/OK in the shooting display and se- PRE-SHOT SELF-TIMER lect the A (SHOOTING SETTING) tab. SAVE SELF-TIMER SETTING INTERVAL TIMER SHOOTING INTERVAL TIMER SHOOTING EXPOSURE SMOOTHING AE BKT SETTING The options available vary with the shoot- FILM SIMULATION BKT... -
Page 153: Pre-Shot Sn
SHOOTING SETTING PRE-SHOT sN To reduce the lag between your pressing the shutter button all the way down and the resulting picture being recorded to the memory card, the camera starts shooting with the electronic shutter when the shutter button is pressed halfway and saves a series shots starting just before the shutter button is pressed the rest of the way down. -
Page 154: Self-Timer
SELF-TIMER Choose a shutter release delay. Option Option Description Description The shutter is released two seconds after the shutter button is pressed. Use to reduce blur caused by the camera moving when the shutter R 2 SEC button is pressed. The self-timer lamp blinks as the timer counts down. -
Page 155: Interval Timer Shooting
SHOOTING SETTING INTERVAL TIMER SHOOTING Confi gure the camera to take photos automatically at a preset interval. Highlight INTERVAL TIMER SHOOTING INTERVAL/NUMBER OF TIMES INTERVAL NUMBER OF TIMES in the A (SHOOTING SETTING) tab and press MENU/OK. CANCEL Use the focus stick (focus lever) to START WAITING TIME choose the interval and number of shots. -
Page 156: Interval Timer Shooting Exposure Smoothing
INTERVAL TIMER SHOOTING EXPOSURE SMOOTHING Select ON to automatically adjust exposure during interval-timer photography to prevent it changing dramatically between shots. Options Options • Large changes in subject brightness may make exposure appear er- ratic. We recommend that you choose shorter values for INTERVAL TIMER SHOOTING >... -
Page 157: Ae Bkt Setting
SHOOTING SETTING AE BKT SETTING Adjust exposure bracketing settings. Option Option Description Description Choose the number of shots in the bracketing sequence and the amount exposure is varied with each shot. • FRAMES: Choose the number of shots in the bracketing FRAMES/STEP SETTING sequence. -
Page 158: Focus Bkt Setting
FOCUS BKT SETTING Choose from AUTO and MANUAL focus bracketing modes. MANUAL MANUAL In MANUAL mode, you choose the following. Option Option Description Description FRAMES Choose the number of shots. STEP Choose the amount focus changes with each shot. INTERVAL Choose the interval between shots. - Page 159 SHOOTING SETTING AUTO AUTO In AUTO mode, the camera calculates FRAMES and STEP auto- matically. Select A SHOOTING SETTING in the shooting menu, high- light FOCUS BKT SETTING, and press MENU/OK. Select AUTO and choose an INTERVAL. The view through the lens will be displayed. Focus on the nearest end of the sub- FOCUS BKT SETTING SET POINT A...
-
Page 160: Multiple Exposure Ctrl
MULTIPLE EXPOSURE CTRL Choose how the camera combines shots to create a multiple ex- posure. Option Option Description Description The camera adds the exposures together. You may need to lower ADDITIVE exposure compensation depending on the number of shots. The camera automatically optimizes exposure for the fi nal pic- AVERAGE ture. -
Page 161: Photometry
SHOOTING SETTING PHOTOMETRY Choose how the camera meters exposure. The selected option will only take eff ect when G AF/MF SETTING > FACE/EYE DETECTION SETTING is OFF. Mode Mode Description Description The camera instantly determines exposure based on an analysis of composition, color, and brightness distribution. Recommend- (multi) ed in most situations. -
Page 162: Shutter Type
SHUTTER TYPE Choose the shutter type. Choose the electronic shutter to mute the shutter sound. Option Option Description Description t MECHANICAL SHUTTER Take pictures with the mechanical shutter. s ELECTRONIC SHUTTER Take pictures with the electronic shutter. t E-FRONT CURTAIN The camera chooses the mechanical or electronic SHUTTER front curtain shutter according to shooting conditions. -
Page 163: Flicker Reduction
SHOOTING SETTING FLICKER REDUCTION Reduce fl icker in pictures and the display when shooting under fl uorescent lighting and other similar light sources. Option Option Description Description Flicker reduction is applied to all frames continuous ALL FRAMES shooting frame rate reduces. Flicker measurement is taken prior to the fi... -
Page 164: Is Mode
IS MODE Choose from the following image stabilization options: Option Option Description Description l CONTINUOUS Image stabilization on. As above, except that image stabilization is performed only m SHOOTING ONLY when the shutter button is pressed halfway (focus mode C only) or the shutter is released. -
Page 165: Iso Auto Setting
SHOOTING SETTING ISO AUTO SETTING Choose the base sensitivity, maximum sensitivity, and minimum shutter speed for the A position on the sensitivity dial. Settings for AUTO1, AUTO2, and AUTO3 can be stored separately; the de- faults are shown below. Default Default Item Item... -
Page 166: Mount Adapter Setting
MOUNT ADAPTER SETTING Adjust settings for lenses attached via a mount adapter. Bright Frame Brightness Adjust the brightness of the bright frame in the OVF display. Saved Settings Store settings for up to 6 lenses. Choosing a Focal Length Choosing a Focal Length Use the focus stick (focus lever) to enter LENS 5 INPUT FOCAL LENGTH... - Page 167 SHOOTING SETTING Color Shading Correction Color Shading Correction Color (shading) variations between the center and edges of the frame can be ad- justed separately for each corner. To use color shading correction, follow the NEXT steps below. Rotate the rear command dial to choose a corner. The select- ed corner is indicated by a triangle.
-
Page 168: Wireless Communication
SHOOTING SETTING WIRELESS COMMUNICATION Connect to smartphones running the latest version of the FUJIFILM Camera Remote app. The smartphone can then be used to: • Control the camera and take pictures remotely • Receive pictures uploaded from the camera •... -
Page 169: Flash Setting
FLASH SETTING Adjust fl ash-related settings. To display fl ash-related settings, press FLASH SETTING MENU/OK in the shooting display and se- FLASH FUNCTION SETTING RED EYE REMOVAL lect the F (FLASH SETTING) tab. TTL-LOCK MODE LED LIGHT SETTING MASTER SETTING CH SETTING The options available vary with the shoot- ing mode selected. -
Page 170: Ttl-Lock Mode
TTL-LOCK MODE Instead of adjusting fl ash level with each shot, TTL fl ash control can be locked for consistent results across a series of photo- graphs. Option Option Description Description Flash output is locked at the value metered for the most LOCK WITH LAST FLASH recent photo. -
Page 171: Master Setting
FLASH SETTING MASTER SETTING Choose a fl ash group (A, B, or C) for the fl ash mounted on the camera hot shoe when it functions as a master fl ash controlling remote fl ash units via Fujifi lm wireless optical fl ash control, or choose OFF to limit master fl ash output to a level that does not aff ect the fi nal picture. -
Page 172: Movie Setting
MOVIE SETTING Adjust movie-recording options. To display options for movie recording, MOVIE SETTING MOVIE MODE press MENU/OK in the shooting display and FULL HD HIGH SPEED REC FILM SIMULATION select the B (MOVIE SETTING) tab. MONOCHROMATIC COLOR WHITE BALANCE DYNAMIC RANGE TONE CURVE The options available vary with the shoot- COLOR... -
Page 173: Full Hd High Speed Rec
MOVIE SETTING Press the focus stick (focus lever) up or down to highlight a frame rate ( ) and press the stick right. Options Options 23.98P 29.97P 59.94P Press the focus stick up or down to highlight a bit rate ( and press MENU/OK. -
Page 174: F Film Simulation
F FILM SIMULATION Choose a fi lm simulation eff ect for movie recording. Option Option Description Description PROVIA/STANDARD Velvia/VIVID ASTIA/SOFT CLASSIC CHROME PRO Neg. Hi See “FILM SIMULATION” (P 100). PRO Neg. Std CLASSIC Neg. ETERNA/CINEMA ACROS MONOCHROME SEPIA F MONOCHROMATIC COLOR Add a reddish or bluish tinge (warm or MONOCHROMATIC COLOR cool color cast) to the a ACROS and... -
Page 175: F White Balance
MOVIE SETTING F WHITE BALANCE Adjust white balance for movie recording. Option Option Description Description AUTO k/l/m See “WHITE BALANCE” (P 104). F DYNAMIC RANGE Choose a dynamic range for movie recording. Option Option Description Description V100% W200% See “DYNAMIC RANGE” (P 107). X400% •... -
Page 176: F Tone Curve
F TONE CURVE With reference to a tone curve, use the TONE CURVE HIGHLIGHTS SHADOWS focus stick (focus lever) to adjust the appearance of highlights or shadows, making them harsher or softer. Choose higher values to make shadows and highlights harsher, lower values to make CANCEL them softer. -
Page 177: F Noise Reduction
MOVIE SETTING F NOISE REDUCTION Reduce noise in movies shot at high sensitivities. Choose high- er values to reduce noise and smooth outlines, lower values to leave outlines visible. Options Options −4 −3 −2 −1 V INTERFRAME NR Select ON to enable interframe noise reduction. Options Options •... -
Page 178: F-Log Recording
• If ON is selected when a lens that does not transmit data to the camera is attached using a FUJIFILM M MOUNT ADAPTER (available separately), peripheral illumination will be adjusted according to the option selected for A SHOOTING SETTING > MOUNT ADAPTER SETTING ... -
Page 179: Movie Af Mode
MOVIE SETTING MOVIE AF MODE Choose how the camera selects the focus point for movie recording. Option Option Description Description MULTI Automatic focus-point selection. AREA The camera focuses on the subject in the selected focus area. F AF-C CUSTOM SETTING Select focus-tracking options when recording movies in focus mode C. -
Page 180: F Face/Eye Detection Setting
F FACE/EYE DETECTION SETTING Enable or disable Intelligent Face Detection when recording movies. Option Option Description Description FACE DETECTION ON See “FACE/EYE DETECTION SETTING” (P 122). Intelligent Face Detection and eye priority off . When Intelligent Face Detection is enabled, the camera will focus using continuous AF even when single AF (S) is chosen with the focus mode selector. -
Page 181: Zebra Setting
MOVIE SETTING ZEBRA SETTING Highlights that may be overexposed are shown by zebra stripes in the movie mode display. Option Option Description Description ZEBRA RIGHT Right-slanting stripes. ZEBRA LEFT Left-slanting stripes. Stripes off . ZEBRA LEVEL Choose the brightness threshold for the zebra stripe display. Options Options AUDIO SETTING... - Page 182 EXTERNAL MIC LEVEL ADJUSTMENT Adjust the recording level for external microphones. Option Option Description Description AUTO The camera adjusts the recording level automatically. Adjust the recording level manually. Press the focus stick (focus MANUAL lever) right to choose from 25 recording levels. Disable recording using external microphones.
-
Page 183: Mic/Remote Release
MOVIE SETTING MIC/REMOTE RELEASE Specify whether the device connected to the microphone/re- mote release connector is a microphone or a remote release. Options Options m MIC n REMOTE TIME CODE SETTING Adjust time code (hour, minute, second, and frame number) dis- play settings for movie recording. - Page 184 DROP FRAME At frame rates of 59.94P, and 29.97P, a discrepancy will gradu- ally develop between the time code (measured in seconds) and the actual recording time (measured in fractions of a second). Choose whether the camera drops frames as necessary to match the recording time to the time code.
-
Page 185: Tally Light
MOVIE SETTING TALLY LIGHT Choose the lamp (indicator or AF-assist) that lights during movie recording and whether the lamp blinks or remains steady. Indicator lamp AF-assist illuminator Option Option Description Description FRONT OFF The indicator lamp lights during movie recording. REAR z FRONT OFF The indicator lamp blinks during movie recording. -
Page 186: Movie Silent Control
MOVIE SETTING MOVIE SILENT CONTROL Select ON to disable camera dials and adjust movie settings us- ing touch-screen controls, preventing the sounds made by cam- era controls being recorded with the movie (P 24). Options Options... -
Page 187: Playback And The Playback Menu
Playback and the Playback Menu... -
Page 188: The Playback Display
The Playback Display This section lists the indicators that may be displayed during playback. For illustrative purposes, displays are shown with all indicators lit. BC D E F 12/31/2020 12:10 AM Date and time ........40, 42, 195 White balance ..........104 Face detection indicator ......122 Sensitivity ............79 Bluetooth ON/OFF ........231... -
Page 189: The Disp/Back Button
The Playback Display The DISP/BACK Button The DISP/BACK button controls the display of indicators during playback. Standard Information off 12/31/2020 12:10 AM 12/31/2020 12:10 AM Info display... - Page 190 The Playback Display Viewing Photo Information The photo information display changes each time the focus stick (focus lever) is pressed up. Basic data Info display 1 12/31/2020 12:10 AM 12/31/2020 12:10 AM NEXT NEXT LENS 23.0mm F5.6 FOCAL LENGTH 23.0mm COLOR SPACE sRGB LENS MODULATION OPT.
-
Page 191: Viewing Pictures
Viewing Pictures Read this section for information on playback zoom and multi-frame playback. Use the rear command dial to go from full-frame playback to playback zoom or multi-frame playback. Full-frame playback 100-0001 Multi-frame Playback playback zoom DISP/BACK MENU/OK Nine-frame view Medium zoom Hundred- frame view Maximum zoom... -
Page 192: Playback Zoom
Viewing Pictures Playback Zoom Rotate the rear command dial right to zoom in on the current picture, left to zoom out. To exit zoom, press DISP/BACK, MENU/OK, or the center of the rear command dial. • The maximum zoom ratio varies with the option selected for H IMAGE QUALITY SETTING >... -
Page 193: The Playback Menu
The Playback Menu Adjust playback settings. The playback menu is displayed when PLAY BACK MENU SWITCH SLOT you press MENU/OK in playback mode. RAW CONVERSION ERASE SIMULTANEOUS DELETE(RAW SLOT1/JPG SLOT2) CROP RESIZE PROTECT IMAGE ROTATE EXIT SWITCH SLOT Choose the card from which images will be played back. If two memory cards are inserted, you can press and hold the PLAY button to choose a card for playback. -
Page 194: Raw Conversion
RAW CONVERSION Even if you don’t have a computer, you can use the camera to modify RAW pictures and save them in other formats. Saving RAW Pictures in Another Format Display a RAW picture. Highlight RAW CONVERSION in the playback menu. Press MENU/OK. - Page 195 The Playback Menu The settings that can be adjusted when converting pictures from RAW to another format are: Setting Setting Description Description Create a copy using the settings in eff ect at the time REFLECT SHOOTING COND. REFLECT SHOOTING COND. the photo was taken.
-
Page 196: Erase
ERASE Delete individual pictures, multiple selected pictures, or all pic- tures. Deleted pictures cannot be recovered. Protect important pictures or copy them to a computer or other storage device before proceeding. Option Option Description Description FRAME Delete pictures one at a time. SELECTED FRAMES Delete multiple selected pictures. - Page 197 The Playback Menu SELECTED FRAMES Select SELECTED FRAMES for ERASE in the playback menu. Highlight pictures and press MENU/OK to select. • Selected pictures are indicated by check marks (R). • To deselect a highlighted picture, press MENU/OK again. When the operation is complete, press DISP/BACK to display a confi rmation dialog.
-
Page 198: Simultaneous Delete(Raw Slot1/Jpg Slot2)
SIMULTANEOUS DELETE(RAW SLOT1/JPG SLOT2) Taking photos with RAW / JPEG selected for D SAVE DATA SET-UP > CARD SLOT SETTING (STILL IMAGE) creates two copies. Choose whether deleting the RAW image will also delete the JPEG copy. Option Option Description Description Deleting the RAW image from the card in Slot 1 also deletes the JPEG copy from the card in Slot 2. -
Page 199: Resize
The Playback Menu RESIZE Create a small copy of the current picture. Display the desired picture. Select RESIZE in the playback menu. Highlight a size and press MENU/OK to display a confi rmation dialog. Press MENU/OK again to save the resized copy to a separate fi le. -
Page 200: Protect
PROTECT Protect pictures from accidental deletion. Highlight one of the following options and press MENU/OK. Option Option Description Description Protect selected pictures. Press the focus stick (focus lever) left or FRAME right to view pictures and press MENU/OK to select or deselect. Press DISP/BACK when the operation is complete. -
Page 201: Image Rotate
The Playback Menu IMAGE ROTATE Rotate pictures. Display the desired picture. Select IMAGE ROTATE in the playback menu. Press the focus stick (focus lever) down to rotate the picture 90° clockwise, up to rotate it 90° counterclockwise. Press MENU/OK. The picture will automatically be displayed in the selected orientation whenever it is played back on the camera. -
Page 202: Red Eye Removal
RED EYE REMOVAL Remove red-eye from portraits. The camera will analyze the im- age; if red-eye is detected, the image will be processed to create a copy with reduced red-eye. Display the desired picture. Select RED EYE REMOVAL in the playback menu. Press MENU/OK. -
Page 203: Voice Memo Setting
The Playback Menu VOICE MEMO SETTING Add a voice memo to the current photograph. Select ON for VOICE MEMO SETTING in the playback menu. Display a photo to which you wish to add a voice memo. Press and hold the Fn2 button to record the memo. Record- ing ends after 30 s or when you release the button. -
Page 204: Rating
RATING Rate pictures using stars. Select RATING in the playback menu. Rotate the front command dial to choose a picture and the rear command dial to choose a rating of from 0 to 5 stars (“I”). • The focus stick (focus lever) can be used in place of the front com- mand dial to choose a picture. -
Page 205: Copy
The Playback Menu COPY Copy pictures between the cards in the fi rst and second slots. Select COPY in the playback menu. Highlight one of the following options. Option Option Description Description Copy pictures from the card in the fi rst slot to the card in SLOT1 y SLOT2 the second slot. -
Page 206: Image Transfer Order
IMAGE TRANSFER ORDER Select photos for upload to a paired smartphone or tablet. Select IMAGE TRANSFER ORDER > SELECT FRAMES in the playback menu. Highlight photos and press MENU/OK to select or deselect. Re- peat until all the desired photos have been selected. Press DISP/BACK to exit to playback. -
Page 207: Wireless Communication
The Playback Menu WIRELESS COMMUNICATION Connect to smartphones running the latest version of the FUJIFILM Camera Remote app. The smartphone can then be used to: • Control the camera and take pictures remotely • Receive pictures uploaded from the camera •... -
Page 208: Photobook Assist
PHOTOBOOK ASSIST Create books from your favorite photos. Creating a Photobook Select NEW BOOK for C PLAY BACK MENU > PHOTOBOOK ASSIST. Scroll through the images and press the focus stick (focus le- ver) up to select or deselect. Press MENU/OK to exit when the book is complete. -
Page 209: Pc Auto Save
PC AUTO SAVE Upload pictures from the camera to a computer running the latest version of FUJIFILM PC AutoSave (note that you must fi rst install the software and confi gure the computer as a destination for images copied from the camera). -
Page 210: Print Order (Dpof)
PRINT ORDER (DPOF) Create a digital “print order” for DPOF-compatible printers. Select C PLAY BACK MENU > PRINT ORDER (DPOF). Select WITH DATE s to print the date of recording on pic- tures, WITHOUT DATE to print pictures without dates, or RESET ALL to remove all pictures from the print order before proceeding. -
Page 211: Instax Printer Print
Select C PLAY BACK MENU > instax PRINTER PRINT PRINTER PRINT. The camera will con- instax-12345678 nect to the printer. CONNECTING FUJIFILM-CAMERA-1234 CANCEL Use the focus stick (focus lever) to PRINTER PRINT 100-0020 display the picture you want to print, then press MENU/OK. The picture will be sent to the printer and printing will start. - Page 212 MEMO...
-
Page 213: The Setup Menus
The Setup Menus... -
Page 214: User Setting
USER SETTING Adjust basic camera settings. To access basic camera settings, press USER SETTING FORMAT MENU/OK, select the D (SET UP) tab, and DATE/TIME TIME DIFFERENCE choose USER SETTING. MY MENU SETTING SENSOR CLEANING RESET REGULATORY EXIT FORMAT To format a memory card: Select D USER SETTING >... -
Page 215: Date/Time
USER SETTING DATE/TIME To set the camera clock: Select D USER SETTING > DATE/TIME in the D (SET UP) tab. Press the focus stick (focus lever) left or right to highlight the year, month, day, hour, or minute and press up or down to change. -
Page 216: My Menu Setting
Choose a language. MY MENU SETTING Edit the items listed in the E (MY MENU) tab, a personalized cus- tom menu of frequently-used options. Highlight D USER SETTING > MY MY MENU SETTING MENU SETTING in the D (SET UP) ADD ITEMS tab and press MENU/OK. -
Page 217: Sensor Cleaning
USER SETTING SENSOR CLEANING Remove dust from the camera image sensor. Option Option Description Description Clean the sensor immediately. Sensor cleaning will be performed when the camera is WHEN SWITCHED ON turned on. Sensor cleaning will be performed when the camera turns WHEN SWITCHED OFF off... -
Page 218: Reset
USER SETTING RESET Reset shooting or setup menu options to default values. Highlight the desired option and press MENU/OK. Option Option Description Description Reset all shooting menu settings other than custom SHOOTING MENU white balance and custom settings banks created using RESET EDIT/SAVE CUSTOM SETTING to default values. -
Page 219: Sound Setting
SOUND SETTING Make changes to camera sounds. To access sound settings, press MENU/OK, SOUND SETTING select the D (SET UP) tab, and choose AF BEEP VOL. SELF-TIMER BEEP VOL. SOUND SET-UP. OPERATION VOL. SHUTTER VOLUME SHUTTER SOUND PLAYBACK VOLUME EXIT AF BEEP VOL. -
Page 220: Operation Vol
SOUND SETTING OPERATION VOL. Adjust the volume of the sounds produced when camera con- trols are operated. Choose eOFF to disable control sounds. Options Options b (high) c (medium) d (low) eOFF (mute) SHUTTER VOLUME Adjust the volume of the sounds produced by the electronic shutter. -
Page 221: Screen Setting
SCREEN SETTING Make changes to display settings. To access display settings, press MENU/OK, SCREEN SETTING EYE SENSOR SETTING select the D (SET UP) tab, and choose EVF BRIGHTNESS EVF COLOR SCREEN SET-UP. EVF COLOR ADJUSTMENT LCD BRIGHTNESS LCD COLOR LCD COLOR ADJUSTMENT IMAGE DISP. -
Page 222: Evf Color Adjustment
EVF COLOR ADJUSTMENT Adjust the color of the display in the electronic viewfi nder. Adjust colors using the focus stick EVF COLOR ADJUSTMENT (focus lever). CANCEL Press MENU/OK. LCD BRIGHTNESS Adjust monitor brightness. Options Options −5 −4 −3 −2 −1 LCD COLOR Adjust monitor hue. -
Page 223: Image Disp
SCREEN SETTING IMAGE DISP. Choose how long images are displayed after shooting. Option Option Description Description Pictures are displayed until the MENU/OK button is pressed or the shutter button is pressed halfway. To zoom in on the active focus CONTINUOUS point, press the center of the rear command dial;... -
Page 224: Preview Exp./Wb In Manual Mode
PREVIEW EXP./WB IN MANUAL MODE Choose whether to enable exposure and/or white balance preview in manual exposure mode. Option Option Description Description PREVIEW EXP./WB Enable exposure and white balance preview. Preview white balance only. Choose this option in situations in which exposure and white balance are likely to change during PREVIEW WB shooting, as may be the case when you use a fl... -
Page 225: Framing Guideline
SCREEN SETTING FRAMING GUIDELINE Choose a framing grid for shooting mode. Option Option F GRID 9 G GRID 24 H HD FRAMING GRID 9 GRID 24 HD FRAMING For “rule of thirds” compo- A six-by-four grid. Frame HD pictures in the sition. -
Page 226: Autorotate Pb
AUTOROTATE PB Choose ON to automatically rotate “tall” (portrait-orientation) pictures during playback. Options Options FOCUS SCALE UNITS Choose the units used for the focus distance indicator. Options Options METERS FEET... -
Page 227: Aperture Unit For Cinema Lens
SCREEN SETTING APERTURE UNIT FOR CINEMA LENS Choose whether the camera displays aperture as a T-number (used for movie camera lenses) or an f/-number (used for still camera lenses) when an optional FUJINON MKX-series lens is attached. For information on using cinema lenses, see the docu- mentation provided with the lens. -
Page 228: Disp. Custom Setting
DISP. CUSTOM SETTING Choose the items shown in the standard indicator display. In shooting mode, use the DISP/BACK button to display stan- dard indicators. Press MENU/OK and select D SCREEN SET-UP > DISP. CUSTOM SETTING in the D (SET UP) tab. Choose OVF or EVF/LCD. - Page 229 SCREEN SETTING Available Items The items that can be displayed in the OVF or EVF/LCD monitor are as follows: Default Default Item Item EVF/LCD EVF/LCD FRAMING GUIDELINE ELECTRONIC LEVEL FOCUS FRAME AF DISTANCE INDICATOR MF DISTANCE INDICATOR HISTOGRAM LIVE VIEW HIGHLIGHT ALERT —...
-
Page 230: Large Indicators Mode(Evf/Ovf)
LARGE INDICATORS MODE(EVF/OVF) Select ON to display large indicators in the optical or electron- ic viewfi nder. The indicators displayed can be selected using D SCREEN SET-UP > LARGE INDICATORS DISP. SETTING. 12800 Some icons are not displayed when ON is selected for LARGE INDICATORS MODE(EVF/OVF) (P 13). -
Page 231: Large Indicators Disp. Setting
SCREEN SETTING LARGE INDICATORS DISP. SETTING Choose the indicators displayed when LARGE INDICATORS DISP. SETTING Expo. DISP. ON is selected for D SCREEN SET-UP > Scale LARGE INDICATORS MODE(EVF/OVF) or LARGE INDICATORS MODE(LCD). Option Option Description Description Choose the items listed at the bottom of the display. A Expo. -
Page 232: Sub Monitor
SUB MONITOR Adjust display settings for the sub monitor. Separate displays are available for still photography and movie recording. Choose from the following: Option Option Description Description Display the settings chosen for fi lm simulation, white CLASSIC balance, and ISO sensitivity. Display camera settings. - Page 233 SCREEN SETTING Highlight the indicator you wish to DISPLAY 1 SETTING SHUTTER SPEED display and press MENU/OK. APERTURE EXPO. COMP. MOVIE MODE FRAMES REM. REC. TIME NONE Choose from: • • SHUTTER SPEED FOCUS MODE • • APERTURE WHITE BALANCE •...
-
Page 234: Button/Dial Setting
BUTTON/DIAL SETTING Access options for camera controls. To access control options, press MENU/OK, BUTTON/DIAL SETTING FOCUS LEVER SETTING select the D (SET UP) tab, and choose EDIT/SAVE QUICK MENU Q MENU BACKGROUND BUTTON/DIAL SETTING. FUNCTION (Fn) SETTING COMMAND DIAL SETTING SHUTTER AF SHUTTER AE SHOOT WITHOUT LENS... -
Page 235: Edit/Save Quick Menu
BUTTON/DIAL SETTING EDIT/SAVE QUICK MENU Choose the items displayed in the quick menu. Select D BUTTON/DIAL SETTING > EDIT/SAVE QUICK MENU in the D (SET UP) tab. Choose the number of items displayed in the quick menu. Quick menu save/edit options will be displayed. Highlight the item you wish to change and press MENU/OK. -
Page 236: Q Menu Background
Q MENU BACKGROUND Choose TRANSPARENT for a transparent background. Options Options TRANSPARENT BLACK FUNCTION (Fn) SETTING Choose the roles played by the function buttons. Select D BUTTON/DIAL SETTING > FUNCTION (Fn) SETTING in the D (SET UP) tab. Highlight the desired control and press MENU/OK. Highlight any of the following options and press MENU/OK to assign it to the selected control. - Page 237 BUTTON/DIAL SETTING Roles That Can Be Assigned to the Function Buttons Choose from: • • IMAGE SIZE WIRELESS COMMUNICATION • • IMAGE QUALITY FLASH FUNCTION SETTING • • TTL-LOCK • • FILM SIMULATION MODELING FLASH • • GRAIN EFFECT FULL HD HIGH SPEED REC •...
- Page 238 AF-ON If AF-ON is selected, you can press the control instead of keeping the shutter button pressed halfway. MODELING FLASH If MODELING FLASH is selected when a compatible shoe-mount- ed fl ash unit is attached, you can press the control to test-fi re the fl ash and check for shadows and the like (modeling fl ash).
-
Page 239: Command Dial Setting
BUTTON/DIAL SETTING COMMAND DIAL SETTING Choose the roles played by the command dials. Option Option Description Description FRONT COMMAND Assign shutter speed (S.S. (PROGRAM SHIFT)) or aper- DIAL 1 ture (APERTURE) to FRONT COMMAND DIAL 1. Assign shutter speed (S.S. (PROGRAM SHIFT)), ap- FRONT COMMAND erture (APERTURE) , exposure compensation (EXP. -
Page 240: Shutter Af
SHUTTER AF Choose whether the camera focuses when the shutter button is pressed halfway. Option Option Description Description • ON: Focus locks when the shutter button is pressed halfway. • AF-S OFF: No focus operation is performed when the shutter button is pressed halfway. -
Page 241: Shoot Without Lens
BUTTON/DIAL SETTING SHOOT WITHOUT LENS Choose ON to enable the shutter release when no lens is at- tached. Options Options SHOOT WITHOUT CARD Choose whether the shutter can be released without a memory card inserted in the camera. Option Option Description Description When no memory card is inserted, the shutter can be released... -
Page 242: Focus Ring Operation
FOCUS RING OPERATION Choose how the camera adjusts focus in response to the move- ment of the focus ring. Option Option Description Description NONLINEAR Focus is adjusted at the same rate as the ring is rotated. Focus is adjusted linearly according to the amount the ring is ro- LINEAR tated, but the focusing speed is unaff... -
Page 243: Aperture Ring Setting (A)
BUTTON/DIAL SETTING APERTURE RING SETTING (A) Choose whether the front command dial can be used to adjust aperture when aperture is set to A (auto). Option Option Description Description AUTO The camera adjusts aperture automatically. COMMAND Aperture can be adjusted using the front command dial. APERTURE SETTING Choose the method used to adjust aperture when using lenses with no aperture rings. -
Page 244: Touch Screen Setting
BUTTON/DIAL SETTING TOUCH SCREEN SETTING Enable or disable touch-screen controls. Option Option Description Description • ON: The LCD monitor functions as a touch screen during x TOUCH SCREEN shooting. SETTING • OFF: Touch controls disabled. • ON: Tap the LCD monitor twice to zoom in on your sub- x DOUBLE TAP ject during shooting. -
Page 245: Power Management
POWER MANAGEMENT Adjust power management settings. To access power management settings, POWER MANAGEMENT press MENU/OK, select the D (SET UP) tab, AUTO POWER OFF and choose POWER MANAGEMENT. PERFORMANCE EVF PERFORMANCE EXIT AUTO POWER OFF Choose the length of time before the camera turns off automati- cally when no operations are performed. -
Page 246: Performance
POWER MANAGEMENT PERFORMANCE Select BOOST to improve focus and viewfi nder display perfor- mance. Option Option Description Description Boost camera focus and viewfi nder display performance. The BOOST battery drains faster than when is NORMAL selected. Choose for standard focus and viewfi nder display performance NORMAL and battery endurance. -
Page 247: Save Data Setting
SAVE DATA SETTING Make changes to fi le management settings. To access fi le management settings, SAVE DATA SETTING FRAME NO. press MENU/OK, select the D (SET UP) tab, SAVE ORG IMAGE EDIT FILE NAME and choose SAVE DATA SET-UP. CARD SLOT SETTING (STILL IMAGE) SELECT SLOT( SEQUENTIAL) -
Page 248: Save Org Image
SAVE ORG IMAGE Choose ON to save unprocessed copies of pictures taken using RED EYE REMOVAL. Options Options EDIT FILE NAME Change the fi le name prefi x. sRGB images use a four-letter prefi x (default “DSCF”), Adobe RGB images a three-letter prefi x (“DSF”) preceded by an underscore. -
Page 249: Select Slot(Xsequential)
SAVE DATA SETTING SELECT SLOT(xSEQUENTIAL) Choose the card that is recorded to fi rst when SEQUENTIAL is selected for CARD SLOT SETTING (STILL IMAGE). Options Options SLOT 1 SLOT 2 SELECT SLOT(FSEQUENTIAL) Choose the slot used to store movies. Options Options SLOT 1 SLOT 2... -
Page 250: Copyright Info
SAVE DATA SETTING COPYRIGHT INFO Copyright information, in the form of Exif tags, can be added to new images as they are taken. Changes to copyright information are refl ected only in images taken after the changes are made. Option Option Description Description... -
Page 251: Connection Setting
Description To pair the camera with a smartphone or tablet, select this op- PAIRING tion, then launch FUJIFILM Camera Remote on the smart device REGISTRATION and tap PAIRING REGISTRATION. Choose a connection from a list of devices with which the SELECT PAIRING camera has been paired using PAIRING REGISTRATION. - Page 252 • Install the latest version of the FUJIFILM Camera Remote app on your smartphone or tablet before pairing the device with your camera or uploading images. • When ON is selected for both Bluetooth ON/OFF and AUTO IMAGE TRANSFER or images are currently selected for upload using the IMAGE TRANSFER ORDER option in the C (playback) menu, upload to paired...
-
Page 253: Network Setting
CONNECTION SETTING NETWORK SETTING Adjust settings for connection to wireless networks. Option Option Description Description • SIMPLE SETUP: Connect to an access point using simple settings. • WIRELESS ACCESS MANUAL SETUP: Manually adjust settings for connec- POINT SETTING tion to a wireless network. Choose the network from a list (SELECT FROM NETWORK LIST) or enter the name manu- ally (ENTER SSID). -
Page 254: Instax Printer Connection Setting
instax PRINTER CONNECTION SETTING Adjust settings for connection to optional Fujifi lm instax SHARE printers. The Printer Name (SSID) and Password The printer name (SSID) can be found on the bottom of the printer; the default password is “1111”. If you have already chosen a diff erent password to print from a smartphone, enter that password instead. -
Page 255: Pc Connection Mode
Connecting the camera to a computer via USB automatical- ly enables USB RAW conversion/backup restore mode. The camera functions normally when not connected. • USB RAW CONV. (requires FUJIFILM X RAW STUDIO): Use the USB RAW CONV./ camera’s image processing engine to rapidly convert RAW BACKUP RESTORE fi... -
Page 256: Usb Power Supply Setting
Tether Shooting Plug-in is available free of charge. • FUJIFILM X Acquire also supports tethered shooting using camera controls. FUJIFILM X Acquire can be downloaded free of charge from the Fujifi lm website. USB POWER SUPPLY SETTING Choose whether power is supplied to the camera when it is con- nected to a computer or other device via a USB cable. -
Page 257: General Settings
CONNECTION SETTING GENERAL SETTINGS Adjust settings for connection to wireless networks. Option Option Description Description Choose a name (NAME) to identify the camera on the wireless NAME network (the camera is assigned a unique name by default). Choose whether to resize images for upload to smartphones. Resizing applies only to the copy uploaded to the smartphone;... - Page 258 MEMO...
-
Page 259: Shortcuts
Shortcuts... -
Page 260: Shortcut Options
Shortcut Options Customize camera controls to suit your style or situation. Frequently-used options can be added to the Q menu or a cus- tom “my” menu or assigned to an Fn (function) button for direct access: Shortcut Option Shortcut Option Description Description Add frequently-used options to this custom menu,... -
Page 261: My Menu
MY MENU Access a personalized menu of frequently-used options. To display “my menu”, press MENU/OK in the MY MENU SELF-TIMER shooting display and select the E (MY INTERVAL TIMER SHOOTING FILM SIMULATION MENU) tab. GRAIN EFFECT SHUTTER TYPE IS MODE FACE/EYE DETECTION SETTING EXIT The E tab is only available if options have been assigned to... - Page 262 MY MENU SELECT ITEM LOCATION Choose a position for the item and 1 IMAGE SIZE press MENU/OK. The item will be added 2 IMAGE QUALITY to “my menu”. MOVE SAVE Press MENU/OK to return to the edit display. Repeat Steps 3 and 4 until all the desired items have been added.
-
Page 263: The Q (Quick Menu) Button
The Q (Quick Menu) Button Press Q for quick access to selected options. The Quick Menu Display At default settings, the quick menu contains the following items: • Use D BUTTON/DIAL SETTING > FUNCTION (Fn) SETTING to choose the function performed by the Q (quick menu) button or as- sign its default function to other controls (P 248). -
Page 264: Viewing And Changing Settings
SELECT CUSTOM SETTING The H IMAGE QUALITY SETTING > SELECT CUSTOM SETTING item (item ) shows the current custom settings bank: • q: No custom settings bank selected. • t–u: Select a bank to view the settings saved using the H IMAGE QUALITY SETTING >... -
Page 265: Editing The Quick Menu
The Q (Quick Menu) Button Editing the Quick Menu To choose the items displayed in the quick menu: Press and hold the Q button during shooting. The current quick menu will be dis- played; use the focus stick (focus le- ver) to highlight the item you wish to change and press MENU/OK. -
Page 266: The Fn (Function) Buttons
The Fn (Function) Buttons Assign a role to the function buttons for quick access to the selected feature. • The functions assigned to T-Fn1 through T-Fn4 can be accessed by fl icking the monitor. • Touch-function gestures are disabled by default. To enable touch-function gestures, select ON for D BUTTON/DIAL SETTING >... - Page 267 The Fn (Function) Buttons Back-of-Camera Function Buttons Back-of-Camera Function Buttons Function buttons Function buttons Default Default A A AE-L/AF-L button AE/AF LOCK B B Center of rear command dial FOCUS CHECK C C Fn1 button PHOTOMETRY D D Fn3 Fn3 button button FILM SIMULATION E E Q button...
-
Page 268: Assigning Roles To The Function Buttons
Assigning Roles to the Function Buttons To assign roles to the buttons: Press and hold the DISP/BACK button until a control selection menu is dis- played. Highlight the desired control and press MENU/OK. Highlight any of the following options and press MENU/OK to assign it to the selected control. - Page 269 The Fn (Function) Buttons Roles That Can Be Assigned to the Function Buttons Choose from: • • IMAGE SIZE WIRELESS COMMUNICATION • • IMAGE QUALITY FLASH FUNCTION SETTING • • TTL-LOCK • • FILM SIMULATION MODELING FLASH • • GRAIN EFFECT FULL HD HIGH SPEED REC •...
- Page 270 The Fn (Function) Buttons AF-ON If AF-ON is selected, you can press the control instead of keeping the shutter button pressed halfway. MODELING FLASH If MODELING FLASH is selected when a compatible shoe-mount- ed fl ash unit is attached, you can press the control to test-fi re the fl ash and check for shadows and the like (modeling fl ash).
-
Page 271: Peripherals And Optional Accessories
Peripherals and Optional Accessories... -
Page 272: Lenses
Lenses The camera can be used with lenses for the FUJIFILM X-mount. Lens Parts Lens hood O.I.S. switch Mounting marks Aperture mode switch Focus ring Lens signal contacts Zoom ring Front lens cap Aperture ring Rear lens cap... -
Page 273: Removing Lens Caps
Lenses Removing Lens Caps Remove lens caps as shown. Lens caps may diff er from those shown. Attaching Lens Hoods When attached, lens hoods reduce glare and protect the front lens element. -
Page 274: Lenses With Aperture Rings
Lenses with Aperture Rings At settings other than A, you can adjust aperture by rotating the lens aperture A 16 11 8 5.6 4 2.8 ring (exposure modes A and M). A 16 11 8 5.6 4 Aperture ring When the aperture ring is set to A, rotate the command dials to adjust aperture (P 219). -
Page 275: Lenses With No Aperture Rings
Lenses Lenses with No Aperture Rings The method used to adjust aperture can be selected using D BUTTON/DIAL SETTING > APERTURE SETTING. When an option other than AUTO is selected, aperture can be adjusted using the front command dial. Aperture control defaults to the front command dial, but can be reas- signed to the rear command dial using D BUTTON/DIAL SETTING >... -
Page 276: Manual Focus Lenses
Manual Focus Lenses Slide the focus ring to the front for aut- ofocus. For manual focus, slide the focus ring to the back and rotate it while checking the results in the camera display. The focus distance and depth-of-fi eld indicators can be used to assist manual focus. -
Page 277: Lens Care
Lenses Lens Care • Use a blower to remove dust, then gently wipe with a soft, dry cloth. Any remaining stains can be removed by wiping gently with a piece of Fujifi lm lens-cleaning paper to which a small amount of lens-cleaning fl uid has been applied. •... -
Page 278: External Flash Units
External Flash Units Use optional external fl ash units for fl ash photography. Some units support high-speed sync (FP) and can be used at shutter speeds faster than the fl ash sync speed, while others can function as master fl ash units controlling re- mote units via optical wireless fl ash control. -
Page 279: Flash Settings
External Flash Units Flash Settings Connect the unit to the camera. In shooting mode, select FLASH FLASH SETTING FUNCTION SETTING in the F (FLASH FLASH FUNCTION SETTING RED EYE REMOVAL TTL-LOCK MODE SETTING) menu tab. The options LED LIGHT SETTING MASTER SETTING available vary with the fl ash unit. -
Page 280: Sync Terminal
SYNC TERMINAL Displayed when no compatible fl ash unit is connected. MODE SYNC TERMINAL ADJUST Setting Setting Description Description Choose from the following options: • M: A trigger signal is transmitted via the hot shoe X contacts when a picture is taken. Choose a shutter speed slower than Flash control mode the sync speed;... -
Page 281: Shoe Mount Flash
External Flash Units SHOE MOUNT FLASH The following options are available when an optional shoe-mounted fl ash unit is attached and turned on. MODE SHOE MOUNT FLASH ADJUST Setting Setting Description Description The fl ash control mode selected with the fl ash unit. This can in some cases be adjusted from the camera;... - Page 282 Setting Setting Description Description The options available vary with fl ash control mode. • TTL: Adjust fl ash compensation (the full value may not be applied if the limits of the fl ash control system are exceed- ed). In the cases of the EF-X20, EF-20, EF-42, and EF-X500, the selected value is added to the value selected with the Flash compensation/ fl...
- Page 283 External Flash Units Setting Setting Description Description The angle of illumination (fl ash coverage) for units that sup- port fl ash zoom. Some units allow the adjustment to be Zoom made from the camera. If AUTO is selected, zoom will auto- matically be adjusted to match coverage to lens focal length.
-
Page 284: Master(Optical)
MASTER(OPTICAL) The options will be displayed if the unit is currently functioning as master fl ash for Fujifi lm optical wireless remote fl ash control. MODE MASTER(OPTICAL) ADJUST The master and remote units can be placed in up to three groups (A, B, and C) and fl ash mode and fl ash level adjusted separately for each group. - Page 285 External Flash Units Setting Setting Description Description Choose fl ash control modes for groups A, B, and C. TTL% is available for groups A and B only. Flash control mode • TTL: The units in the group fi re in TTL mode. Flash com- (group A) pensation can be adjusted separately for each group.
- Page 286 Setting Setting Description Description Choose a fl ash mode for TTL fl ash control. The options available vary with the shooting mode (P, S, A, or M) se- lected. • E (FLASH AUTO): The fl ash fi res only as required; fl ash level is adjusted according to subject brightness.
- Page 287 External Flash Units Setting Setting Description Description If the unit supports this feature, choose from: • J (FLASH POWER PRIORITY): Gain range by slightly re- ducing coverage. Lighting • K (STANDARD): Match coverage to picture angle. • L (EVEN COVERAGE PRIORITY): Slightly increase coverage for more even lighting.
- Page 288 MEMO...
-
Page 289: Connections
Connections... -
Page 290: Wireless Connections (Bluetooth®, Wireless Lan/Wi-Fi)
Connect to the camera via Bluetooth or wireless LAN. To establish a wireless connection to the camera, you will need to in- stall the latest version of the FUJIFILM Camera Remote app on your smartphone or tablet. FUJIFILM Camera Remote... - Page 291 Wireless Connections SmartPhones and Tablets: Bluetooth® Pairing Use D CONNECTION SETTING > Bluetooth SETTINGS > PAIRING REGISTRATION to pair the camera with smartphones or tablets. Pairing off ers a simple method for downloading photos from the camera. • Photos are downloaded via a wireless connection. •...
-
Page 292: Tethered Shooting: Capture One Pro Fujifi Lm/Adobe® Photoshop® Lightroom® Classic Cc + Fujifilm Tether Shooting Plug-In/Fujifilm X Acquire
RESET WIRELESS SETTING Tethered shooting can be performed us- ing software such as Adobe® Photoshop® Lightroom® Classic CC and FUJIFILM X Acquire. If you use Adobe® Photoshop® Lightroom® Classic CC, download FUJIFILM Tether Shooting Plug-in from the Adobe Exchange website. FUJIFILM Tether Shooting Plug-in is available free of charge. -
Page 293: Connecting Via Usb
Connecting via USB The camera can be connected to computers and smart- phones via USB. Connecting to Computers Before downloading pictures or taking pictures remotely, connect the camera to a computer and check that it functions normally. Turn the computer on. Adjust settings according to whether you will be using the camera for tethered shooting (P 276), copying pictures to a computer (P 277), save RAW pictures in other formats... - Page 294 STUDIO. The power of the camera’s image processing en- gine is used for rapid processing. • Saving and loading camera settings: Use FUJIFILM X Acquire to save or load camera settings. Save your preferred settings to a fi le in a single operation and copy them to multiple...
- Page 295 Connecting via USB • Turn the camera off before disconnecting the USB cable. • When connecting USB cables, be sure the connectors are fully in- serted in the correct orientation. Connect the camera directly to the computer; do not use a USB hub or keyboard. •...
-
Page 296: Tethered Shooting: Capture One Pro Fujifi Lm/Adobe® Photoshop® Lightroom® Classic Cc + Fujifilm Tether Shooting Plug-In/Fujifilm X Acquire
For more information, visit the following website: http://app.fujifilm-dsc.com/en/#tether • For more information on Capture One Pro Fujifi lm, Adobe® Photoshop® Lightroom® Classic CC + FUJIFILM Tether Shooting Plug-in, and FUJIFILM X Acquire, see “Software for Use with Your Camera” (P 289). -
Page 297: Copying Pictures To A Computer
Connecting via USB Copying Pictures to a Computer • Before copying pictures to a computer, CONNECTION SETTING Bluetooth SETTINGS select USB CARD READER for D CON- USB CARD READER NETWORK SETTING USB TETHER SHOOTING AUTO PRINTER CONNECTION SETTING USB TETHER SHOOTING FIXED NECTION SETTING >... -
Page 298: Converting Raw Images: Fujifilm X Raw Studio
FUJIFILM X RAW STUDIO can be used to convert RAW images to JPEG or TIFF images. For more information on FUJIFILM X RAW STUDIO, see “Software for Use with Your Camera” (P 289). Backing up and Restoring Camera Settings (FUJIFILM X Acquire) •... -
Page 299: Connecting To Smartphones
Connecting via USB Connecting to Smartphones To copy pictures to a smartphone, select OFF for D CONNECTION SETTING > USB POWER SUPPLY SETTING and connect the cam- era to the phone using a USB cable. For Customers Using Android Devices How you will connect the camera depends on the type of USB connector with which your smartphone is equipped. - Page 300 Set the camera’s D CONNECTION SETTING > USB POWER SUPPLY SETTING to OFF. Connect the camera and smartphone using a USB cable. If the smartphone asks for permission for an application other than the “Camera Importer” to access the camera, tap “Cancel” and move on to the next step.
- Page 301 Connecting via USB For Customers Using iOS An Apple Lightning to USB Camera Adapter is required. Apple Lightning to Supplied USB cable USB Camera Adapter Type-C connector (male) Use an Apple Lightning to USB Camera Adapter Type-A connector (male) Set the camera’s D CONNECTION SETTING > USB POWER SUPPLY SETTING to OFF.
-
Page 302: Instax Share Printers
instax SHARE Printers Print pictures from your digital camera to instax SHARE printers. Establishing a Connection Select D CONNECTION SETTING > instax PRINTER CONNECTION SETTING and enter the instax SHARE printer name (SSID) and pass- word. The Printer Name (SSID) and Password The printer name (SSID) can be found on the bottom of the printer;... -
Page 303: Printing Pictures
Select C PLAY BACK MENU > instax PRINTER PRINT PRINTER PRINT. The camera will con- instax-12345678 nect to the printer. CONNECTING FUJIFILM-CAMERA-1234 CANCEL Use the focus stick (focus lever) to PRINTER PRINT 100-0020 display the picture you want to print, then press MENU/OK. - Page 304 MEMO...
-
Page 305: Technical Notes
Technical Notes... -
Page 306: Accessories From Fujifi Lm
RR-100: Use to reduce camera shake or keep the shutter open during a time ex- ⌀ posure ( 2.5 mm). Stereo microphones Stereo microphones MIC-ST1: An external microphone for movie recording. FUJINON lenses FUJINON lenses XF-/XC-series lenses: Interchangeable lenses for use exclusively with the FUJIFILM X-mount. FUJINON MKX-series lenses: Cinema lenses for the FUJIFILM X-mount. - Page 307 XF1.4X TC WR: Increases the focal length of the compatible lenses by about 1.4×. XF2X TC WR: Increases the focal length of the compatible lenses by about 2.0×. Mount adapters Mount adapters FUJIFILM M MOUNT ADAPTER: Allows the camera to be used with a wide selection of M-mount lenses. Body caps Body caps BCP-001: Cover the camera lens mount when no lens is attached.
- Page 308 Accessories from Fujifi lm Leather cases Leather cases BLC-XPRO3: This case combines practicality with the luxury of leather and comes with a shoulder strap made of the same material, as well as a cloth that can be used to wrap the camera before putting it in the case and on other occasions. Pictures can be taken and batteries inserted or removed with the camera still in its case.
-
Page 309: Software For Use With Your Camera
Software for Use with Your Camera The camera can be used with the following software. FUJIFILM Camera Remote Establish a wireless connection between your camera and a smartphone or tablet (P 270). http://app.fujifilm-dsc.com/en/camera_remote/ Capture One Express Fujifi lm Capture One Express Fujifi lm is image edit software from Phase One A/S. -
Page 310: Adobe® Photoshop® Lightroom® Classic Cc + Fujifilm Tether Shooting Plug-In
Auto download (tethered shooting) is not supported with some cam- eras. FUJIFILM X RAW STUDIO When the camera is connected to a computer via USB, FUJIFILM X RAW STUDIO can use the camera’s unique image processing engine to rapidly convert RAW fi les to create high-quality images in other formats. -
Page 311: For Your Safety
For Your Safety IMPORTANT SAFETY INSTRUCTIONS • Read Instructions: All the safety and operating instructions Power-Cord Protection: Power-supply cords should be routed Read Instructions should be read before the appliance is operated. so that they are not likely to be walked on or pinched by •... - Page 312 Power Lines: An outside antenna system should not be locat- Damage Requiring Service: Unplug this video product from ed in the vicinity of overhead power lines or other electric the wall outlet and refer servicing to qualifi ed service person- light or power circuits, or where it can fall into such power nel under the following conditions: •...
- Page 313 For Your Safety WARNING WARNING WARNING WARNING Do not use the charger to charge batteries other than Do not use the charger to charge batteries other than Do not use the camera in the bathroom or shower. Do not use the camera in the bathroom or shower. This those specifi ed here.
- Page 314 CAUTION CAUTION CAUTION CAUTION Do not place heavy objects on the camera. This can cause Do not place heavy objects on the camera. When charging ends, unplug the charger from the power When charging ends, unplug the charger from the power the heavy object to tip over or fall and cause injury.
- Page 315 Digital Split Image is a trademark or registered trademark of • Strong sunlight focused through the viewfi nder may dam- FUJIFILM Corporation. Digital Micro Prism is a trademark or age the panel of electronic viewfi nder (EVF). Do not aim registered trademark of FUJIFILM Corporation. The typefaces the electronic viewfi...
- Page 316 NOTICES To prevent fire or shock hazard, do not expose the unit to rain or moisture. Please read the “Safety Notes” and make sure you understand them before using the camera. Perchlorate Material—special handling may apply. See: http://www.dtsc.ca.gov/hazardouswaste/perchlorate For Customers in the U. S. A. For Customers in the U.
- Page 317 fi ndings Liechtenstein: If you wish to discard this product, including have not been confi rmed by additional research. X-Pro3 has the batteries or accumulators, please contact your local au- been tested and found to comply with IC radiation exposure thorities and ask for the correct way of disposal.
- Page 318 RE Directive 2014/53/EU er attention to security than applies in the case of wired networks. Hereby, FUJIFILM Corporation declares that the radio Do not connect to unknown networks or networks to equipment type FF190002 is in compliance with Directive which you do not have access rights, even if they are 2014/53/EU.
- Page 319 For Your Safety Be sure to read these notes before using the lens Safety Notes WARNING WARNING • Make sure that you use the lens correctly. Read these safety Do not immerse in or expose to water. Failure to ob- Do not immerse in or expose to water.
-
Page 320: Product Care
Product Care To ensure continued enjoyment of the product, observe the following precautions. Camera body: Use a soft, dry cloth to clean the camera body after each use. Do not use alcohol, thinner, or other volatile chemicals, which could discolor or deform the leather on the camera body. Any liquid on the camera should be removed immediately with a soft, dry cloth. -
Page 321: Cleaning The Image Sensor
Cleaning the Image Sensor Dust that cannot be removed using D USER SETTING > SENSOR CLEANING can be removed manually as de- scribed below. Note that there will be a charge to repair or replace the image sensor if it is damaged during cleaning. Use a blower (not a brush) to remove dust from the sensor. -
Page 322: Firmware Updates
Firmware Updates Updates to product fi rmware may result in changes not described in the manual. For more information, visit: http://www.fujifilm.com/support/digital_cameras/software Checking the Firmware Version The camera will only display the fi rmware version if a memory card is inserted. -
Page 323: Troubleshooting
Troubleshooting Consult the table below should you encounter problems using your camera. If you don’t fi nd the solution here, con- tact your local Fujifi lm distributor. Power and Battery Problem Problem Solution Solution • The battery is exhausted: Charge the battery or insert a ful- ly-charged spare battery (P 36). - Page 324 Problem Problem Solution Solution • Insert the camera battery (P 31). • Reinsert the camera battery in the correct orientation (P 31). • Charging does not start Confi rm that the camera is connected to the computer (USB). (P 36). •...
- Page 325 Troubleshooting Shooting Problem Problem Solution Solution • The memory card is full: Insert a new memory card or delete pictures (P 33, 176). • The memory card is not formatted: Format the memory card in the camera (P 194). • There is dirt on the memory card contacts: Clean the contacts with a soft, dry cloth.
- Page 326 Problem Problem Solution Solution • The subject’s face is obscured by sunglasses, a hat, long hair, or other objects: Remove the obstructions (P 122). • The subject’s face occupies only a small area of the frame: Change the composition so that the subject’s face occu- No face is detected.
- Page 327 Troubleshooting Problem Problem Solution Solution • The lens is dirty: Clean the lens. • The lens is blocked: Keep objects away from the lens Pictures are blurred. (P 45). • s is displayed during shooting and the focus frame is dis- played in red: Check focus before shooting (P 45).
- Page 328 Playback Problem Problem Solution Solution The pictures were taken with a diff erent make or model of Pictures are grainy. camera. Playback zoom is The pictures were created using RESIZE or with a diff erent unavailable. make or model of camera. •...
- Page 329 The computer does not Be sure the camera and computer are correctly connected recognize the camera. (P 273). FUJIFILM X RAW STUDIO Check the option selected for PC CONNECTION MODE or FUJIFILM X Acquire on the camera. Select USB RAW CONV./BACKUP fails to correctly detect RESTORE before connecting the USB cable (P 278).
- Page 330 Wireless Transfer For additional information on troubleshooting wireless connec- tions, visit: http://digital-cameras.support.fujifilm.com/app?pid=x Problem Problem Solution Solution Cannot connect to smartphone. • The smartphone is too far away: Move the devices closer The camera is slow (P 270). to connect or upload •...
- Page 331 Troubleshooting Miscellaneous Problem Problem Solution Solution • Temporary camera malfunction: Remove and reinsert the battery (P 31). • The battery is exhausted: Charge the battery or insert a fully-charged spare battery (P 36). The camera is unresponsive. • The camera is connected to a wireless LAN: End the con- nection.
-
Page 332: Warning Messages And Displays
Warning Messages and Displays The following warnings appear in the display. Warning Warning Description Description Low battery. Charge the battery or insert a fully-charged i (red) spare battery. Battery exhausted. Charge the battery or insert a ful- j (blinks red) ly-charged spare battery. - Page 333 Warning Messages and Displays Warning Warning Description Description Turn the camera off , remove the lens, and clean the mount- ing surfaces, then replace the lens and turn the camera on. LENS ERROR If the problem persists, contact a Fujifi lm dealer. •...
- Page 334 Warning Warning Description Description • Memory card error or connection error: Reinsert the card or turn the camera off and then on again. If the message persists, contact a Fujifi lm dealer. • Not enough memory remaining to record additional pictures: WRITE ERROR Delete pictures or insert a memory card with more free space.
- Page 335 Warning Messages and Displays Warning Warning Description Description The picture is damaged or was not created with the camera. CAN NOT CROP Print orders can contain no more than 999 pictures. Copy any additional pictures you wish to print to another memo- DPOF FILE ERROR ry card and create a second print order.
-
Page 336: Memory Card Capacity
Memory Card Capacity The following table shows the recording time or number of pictures available at diff erent image sizes. All fi gures are approximate; fi le size varies with the scene recorded, pro- ducing wide variations in the number of fi les that can be stored. -
Page 337: Specifi Cations
Specifi cations System Model FUJIFILM X-Pro3 Product Number FF190002 Eff ective pixels Approx. 26.1 million Image sensor 23.5 mm × 15.6 mm (APS-C), X-Trans CMOS sensor with primary color fi lter Storage media Fujifi lm-recommended SD/SDHC/SDXC memory cards Memory card slots... - Page 338 System • Exposure compensation Still pictures: −5 EV – +5 EV in increments of ⁄ EV • Movies: −2 EV – +2 EV in increments of ⁄ EV • Shutter speed MECHANICAL SHUTTER ⁃ Mode P: 4 s to ⁄ s ⁃ Mode A: 30 s to ⁄ s ⁃ Modes S and M: 15 min. to ⁄ s ⁃...
- Page 339 Specifi cations System Continuous Available frame advance rates Available frame advance rates CONTINUOUS MODE CONTINUOUS MODE (JPEG) (JPEG) 30fps(1.25X CROP) 30fps(1.25X CROP) 20fps(1.25X CROP) 20fps(1.25X CROP) 20fps 20fps 11fps 11fps 10fps(1.25X CROP) 10fps(1.25X CROP) 10fps 10fps 8.0fps 8.0fps 5.7fps 5.7fps 5.0fps 5.0fps 4.0fps...
- Page 340 System Hot shoe Accessory shoe with TTL contacts; supports sync speeds as fast as ½ s Sync contact X contact; supports sync speeds as fast as ½ s Optical viewfi nder Reverse Galilean viewfi nder with electronic bright frame dis- (OVF) play and approx.
- Page 341 Specifi cations Power supply/other Power supply NP-W126S rechargeable battery (supplied with camera) • Battery life Battery type: NP-W126S • Lens: XF35mmF1.4 R • Flash: Disabled • Shooting mode: Mode P Number of shots Number of shots PERFORMANCE PERFORMANCE BOOST Approx. 310 Approx.
- Page 342 Specifi cations Wireless transmitter Wireless LAN Standards IEEE 802.11b/g/n (standard wireless protocol) Operating frequency 2,412 MHz–2,462 MHz (11 channels) (center frequency) Access protocols Infrastructure Bluetooth® Standards Bluetooth version 4.2 (Bluetooth Low Energy) Operating frequency 2,402 MHz–2,480 MHz (center frequency) NP-W126S rechargeable battery Nominal voltage 7.2 V Nominal capacity...
- Page 343 MEMO...
- Page 344 7-3, AKASAKA 9-CHOME, MINATO-KU, TOKYO 107-0052, JAPAN http://www.fujifilm.com/products/digital_cameras/index.html...
Need help?
Do you have a question about the X-Pro3 and is the answer not in the manual?
Questions and answers