FujiFilm X-Pro1 User Manual
Camera
Hide thumbs
Also See for X-Pro1:
- Owner's manual (136 pages) ,
- Service manual (132 pages) ,
- New features manual (24 pages)
Table of Contents
Advertisement
Advertisement
Table of Contents

Subscribe to Our Youtube Channel
Related Manuals for FujiFilm X-Pro1


Summary of Contents for FujiFilm X-Pro1
- Page 1 Rico Pfirstinger Mastering the FUJIFILM X-Pro1...
- Page 2 This book in no way makes the X-Pro1 owner’s manual superfluous, and you should read the manual, because this book picks up where the manual leaves off.
- Page 3 This handbook includes personal experiences, tips, and background information—not only from me, but from other photographers as well. Some basic photographic knowledge is assumed. The X-Pro1 is probably not your first camera, and you hopefully are already familiar with concepts like aperture and shutter speed.
-
Page 5: The Camera
Contents An oVerVIew oF the X-Pro1 SyStem Interchangeable Lenses / Flash Units / Accessories the CAmerA Overview of the Controls / Color Codes for the LED Indicator Lamp / Camera Menus / Highlighted vs. Selected / The Quick Menu (Q Button) /... -
Page 6: Extending The Dynamic Range
Tips for Exposing with Flash 2.10 USIng thIrd-PArty LenSeS Connecting and Recognizing Third-Party Lenses / Focusing with Third-Party Lenses / Exposing Correctly with Third-Party Lenses / Special Features of the FUJIFILM M Adapter 2.11 SoUrCeS And LInkS 2.12 FIrmwAre VerSIon 2.00... -
Page 7: An Overview Of The X-Pro1 System
THE CAMERA Before we get started with the actual operation of the X-Pro1, we should take a quick look at the camera’s buttons, dials, menus, and connections—not because I think that you haven’t done this already, but to be sure that we’re speaking the same language and using the... - Page 8 Speaker Image 4: X-Pro1 back and Left Side View: viewfinder with diopter ring, eye sensor, LCD monitor, VIEW MODE button, indicator lamp, command dial, AE-L/AF-L button, Quick Menu (Q) button, playback button, selector with macro button, Flash Sync...
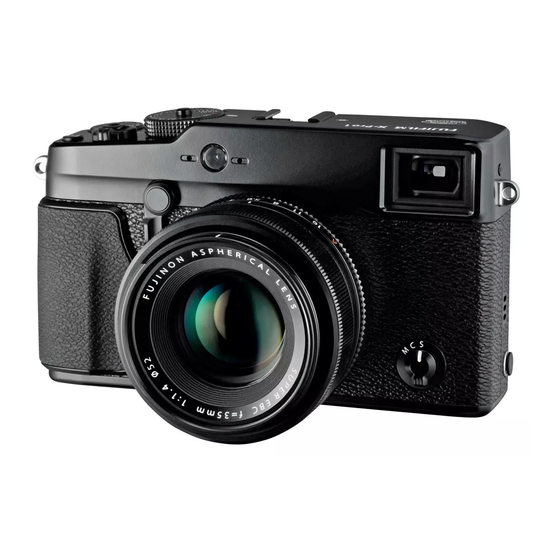
- Page 9 Lens Aperture ring hoods and Filters USb/hdmI connector cover handgrip Focus ring Image 6: X-Pro1 right Side View (with 35mm f/1.4 lens): USB/HDMI connector cover, handgrip, aperture ring, focus ring, mount for lens hood and filters.
- Page 10 The Camera Image 7: X-Pro1 right Side View: open connector cover revealing HDMI and USB ports. hdmI Port USb Port CoLor CodeS For the Led IndICAtor LAmP The indicator lamp next to the VIEW MODE button con- veys the following information: The autofocus has identified a target and has it in focus.
- Page 11 Well, whatever you want! Simply by renaming an image file on your memory card using your com- puter, you can trick the X-Pro1 into resuming its internal frame counter where you want it to start. This little trick obviously works for any situation in which you want to avoid unwanted or conflicting image num- bers—for example, if you shoot with multiple cameras or...
- Page 12 Fuji’s recommendation that you should use memory cards in speed class four or higher is also something short of realistic. The X-Pro1 writes RAW files in excess of 26 MB and JPEGs in excess of 3–5 MB, or in other words around 30 MB per RAW+JPEG exposure.
- Page 13 16 GB for my X-series cameras and make a habit of transferring my exposures to my computer regularly. When shooting with the maximum RAW+JPEG quality settings on your X-Pro1, a 16 GB card is good for 500 exposures. In addition to one or two of these superfast memory...
- Page 14 19mm threads. The first surprise: FUJIFILM didn’t offer its own diopter lens as part of its accessories for the X-Pro1 for several months, instead pointing users toward Cosina as a third-party manufacturer.
-
Page 15: The Lenses
Since camera viewfinders are designed for photographers with standard eyesight, we can assume that the neutral diopter lens (i.e., 0D) that comes with the X-Pro1 represents the normal case for people with normal vision. Experience shows that on this basis farsighted people who wear glasses to read should use a diopter lens with the same correction value as they use for help reading. - Page 16 You can purchase diopter lenses from FUJIFILM, Co sina, Carl Zeiss, and Nikon at most specialized retailers. ImPortAnt The X-Pro1’s optical and digital viewfinder displays are located at different virtual levels of distance.
- Page 17 Here are a few tips for an all-purpose configuration and for handling the camera: • Set the X-Pro1 to auto ISO (SHOOTING MENU 1 > ISO > AUTO [3200]) and auto DR (SHOOTING MENU 1 > DYNAMIC RANGE > AUTO). This setup gives the camera the maximum amount of flexibility and will immediately provide you with a high-quality result.
- Page 18 SHOOTING MENU 3 and then activating the CORRECTED AF FRAME function (see section 2.2). • The X-Pro1 features a hybrid viewfinder, which can show either an optical or an electronic image based on your preference. This doesn’t mean that you need to select one or the other display option.
- Page 19 Shooting with the X-Pro1 • The X-Pro1 is a mirrorless system camera—not a reflex camera. Don’t expect your X-Pro1 to operate like a DSLR or you’ll be setting yourself up for bitter disap- pointment. Photographers who are upgrading from the...
- Page 20 Press the DISP/BACK button for a couple seconds to activate (or deactivate) the camera’s silent mode. When this mode is turned on, the X-Pro1 functions quietly and inconspicuously. It won’t make any artificial noises and it abstains from using both the flash and the AF-assist lamp.
- Page 21 “ Batteries and Chargers” in section 1.1). • Make things as easy as possible for yourself and your X-Pro1: activate the quick start mode (SETUP MENU 2 > QUICK START MODE > ON), avoid using the energy save mode (SETUP MENU 2 > POWER SAVE MODE >...
- Page 22 For this reason, I don’t have any intention of trying to resolve the question, but I would like to address it specifically as it relates to the Fuji X-Pro1 and reassert my earlier recommendation that you keep your cake and eat it too by shooting with both formats: RAW+JPEG (SHOOTING MENU 1 >...
- Page 23 Image 48: Conventional Viewfinder (top row) and Multiview Viewfinder (bottom row): Without any additional magnification, the X-Pro1’s OVF is optimized for a focal length of 18mm (left). If you attach a lens with a focal length of 35mm (middle) or 60mm (right), the superimposed right rectangle adjusts to the actual image frame by becoming smaller—at a focal length of 60mm, the display is hardly practicable.
-
Page 24: Hybrid Viewfinder And Monitor
• The white image frame that you see in the optical view- finder doesn’t correspond exactly to the actual image frame that the camera exposes. In reality, the X-Pro1 exposes a slightly larger area than what appears in the optical viewfinder’s digital rectangular frame. The camera errs on the side of caution and frames some- thing like 85 percent of the actual exposure area. - Page 25 Shooting with the X-Pro1...
-
Page 26: Exposure And Metering
Image 62: Light metering methods: This example illustrates how the X-Pro1’s three different light metering methods work. This high-contrast test scene features a foreground with a dark tree trunk, a much brighter empty field, and a sky with very bright clouds. - Page 27 (DRIVE button > AE BKT). The most common tool for mirrorless system cameras such as the X-Pro1, however, is the live histogram, which delivers useful guidance in every exposure mode except manual.
- Page 28 Exposure and Metering experience. The histogram also does not produce reli- able results with very dark subjects in the three other exposure modes ( Image 63: By using the live histogram you can identify over- and underexposed areas of an image—and make the corresponding compensation adjustments—before you press the shutter-release button.
- Page 29 Automatic exposure bracketing Combined with the Compensation dial: For this rain forest idyll, I mounted the X-Pro1 to a small table tripod. In order to slow down the shutter speed, I attached an ND1.8 neutral density filter to the 35mm f/1.4 lens, which effectively allowed me to slow the shutter by a factor of 64 by blocking six stops.
- Page 30 The CDAF also has significant drawbacks in comparison to the PDAF technology: • CDAF systems like the one in the X-Pro1 work more slowly than PDAF systems. They’re also not able to track objects that move toward the camera or away from it.
- Page 31 Shooting with the X-Pro1 The X-Pro1 offers two autofocus modes: AF Single (AF-S) and AF Continuous (AF-C). These two modes are only modestly different because the camera’s AF system is not capable of tracking objects in anticipation of where they are going to be.
- Page 32 AF frame completely with your targeted object. • When shooting a low-contrast subject in dim light- ing, use the X-Pro1’s built-in AF-assist lamp. Turn this on by navigating to SHOOTING MENU 4 > AF ILLUMINATOR. With this option activated, the camera...
- Page 33 AE-L/AF-L button. With a bit of practice, this process will become second nature and you will only need to run the X-Pro1’s precise but time- consuming autofocus when you actually need to. If you use this method, you’ll be able to capture critical moments with success more often and you’ll be able to apply an...
- Page 34 Focusing with the X-Pro1 ImPortAnt The magnified viewfinder won’t be accessible immediately after shooting until your exposures are completely saved to the SD memory card (firmware version 1.11). Since it’s a good idea after taking a few shots to examine the last focus...
- Page 35 Image 75: balinese woman in temple: Exposure parameters: XF60mmF2.4 R Macro, ISO 200, f/3.6, 1/150 second. Developed from the RAW file with a beta version of RPP 64 that’s compatible with the X-Pro1 and polished off with Apple Aperture 3.
- Page 37 This horse was trotting toward the camera at a rate of around 12mph. To capture it with the X-Pro1’s CDAF, I set the camera to AF-S and then tracked the horse’s head with my AF frame for 1-2 seconds while I held the shutter-release button completely down and waited until the camera locked its focus and exposed the image automatically.
- Page 39 X-Pro1 at least shares an exter- nal resemblance. The X-Pro1’s depth of field indicator, however, is too conservative for many photographers. If that’s the case, it makes sense to rely less on the depth...
-
Page 40: Iso, Detail, And Image Noise
Why is this the case? What’s hiding behind the extended ISO range? Not much, actually. At these two high ISO settings, the X-Pro1 shoots RAW images at ISO 6400, but underexposes them by one or two exposure values and then boosts up the exposure again when the image data is converted to a JPEG. - Page 41 Shooting with the X-Pro1 underexpose your image while shooting with ISO 6400 and FINE+RAW and then plan on adjusting the exposure manually during the RAW conversion. Image 83: the test Subject with ISo 25600: You can see that as long as you don’t overly enlarge the picture, this for-emergencies- only mode still offers quite acceptable results.
- Page 42 ISO, Detail, and Image Noise areas, which comes at the expense of the high end of the dynamic range. The highlights, or bright tones, suffer dramatically, making ISO 100 also a setting for use only in emergencies for images that don’t feature high contrast or important highlight details.
-
Page 43: Extending The Dynamic Range
Normally this would require a manual process in which the photographer would purposefully underexpose an image and then make the appropriate adjustments when developing the image in a RAW converter. The X-Pro1’s DR function automates this process. - Page 44 Extending the Dynamic Range Figure 4 (right, below) shows the results of allowing the X-Pro1 to rescue the high- lights of the image by itself using the DR function. With auto DR activated, the camera selected DR400%, exposed the RAW file two aperture stops (exposure values) dimmer than normal, and remapped the brightness tones appropriately when developing the JPEG file.
- Page 45 Shooting with the X-Pro1 Image 87: the X-Pro1’s dr Function in Action The three JPEGs here illustrate the effect of the DR function on a high-contrast subject. At the top left is the baseline image with the extended DR disabled (DR100%). Next to this image, on the right, is the result of shooting in DR200%, and at the bottom left, DR400%.
- Page 46 Shooting with the X-Pro1 tIPS For hAndLIng the dr FUnCtIon There are four ways to change the DR settings of your camera: • Go to SHOOTING MENU 1 > DYNAMIC RANGE, where you can select from AUTO, DR100%, DR200%, or DR400%. If AUTO is selected, the camera will choose from the three other options: DR100% turns the dynamic range off;...
- Page 47 Erweitern des Dynamikumfang...
- Page 48 If you would like to see three different dynamic range versions of the same subject, press the DRIVE button and select DYNAMIC RANGE BKT. The X-Pro1 will then capture three images when you press the shutter-release button: one at DR100%, DR200%, and DR400%.
- Page 49 Extending the Dynamic Range Image 90: ogoh-ogoh Festival The X-Pro1’s internal RAW converter developed this JPEG, which (aside from crop- ping) is unedited. Exposure parameters: XF60mmF2.4 R Macro, DR400%, ISO 800, f/4, 1/800 second. JPEG conversion parameters that deviate from the default settings: white balance 5300K, Push/Pull processing +1/3 EV, film simulation PRO Neg.
-
Page 50: White Balance And Jpeg Settings
RAW file afterward. Image 91: Automatic white balance: The X-Pro1’s default white balance setting delivers excellent results even in complex lighting conditions. This example image featured a blend of natural light from the right as well as artificial light from the upper left. - Page 51 Shooting with the X-Pro1 The following seven presets are available in the WHITE BALANCE menu: • DIRECT SUNLIGHT: for subjects in sunlight • SHADE: for subjects in shadows • DAYLIGHT FLOURESCENT: for exposures under “ daylight” fluorescents • WARM WHITE FLOURESCENT: for warm white light •...
- Page 52 Quick Menu, changing the custom shooting profile, or programming the Fn button accordingly. In addition to the five color film choices, the X-Pro1 is able to create sepia as well as black-and-white digital images with various virtual color filters (red, yellow, green, neutral).
- Page 54 PC. Image 100: manual Contrast enhancement in black-and-white Conversions: The X-Pro1 converted the JPEG here with the MONOCHROME + R FILTER. I then edited the image in Apple Aperture 3 by applying a contrast curve typical for black-and-white...
- Page 55 Q button or changing the shooting profile. Image 103: the ShAdow tone Setting: This setting controls the reproduction of shadows when the X-Pro1 produces JPEG files. SOFT brightens the shadows and HARD darkens them. This effect can be seen clearly in the overcoat depicted in this photo.
- Page 56 White Balance and JPEG Settings ShAdow tone (–2) SoFt ShAdow tone (0) StAndArd ShAdow tone (+2) hArd...
- Page 57 Velvia image produced directly by the camera; the right is the product of an external RAW workflow. oPtICAL CorreCtIonS When the X-Pro1 produces a JPEG file for you to review immediately after snapping an exposure, it applies several corrections based on the optics of the lens (distortion, vignetting, chromatic aberrations) and saves information about these corrections as metadata in the RAW file.
- Page 58 Quick Menu and you can’t assign it to the Fn button or save it in the custom shooting profiles. The X-Pro1 allows you to save JPEGs in two different color spaces: sRGB or Adobe RGB. Both color spaces have the same number of colors, but those colors aren’t the same.
- Page 59 • Images that are part of a continuous series are treated differently from still images in the X-Pro1’s playback mode: only the first image of the series is shown at the...
- Page 60 Image 109: Continuous Shooting mode: Even when saving RAW files, the X-Pro1 can shoot up to six frames per second. The buffer memory, which can hold 11 RAW exposures, accordingly fills up in about 2 seconds. This means that good timing is critical for starting a series, because the actual window of time that the burst mode is fully functional is quite short.
- Page 61 Shooting with the X-Pro1 Image 116: Considering Ambient Light when Using Flash: With many successful flash exposures, you don’t even realize at first glance that flash was used. In this photo, the cat’s eyes betray the use of a flash. Fuji’s automatic TTL flash system is one of best in the world and consistently delivers results that users of other brands can only dream of.
- Page 62 Flash Photography with the X-Pro1 X-Pro1 and/or adjust the flash unit output directly on the device) and by using the exposure compensation dial to regulate the ambient light. • If you want to depict the background sharply when using long exposure times, you should use a tripod despite using a flash.
-
Page 63: Using Third-Party Lenses
X-Pro1 features to assist with manual focusing is a magnified digital viewfinder. Your search for focus peaking and other comparable tools to help with manual focusing in the X-Pro1 will be in vain. In other regards as well, the X-Pro1 is poorly equipped for working with third-party lenses, owing to its firmware (version 1.11). - Page 64 Shooting with the X-Pro1 the X-Pro1 via an adapter, the auto ISO operates with a minimum shutter speed of 1/30 second independently of the actual focal length and what is defined in the adapter menu. This is too fast for many wide-angle lenses and too slow for most normal and telephoto lenses.
- Page 65 ImPortAnt Third-party lenses attached to the X-Pro1 over a specific adapter can only be focused manually. The only exposure modes that are available are the aperture-priority manual exposure modes.
-
Page 66: Index
IndeX AdobeRGB 217 cable channel cover 6 AE/AF LOCK MODE 122 closeups (macro mode) 130 AE-L/AF-L button 5, 121 COLOR SPACE 217 AE-Lock 121 Adobe RGB 217 AE/zoom-out button 5 sRGB 217 AF-assist lamp 4 command dial 5 AF/delete button 5 CONTINUOUS shooting 223 AF ILLUMINATOR 125 contrast detection autofocus (CDAF) 109... - Page 67 132 eye sensor 5 focus mode selector 4 focus ring 6 frame counter 16 film simulation 182 FUJIFILM M-Mount-adapter 252 ASTIA 184 FUJINON XF18mmF2 R 35 MONOCHROME 190 FUJINON XF35mmF1.4 R 36 MONOCHROME + Ye/R/G FILTER 190 FUJINON XF60mmF2.4 R Macro 38...
- Page 68 Index image playback 72 noise 142 indicator lamp 5 noise reduction 204 internal RAW conversion 213 NP-W126 20 internal RAW converter 56 ISO 138 ISO setting and image quality 141 ON/OFF switch 4 ISO bracketing 155 OVF/EVF viewfinder selector 4 OVF (optical viewfinder) 61 JPEG 53 panorama 223...
- Page 69 Index SD memory card 17 VELVIA 184 self-timer 237 viewfinder 24 SENSOR CLEANING 28 viewfinder selector 52 Sensor Swabs 32 VIEW MODE 63 setting image size 59 VIEW MODE button 5 setup menu 8 Voigtländer Heliar F1.8/75 mm 255 SHADOW TONE 198 sharpness 202 shooting menu 8 white balance...
Need help?
Do you have a question about the X-Pro1 and is the answer not in the manual?
Questions and answers