
Related Manuals for Philips MC-90


Summary of Contents for Philips MC-90
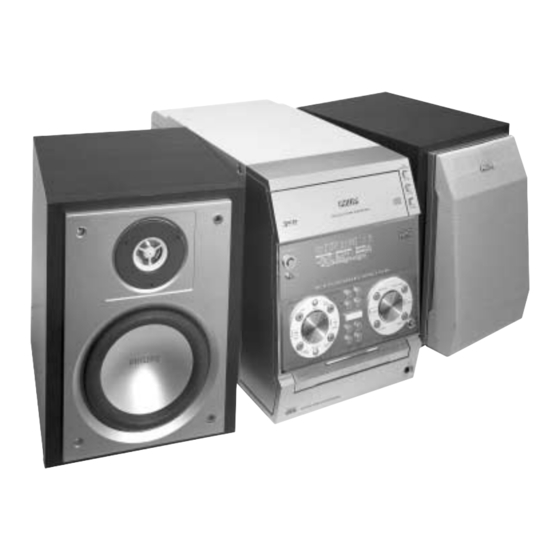
- Page 1 CD Recorder Micro Hi-Fi System 3139 115 20971 pg 001-038/MC90/22-Eng 1/29/02, 6:37 PM...
-
Page 2: How To Connect Plug
Italia U.K. DICHIARAZIONE DI CONFORMITA’ Mains plug Si dichiara che l’apparecchio MC-90 Philips This apparatus is fitted with an approved 13 risponde alle prescrizioni dell’art. 2 comma 1 del Amp plug. To change a fuse in this type of plug D.M. - Page 3 OPEN•CLOSE CD 1 CD 2 CD / CD - R / CD - RW COMPATIBLE CD 3 STANDBY-ON POWER ∞ M C - C D R E C O R D A B L E M I C R O S Y S T E M ≤...
- Page 4 Luokan 1 laserlaite Advarsel: Usynlig laserstråling ved åbning Varoitus! Laitteen käyttäminen muulla når sikkerhedsafbrydere er ude af funktion. Undgå utsættelse for stråling. kuin tässä käyttöohjeessa mainitulla tavalla saattaa altistaa käyttäjän Bemærk: Netafbryderen er sekundært turvallisuusluokan 1 ylittävälle indkoblet og ofbryder ikke strømmen fra näkymättömälle lasersäteilylle.
- Page 5 Index English ----------------------------------------- 6 Français -------------------------------------- 39 Español -------------------------------------- 72 Deutsch ------------------------------------- 105 Nederlands -------------------------------- 138 Italiano -------------------------------------- 171 3139 115 20971 pg 001-038/MC90/22-Eng 1/29/02, 6:37 PM...
-
Page 6: Table Of Contents
Contents General Information Recording Supplied accessories ............7 General information on recording ......23 Environmental information ..........7 Direct Line Recording (DLR) ........23 Maintenance ............... 7 Auto Level Control (ALC) ..........23 Activating/Deactivating ALC Safety information ............. 7 Adjusting the record level ..........24 Preparation for recording .......... -
Page 7: General Information
General Information This product complies with the radio Safety information interference requirements of the European Before operating the system, check that the Community. operating voltage indicated on the typeplate (or the voltage indication beside the voltage Supplied accessories selector) of your system is identical with the –... -
Page 8: Introduction
MP3 quality, a bit rate of CDRW compatible. 128 kbps is recommended. To ensure proper working of the set we recommend the use of Philips audio CDR and Notes: audio CDRW disc only. – In compliance with the SDMI (Secure Digital... -
Page 9: Preparations
Preparations FM wire antenna AM loop antenna speaker speaker DIGITAL MAINS LINE OUT (right) (left) AM ANTENNA AUX/CDR IN WOOFER OUT — — SPEAKERS 6 AC power cord Antennas connection Rear connections Connect the supplied AM loop antenna and FM The type plate is located at the rear of the antenna to the respective terminals. -
Page 10: Speakers Connection
Preparations FM Antenna Optional connections The additional appliances and connecting cords are not supplied. Refer to the operating instructions of the connected equipment for details. ¶ For better FM stereo reception, connect an DIGITAL IN outdoor FM antenna to the FM ANTENNA terminal. -
Page 11: Digital Audio Connection
Preparations Notes: Inserting batteries into the – Do not connect equipment to both the remote control LINE OUT and AUX/CDR IN terminals at the Insert two batteries (Type R06 or AA) into the same time. Otherwise, noise will be generated and remote control with the correct polarity as malfunction might occur. -
Page 12: Controls
Controls (main system’s illustration on page 3) Controls on the system and remote control § ° ECO POWER – to switch the system on or to Eco Power standby mode. ≥ ‡ STANDBY ON y • fl – to switch the system on or to standby mode. fi... - Page 13 Controls JOG CONTROL (rotary) BASS/TREBLE (í / ë – on remote control) – to select BASS or TREBLE sound feature. for CDC/CDR…to select a track. BASS/TREBLE +/- (on the remote control) ......... to review the tracks in a – to increase or decrease the low or high tone programme.
- Page 14 Controls ∞ – infrared sensor for remote control. § MUTE – to interrupt or resume sound reproduction. ≥ CD DIRECT 1/2/3 – to select a disc tray for playback. • IS (Incredible Surround) – to activate or deactivate the surround sound effect.
-
Page 15: Basic Functions
Basic Functions STANDBY-ON POWER M C - C D R E C O R D A B L E M I C R O S Y S T E M CD 1•2•3 PREV PRESET PRESET NEXT PLAY/ REC LEVEL CLOCK/TIMER STOP PAUSE PROG... -
Page 16: Demonstration Mode
Basic Functions Notes: Switching the system to standby – When the power is turned on, the disc tray may mode open and close to initialise the system. – If no stereo frequency is detected during In demonstration mode Plug and Play, "CHECK ANTENNA" is displayed. Press and hold Ç... -
Page 17: Display Screen Selection
Basic Functions Information display Display screen selection Press DISPLAY. Dim mode During playback, stop or recording; You can select the desired brightness for the To view various track’s/disc’s time information. display. Press DIM on the remote control repeatedly to Volume control select DIM 1, DIM 2, DIM 3 or DIM OFF display Adjust the MASTER VOLUME to increase mode. -
Page 18: Sound Control
Basic Functions Sound control IS (Incredible Surround) The Incredible Surround magnifies the virtual distance between the front speakers for an incredibly wide, enveloping, stereo effect. Press IS on the remote control repeatedly. If activated, . is shown and INCRED SURR “INCR SURR”... -
Page 19: Cd Changer/Recorder Operations
CD Changer/Recorder Operations OPEN•CLOSE CD 1 CD 2 CD / CD - R / CD - RW COMPATIBLE CD 3 STANDBY-ON POWER M C - C D R E C O R D A B L E M I C R O S Y S T E M CD 1•2•3 PREV PRESET... -
Page 20: Playing Disc
CD Changer/Recorder Operations To skip to the beginning of the current Playing disc track during playback Adjust JOG CONTROL anti-clockwise a disc is loaded in the disc tray (or pressí on the remote control). the current selected disc tray is empty Note: the current selected disc tray is loaded –... -
Page 21: Repeat And Shuffle
CD Changer/Recorder Operations CD text display Repeat and Shuffle This feature allows you to display information You can select and change the various play such as album title or track title contained on a modes before or during playback. specially encoded CD. Repeat play Press RDS/NEWS/CD TEXT (or CD TEXT/ EDIT on the remote control) repeatedly to see... -
Page 22: Changing The Programme
CD Changer/Recorder Operations Repeat steps 3–5 to store other discs and Erasing the programme tracks. To end programming, press Ç once . To erase a track stays and the programme mode PROG Stop playback and press CD 1•2•3 or CDR to remains active. -
Page 23: General Information On Recording
Recording The CD recorder can be used for : Direct Line Recording (DLR) – Recording from the internal CD changer and The CD recorder is equipped with the high- tuner or from external source. performance Direct Line Recording technique. It –... -
Page 24: Adjusting The Record Level
Recording Adjusting the record level CD 1•2•3 PREV PRESET PRESET NEXT You can adjust the reference record level for PLAY/ STOP PAUSE recordings from the internal CD changer or PROG TUNER external source. This feature can be used for fading your recordings in or out. COPY CD Cancel Enter... -
Page 25: Recording A Programme
Recording Recording a programme Further recording possibilities Make a programme from the CD changer only Press CD1•2•3 to select the disc you wish to (refer to “CD Changer/Recorder Operations - record from. Programming the disc tracks”). Press RECORD. Press COMPILE CD. Adjust JOG CONTROL (or pressí... -
Page 26: External Recording
Recording Notes: CD 1•2•3 PREV PRESET PRESET NEXT – Track numbers can be incremented manually by PLAY/ pressing TRACK INCR. on the remote control during STOP PAUSE PROG TUNER recording. The minimum track length is four seconds. COPY CD – Track numbers cannot be changed after Cancel Enter COMPILE CD... -
Page 27: Manual Recording
Recording / Other Features If a digital source is selected: CD 1•2•3 PREV PRESET PRESET NEXT After the recording process, the CD recorder PLAY/ stops automatically. STOP PAUSE PROG TUNER If an analogue source is selected: COPY CD At the end of the recording process, the CD recorder stops after a silence of 20 seconds on Cancel Enter... -
Page 28: Unfinalising Cdrw Disc
Other Features Note: Unfinalising CDRW disc – When erasing several tracks, the tracks to be If you want to record (or erase) on erased must be selected in sequence, starting from (from) a finalised CDRW, you have to the last recorded track. For example, if the CDRW unfinalise it first. -
Page 29: Changing Text
Other Features Changing Text In text editing mode, press à or á to move the cursor. The cursor position starts blinking. To insert a space, press YES. A space will be inserted after the cursor. To delete a character, press NO. The character before the cursor will be deleted. -
Page 30: Radio Reception
Radio Reception STANDBY- ON POWER M C - C D R E C O R D A B L E M I C R O S Y S T E M CD 1•2•3 PREV PRESET PRESET NEXT PLAY/ REC LEVEL CLOCK/TIMER STOP PAUSE... -
Page 31: Manual Preset Programming
Radio Reception Manual Preset Programming Erasing a preset radio station Tune to your desired radio station (refer to Adjust JOG CONTROL (or pressí or ë “Tuning to radio stations”). on the remote control) to select the preset radio station to be erased. Press PROG. -
Page 32: Setting The Rds Clock
Radio Reception Notes: NEWS (only available in RDS radio station) – If the tuned radio station does not transmit RDS Once the News PTY (Programme Type) is signal or is a non RDS station, "NO RDS" is detected in a RDS radio station, it will switch to displayed. -
Page 33: Clock/Timer
Clock/Timer STANDBY-ON POWER M C - C D R E C O R D A B L E M I C R O S Y S T E M CD 1•2•3 PREV PRESET PRESET NEXT PLAY/ REC LEVEL CLOCK/TIMER STOP PAUSE PROG TUNER... -
Page 34: Timer Setting
Clock/Timer Notes: Repeat step 3-6 of “Clock Setting” to set the – The clock setting will be cancelled when the hours and minutes. "TIMER ON" is displayed and followed by the power cord is disconnected or if a power failure occurs. -
Page 35: Sleep Timer Setting
Clock/Timer Sleep timer setting The sleep timer enables the system to switch to standby mode automatically at a preset time. Press SLEEP on the remote control repeatedly to select a preset amount of time. The selections are as follows (time in minutes): 15 ™... -
Page 36: Specifications
Specifications Amplifier Speakers Front left/right Output power ........2 x 50 W MPO System ........... 2 way, Bass reflex ............... 2 x 25 W RMS Impedance ................ 6 Signal-to-noise ratio ......75 dBA (IEC) Woofer ........1 x 5.25" metal cones Frequency response .. -
Page 37: Troubleshooting
– Check if a digital audio CDR(W) is inserted and make sure it is unfinalised. Stop during recording. – Use Philips audio CDR(W)s. – In case recording process is interrupted (power loss, mechanical shock), start recording again with a new disc. -
Page 38: Troubleshooting
Troubleshooting General The system does not react when buttons – Remove and reconnect the AC power plug and are pressed. switch on the system again. Sound cannot be heard or is of poor – Adjust the volume. quality. – Disconnect the headphones. –...
Need help?
Do you have a question about the MC-90 and is the answer not in the manual?
Questions and answers