Table of Contents
Advertisement
Quick Links
Advertisement
Table of Contents

Subscribe to Our Youtube Channel
Related Manuals for DRAKE ESR-D104


Summary of Contents for DRAKE ESR-D104
- Page 1 User’s Guide ESR-D104 Digital Satellite Receiver...
-
Page 2: Table Of Contents
Table of Contents 1. General Information ..................4 1.1 Main Features....................4 1.2 For Your Safety....................5 1.3 Unpacking......................5 1.4 General Operation of the Digital Satellite Receiver........5 1.5 RCU ......................6 1.6 Front Panel ....................7 1.7 Rear Panel .....................7 2. Installation of Digital Satellite Receiver............8 2.1 Connecting to Antenna and TV..............8 2.2 Connecting to TV/VCR using SCART Support ...........8 2.3 Connecting to TV using RCA Support ............9... - Page 3 5.8 Sat ......................21 5.9 Favourite List ....................21 6. Channel Manager ..................22 6.1 Channel Manager ..................22 2. Favorite mode (Green key)................22 3. Sort ....................... 22 6.2 Favorite Channel..................22 6.3 Move Channel....................23 6.4 Lock Channel ....................23 6.5 Rename Channel..................
-
Page 4: General Information
1. General Information The Digital Satellite Receiver allows you to view a variety of satellite programs. This user’s guide covers the installation of the Digital Satellite Receiver and the necessary steps to operate various features. It also explains special features available only in this Digital Satellite Receiver in detail, and will allow you to take full advantage of these features. -
Page 5: For Your Safety
1.2 For Your Safety • Allow clear space around the Digital Satellite Receiver for sufficient ventilation • Do not cover the Digital Satellite Receiver or place it on a unit that emits heat • Use a soft cloth and a mild solution of washing liquid to clean the casing •... -
Page 6: Rcu
1.5 RCU Figure 1: Remote Control Unit - 6 -... -
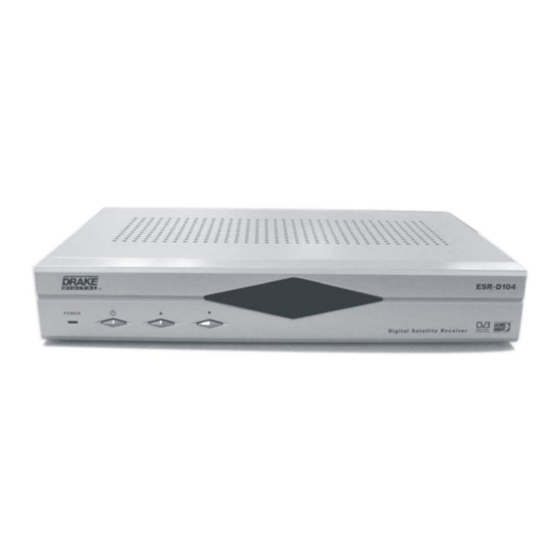
Page 7: Front Panel
1.6 Front Panel Button Function Switches between normal mode and standby. To step up and down through the channels. To select the different elements in the menus. 1.7 Rear Panel Name Function LNB IN Connect to satellite antenna LNB OUT Connect to another receiver To connect a VCR via a SCART connector. -
Page 8: Installation Of Digital Satellite Receiver
2. Installation of Digital Satellite Receiver This section explains the installation of Digital Satellite Receiver. Refer to the manuals supplied with the equipment for the installation of outdoor equipment such as the dish antenna. When adding new equipment, be sure to refer to the related parts of the manual for the installation. 2.1 Connecting to Antenna and TV 2.2 Connecting to TV/VCR using SCART Support - 8 -... -
Page 9: Connecting To Tv Using Rca Support
2.3 Connecting to TV using RCA Support 2.4 Connecting to another IRD - 9 -... -
Page 10: Connecting To Digital Amplifier
2.5 Connecting to Digital Amplifier - 10 -... -
Page 11: Menu Information
3. Menu Information Once you have installed and connected the cables of the Digital Satellite Receiver, the menu will is displayed. This menu consists of 5 main menus as shown below. • Channel Manager • Program Guide • Timer • User Installation •... -
Page 12: User Installation
4. User Installation This menu consists of 5 sub-menus as shown below. • Antenna Setup • Channel Search • System Setting • Parental Lock • Factory Default 4.1 Antenna Setup – 1) DiSEqC 1.2 1. Antenna : You can select a maximum of 16 antennas with the combination switches. -
Page 13: Antenna Setup - 2) Fixed
pressing OK key on the RCU. The cursor will move to the East limit button so that you can reset the limit. To reset West limits follow the same steps as East limits. Select EXIT to finish antenna setup. The message “Are you sure to change the configuration of Antenna setup?”... - Page 14 3. Position : After selecting a satellite, please select Position button and then keep pressing E or W key on the RCU until the selected satellite is locked. If the satellite is locked correctly, the color of the signal label bar will change to yellow.
- Page 15 10. Sat name edit : If you want to change the satellite name, select the satellite and press Sat Name Edit key (Yellow color key) on the RCU to display the command box. keypad dialog will appear. Using the arrow keys on the RCU, you can edit the satellite name.
-
Page 16: Channel Search - 2) Fixed
4.4 Channel Search – 2) Fixed 1. Antenna : Select your antenna number. 2. Satellite : Select desired satellite using arrows keys. Pressing the OK key will also display a list of satellites. You can see the information of the selected satellite on the right side. -
Page 17: Parental Lock
8. Start On Channel: If you press OK key, then the channel list is displayed. You can select one channel from the list. The selected channel starts whenever you turn on Digital Satellite Receiver. 4.6 Parental Lock This function allows you to lock the channel with a password in order to prevent children from accessing the channel. -
Page 18: Factory Default
• How to use Parent Lock 1. To activate parent lock function, go to the TV channel Manager Page. 2. Press Lock key (Blue color key) on the RCU. 3. Select the channel which you want to Lock. 4. Press OK then symbol is displayed. -
Page 19: General Viewing Function
5. General Viewing Function The following describes the basic functions of your Digital Satellite Receiver while watching satellite TV or listening to satellite radio. While watching, the current channel information will be shown on the bottom of the screen if you press the INFO button on the RCU. -
Page 20: Channel Information
Channel Information Every time you change channels, you will receive program information for a few seconds. While watching the channel you can see the current channel information at anytime by pressing the INFO key on the RCU. Note: Channel information will be displayed for 6 seconds by default and will disappear. -
Page 21: Sat
5.8 Sat If you searched channels from more than one satellite and want to have a channel list for each satellite, press SAT key on the RCU, a satellite list will be displayed. Select one satellite you want, press OK key on the RCU then you will have a channel list of your choice. -
Page 22: Channel Manager
6. Channel Manager Digital Satellite Receiver provides one of the most powerful channel managing functions in the world. This function not only allows you to watch channels but also do a lot of interesting and useful things. 6.1 Channel Manager Channel manager consists of TV channel and Radio channel. -
Page 23: Move Channel
• How to make a favorite group 1. When you enter channel manager, the default favorite group will be shown once on the screen as Favorite 1. 2. If you press favorite key (Green color key) on the RCU, a new favorite group will be created as Favorite 2. -
Page 24: Rename Channel
6.5 Rename Channel In the Main Page, press MENU key on the RCU, and then select Rename on the command menu. This Rename command allows you to rename the channel. First select the channel to be renamed and press OK key, then a Keypad dialog box will be displayed. -
Page 25: Epg (Electronic Program Guide)
7. EPG (Electronic Program Guide) Digital Satellite Receiver provides EPG function for you to get access to the TV Guide (or Radio Guide if you are listening to radio channels) that will show the titles and other information of the current and next programs on different channels. -
Page 26: Timer
8. Timer You can adjust the real time as well as you can program the timer in various ways. This function is one of the strong points of Digital Satellite Receiver. 8.1 Time Adjust Usually you get the information real time from the satellite automatically but sometimes they transmit wrong information. -
Page 27: Antenna Direction Help
9. Antenna Direction Help Although you have entered correct values in Antenna Set up menu, if your antenna is positioned incorrectly, you will not receive signal from the Satellite. So Digital Satellite Receiver provides Antenna Direction Help in order to let you have exact information to direct your antenna toward a satellite. -
Page 28: Front Panel Display
10. Front Panel Display : UP LOAD PROCEDURE : VCR MODE : DOWN LOAD : SYSTEM WAITTING PROCEDURE : ERROR IN DATA : FLASH ROM ERROR TRANSMITTING : TV MODE : SYSTEM BOOTING - 28 -... -
Page 29: Menu Tree Of Digital Satellite Receiver
11. Menu Tree of Digital Satellite Receiver First Time Installation Welcome System Settings User Installation User Installation Channel Search Timer PICTURE Menu Language Antenna Setup Channel Search Search 1Sat/TP/Net Timer Adjustment Menu Navigation Tv Channels Parental Lock System Settings Channels Search Search 1 Sat/TP/Net Delete Current Password... -
Page 30: Trouble Shooting
12. Trouble Shooting Problem Possible Causes What To Do Main cable is not The display on the Check that the main connected. front panel does cable is plugged into not light up. the power socket. The Digital Satellite No sound or picture, Receiver is in standby Press the standby but the front panel... - Page 31 Problem Possible Causes What To Do If the system is connected The systen is connected No picture appears by SCART leads, switch by SCART leads and TV is on the TV scree. the TV to the appropoate not in AV/EXT mode. AV input.
Need help?
Do you have a question about the ESR-D104 and is the answer not in the manual?
Questions and answers