Table of Contents
Advertisement
Advertisement
Table of Contents

Related Manuals for Packard Bell iPower GX


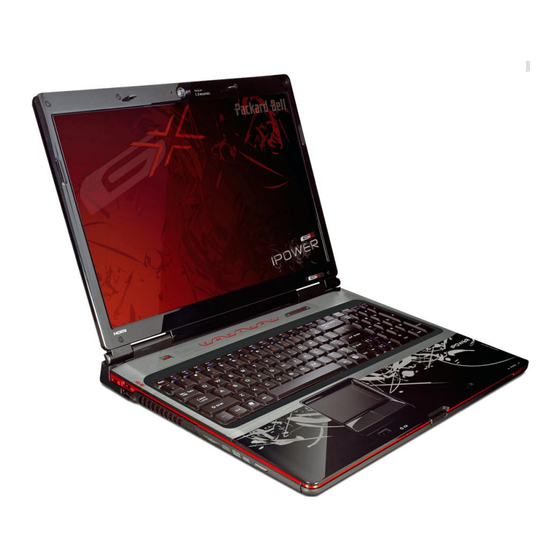
Summary of Contents for Packard Bell iPower GX
- Page 1 Packard Bell iPower GX Disassembly Manual...
-
Page 2: Table Of Contents
Touchpad Button Board.......................... 24 Fingerprint Reader ..........................25 Bluetooth..............................25 Modem ..............................26 Speaker Assembly ..........................27 Main Board .............................. 28 GPU Heat Sink ............................30 Modem Jack / USB Board........................31 System Fan.............................. 32 Notice............................... 33 Packard Bell iPower GX Disassembly Manual... -
Page 3: About This Guide
Packard Bell B.V. reserves the right to make changes to the iPower GX without notice. For More Information For more information about the Packard Bell iPower GX, visit Packard Bell‘s support web site at www.packardbell.com. The support web site also has links to additional Packard Bell documentation and detailed product specifications. -
Page 4: Hazardous Voltage
Always return a Non avviare il sistema senza aver prima defective power supply to the dealer. messo a posto il coperchio. Packard Bell iPower GX Disassembly Manual... -
Page 5: Battery
To remove the memory installed, first remove the battery (see Battery on page 4) and then perform the following steps: 1. Loosen the screws securing the CPU bay cover (the screws cannot be removed). Fig. 3 Location of the CPU bay cover screws. Packard Bell iPower GX Disassembly Manual... -
Page 6: Cpu Heat Sink
To remove the CPU heat sink, first remove the battery (see Battery on page 4) and then perform the following steps: 1. Loosen the screws securing the CPU bay cover; the screws cannot be removed (see Fig. 3 Packard Bell iPower GX Disassembly Manual... -
Page 7: Cpu
Apply new thermal grease on the CPU; use only enough to cover the CPU die. To remove the CPU, first remove the heat sink (see CPU Heat Sink on page 5) and then perform the following steps: Packard Bell iPower GX Disassembly Manual... -
Page 8: Wireless Lan Adapter
2. Use the thumb notch to lift the bay cover and remove it. Be careful not to break off the tabs located on the end of the cover opposite the thumb notch (see Fig. 4 Packard Bell iPower GX Disassembly Manual... - Page 9 Note: There are two WiFi antenna cables connected to the wireless LAN adapter. Take note of which coloured wire is connected to which connector on the adapter. 4. Remove the screws securing the wireless LAN adapter; it will eject upwards. Fig. 12 Location of the wireless LAN adapter screw. Packard Bell iPower GX Disassembly Manual...
-
Page 10: Rtc Battery
1. Disconnect the RTC battery cable from the header on the main board. Fig. 14 Disconnecting the RTC battery. 2. Detach the RTC battery from the main board. Note: The RTC battery is held in place by double-sided tape. Packard Bell iPower GX Disassembly Manual... -
Page 11: Hard Disk Drive
2. Use the thumb notch to lift the bay cover and remove it. Be careful not to break off the tabs located on the end of the cover opposite the thumb notch. Fig. 16 Removing the hard disk drive bay cover. Packard Bell iPower GX Disassembly Manual... - Page 12 5. Remove the four screws (Phillips-head) on the metal bracket holding the hard disk drive. Fig. 18 Location of the hard disk drive bracket screws. 6. Separate the metal bracket and the hard disk drive. Fig. 19 Separating the hard disk drive from the bracket. Packard Bell iPower GX Disassembly Manual...
-
Page 13: Dvd Drive
2. Remove the screw that secures the DVD drive to your notebook. Fig. 21 Location of the DVD drive screw. 3. Carefully slide the drive out of the drive bay. Fig. 22 Removing the DVD drive. Packard Bell iPower GX Disassembly Manual... -
Page 14: Keyboard Cover
4. Pull the cover off the notebook by lifting the back corners of the cover and let it rest on the LCD panel. Be careful not to damage the LCD panel. Fig. 25 Releasing the keyboard cover. Note: The cover is connected to the notebook by one cable. Do not pull the cable! Packard Bell iPower GX Disassembly Manual... -
Page 15: Power Button Board
The volume control board is located on the inside of the keyboard cover. To remove the volume control board, first remove the keyboard cover (see Keyboard Cover on page 13) and then perform the following steps: Packard Bell iPower GX Disassembly Manual... -
Page 16: Multimedia Board
Fig. 29 Releasing the power button board flat cable. 2. Remove the five screws securing the multimedia board to the keyboard cover. Fig. 30 Location of the multimedia board screws. Packard Bell iPower GX Disassembly Manual... -
Page 17: Keyboard
2. Lift the back edge of the keyboard slightly and then slowly slide it toward the LCD panel to release the keyboard retaining tabs located on the front edge of the keyboard. Fig. 33 Releasing the keyboard. Packard Bell iPower GX Disassembly Manual... -
Page 18: Lcd Bezel
Fig. 35 Location of the LCD bezel screw covers. 2. Remove the screws that became accessible after removing the inserts. 3. Carefully pry open the LCD bezel; it has been clicked into place. Fig. 36 Removing the LCD bezel. Packard Bell iPower GX Disassembly Manual... -
Page 19: Inverter
1. Disconnect the cable from the header on the webcam module. Fig. 40 Location of the webcam connector. 2. Remove the screws that secure the webcam. Fig. 41 Location of the webcam module screws. Packard Bell iPower GX Disassembly Manual... -
Page 20: Lcd Assembly
5. Make sure that you grasp the plastic connector carefully and pull to disconnect the LCD video cable from the header on the main board. Fig. 44 Disconnecting the LCD video cable. Note: The LCD video cable connector is fragile. Packard Bell iPower GX Disassembly Manual... -
Page 21: Lcd Panel
Fig. 45 Disconnecting the WLAN antenna cables. Note: Take care to note the cables’ routing and positions as they have been installed by Packard Bell. 7. Remove the two screws securing the LCD assembly hinges on the top of the chassis. -
Page 22: Lcd Panel Hinges
1. Remove the LCD panel hinges. Top Cover To remove the top cover, first remove the LCD assembly (see LCD Assembly on page 19) and then perform the following steps: Packard Bell iPower GX Disassembly Manual... - Page 23 4. Turn the notebook over so the top is facing up. 5. Remove the screws from the top of the top cover. Fig. 52 Location of the top cover screws (top). Note: Note the location of the screw types and sizes. Packard Bell iPower GX Disassembly Manual...
-
Page 24: Touchpad Board
2. Remove the screws from the touchpad board bracket. Fig. 54 Location of the touchpad board bracket screws. 3. Remove the screws from the touchpad button board bracket. Fig. 55 Location of the touchpad button board bracket screws. Packard Bell iPower GX Disassembly Manual... -
Page 25: Touchpad Button Board
6. Remove the touchpad board from the notebook. Fig. 58 Removing the touchpad board. Touchpad Button Board To remove the touchpad button board, first remove the touchpad board (see Touchpad Board on page 23), and then do the following: Packard Bell iPower GX Disassembly Manual... -
Page 26: Fingerprint Reader
To remove the Bluetooth module, first remove the top cover (see Top Cover on page 21) and then perform the following steps: 1. Lift the Bluetooth module out of the notebook. Fig. 61 Detaching the Bluetooth module. Packard Bell iPower GX Disassembly Manual... -
Page 27: Modem
To remove the modem, first remove the top cover (see Top Cover on page 21) and then perform the following steps: 1. Remove the screws securing the modem to the main board. Fig. 63 Location of the modem screws. Packard Bell iPower GX Disassembly Manual... -
Page 28: Speaker Assembly
To remove the speaker assembly, first remove the top cover (see Top Cover on page 21) and then perform the following steps: 1. Disconnect the speaker cable connector from the header on the main board. Fig. 66 Disconnecting the speaker cable. Packard Bell iPower GX Disassembly Manual... -
Page 29: Main Board
(see Top Cover on page 21), and then perform the following steps: 1. Disconnect the Bluetooth cable connector from the header on the main board. Fig. 69 Location of the Bluetooth cable header on the main board. Packard Bell iPower GX Disassembly Manual... - Page 30 3. Remove the screw(s) securing the EMI shield. Fig. 71 Location of the EMI shield screw(s). 4. Disconnect the system fan cable connector from the header on the main board. Fig. 72 Disconnecting the system fan cable. Packard Bell iPower GX Disassembly Manual...
-
Page 31: Gpu Heat Sink
Fig. 75 Wireless LAN switch. GPU Heat Sink To remove the GPU heat sink, first remove the main board (see Main Board on page 28), and then perform the following steps: Packard Bell iPower GX Disassembly Manual... -
Page 32: Modem Jack / Usb Board
To remove the modem jack / USB board, first remove the main board (see Main Board on page 28), and then perform the following steps: 1. Remove the screw securing the modem jack / USB board. Fig. 77 Location of the modem jack / USB board screw. Packard Bell iPower GX Disassembly Manual... -
Page 33: System Fan
1. Remove the screws securing the system fan. Fig. 79 Location of the system fan screws. 2. Remove the system fan from the notebook. Fig. 80 Extracting the system fan. Packard Bell iPower GX Disassembly Manual... -
Page 34: Notice
The information in this guide is subject to change without notice. This guide contains information protected by copyright. No part of this guide may be photocopied or reproduced in any form or by any means without prior written consent from Packard Bell B.V. B.V.
Need help?
Do you have a question about the iPower GX and is the answer not in the manual?
Questions and answers