Table of Contents
Advertisement
Advertisement
Table of Contents

Related Manuals for EE Brightbox


Summary of Contents for EE Brightbox
- Page 1 EE User Manual Bright Box Wireless Router...
- Page 2 Document Identification Version Date Comments 30/03/12 First Issue 18/10/12 Content update EE Bright Box User Manual...
-
Page 3: Table Of Contents
Advanced Set-Up tab ........................... 34 Making Configuration Changes ......................38 Help pages ..............................39 Chapter 5: The Bright Box status page ..............40 Internet status ............................40 Wireless Status ............................42 EE Bright Box User Manual... - Page 4 How to set manual DNS addresses ....................54 Migration Wizard ............................55 How to migrate to EE Fibre broadband .................... 56 How to migrate to EE ADSL broadband ................... 57 Wireless Settings ............................59 ...
- Page 5 How to restore the router to factory defaults from the router admin page ......177 How to restore the router to factory defaults from the reset button on the router ....179 Firmware Upgrade ..........................179 EE Bright Box User Manual...
- Page 6 Poor wireless signal strength and speeds or the wireless connection is lost ......202 Problem sharing files with a USB drive connected to the router..........203 Appendix A: Default Router Settings ..............204 EE Bright Box User Manual...
-
Page 7: Chapter 1: Introduction
The Bright Box Wireless Router supports ADSL2+ broadband connections offering maximum theoretical speeds of up to 24 Mbps on your EE home broadband line. The Bright Box also supports a simple ADSL setup over the EE broadband network through remote configuration –... - Page 8 Power Supply (Input) 100-240V ~ 50-60Hz 0.5A Power Supply (Output) 12V ~ 1.0A Firmware/Software Version v0.09.94.0006-OT (28 November 2011) Boot Code Version v1.00.09.0003-OT or v1.00.10.0001-OT ADSL Code Version A2pD035b-d23i Hardware Version Dimensions 165mm x 133mm x 30mm EE Bright Box User Manual...
-
Page 9: Chapter 2: Router Identification And Panels
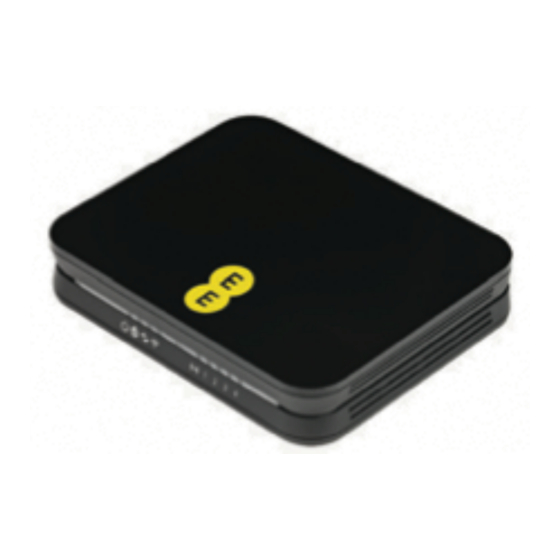
CHAPTER 2: ROUTER IDENTIFICATION AND PANELS ROUTER IDENTIFICATION The Bright Box Wireless Router is black with an EE logo printed on the top of the device, as illustrated below: On the bottom of the router you will find a sticker detailing the model name, MAC Address, Serial Number and important wireless information including your wireless network name (also known as an SSID) and wireless password. - Page 10 The router is training or synchronising with the flashing exchange. Slow The router has attempted to connect to the flashing Internet but has failed. This could be a problem connecting to the broadband exchange, however will be most commonly experienced when the EE Bright Box User Manual...
-
Page 11: Back Panel View
The router can’t detect a broadband signal. If you are using the EE Fibre broadband service check that the Ethernet connection between the WAN port on the Bright Box and LAN1 port on the Fibre modem is connected and the modem is powered on. - Page 12 Connect a USB storage device such as a USB hard drive to this port. See USB File Sharing on page 88 Power switch Use this switch to turn the router on/off. Power socket Connect the supplied power adapter to this socket. EE Bright Box User Manual...
-
Page 13: Bottom Panel View
On the base or bottom of the router, you’ll find a sticker detailing the information below: Model name of router (Bright Box Wireless Router) • Wireless network name (also known as SSID), e.g. BrightBox-1a2b3c • Wireless password – 6 character random password •... -
Page 14: Chapter 3: Installation
If you’d like a helping hand, follow this guide and you’ll be online in no time. The box should include the following items: A Bright Box Wireless Router: 2-Part power supply: Grey broadband cable (for ADSL broadband only) 2 x broadband filters EE Bright Box User Manual... - Page 15 Black Ethernet cable: Bright Box wireless router set-up guide: ‘KEEP MEE’ card If any of these items are missing or damaged please contact us on 0844 873 8586. EE Bright Box User Manual...
-
Page 16: Setting Up Your Adsl Broadband
SETTING UP YOUR ADSL BROADBAND Follow these steps to set up your Bright Box Wireless Router for your ADSL EE broadband service. If you are using the EE Fibre optic broadband service, see the next section. Disconnecting your old equipm ent If you’ve already got a broadband modem or router connected to your line, unplug the power... -
Page 17: Check It Over
The power light will go green and the broadband light will go green shortly afterwards. 2. Your set up should now look like this: Your hom e broadband is being set up This will take up to 5 minutes, so relax and let us do the leg work. EE Bright Box User Manual... -
Page 18: You Can Now Connect Your Devices
23 and 25 SETTING UP YOUR FIBRE BROADBAND Follow these steps to set up your Bright Box Wireless Router for your EE Fibre broadband service. Make sure that your Fibre broadband has been installed – the engineer will confirm that... -
Page 19: Check It Over
4. Connect the power supply into a plug socket and turn it on. 5. You can now switch on your router. Check it over Everything should now look like this, the power light will go green and the broadband light will go green shortly afterwards: EE Bright Box User Manual... -
Page 20: Your Fibre Broadband Is Being Set Up
23 and 25 MOVING TO FIBRE BROADBAND Follow these steps to move your Bright Box Wireless Router from an ADSL to EE Fibre broadband service. Make sure that your Fibre broadband has been installed – the engineer will confirm that... -
Page 21: Connect And Turn On Your Router
Plug the other end of the black Ethernet cable connected to the modem into the red WAN port on your router: Check it over Everything should now look like this: The power light will go green, the broadband light will go green once you’ve completed the next steps. EE Bright Box User Manual... -
Page 22: Six Simple Steps To Move
‘KEEP MEE’ card or on the sticker on the bottom of your router. 3. Select the Basic Set-Up tab at the top of the screen. 4. Select the Migration Wizard from the menu on the left hand side menu: 5. Press the Fibre/Ethernet button. EE Bright Box User Manual... -
Page 23: Your Fibre Broadband Is Being Set Up
To set up a wired (Ethernet) connection between your computer and the Bright Box Wireless Router, follow the steps below: For ADSL broadband, plug one end of the black Ethernet cable into any of the four yellow Ethernet sockets on the back of your Bright Box Wireless Router: EE Bright Box User Manual... - Page 24 3. Plug the other end into the Ethernet socket on your device. You’ll hear a click when you’ve connected the cable correctly: 4. To check your connection, type ee.co.uk into a browser's address bar and click Go: 5. The EE home page will load:...
-
Page 25: Setting Up A Wireless Connection
4. Select ‘connect’ or ‘join’ on your wireless network and when prompted enter your wireless password. 5. You should now be connected to the wireless network 6. To check your connection, type ee.co.uk into a browser's address bar and click Go: EE Bright Box User Manual... - Page 26 The EE home page will load: EE Bright Box User Manual...
-
Page 27: Chapter 4: The Bright Box Admin Pages
Open a browser, for example Internet Explorer Safari or Firefox In the address bar type, http://192.168.1.1 The router’s admin page login will open: Enter the Username and Password to login to the router admin pages: EE Bright Box User Manual... - Page 28 The Password can be found on the sticker on the bottom of the router (in the Router Login Details section) and on the ‘KEEP MEE’ card. Click Login The Bright Box ‘status’ page will be displayed: EE Bright Box User Manual...
-
Page 29: How To Log Out Of The Bright Box Adm In Pages
How to log out of the Bright Box adm in pages To logout of the router's admin pages: Click Logout – you’ll find this in the top right-hand corner of the router’s admin pages: 2. You’ll be taken back to the login screen: EE Bright Box User Manual... -
Page 30: Possible Errors Displayed When Logging Into The Adm In Pages
System > Password Settings page, and can’t remember the new password, you will need to return the router to factory settings using the reset button on the back panel of the router (see how to restore the router to it’s default settings on page 179) EE Bright Box User Manual... -
Page 31: Navigating The Bright Box Admin Pages
After logging into the Bright Box in your web browser, you can access each of the router admin pages by a combination of navigating the three tabs at the top of the page, and the EE Bright Box User Manual... - Page 32 Filtering, URL Blocking, Schedule Rules, Intrusion Detection, DMZ, Quality of Service (QoS), Traffic Mapping, DiffServ Groups, WMM, UPnP, Backup and Restore Configuration, Restart Router, Factory Default, Firmware Upgrade, System Settings, Time Settings, Password Settings, DDNS, ADSL Status and System Log. EE Bright Box User Manual...
-
Page 33: Bright Box Admin Page Descriptions
Bright Box admin pages. Basic Set-Up tab Section Description Broadband Settings This page contains basic settings to connect to your EE broadband service. Two network types can be configured here – ADSL and Fibre/Ethernet. The EE Bright Box User Manual... -
Page 34: Advanced Set-Up Tab
ISP settings, DNS and MTU settings. > Migration Wizard This page contains a wizard that allows you to change the default router configuration to work on either EE Fibre broadband or EE ADSL broadband services. Wireless Settings This page contains basic settings to configure your wireless network. - Page 35 Gateway/Subnet IP addresses, Lease Time, Domain Name and DHCP Start/End ranges can be configured here. The NAT (Network Address Translation) setting can be disabled/enabled on this page. Please note that this feature is enabled by default. EE Bright Box User Manual...
- Page 36 LAN IP addresses ranges to be mapped to particular Internet IP addresses in order to isolate internal networks. EE does not currently support this feature. > Port Forwarding This page allows you to configure the Port Forwarding (sometimes known as Port Mapping)
- Page 37 Boot, ADSL and Hardware versions, as well as the router Serial Number, LAN and Wireless MAC addresses. > Time Settings This page allows you to enable or disable the Automatic Time Server Maintenance to ensure the EE Bright Box User Manual...
-
Page 38: Making Configuration Changes
Basic Set-Up > Wi-Fi Protected Setup, Advanced Set-Up > Wireless Settings, Advanced Set-Up > Channel and SSID, Advanced Set-Up > WEP, Advanced Set- Up > WPA, Advanced Set-Up > Bandwidth Control or Advanced Set-Up > 802.1x pages. EE Bright Box User Manual... -
Page 39: Help Pages
Save Settings again to re-apply. HELP PAGES You can display contextual help information on admin pages by clicking the Help button on any page: This will open a window with the relevant help information for that particular admin page: EE Bright Box User Manual... -
Page 40: Chapter 5: The Bright Box Status Page
The follow sections describe the elements of the status page in more detail. INTERNET STATUS In this section you can check your Internet connection status, speed of your connection and how long you’ve been connected for. EE Bright Box User Manual... - Page 41 Broadband Username and Broadband Password on the Basic Set-Up > Broadband Settings page is correct. Also check the other settings on the Broadband Settings page to ensure these are correct for your EE ADSL connection. Also see chapter 8: troubleshooting on page 198...
-
Page 42: Wireless Status
Advanced Set-Up > Broadband Settings pages. The Username will automatically be populated when you first connect your router to your EE Broadband line. If the Username displays readytoconnect@fs then you may need to configure the Username and Password manually on the Basic Set-Up >... - Page 43 Basic Set-Up > Wireless Settings page and set the router to a manual channel between 1 and 13. If you have set the router to the 40MHz bandwidth setting in Advanced Set-Up > Wireless Settings > Channel EE Bright Box User Manual...
-
Page 44: Currently Connected Devices
This field displays the 12-digit unique MAC (Media Access Control) address of the connected device. Connection Type This field will display whether the connected device is connected over a wired Ethernet connection (‘LAN’) or over the router’s wireless connection (‘Wireless’). EE Bright Box User Manual... -
Page 45: Usb Device
The section is comprised of three areas – Internet, Features and LAN & Wireless(Default) Field Description Protocol This field displays the network protocol for the active Internet connection. On EE ADSL broadband, the value will EE Bright Box User Manual... - Page 46 ‘PPPoA’ and on EE Fibre broadband the value will be ‘PPPoE’ Alternative values of ‘DHCP’, ‘Fix’ or ‘Bridge’ may be displayed if alternative ADSL or Ethernet connection modes have been configured in the Basic Set-Up > Broadband Settings or Advanced Set-Up >...
- Page 47 IP addresses. If the value of this field is ‘0.0.0.0’ either a connection through to the Internet has not been successfully established, or there are problems with the EE domain name servers. Also see chapter 8: troubleshooting on page Secondary DNS This field displays the secondary Domain Name Server (DNS) for the active Internet connection.
- Page 48 If the value is ‘Disabled’ then client devices must supply their own LAN IP addresses in order to connect to the router. The setting can be configured on the Advanced Set-Up > DHCP page. EE Bright Box User Manual...
-
Page 49: Chapter 6: Bright Box Basic Set-Up Pages
Broadband Settings item in the left hand navigation menu when inside the Basic Set-Up tab. This page contains basic settings to connect to your EE broadband service. The Broadband Username and Password can be found here, as well as ISP settings, DNS and MTU settings. - Page 50 This field is not visible for the Fibre/Ethernet Broadband Type. Encapsulation (ADSL This dropdown allows you to configure the ATM Broadband Type Encapsulation setting for the active Internet connection. only) For EE ADSL broadband the default value is ‘VC MUX’. EE Bright Box User Manual...
- Page 51 Type. Internet IP Address This dropdown allows you to configure how the Internet IP Address is allocated. For EE Broadband the default value is ‘Dynamic’. Select ‘Dynamic’ if the Internet IP address is assigned by your ISP, this is the standard setting for EE broadband.
-
Page 52: How To Manually Update The Broadband Username And Password
How to m anually update the broadband usernam e and passw ord When you first connect your EE Bright Box router to your EE line, your Broadband Settings will be automatically configured, however you can also manually update your broadband username and password on the router from the Broadband Settings page. -
Page 53: How To Change The Broadband Mtu
How to change the broadband M TU The Maximum Transmission Unit (MTU) value is optimised on the Bright Box router for the EE network with a default value of 1492. In some cases (if web pages are not loading or secure web sites are timing out for example) it may be necessary to adjust the MTU value. -
Page 54: How To Set Manual Dns Addresses
The Bright Box router is set to automatically obtain the Domain Name Server (DNS) IP address from EE broadband when establishing an Internet connection. The DNS server translates Internet names and URL’s to IP addresses in order to display web pages or other Internet services. -
Page 55: Migration Wizard
ISP’ and click the Save Settings button: MIGRATION WIZARD This page allows you to easily migrate your Broadband service from EE ADSL to EE Fibre broadband or vice-versa. The page also displays the current default Broadband Type (either ADSL or Fibre/Ethernet). -
Page 56: How To Migrate To Ee Fibre Broadband
How to m igrate to EE Fibre broadband When your EE Fibre service has been provisioned and an engineer has installed your Fibre modem you may need to migrate the router to the EE Fibre broadband settings using the Migration Wizard. -
Page 57: How To Migrate To Ee Adsl Broadband
There may be an occasion when you need to migrate your Bright Box router from EE Fibre broadband settings to EE ADSL broadband (for example if you are moving to a house that no longer has a Fibre connection). You can also use the Migration Wizard to set the router to EE ADSL settings. - Page 58 4. Press the ADSL button. 5. Press OK on the warning pop-up: 6. The migration countdown will begin. You can now close your browser. EE Bright Box User Manual...
-
Page 59: Wireless Settings
2. Click on the Basic Set-Up tab and then select Wireless Settings from the left hand menu: Description of W ireless Settings The following table contains a description of the fields and options in the Wireless Settings page: EE Bright Box User Manual... - Page 60 By default your router will have a unique SSID applied by EE. For example ‘BrightBox-1a2b3c’. Broadcast SSID This option is used to configure whether the Wireless Network Name (SSID) is being broadcast by the router.
- Page 61 By default the wireless password will be a randomly generated by EE. You can change this to something more memorable, between 8 and 63 characters (a-z, A-Z, 0-9). Please note that the wireless password is case sensitive.
-
Page 62: A Note On Changing Wireless Settings
In some instances you may have trouble re-connecting to the wireless network after making changes to wireless settings. If this occurs you may need to delete the old wireless network from your saved network list, and reconnect again. EE Bright Box User Manual... -
Page 63: How To Enable Or Disable Wireless
4. Click on the Basic Set-Up tab and then select Wireless Settings from the left hand menu: The Wireless Settings page will open: 2. In the 'Enable or disable wireless' field, select your required option in the example below we're going to 'Disable' wireless on the router: EE Bright Box User Manual... -
Page 64: How To Change The Wireless Network Name (Ssid)
Bright Box router to a more memorable name. To do this: Login to the router’s admin pages. 2. Click on the Basic Set-Up tab and then select Wireless Settings from the left hand menu: EE Bright Box User Manual... - Page 65 3. On the Wireless Settings page, click in the ‘Wireless Network Name (SSID)’ field and overwrite the default wireless network name with a new one up to 32 characters in length. 4. Click Save Settings: 5. The router will apply the new settings: EE Bright Box User Manual...
-
Page 66: How To Change The Wireless Wpa Password
‘MySecretPassword’ is different to ‘mysecretpassword’, and will need to be entered exactly as typed when making a connection to the wireless network: EE Bright Box User Manual... -
Page 67: How To Change The Wireless Mode
802.11b+11g will limit the connection speed up to 54Mbps. To change the wireless mode: Login to the router’s admin pages. 2. Click on the Basic Set-Up tab and then select Wireless Settings from the left hand menu: EE Bright Box User Manual... - Page 68 3. On the Wireless Settings page, click on the ‘Wireless Mode’ dropdown box and select the new wireless mode from the list. In this example we will change to ‘11b+11g’: 4. Click Save Settings: 5. The router will apply the new settings: EE Bright Box User Manual...
-
Page 69: How To Change The Wireless Channel
On the Wireless Settings page, click on the ‘Channel’ dropdown box and select from Channels 1 to 13, or ‘Auto’ to allow the router to automatically select the best wireless channel. In this example we will change to Channel 6: 3. Click Save Settings: EE Bright Box User Manual... -
Page 70: How To Change The Broadcast Ssid Option
2. Click on the Basic Set-Up tab and then select Wireless Settings from the left hand menu: 3. In the ‘Broadcast SSID’ field select your required option, either ‘Enable’ or ‘Disable’. In the example below we're going to 'Disable' broadcasting of the SSID on the router: EE Bright Box User Manual... - Page 71 6. To connect to the non broadcasting SSID, you will have to enter the wireless network name, security type and security key (wireless password) in the operating system wireless software manually. For example here is a screenshot from Windows 7 (please note that exact steps will differ between operating systems): EE Bright Box User Manual...
-
Page 72: How To Change To Wireless Wep Security
(for example by installing Windows XP Service Pack 2 or 3), then you may need to set the router to WEP security mode to establish a wireless connection to the router. EE Bright Box User Manual... - Page 73 5. Scroll down to the Security Setting section of the page and choose the ‘WEP mode’ option. In this example we select ’128-bit’ 6. Select a ‘Key Entry Method’ of ‘HEX’ EE Bright Box User Manual...
- Page 74 7. In the ‘Passphrase’ field tick the box and then enter any phrase, in this example we use ‘brightbox’, but enter your own unique one for when you follow this step. 8. Click the Generate Key button. Your screen should look like the example below: 8.
-
Page 75: How To Change To Wireless Wpa Mode
To set the Bright Box router to wireless WPA security, do the following: Login to the router’s admin pages. 2. Click on the Basic Set-Up tab and then select Wireless Settings from the left hand menu: EE Bright Box User Manual... - Page 76 4. Scroll down to the ‘Security Setting’ dropdown and choose the WPA mode you wish to use. In this example we will select ‘’WPA/WPA2 Mixed Mode’ (the most secure and compatible): 4. Click Save Settings: 5. The router will apply the new settings: EE Bright Box User Manual...
-
Page 77: How To Disable Wireless Security
Disabling wireless security should only be done with great care. With wireless security disabled, anyone in range of the router can establish a wireless connection with the router and use your Internet connection. This setting is not recommended by EE. In order to disable wireless security: Login to the router’s admin pages. -
Page 78: Using The Intelligent Wireless Feature
You can also run the Intelligent Wireless feature from inside the router’s admin pages by logging into the admin pages and navigating to Basic Set-up > Wireless Settings (or Advanced Set-up > Wireless Settings). Click on the Intelligent Wireless button on the page: EE Bright Box User Manual... -
Page 79: Wi-Fi Protected Setup
While WPS is built in to Windows Vista SP2 and Windows 7, the wireless adapter must also support WPS for this feature to work. Compatible devices may carry this WPS logo to identify support for this feature: EE Bright Box User Manual... -
Page 80: Description Of Wps Settings
(WPS availability is dependent on the wireless adapter also supporting the feature). Select ‘Disable’ to switch off the WPS feature on the router. You can only connect with the manual password EE Bright Box User Manual... - Page 81 WPS PBC or manual password methods. ‘Success – The device is connected to the router’ means that the WPS PBC connection method has been successful and a wireless connection between the router and the wireless adapter has been established. EE Bright Box User Manual...
-
Page 82: How To Enable And Disable Wps
2. Click on the Basic Set-Up tab and then select Wireless Settings from the left hand menu. 3. Select Wi-Fi Protected Setup from the left hand menu: 4. The Wi-Fi protected setup page will open: EE Bright Box User Manual... -
Page 83: How To Establish A Wps Connection Using Push Button Configuration (Pbc)
How to establish a W PS connection using push button configuration (PBC) To connect the Bright Box router to a WPS device that supports Push Button Configuration (PBC) mode, you will need to do the following: EE Bright Box User Manual... - Page 84 2. Alternatively you can click on the start pbc button in the Wi-Fi Protected Setup page in the router admin pages: 3. The WPS light on the front of the router will begin to flash quickly: EE Bright Box User Manual...
- Page 85 WPS, we recommend connecting using the manual password method. See setting up a wireless connection on page 25 for further information Some wireless adapters use their own software to establish a wireless connection with WPS. Please follow the manufacturers instructions for WPS if this is the case. EE Bright Box User Manual...
-
Page 86: How To Establish A Wps Connection Using The Personal Identification Number (Pin) Method
PIN number: 5. Launch the wireless connection software in your operating system and when prompted, enter the PIN number of the router and click Next to establish a connection using WPS. EE Bright Box User Manual... - Page 87 6. Alternatively, some wireless devices may provide their own PIN number for establishing a WPS connection: 7. If this case, type the key provided into the ‘device PIN’ field on the Wi-Fi protected setup page and press the Connect button to establish a connection: EE Bright Box User Manual...
-
Page 88: Usb File Sharing
To connect a USB hard drive to the Bright Box router simply plug the USB drive into the USB socket on the back of the router as illustrated: 2. The router should automatically appear in your Network section on Windows Vista and Windows 7, or My Network Places section in Windows XP. EE Bright Box User Manual... - Page 89 3. On Apple Mac OS X, the router should automatically appear in the Finder under Shared: 4. Click on the Brightbox router item in Network or Finder to view and access the shared USB drive: EE Bright Box User Manual...
-
Page 90: Description Of Usb File Sharing Settings
On Mac OS X open the Finder window and select Go > Connect to Server… and enter • smb://brightbox and click Connect to open the network drive. Description of USB File Sharing settings While the Bright Box router is configured to automatically share a USB drive over the network when it is connected to the router, you can configure basic USB File Sharing settings. - Page 91 Note that for Windows XP Home Edition the workgroup name is often ‘Mshome’, so it may be necessary to change the Workgroup Name field to ‘Mshome’ to share the USB drive. File Permissions This option is used to configure the file access EE Bright Box User Manual...
-
Page 92: How To Set A Username And Password On The Usb Drive
To set a username on attached USB drives: Login to the router’s admin pages. 2. Click on the Basic Set-Up tab and then select USB File Sharing from the left hand menu: EE Bright Box User Manual... - Page 93 3. In the ‘Security Control’ field, set the option to ‘Enable’ 4. Update the ‘User Name’ and ‘Password’ fields as appropriate: 5. Click Save Settings: 6. The router will apply the new settings: EE Bright Box User Manual...
- Page 94 Step 5 (Windows 7 and Mac OS X 10.7 screenshot examples below): 8. Click OK or Connect to complete the connection to the attached USB drive. The files and folders on your drive will now be visible. EE Bright Box User Manual...
-
Page 95: Chapter 7: Bright Box Advanced Set-Up Pages
Set-Up > Broadband Settings page, with a few advanced configurable settings. You can return to the advanced Broadband Settings page by clicking on the Broadband Settings item in the left hand navigation menu on the Advanced Set-Up pages: EE Bright Box User Manual... -
Page 96: Description Of Advanced Broadband Settings
‘Auto – Trigger by Traffic’ for this field to be configurable. Authentication Protocol This dropdown allows you to configure the type of authentication used for connecting to your Internet service. This option is set to ‘CHAP’ by default for EE EE Bright Box User Manual... -
Page 97: Using The Button To Force An Internet Connection/Disconnection
Internet service. Select ‘CHAP’ to use the Challenge Handshake Authentication Protocol for establishing an Internet connection. This is the correct setting for EE Broadband. Select ‘PAP’ to use the Password Authentication Protocol for establishing an Internet connection. -
Page 98: Adsl Mode
Internet connection. MIGRATION WIZARD This page allows you to easily migrate your Broadband service from EE ADSL to EE Fibre broadband or vice-versa. The page also displays the current default Broadband Type (either ADSL or Fibre/Ethernet) and is identical to the Migration Wizard found in Basic Set-up >... -
Page 99: Channel And Ssid
Channel This option is used to configure the 2.4GHz radio channel for wireless communication. By default the router will select the wireless channel with the least interference in the ‘Auto’ mode using the Intelligent EE Bright Box User Manual... - Page 100 ‘security’ and tick the ‘broadcast SSID’ option in order to configure an SSID to be transmitting the wireless network name. Untick the box to disable the relevant SSID and prevent it from transmitting over the wireless network. EE Bright Box User Manual...
-
Page 101: How To Change The Wireless Speed From 144Mbps To 300Mbps
‘20/40MHz’. To do this from a computer connected to your Bright Box Wireless Router: Login to the router’s admin pages. 2. Click on the Advanced Set-Up tab and click Accept on the ‘Please proceed with caution’ page. EE Bright Box User Manual... -
Page 102: How To Set Up Multiple Ssid's (Multiple Wireless Network Names)
This could be particularly useful if : You only want to give somebody temporary access to your home network - you can then • regularly change the password without disconnecting all of your own wireless devices. EE Bright Box User Manual... - Page 103 8. Optional – if you want keep your home network separate to GuestWiFi, select ‘VLAN2’ in the 'SSID2' field under VLAN Binding. This will prevent people connecting to GuestWiFi from seeing computers on the BrightBox-wrfeta network: 9. Click Save Settings: 10.
- Page 104 If you wish to set up one of your wireless network names in the WEP wireless security mode you will need to set the ‘Wireless Mode’ dropdown on the Channel and SSID page to ‘11b+11g’. You must then configure the WEP key/password on the Advanced Set-Up > WEP EE Bright Box User Manual...
-
Page 105: Wep
10. Optional – if you want keep your home network separate to GuestWiFi, select ‘VLAN2’ in the 'SSID2' field under VLAN Binding. This will prevent people connecting to GuestWiFi from seeing computers on the home BrightBox-wrfeta network: EE Bright Box User Manual... - Page 106 11. Click Save Settings: 12. Now you will need to set a password on the new SSID. Click on the WEP option under Wireless Settings in the left hand navigation area: EE Bright Box User Manual...
- Page 107 13. In the ‘Multiple SSID’ dropdown select ‘2’: 14. In the ‘WEP Mode’ select ’128-bit’ 15. In the ‘Key Entry Method’ select ‘ASCII’ 16. Click inside the Key1 field - in the example below we used 'examplepass12'. EE Bright Box User Manual...
-
Page 108: Wpa
3. Click on Wireless Settings in the left hand navigation menu to expand the Wireless Settings menu. 4. Click WPA in the left hand navigation menu: Description of W PA settings The following table contains a description of the settings on the advanced WPA settings page: EE Bright Box User Manual... - Page 109 Select ‘Wireless Password’ to authenticate using a password method. This is the standard authentication method for most wireless adapters and devices. Select ‘802.1X’ for authentication over a RADIUS EE Bright Box User Manual...
-
Page 110: 110
802.1X is an enterprise authentication method that allows you to use an external RADIUS server for wireless authentication using the Extensible Authentication Protocol (EAP). This setting is sometimes known as WPA-Enterprise. EE is unable to offer 802.1X authentication, so you must provide your own RADIUS server for this option to work. -
Page 111: Description Of 802.1X Settings
This is the 802.1x authentication server type. Currently the only option is RADIUS. Server IP This field allows you to configure the IP address of the RADIUS authentication server for 802.1X. This may be an internal LAN or external Internet address. EE Bright Box User Manual... -
Page 112: Bandwidth Control
2. Click on the Advanced Set-Up tab and click Accept on the ‘Please proceed with caution’ page. 3. Click on Wireless Settings in the left hand navigation menu to expand the Wireless Settings menu. 4. Click Bandwidth Control in the left hand navigation menu: EE Bright Box User Manual... -
Page 113: Description Of Bandwidth Control Settings
6. We will limit the upstream to 64 kilobytes (about 0.5 Mbps) – in the SSID2 upstream field enter a value of 64. 7. We will limit the downstream to 128 kilobytes (about 1 Mbps) – in the SSID2 downstream field enter a value of 128: EE Bright Box User Manual... - Page 114 9. Now we need to enable the Quality of Service function on the router for the Bandwidth Control to be applied. In the left hand navigation bar, click QoS: 10. Set the ‘QoS module function’ option to ‘Enable’ and click Save Settings: EE Bright Box User Manual...
-
Page 115: Usb File Sharing
Login to the router’s admin pages. 2. Click on the Advanced Set-Up tab and click Accept on the ‘Please proceed with caution’ page. 3. Click on USB File Sharing in the left hand navigation menu: EE Bright Box User Manual... -
Page 116: Description Of Usb File Sharing Settings
This field is used to configure the Windows Workgroup that the shared USB drive belongs to. By default the workgroup associated with the USB drive is called ‘Workgroup’. This is the standard workgroup name for Windows XP (Professional), EE Bright Box User Manual... - Page 117 USB device list again when the router is restarted. Share Name This field displays the name of the shared drive as it appears in the Network, My Network Places or Finder in your operating system. This value is EE Bright Box User Manual...
-
Page 118: How To Add User Account Access To A Usb Drive
4. On the ‘Auto Share’ option select ‘Disable’ 5. Ensure that the ‘Samba function’ is set to ‘Enable’ 6. Windows users: Ensure that the ‘Workgroup Name’ matches the workgroup name on your network (this is usually ‘Workgroup’): 7. Click Save Settings: EE Bright Box User Manual... -
Page 119: Save Settings
Network on Windows or Mac OS X) if you want to give it a new name. Please ensure that the share name doesn’t contain any spaces. 12. Tick the box next to the user account you created in step 9 and click Save Settings: EE Bright Box User Manual... - Page 120 13. Now you can access your shared drive on your network by selecting the drive, and entering the user name and password created in step 9 (screenshots below from Windows 7 and Mac OS X 10.7) EE Bright Box User Manual...
-
Page 121: Mobile Broadband
Bright Box router. This will allow you to share your 3G Internet service over your home network as an alternative to using ADSL broadband. The EE router can use the following 3G USB dongle models for 3G Internet sharing: E173 •... -
Page 122: Dhcp
To access the advanced DHCP page: Login to the router’s admin pages. 2. Click on the Advanced Set-Up tab and click Accept on the ‘Please proceed with caution’ page. 3. Click on DHCP in the left hand navigation menu: EE Bright Box User Manual... -
Page 123: Description Of Dhcp Settings
On VLAN2 and VLAN3, the gateway IP address is 192.168.2.1 and 192.168.3.1 respectively, but these values can be altered. When configuring the Gateway IP address, ensure that the IP address does not match one of the other virtual LAN’s. EE Bright Box User Manual... -
Page 124: How To Reserve An Ip Address For A Computer Or A Device
IP address every time it connects to your router. You can reserve addresses for up to 32 devices. To reserve an IP address for a computer or device: EE Bright Box User Manual... - Page 125 8. If you chose the Manually Reserve option, enter the MAC Address of the device you want to reserve and a Device Name (an easy to remember reference for the device) EE Bright Box User Manual...
-
Page 126: Nat
You can configure the NAT module as follows: Login to the router’s admin pages. 2. Click on the Advanced Set-Up tab and click Accept on the ‘Please proceed with caution’ page. 3. Click on NAT in the left hand navigation menu: EE Bright Box User Manual... -
Page 127: Address Mapping
Internet. This feature is useful if you have multiple static global/WAN IP addresses and wish to divide local networks into different groups. This feature is not currently supported for EE Broadband users. To access the Address Mapping page: Login to the router’s admin pages. -
Page 128: Description Of Address Mapping Settings
Before setting up a Port Forwarding rule, it is a good idea to reserve an IP address for the device you wish to set up the rule for. You can do this in the Advanced Set-Up > DHCP EE Bright Box User Manual... - Page 129 2. Click on the Advanced Set-Up tab and click Accept on the ‘Please proceed with caution’ page. 3. Click on NAT in the left hand navigation menu to expand the NAT menu items 4. Click on Port Forwarding in the left hand navigation menu: EE Bright Box User Manual...
-
Page 130: Description Of Port Forwarding Settings
Select this option if you are unsure which type to use. LAN Port This field is used to configure the internal port that traffic will be forwarded to on the LAN IP address for EE Bright Box User Manual... -
Page 131: How To Set Up A Port Forwarding Entry
8. Enter the ‘LAN Port’ - in the example below we're opening port 21 for FTP. 9. Enter the ‘Public Port’ - in the example below we're opening port 21 for FTP 10. Tick the ‘Enable’ option. EE Bright Box User Manual... -
Page 132: Port Triggers
2. Click on the Advanced Set-Up tab and click Accept on the ‘Please proceed with caution’ page. 3. Click on NAT in the left hand navigation menu to expand the NAT menu items 4. Click on Port Triggers in the left hand navigation menu: EE Bright Box User Manual... -
Page 133: Description Of Port Trigger Settings
Public Port This field is used to configure the public incoming ports that are opened when the trigger port is activated by your software. You can enter a single public port, multiple ports EE Bright Box User Manual... -
Page 134: How To Set Up A Port Trigger Rule
(,) or a range of ports using a dash (-). In this example we are using ports 6667,2300-2400,47624,28800,29000 for MSN Gaming Zone. 8. In the ‘public type’ select either TCP or UDP for the traffic type of the incoming ports. In this example we are using TCP for MSN Gaming Zone. EE Bright Box User Manual... -
Page 135: Nat Mapping Table
2. Click on the Advanced Set-Up tab and click Accept on the ‘Please proceed with caution’ page. 3. Click on NAT in the left hand navigation menu to expand the NAT menu items 4. Click on NAT mapping table in the left hand navigation menu: EE Bright Box User Manual... - Page 136 Peer IP This field is the IP address of the remote/originating NAT mapping source on the Internet/WAN. Peer Port This field is the port of the remote/originating NAT EE Bright Box User Manual...
-
Page 137: Firewall
3. Click on Firewall in the left hand navigation menu: You can enable or disable the NAT module on the Bright Box router by selecting the option you want on the Firewall page and pressing Save Settings: EE Bright Box User Manual... -
Page 138: Access Control
2. Click on the Advanced Set-Up tab and click Accept on the ‘Please proceed with caution’ page. 3. Click on Firewall in the left hand navigation menu to expand the Firewall menu 4. Click on Access Control in the left hand navigation menu: EE Bright Box User Manual... -
Page 139: Description Of Settings On The Access Control Page
You select the service(s) for the rule by clicking on the Add Device Filtering Rule link. Possible client service names include ‘http’, ‘urlblock’, ‘smtp’, ‘nntp’, ‘pop3’, ‘https’, ‘ftp’, ‘telnet’, EE Bright Box User Manual... -
Page 140: How To Create An Access Control Rule
3. Click on Firewall in the left hand navigation menu to expand the Firewall menu 4. Click on Access Control in the left hand navigation menu. 5. Select the ‘Enable’ option on the Access Control page and click Save Settings: EE Bright Box User Manual... - Page 141 9. Tick the ‘blocking’ box for the client device services you wish to block. These are the traffic types (and port numbers) that will be blocked by the access control – in this example we will select ‘File Transfer’ for FTP and ‘E-mail Sending’ and ‘E-mail Receiving’ for Email. EE Bright Box User Manual...
- Page 142 Please refer to your software instructions or user manual for information on the ports that are used and need to be blocked. In the example below we have blocked port ranges 200-213 and port 1500 for TCP traffic: EE Bright Box User Manual...
-
Page 143: Mac Filter
2. Click on the Advanced Set-Up tab and click Accept on the ‘Please proceed with caution’ page. 3. Click on Firewall in the left hand navigation menu to expand the Firewall menu 4. Click on MAC filter in the left hand navigation menu: EE Bright Box User Manual... -
Page 144: Description Of Mac Filter Settings
3. Click on Firewall in the left hand navigation menu to expand the Firewall menu 4. Click on MAC Filter in the left hand navigation menu 5. On the ‘MAC Address Control’ option select ‘Enable’: EE Bright Box User Manual... -
Page 145: Url Blocking
This feature may be useful if you want to block access to particular sites, for example Facebook from your child’s computer. EE Bright Box User Manual... -
Page 146: How To Create A Url Blocking Rule
3. Click on Firewall in the left hand navigation menu to expand the Firewall menu 4. Click on URL Blocking in the left hand navigation menu: How to create a URL Blocking rule To block access to particular web sites on your computers or attached devices: EE Bright Box User Manual... - Page 147 URL e.g. (you don’t need to enter both) – example: 7. Scroll to the bottom of the page and click Save Settings: 8. Now, in the left hand navigation menu select Access Control: EE Bright Box User Manual...
- Page 148 URL on. You can block the URL on all computers by entering ‘192.168.1.2 ~ 254’ – In this example we will block the URL on the computer 192.168.1.10 only by entering ‘192.168.1.10 ~ 10’ 12. Tick the ‘blocking’ box for the ‘WWW with URL Blocking’ service: EE Bright Box User Manual...
- Page 149 If you want to remove the URL Blocking rule at any time, navigate back to the Access Control page and click the Delete link next to the URL Blocking rule: EE Bright Box User Manual...
-
Page 150: Schedule Rule
2. Click on the Advanced Set-Up tab and click Accept on the ‘Please proceed with caution’ page. 3. Click on Firewall in the left hand navigation menu to expand the Firewall menu 4. Click on Schedule Rule in the left hand navigation menu: EE Bright Box User Manual... -
Page 151: How To Create A Schedule Rule For Access Control
3. Click on Firewall in the left hand navigation menu to expand the Firewall menu 4. Click on Schedule Rule in the left hand navigation menu. 5. Click the Add Schedule Rule link: EE Bright Box User Manual... - Page 152 ’21:00’ (9pm) and end at 23:59 (midnight). 9. Click Save Settings: 10. The new schedule rule will appear in the Schedule Rule table: 11. Next, click on Access Control in the left hand navigation menu: EE Bright Box User Manual...
- Page 153 URL on. You can block the URL on all computers by entering ‘192.168.1.2 ~ 254’ – In this example we will block the URL on the computer 192.168.1.10 only by entering ‘192.168.1.10 ~ 10’ EE Bright Box User Manual...
- Page 154 If you want to delete a schedule rule, you must first delete the associated access control rule on the Access Control page. When the associated access control rule has been deleted, you will then see a ‘Delete’ link in the Schedule Rule table in the Schedule Rule page. EE Bright Box User Manual...
-
Page 155: Intrusion Detection
2. Click on the Advanced Set-Up tab and click Accept on the ‘Please proceed with caution’ page. 3. Click on Firewall in the left hand navigation menu to expand the Firewall menu 4. Click on Intrusion Detection in the left hand navigation menu: EE Bright Box User Manual... -
Page 156: Description Of Intrusion Detection Settings
This option enables or disables the SPI firewall for all UDP (User Datagram Protocol) traffic. FTP Service This option enables or disables the SPI firewall for all FTP (File Transfer Protocol) traffic. H.323 Service This option enables or disables the SPI firewall for all EE Bright Box User Manual... -
Page 157: Dmz
2. Click on the Advanced Set-Up tab and click Accept on the ‘Please proceed with caution’ page. 3. Click on Firewall in the left hand navigation menu to expand the Firewall menu 4. Click on DMZ in the left hand navigation menu: EE Bright Box User Manual... -
Page 158: Description Of Dmz Settings
IP addresses for the DMZ. These entries must be unique, and not match another entry in the list. They are suitable if you have multiple static IP addresses and are not supported for EE Broadband users. Client IP Address... -
Page 159: How To Add A Computer To The De-Militarized Zone (Dmz)
3. Click on Firewall in the left hand navigation menu to expand the Firewall menu 4. Click on DMZ in the left hand navigation menu: 5. In the ‘Enable DMZ’ option, select ‘Enable’ EE Bright Box User Manual... -
Page 160: Qos
To configure QoS, you must define the types of traffic that you want to prioritise, either from a pre-defined list or custom port numbers. You can also prioritise individual devices on your network by MAC address, IP address or by the connected Ethernet ports or wireless SSID’s. EE Bright Box User Manual... -
Page 161: How To Enable Quality Of Service On The Router
2. Click on the Advanced Set-Up tab and click Accept on the ‘Please proceed with caution’ page. 3. Click on QoS in the left hand navigation menu to expand the QoS menu: 4. In the ‘QoS module function’ option, select ‘Enable’ and click Save Settings: EE Bright Box User Manual... -
Page 162: Traffic Mapping
2. Click on the Advanced Set-Up tab and click Accept on the ‘Please proceed with caution’ page. 3. Click on QoS in the left hand navigation menu to expand the quality of service menu 4. Click on Traffic Mapping in the left hand navigation menu: EE Bright Box User Manual... -
Page 163: How To Create A Quality Of Service Traffic Mapping Rule
(Highest, Higher, High, Medium, Normal, Low, Lower and Lowest) to choose from. The traffic shaping effect of the priority applied to each level will be configured in the Diffserv Groups page. In this example we will select ‘Low’: EE Bright Box User Manual... - Page 164 ‘MAC Address’, ‘IP Address’ or ‘Incoming Port’ options from the ‘Traffic Type’ dropdown. In the example below, the ‘High’ priority traffic rule would be applied to any device connected to Ethernet Port 1. EE Bright Box User Manual...
-
Page 165: Quality Of Service Traffic Type Descriptions
(for a device on your network) or outgoing/remote traffic (to a location on the Internet). TCP/UDP Select this option to assign a Quality of Service rule to individual ports or a range of ports for TCP, UDP EE Bright Box User Manual... -
Page 166: Diffserv Groups
4. Click on Diffserv Groups in the left hand navigation menu: How to apply bandwidth prioritisation for Diffserv Groups As you can see from the Diffserv Groups page, there are eight levels of traffic prioritisation (known as Diffserv Groups): EE Bright Box User Manual... - Page 167 4. Click on Diffserv Groups in the left hand navigation menu. 5. If you are using EE Fibre Broadband, set the ‘Maximum Upstream Bandwidth’ value to the correct setting for the upload speed of your Fibre service. To help determine your upload speed, you can run a Broadband speedtest online.
-
Page 168: Wmm
2. Click on the Advanced Set-Up tab and click Accept on the ‘Please proceed with caution’ page. 3. Click on QoS in the left hand navigation menu to expand the quality of service menu 4. Click on WMM in the left hand navigation menu: EE Bright Box User Manual... - Page 169 5. On the ‘WMM Support’ option select ‘Enable’ and click Save Settings. 6. If you have not already enabled the Quality of Service module, you will need to do so. Click on QoS in the left hand navigation menu : EE Bright Box User Manual...
-
Page 170: Upnp
UPnP is enabled on the Bright Box Wireless Router by default meaning that UPnP compliant applications and devices will work correctly on your home network as soon as they are connected to the router. EE Bright Box User Manual... - Page 171 4. On the ‘UPnP module function’ option, select the option you want, either ‘Enable’ to switch UPnP on (this is the default setting) or ‘Disable’ to switch off UPnP – in this example we are selecting ‘Enable’. 5. Click Save Settings: EE Bright Box User Manual...
-
Page 172: Tools
Default or Firmware Upgrade in the left hand navigation menu. CONFIGURATION The Bright Box router is configured for EE Broadband out of the box, however you may wish to make changes to the router settings at any time. The Configuration page allows you to make a backup of your router’s settings, and also restore those settings at a later time. -
Page 173: How To Save A Copy Of Your Router's Settings
2. Click on the Advanced Set-Up tab and click Accept on the ‘Please proceed with caution’ page. 3. Click on Tools in the left hand navigation menu to expand the Tools menu: 4. Click on Configuration on the left hand menu 5. Click the Backup button: EE Bright Box User Manual... -
Page 174: How To Restore Your Router's Settings From A Backup
3. Click on Tools in the left hand navigation menu to expand the Tools menu: 4. Click on Configuration on the left hand menu: 5. Click the Restore button: 6. Click on the Browse… button: EE Bright Box User Manual... -
Page 175: Restart
You may find it is more convenient to power the router off and on using the power switch on the back of the router if you are nearby, or not logged into the admin pages. However if EE Bright Box User Manual... -
Page 176: How To Restart Your Router
3. Click on Tools in the left hand navigation menu to expand the Tools menu: 4. Click on Restart on the left hand menu: 5. Click the Restart button: 6. Click OK when prompted whether you want to restart your router: EE Bright Box User Manual... -
Page 177: Factory Default
2. Click on the Advanced Set-Up tab and click Accept on the ‘Please proceed with caution’ page. 3. Click on Tools in the left hand navigation menu to expand the Tools menu: 4. Click on Factory Default on the left hand menu: EE Bright Box User Manual... - Page 178 5. Click on the Factory Default button: 6. A warning dialog box will be displayed. Click OK to proceed with the restoration of factory default settings, or click Cancel if you want to keep the current settings: EE Bright Box User Manual...
-
Page 179: How To Restore The Router To Factory Defaults From The Reset Button On The Router
Bright Box router. It is possible to update this firmware through the Bright Box admin pages. If we need to release an up-to-date version of firmware in this way, we may provide a firmware file download at the page below: EE Bright Box User Manual... -
Page 180: How To Upgrade Your Router With A Firmware File
EE. How to upgrade your router with a firm ware file To upgrade the Bright Box router from a firmware file supplied by EE: Login to the router’s admin pages. 2. Click on the Advanced Set-Up tab and click Accept on the ‘Please proceed with caution’... - Page 181 Click the OK button to confirm you want to upgrade the router, or click Cancel if you don’t want to upgrade: 10. A ‘Do not turn off router, please wait until firmware update has completed’ message will be displayed. The firmware upgrade process may take up to 199 seconds. EE Bright Box User Manual...
-
Page 182: System
12. You can confirm that your firmware has been successfully upgraded by logging back into the admin pages and navigating to the Advanced Set-Up > System page. The ‘Runtime Code Version’ should now match the version of the firmware supplied by EE: SYSTEM The System pages contain a number of additional configuration features and information pages. - Page 183 LAN MAC Address This field displays the 12-digit MAC address of the LAN Interface of the router. The LAN MAC address is also displayed on the sticker on the bottom of the EE Bright Box User Manual...
-
Page 184: Time Settings
2. Click on the Advanced Set-Up tab and click Accept on the ‘Please proceed with caution’ page. 3. Click on System in the left hand navigation menu to expand the System menu: 4. Click on Time Settings on the left hand menu: EE Bright Box User Manual... - Page 185 5. On the ‘Enable Automatic Time Server Maintenance’ option select ‘Enable’ to switch on time synchronisation with the NTP server, or select ‘Disable’ to switch off time synchronisation. In this example we’ll select ‘Enable’: 6. Click Save Settings: EE Bright Box User Manual...
-
Page 186: Password Settings
Please note that it is not possible to update the Time Zone or NTP Server options, these are fixed and optimised for EE Broadband. PASSWORD SETTINGS From the Password Settings page, you can change the password you use to log into the router's admin pages. -
Page 187: How To Change The Router's Admin Password
6. Enter the new password for the admin pages in the ‘New Password’ field. The password is case sensitive, so ‘MYPASSWORD’, ‘MyPassword’ and ‘mypassword’ are all different passwords. 7. Re-enter your new password in the ‘Re-enter Password for verification’ field EE Bright Box User Manual... -
Page 188: How To Change The Tim E Out Period Of The Adm In Pages
Time Out’ field. You can enter a value between 0 and 99. If you want to ensure that you are never timed out of the admin pages, then set the value to 0. In this example we will change the time out period to 15 minutes: EE Bright Box User Manual... -
Page 189: Ddns
DNS is online service that allows you to register a domain name and have any traffic that tries to access that domain name be forwarded to your router’s Internet IP address. This feature is particularly handy for EE Broadband users who will have a different Internet IP address each time the router is restarted. -
Page 190: How To Configure Your Router For Dynamic Dns
Dynamic DNS account online. 10. Enter your password for your service in the ‘Password / Key’ field. This is the password you use to login to your Dynamic DNS account online: EE Bright Box User Manual... -
Page 191: Adsl Status
11. Click Save Settings: 12. You Dynamic DNS host will now be configured with your current Internet IP address, and this will be updated every time you are assigned a new IP address by EE Broadband (usually when you restart the router). - Page 192 The value will display ‘IDLE’ if your ADSL connection is unable to synchronise with broadband exchange or you are using the EE Fibre broadband service. The value will display ‘TRAINING’ if your ADSL connection is currently in the process of synchronising with the broadband exchange.
- Page 193 The value will display ‘G992.5(ADSL2+)’ for ADSL2+ (up to 24Mbps) or ‘G.992.1 (G.DMT)’ for IPStream (up to 8Mbps) on EE Broadband The ‘configured’ operation mode will always display ‘Automatic’. If the ‘current’ column displays ‘—‘ then no ADSL link has been achieved, and may indicate a problem with your ADSL line.
-
Page 194: System Log
2. Click on the Advanced Set-Up tab and click Accept on the ‘Please proceed with caution’ page. 3. Click on System in the left hand navigation menu to expand the System menu: 4. Click on System Log on the left hand menu: EE Bright Box User Manual... -
Page 195: Description Of System Log Entries
The PPP (Point-to-Point Protocol) software has started up. PPP: Stopped daemon The PPP (Point-to-Point Protocol) software has stopped. You can restart the daemon by clicking the Connect button on the Advanced Set-up > Broadband settings page (see page 97) EE Bright Box User Manual... - Page 196 IP and MAC Address. [MAC Address] A Denial of Service attack may be triggered by the following events - Zero Length IP, Ping of Death, IP Spoofing, Smurf Attack, Snork Attack, UDP Port EE Bright Box User Manual...
- Page 197 [IP An idle timeout on the admin pages has occurred for Address] the listed IP address. admin logout from [IP The listed IP address has logged out of the router Address] admin pages. EE Bright Box User Manual...
-
Page 198: Chapter 8: Troubleshooting
CHAPTER 8: TROUBLESHOOTING The following section contains troubleshooting tips for various issues you may encounter when using your Bright Box Wireless Router. For further assistance, EE Broadband customers may call us on 0844 873 8586. Unable to display the router adm in pages using 192.168.1.1 First check to see whether your computer has a connection to the Bright Box router. -
Page 199: Unable To Connect To The Internet
If you are able to access the router admin pages, but cannot get a connection through to the Internet then either there is a problem with your broadband line, or your router is not correctly configured to connect to EE Broadband. See Chapter 3: Installation for more information on setting up your Bright Box. - Page 200 For Fibre broadband: Check that the Fibre broadband modem is powered on. • Check that your EE ADSL or Fibre broadband service is up and running - you should have • received a text and email when it is (this can take up to 10 working days from the date you placed your order).
-
Page 201: Unable To Establish A Wireless Connection With The Router
‘KEEP MEE’ card that came with the router. The password is also case sensitive, so ensure that the Caps-Lock is not engaged. EE Bright Box User Manual... -
Page 202: Poor Wireless Signal Strength And Speeds Or The Wireless Connection Is Lost
Position the router away from sources of electrical and radio interference such as • microwaves, fans, and other computers. Some devices such as Bluetooth adapters, wireless phones and baby monitors may share • the 2.4GHz frequency of your wireless router, so keep these away from the router. EE Bright Box User Manual... -
Page 203: Problem Sharing Files With A Usb Drive Connected To The Router
On Windows Vista/Windows 7, ensure that the Network Discovery setting is set to ‘Turn • on network discovery’ and that File and Printer Sharing is set to ‘Turn on file and printer sharing’. These settings can be found in Control Panel > Network and Sharing Centre. EE Bright Box User Manual... -
Page 204: Appendix A: Default Router Settings
APPENDIX A: DEFAULT ROUTER SETTINGS The following table lists the default settings for the EE Bright Box wireless router. To restore the router to default settings, see page 177 Section Setting Default Value Router Admin Pages 192.168.1.1 Username admin Unique value - see sticker on bottom of Password router or ‘’KEEP MEE’... - Page 205 802.1X Disable Authentication 30000 Re-Authentication Period Quiet Period Server Type RADIUS Server IP 0.0.0.0 Server Port 1812 Secret Key blank blank NAS-ID Wireless – Bandwidth SSID1-3 Enable Disable Control SSID1-3 Upstream Kbps SSID1-3 Downstream Kbps EE Bright Box User Manual...
- Page 206 Disable Control MAC Filter Entries none Firewall – URL URL Block Entries none Blocking Firewall –Schedule Schedule Rule none Rule Entries Firewall – Intrusion SPI and Anti-DoS Enable Detection protection Enable SPI – TCP Connection EE Bright Box User Manual...
- Page 207 GMT – Greenwich Mean Time: Lisbon, London, Edinburgh NTP Server ntp.readytoconnect.co.uk System – Password Idle Time Out 10 Minutes Settings System – DDNS Dynamic DNS Disable Provider DynDNS.org blank Domain Name Account/Email blank Password/Key blank EE Bright Box User Manual...
Need help?
Do you have a question about the Brightbox and is the answer not in the manual?
Questions and answers