
Subscribe to Our Youtube Channel
Related Manuals for Aztech SDSL Bridge & Router


Summary of Contents for Aztech SDSL Bridge & Router
- Page 2 © Copyright, Jul 2001. All Rights Reserved. (P/N: 040-513436-121) (Ref: 330) • Virata is a registered trademark of Virata Corporation. • All other company or product names are trademarks or registered trademarks or service marks of their respective owners and are hereby recognized as such.
- Page 3 Product warranty does not apply to damage caused by lightning, power surges or wrong voltage usage.
- Page 11 1 — Documentation • Text that appears in this style are console commands. ip device add ppp_device ether //ppp/DEVICE=1 0 35 ip , Note boxes contain information that you need to pay special attention to.
- Page 13 2 — Basics of the SDSL Bridge / Router Ethernet Bridge PC with Ethernet Card Router multiple PCs with Ethernet Cards...
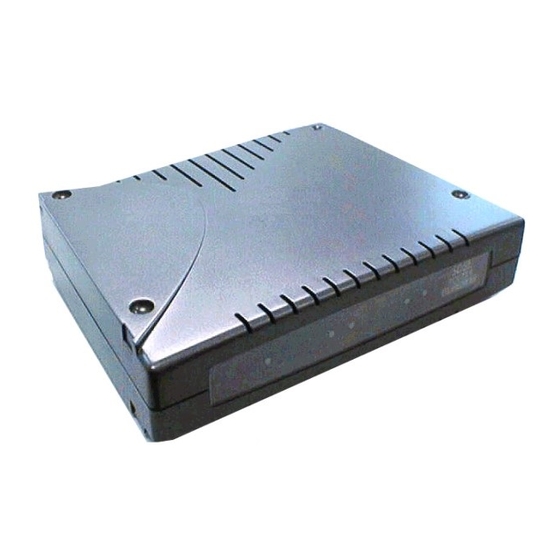
- Page 14 2 — Basics of the SDSL Bridge / Router SDSL ACT SDSL Link Ethernet ACT Power Ethernet Link When the Power Switch is on, the Power LED will light up. Once the bridge/router is initialized, the SDSL Link LED will start blinking, attempting to establish a connection.
- Page 15 2 — Basics of the SDSL Bridge / Router Power off your computer and any connected devices before connecting your bridge/router ! Ethernet MDI Port The Power Mains DC Power Jack SDSL Bridge/ Router Power Switch Power Adaptor Line to Ethernet Card, Jack Switch or Hub...
- Page 16 Setting up of local management needs only to be carried out once for the same PC. However if you are connecting your router to another PC, you will need to run section 3.1 again. Bridge / Router rear of PC serial cable...
- Page 17 3 — Setting Up Local Management...
- Page 18 3 — Setting Up Local Management...
- Page 19 • help • home • • • • The commands in this manual are to be issued at initial command prompt. You may also choose to go to the respective directories and run the commands from there. (For example, upon sdsl> prompt, you need only to type sdsl config to view SDSL port attributes and BUN...
- Page 20 4 — Basic Commands on Running Local Management sdsl set sdslphytargetlinerate=<rate>kbps config save restart sdsl set sdslphyhtutype=htu-c config save restart sdsl set sdslphyhtutype=htu-r config save restart bun list channels sdsl config bun set port sdsl/sdslactivateline=false bun set port sdsl/sdslactivateline=true...
- Page 21 Please refer to Appendix C - Quick Start for Router Configurations (Flow Chart) for an overview of the router configurations. All IP addresses and PVC values stated in this manual serve only as examples for better understanding. You are required to replace these values with those given by your SDSL Service Provider/System Administrator.
- Page 22 5 — Configuring Your Router For configuration without NAT: The range of the IP address used in this example is from 202.166.30.1 to 202.166.30.6 as restricted by subnet mask defined. Network ID : 202.166.30.0 Broadcast ID : 202.166.30.7 The ISP will have to create a static route: Network ID : 202.166.30.0 Subnet Mask : ff:ff:ff:f8 Next Hop Gateway : 202.166.29.154...
- Page 23 5 — Configuring Your Router...
- Page 24 5 — Configuring Your Router Your router is set as Transparent Bridge by factory default. To identify your current line protocol configured, type ip device. type and dev file Check the listing to identify the protocol. type dev file ether //bridge //edd //bun/port=sdsl/rfc1483..
- Page 25 5 — Configuring Your Router ip subnet ip subnet flush ip route ip route flush ip nat nat add <wan_interface> ip nat delete <wan_interface> <wan_interface>...
- Page 26 5 — Configuring Your Router ip device add lan ether //edd 192.168.1.1 ip subnet add lan.home . 192.168.1.1 ff:ff:ff:0 bridge device add //bun/port=sdsl/rfc1483=true/mode=llcbridged/ txvpi= /txvci= /rxvpi= /rxvci= bridge device add //bun/port=sdsl/rfc1483=true/mode=vcmuxbridged/ txvpi= /txvci= /rxvpi= /rxvci= 202.166.29.154 ip device add wan ether //bridge ip subnet add wan.home .
- Page 27 5 — Configuring Your Router ip device add wan ptp //bun/port=sdsl/rfc1483=true/mode=llcrouted/ 35 202.166.29.154 txvpi= /txvci= /rxvpi= /rxvci= 202.166.29.154 ff:ff:ff:0 ip subnet add wan.home . ip device add wan ptp //bun/port=sdsl/rfc1483=true/ mode=vcmuxrouted/txvpi= /txvci= /rxvpi= /rxvci= 202.166.29.154 202.166.29.154 ff:ff:ff:0 ip subnet add wan.home . ip device add wan_1 ptp //bun/port=sdsl/rfc1483=true/ mode=llcrouted/txvpi= /txvci=...
- Page 28 5 — Configuring Your Router 202.166.29.154 ip device add wan atm //atm ip subnet add wan.home . 202.166.29.154 ff:ff:ff:0 ip ipatm pvc add wan sdsl 0/35 remoteip 202.166.29.2 dhcp ip device add wan atm //atm ip ipatm pvc add wan sdsl 0/35 remoteip 202.166.29.2...
- Page 29 5 — Configuring Your Router ip device add ppp_device ether //ppp/DEVICE= ppp user add myuserid mypassword chap 0 35 ip listen interface remoteip 202.166.29.154 theylogin chap enable echo every 10 disable unnumbered enable lansubnet ff:ff:ff:f8 enable config save...
- Page 30 5 — Configuring Your Router When the PPP link is established, you will notice that your LAN IP address actually changes to the address of the WAN IP obtained from the PPP Server. Your WAN IP address now becomes 0.0.0.1, a dummy IP address. To maintain IP connectivity to the router's LAN Port before and after establishing the PPP unnumbered link, you are advised to pre-configure the LAN IP to that of the given WAN IP.
- Page 31 5 — Configuring Your Router lansubnet ff:ff:ff:f8 enable config save When the PPP link is established, you will notice that your LAN IP address actually changes to the address of the WAN IP obtained from the PPP Server. Your WAN IP address now becomes 0.0.0.1, a dummy IP address.
- Page 32 5 — Configuring Your Router ip nat add ip nat add ppp_device config save...
- Page 33 5 — Configuring Your Router NAT Inbound Port Forwarding is not applicable for Transparent Bridge configuration.
- Page 34 5 — Configuring Your Router nat inbound add wan /tcp 192.168.1.100 nat inbound add wan /tcp 192.168.1.101 nat inbound list Interface Port/Proto New IP address 80/tcp 192.168.1.100 21/tcp 192.168.1.101 nat inbound delete nat inbound flush You may refer to Appendix B - Well-Known TCP/UDP Ports for most of the commonly used TCP/UDP Ports.
- Page 35 5 — Configuring Your Router DHCP is not applicable to Transparent Bridge configuration. dhcpserver config dhcpserver config delete dhcpserver config flush dhcpserver status dhcpserver config confirm dhcpserver reset config save Any changes to the dhcpserver configurations must be followed by dhcpserver config confirm, dhcpserver reset config save...
- Page 36 5 — Configuring Your Router dhcpserver config add allow unknown-clients; config add subnet 192.168.1.0 netmask 255.255.255.0 config add { config add range 192.168.1.2 192.168.1.100; config add option subnet-mask 255.255.255.0; config add option routers 192.168.1.1; config add option domain-name-servers config add } config confirm dhcpserver reset config save...
- Page 37 5 — Configuring Your Router dnsrelay server config save restart enableprimarydns relay config save restart Ensure that the DNS Server address of the DHCP Server is set to the LAN IP address of your router. Example, (section 5.4.2 - DHCP Server Illustration, step ii.) config add option domain-name-servers...
- Page 38 5 — Configuring Your Router 192.168.1.1 ip device add lan ether //edd ip subnet add lan.home . 192.168.1.1 ff:ff:ff:0 ip snmp access write 192.168.1.11 ip snmp access read public 192.168.1.11 config save restart snmp trap add <community> <IP addr> [<port>]...
- Page 39 5 — Configuring Your Router snmp trap delete <community> <IP addr> [<port>] snmp trap flush snmp trap list >snmp trap add community_name 192.168.1.5 21 >snmp trap list trap add community_name 192.168.1.5 21 >snmp trap delete community_name 192.168.1.5 21 >snmp trap list No trap destinations set ip portname add telnet 23/tcp config save...
- Page 40 All IP addresses and PVC values stated in this manual serve only as examples for your better understanding. You are required to replace these values with those given by your SDSL Service Provider/System Administrator. Console commands are case-sensitive. Punctuations (examples: '_' underscore, '-' hyphen, ' ' spacing, etc) must be adhered to strictly.
- Page 41 6 — Configuring Your Transparent Bridge Your router is set as Transparent Bridge by factory default. Transparent Bridge, only one of the PCs connected to your router can have access to the Internet at any one time. ppp 1 clear ip device/bridge device ip device flush bridge device flush...
- Page 42 6 — Configuring Your Transparent Bridge <wan_interface> bridge device add edd bridge device add //bun/port=sdsl/rfc1483=true/mode=llcbridged/ txvpi= /txvci= /rxvpi= /rxvci= bridge device add //bun/port=sdsl/rfc1483=true/mode=vcmuxbridged/ txvpi= /txvci= /rxvpi= /rxvci= ip device add bridge ether //bridge 192.168.1.1 192.168.1.1 ff:ff:ff:0 ip subnet add bridge.home . config save...
- Page 43 All IP addresses and PVC values stated in this manual serve only as examples for your better understanding. You are required to replace these values with those given by your ISP / System Administrator. clear ip device flush bridge device flush ip subnet flush ip route flush ip device add lan ether //edd...
- Page 44 7 — Router Configuration Example ip nat add wan config save clear ip device flush bridge device flush ip subnet flush ip route flush ip device add lan ether //edd 192.168.1.1 192.168.1.1 ff:ff:ff:0 ip subnet add lan.home . ip device add ppp_device ether //ppp/DEVICE=1 0 35 welogin myuserid mypassword chap...
- Page 45 ® PPTP protocol is not supported in Windows Ensure that you have already setup your local management as described in Chapter 3 - Setting Up Local Management. All IP addresses and PVC values stated in this manual serve only as examples for your better understanding. You are required to replace these values with those given by your SDSL Service Provider/System Administrator.
- Page 46 8 — Configuring PPTP pptp bind 192.168.1.1 pptp create listen config save...
- Page 47 8 — Configuring PPTP...
- Page 48 8 — Configuring PPTP...
- Page 49 8 — Configuring PPTP...
- Page 50 Check with your SDSL Provider or your System Administrator on which IP option (Dynamic/Fixed IP address) to be used.
- Page 51 9 — Configuring Your Ethernet Card Check with your SDSL Provider or your System Administrator on which IP address (Public/Private IP address) to be used.
- Page 52 9 — Configuring Your Ethernet Card...
- Page 53 If the first test failed, the next test will be skipped. Proceed to fix the problem first before running DSLTEST again.
- Page 54 9 — Configuring Your Ethernet Card Result Description PASS The test is successful. You will be prompted on the error. Click OK, fix the error and FAIL click Test again. SKIP The test is not carried out as the previous test has failed. To enable DSLTEST log file, you are recommended to copy the entire Tools directory from the Installation CD-ROM to your harddisk.
- Page 55 autoloop [on|off] autoloop autoloop hidden ip help. > ip autoloop autoloop off > ip device type dev file IP address device ether ether //nice mtu 1500 192.168.2.1 device loop loop mtu 2048 127.0.0.1 > ip ping 127.0.0.1 ip: ping - reply received from 127.0.0.1 >...
- Page 56 A- Commonly Used Commands config [save] snmp config config print ip snmp > ip config device add ether ether //nice mtu 1500 192.168.2.1 device add vlane ether //lane mtu 1500 192.168.55.1 subnet add vlane.home . 192.168.55.0 ff:ff:ff:00 subnet add ether.home .
- Page 57 A- Commonly Used Commands device device add <i/f> <type> [<file>] [mtu <size>] [<IP address>] device add wan ptp //bun/port=sdsl/rfc1483=true/mode=<encapsulation mode>/txvpi=<vpi>/txvci=<vci>/rxvpi=<vpi>/rxvci=<vci> device delete <i/f> device flush ip config save <i/f> <type> <type> <file> <file> <mtu> <IP address> <type>...
- Page 58 A- Commonly Used Commands ip device add wan ptp //bun/port=sdsl/rfc1483=true/mode=llcrouted/ txvpi= /txvci= /rxvpi= /rxvci= 35 202.166.29.154 ip device add <i/f> <type> <file> [mtu <size>] [<IP address>|dhcp] ip device ip device add dhcp dhcp ip device dhcp IP address device ip device add ethernet ether //edd dhcp ip device type dev file...
- Page 59 A- Commonly Used Commands ipatm pvc ipatm pvc add <i/f> [<port>] <vci>/[<IP address>][/<pcr>] ipatm pvc delete <vci> [<port>] ipatm pvc flush <i/f> <vci> <IP address> <pcr> <port> 0/35 202.166.29.2 ip ipatm pvc add wan sdsl remoteip...
- Page 60 A- Commonly Used Commands relay relay all | <i/f> [<i/f>] [forward] relay all relay if1 relay if1 forward relay if1 if2 relay if1 if2 forward forward norelay ip relay all rip accept [all | <i/f>] [none | <version>]...
- Page 61 A- Commonly Used Commands rip accept all 1 2 ip rip accept all 1 > > ip rip accept ether 2 > ip rip allowed rip send ether none rip send vlane none rip accept ether rip accept vlane rip send [all | <i/f>] [none | <version>] rip send all 2 >...
- Page 62 A- Commonly Used Commands route route add <name> <dest> <relay> [<mask> [<cost> [<timeout>]]] route delete <name> route flush <name> route add route delete <dest> <dest> <mask> <relay> <mask> <dest> <cost> <timeout> route route...
- Page 63 A- Commonly Used Commands route config ip route add default 0.0.0.0 202.166.29.2 0:0:0:0 snmp access [read|write|delete|flush] <parameters> snmp config [save] snmp help [<cmd>|all] snmp trap [add|delete|flush|list] <parameters> snmp version snmp version snmp... ip snmp...
- Page 64 A- Commonly Used Commands device add <device> device add //bun/port=sdsl/rfc1483=true/mode=<encapsulation mode>/ txvpi=<vpi>/txvci=<vci>/rxvpi=<vpi>/rxvci=<vci> • <device> • <encapsulation mode> llcbridged vcmuxbridged • <vpi><vci> device add edd device add //bun/port=sdsl/rfc1483=true/mode=llcbridged/txvpi= txvci= /rxvpi= /rxvci= device delete , device flush , device list device delete <device>...
- Page 65 A- Commonly Used Commands device add device delete //bun/port=sdsl/rfc1483=true/mode=llcbridged/txvpi= txvci= /rxvpi= /rxvci= device add , device flush , device list device flush device flush device add , device delete device list device list device list device add , device delete device flush...
- Page 66 A- Commonly Used Commands config resource config save user user ppp_device ip device add ppp_device ether //ppp/DEVICE=1 ppp 1 pvc <whatever> ppp 1 welogin <name> <password> ppp 1 enable...
- Page 67 A- Commonly Used Commands <channel> echo every <seconds> info all echo info all <channel> pppoe [[<port>] <vpi>] <vci> [ip] [acname "<string>"][servicename "<string>"]<channel> pppoe none none...
- Page 68 A- Commonly Used Commands enable enable acname servicename info ppp 3 pppoe 3 32 ppp 4 info all ppp 5 pppoe 0...
- Page 69 A- Commonly Used Commands <channel> pvc [[<port>] <vpi>] <vci> [ip|mac] [listen] <channel> pvc none listen info ppp 3 pvc 3 32 ppp 4 pvc ppp 5 pvc 0...
- Page 70 A- Commonly Used Commands <channel> welogin <name> <password> [pap|chap] <channel> welogin none welogin user add <name> [pwd <passwd> [pap|chap]] user [<name>] user delete <name>|all user user <name> user delete user add <name>...
- Page 71 A- Commonly Used Commands nat event [n] event show > nat event Event level: 1 > nat event 2 nat inbound list nat inbound add <i/f> <port>/<proto> <new IP> [quiet] nat inbound delete <#> nat inbound flush nat inbound add <i/f>...
- Page 72 A- Commonly Used Commands quiet quiet nat inbound list nat inbound add nat inbound delete <#> nat inbound list nat inbound flush > nat inbound add ethernet 80/TCP 192.168.219.38 > nat inbound list # Interface Port/Proto New IP address 1 ethernet 80/tcp 192.168.219.38 2 r1483...
- Page 73 A- Commonly Used Commands Hash table size per interface: 128 (512 bytes) Total: 512 bytes Fragment table size per interface: 32 (640 bytes) Total: 640 bytes Max queued buffers: 16 Fragment timeout: Support for incoming fragments: enabled Support for outgoing fragments: enabled Session timeouts: ICMP query: UDP:...
- Page 74 A- Commonly Used Commands ip device > ip nat add ethernet event (A.4.2) nat sessions <i/f> [all | summary] nat sessions <i/f> sessions sessions summary > nat sessions ppp Proto Age NAT port Private address/port Public address/port 1024 192.168.219.38/3562 194.129.50.6/21 1025 192.168.219.64/2135 185.45.30.30/80...
- Page 75 A- Commonly Used Commands dhcpserver config [add <text>|confirm|delete|flush] <text> confirm delete flush confirm flashfs update subnet subnet-number netmask netmask { [ parameters ] [ declarations ] range subnet-number netmask subnet- mask subnet-mask subnet...
- Page 76 A- Commonly Used Commands range [ dynamic-bootp ] low-address [ high-address ]; range range dynamic-bootp high-address > dhcpserver config —- Current DHCP server configuration —- allow unknown-clients;...
- Page 77 A- Commonly Used Commands allow bootp; subnet 192.168.219.0 netmask 255.255.255.0 { range 192.168.219.10 192.168.219.30; max-lease-time 5000; > dhcpserver config flush Configuration file flushed. > dhcpserver config —- Current DHCP server configuration (Issue dhcpserver config confirm followed by flashfs update to confirm new configuration) —- >...
- Page 78 A- Commonly Used Commands dnsrelay retry <retry value> bd3000> dnsrelay retry 4 Connection retry value set to 4. bd3000> dnsrelay server <DNS server IP address> bd3000> dnsrelay server 192.168.219.50 DNS server address set to 192.168.219.50. bd3000>...
- Page 79 A- Commonly Used Commands dnsrelay status bd3000> dnsrelay status DNS relay status DNS server address discovery incomplete. bd3000> dnsrelay server 192.168.219.50 DNS server address set to 192.168.219.50. bd3000> dnsrelay status DNS relay status DNS server address : 192.168.219.50 Connection status : Connected bd3000>...
- Page 80 A- Commonly Used Commands untrace bd3000> dnsrelay trace No tracing options currently enabled. bd3000> dnsrelay trace error warn query Currently tracing: error warn query dhcpserver help <command|all> > dhcpserver help Help is available on the following commands: config help pool status trace untrace...
- Page 81 A- Commonly Used Commands bd2000> dhcpserver status DHCP Server Lease Status Interface “ethernet” IP address | Client UID | Expiry ———————————————+—————————————————————————+————————— 192.168.219.1 | 01:00:20:af:20:6f:59 | 11 hours 192.168.219.2 | 01:00:20:af:11:2a:ac | 8 hours 192.168.219.3 | Myclient | 140 seconds 192.168.219.4 | 00:20:af:20:00:2b | 2 days 192.168.219.5 | <unknown>...
- Page 82 A- Commonly Used Commands list channels [<portname>] show channel list channels 0 list channels atm:0...
- Page 83 A- Commonly Used Commands config save ppp 2 pvc 800 ppp 2 interface 0 ppp 2 tunnel 1 pptp out ppp 2 enable pptp bind 192.168.10.1 pptp 1 create listen...
- Page 84 A- Commonly Used Commands bind <ipaddress>|any|none pptp bind 192.168.1.1 <tunnel> create listen An incoming connection can only be accepted if the listener has a free tunnel object allocated to it. (Such objects are allocated with the <tunnel> create listen command.) The tunnel object used will be freed for use again when the tunnel is closed by either end.
- Page 85 A- Commonly Used Commands <tunnel> create <ipaddress>|listen ptp 1 create 192.168.1.2...
- Page 86 A- Commonly Used Commands <tunnel> delete pptp 1 delete <tunnel> create <ipaddress> <tunnel> info [all] info list...
- Page 87 A- Commonly Used Commands sdsl set <variable> = <value> bun show port sdsl. > sdsl set sdslphytargetlinerate=2320kbps sdsl config sdsl config [save|flush] sdsl config config save sdsl config flush...
- Page 88 A- Commonly Used Commands > sdsl config config save sdsl set sdsl flush sdsl unset <variable> sdsl watchdog sdsl watchdog enable sdsl watchdog disable sdsl watchdog timeout sdsl watchdog timeout <time>...
- Page 89 A- Commonly Used Commands sdsl watchdog timeout config save sdsl watchdog timeout 5 port : sdsl=s1/PhysicalPort=14/TrafficShaping=1/PortSpeed=<ps>/ DefaultPCR=<pcr> sdsl PhysicalPort=14 TrafficShaping=1 port : sdsl=s1/PhysicalPort=14/TrafficShaping=1/PortSpeed=5603/ DefaultPCR=2000...
- Page 91 Setup Your Serial Link T r a n s p a r e n t B r i d g e ? Reset Router Configurations Configure Your LAN settings Configure Your WAN settings RFC 2684 RFC 2684 RFC 2225 RFC 2364 RFC 2516 Transparent Ethernet...
- Page 93 D — Frequently Asked Questions sdsl watchdog timeout sdsl watchdog enable config save...
- Page 94 Mains Supply Power adapter be greater Rear view of than 10cm Bridge/Router Telephone cable (RJ-11) - SDSL Line Telephone wall socket...
- Page 95 E — Troubleshooting Guide config confirm config config delete config flush home , config save restart...
- Page 96 E — Troubleshooting Guide...
Need help?
Do you have a question about the SDSL Bridge & Router and is the answer not in the manual?
Questions and answers