Table of Contents
Advertisement
Quick Links
Advertisement
Table of Contents

Related Manuals for Planet NAS-1101


Summary of Contents for Planet NAS-1101
- Page 1 Single-Bay NAS Server NAS-1101 User’s Manual...
- Page 2 PLANET Technology. Disclaimer PLANET Technology does not warrant that the hardware will work properly in all environments and applications, and makes no warranty and representation, either implied or expressed, with respect to the quality, performance, merchantability, or fitness for a particular purpose.
-
Page 3: Table Of Contents
TABLE OF CONTENTS Chapter 1 Introduction ..................1 Package Contents ................1 Features....................1 Specification ..................1 Chapter 2 Hardware Installation ..............3 Chapter 3 Setup Wizard.................5 Chapter 4 Configuration................11 Home....................11 Networking ..................12 4.2.1 Host Name Setting....................13 4.2.2 IP Address Setting ....................14 4.2.3 Superuser/Password Setting ................. - Page 4 4.5.1 FTP Configuration....................29 P2P....................30 4.6.1 BitTorrent Configuration ..................31 4.6.2 Download Configuration ..................32 4.6.2.1 Add a Download Task ..................33 Web Server..................35 Chapter 5 Troubleshooting .................38...
-
Page 5: Chapter 1 Introduction
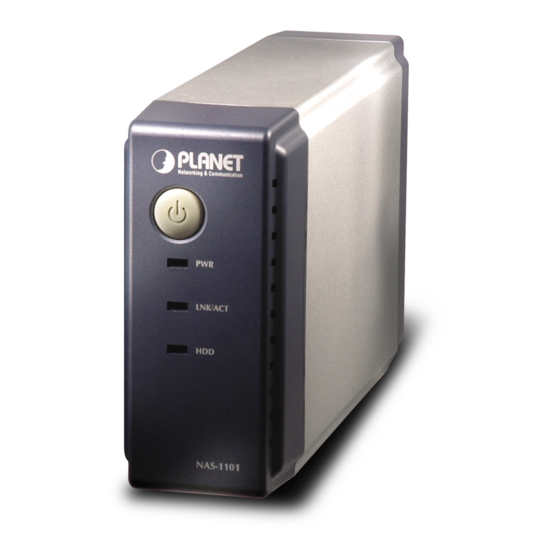
Chapter 1 Introduction The typical installation of PLANET NAS-1101 can be completed in less than ten minutes without any additional configuration of other servers or clients on your network. With the features of a compact, economical and powerful storage server, the NAS-1101 fits your SOHO (Small Office or Home Office) or personal requirements. - Page 6 LEDs PWR, LNK/ACT. HDD System Configuration Windows Base utility Web Browser (Internet Explorer, Netscape) Dimensions 220 x 60 x 132 mm (W x D x H) Weight 865g (without HDD) Supported Hard Disk Removable 3.5” External HD (ATA) Operating Temperature: 0 ~ 40°C Humidity: 10 ~ 95%(non-condensing) Storage Temperature: -10 ~ 70°C...
-
Page 7: Chapter 2 Hardware Installation
Chapter 2 Hardware Installation Please refer to the steps below to install your HDD into NAS-1101: Loosing the two screws on the rear panel by screwdriver or hands. Grabbing the front panel and separate the HD holder from case. Your HD jumper should be set to Master. Different Hard Disk has different jumper settings; please refer to your Hard Disk manual for correct setting. - Page 8 Push the power connector into the power socket of HD as shown. The power cable is designed to go in one way, so you shouldn't have any problems. Secure the Hard Disk with the screws we provided. Push the Hard disk and HD holder back into the box and secure it with the two screws.
-
Page 9: Chapter 3 Setup Wizard
(Suppose “E” is your CD-ROM drive). You will see the Welcome screen as below. Please click “Next” to continue. Plug the circle end of power adapter firmly into the rear panel of NAS-1101, and the other end into a power outlet. Press the Power button on NAS-1101 and make sure Power LED is light on. - Page 10 Note: ONLY use the power adapter supplied with the NAS-1101. Otherwise, the product may be damaged. Connect NAS-1101 to your switch or hub and make sure the LNK/ACT LED is light on. Press “Next” to start the scan.
- Page 11 The Setup Wizard will scan available NAS-1101 in your network. The screen will show you the available NAS-1101. Please select the device you want to setup and click “Next” to continue.
- Page 12 NAS-1101. If the “Reachable” option is “No”, you will see this screen. Please enter the NAS-1101 administrator user name and password and click “Next”. The default username and password are both “admin”.
- Page 13 However, you can still proceed with the configuration procedures described in Chapter 4. To use the storage space of NAS-1101, you can double click on the “Access My Network HD - NAS-1101” icon. A dialog box will pop up and ask for username/password.
- Page 14 The passwords of the above accounts are identical with the account names. For example, the password for account “all” is “all”. Note: As default, the “Share” folder is created automatically in the NAS-1101 and can be accessed by any user. Users that would like to use another set of username/ password after getting access to any folder must log off your operation system and log on again.
-
Page 15: Chapter 4 Configuration
The NAS-1101 provides a web-based configuration interface and you can simply access it by double click on the “Setup My PLANET NAS-1101” icon on desktop. A dialog box will pop up and ask for username/password. The default user name and password are both “admin”. -
Page 16: Networking
You can have max five online users to access NAS-1101 at the same time. FTP Users The number of users who is connected to NAS-1101 by FTP session. You can have max five online users to access NAS-1101 at the same time. -
Page 17: Host Name Setting
4.2.1 Host Name Setting Parameters Description Host Name Identification of NAS-1101 represents on “My Network Places”. Work Group The name of the workgroup which NAS-1101 is located. Description Brief description of the NAS-1101. -
Page 18: Ip Address Setting
This page allows you to change the username and password which are used to access the web interface of NAS-1101. Please do not confuse this screen with the following “Share” screen. The user account created in “Share” screen is for access the storage space of NAS-1101. You should not grant web access privilege to common users. -
Page 19: Ip Filter
Disable: the IP Filter is disabled, and all sessions would be allowed. Allowed: only the clients with IP addresses configured in the table below can access the NAS-1101. Denied: the clients with IP addresses configured in the table below are not allowed to access the... -
Page 20: Mac Filter
Disable: the MAC Filter is disabled, and all sessions would be allowed. Allowed: only the clients with MAC addresses configured in the table below can access the NAS-1101. Denied: the clients with MAC addresses configured in the table below are not allowed to access the... -
Page 21: Administration
Administration In this category, you can manage the NAS-1101 with some useful tools. -
Page 22: System Restart
4.3.1 System Restart Parameters Description Do you want to restart If you want to restart this NAS-1101, please press “Yes”, or press “No” to back to this system? pervious page. 4.3.2 HD Format When you see this massage “HD Unable to use” showing on the “HD used (%)”, it means either your hard disk is a brand new unformatted one or its format is not EXT3. -
Page 23: Factory Default Reset
“Yes”, or press “No” to back to previous page. Note: besides software reset, you can also press the DEFAULT button on the rear panel of NAS-1101 for 10 second. And then wait for a while for NAS-1101 to restart with factory default settings. -
Page 24: System Time
Before this procedure, please make sure the time on your PC is also correct. Use Time Server If this NAS-1101 is connected to Internet already, you may select this option to set it check the system time with Internet time server. You can change the time server address or keep use the default setting and click “Save”... -
Page 25: Share
Share In this option, you can set the user and folder configuration for user login and access data. 4.4.1 User Configuration In this category, you can Add/Delete/Modify the user account. Before operate, please make sure the installed HD was formatted. If the installed HD does not format yet, the operation in this page may be wrong. -
Page 26: Modify Users
4.4.1.1 Modify Users If you want to modify the existing user, please click the user icon in Basic User or Advanced User field. Then you will see the screen below. Parameters Description User Name For existing user, you may click “Change Name” button to change the user name. New Password If you want to set a new password of this user, please enter the new password here. -
Page 27: Add User
Please enter a simple description of this user. FTP Access Allow this user to access NAS-1101 via FTP protocol or not. 4.4.1.2 Add User If you want to add a new user, please click the “Add” button on the screen in section 4.4. Then you can see the screen below for adding new user. -
Page 28: Delete User
Undo When you want to clear the settings, you can press this button. Back Press this button for back to previous page. 4.4.1.3 Delete User If you want to delete the user account, please click the check box under the user name in the User Configuration screen, you may see the “Delete”... -
Page 29: Folder Configuration
4.4.2 Folder Configuration In this category, you can Add/Delete/Modify the shared folder. 4.4.2.1 Modify Folder If you want to modify the folder configuration, please click the folder icon. Then you will see the screen below. - Page 30 Parameters Description Change Name If you want to change the folder name, please press this button. After press this button, you will see the screen below. Please press “Apply” to save the settings. NOTE: The default folder “Share” can’t be changed. Change Description If you want to change the folder description, please press this button.
-
Page 31: Add Folder
Parameters Description Folder Name Please set a name to this share folder. The folder name will be shown when the user access NAS-1101. Folder Description Please set a simple description for this folder. Apply Please press this button to create this new folder. -
Page 32: Delete Folder
Parameters Description Change Name If you want to change the folder name, please press this button. Change Description If you want to change the folder description, please press this button. Please set user’s limit You may set the privilege for each user or set the same setting to all users by for this folder selecting upper options. -
Page 33: Ftp
NAS-1101 provides a FTP server for remote access from Internet. 4.5.1 FTP Configuration To setup this configuration such as user limitation, sever port number, length for time out and anonymous user restriction, click FTP Configuration. - Page 34 “P2P” in the device. Place those Torrent files in the P2P folder. 3. Create a folder in the NAS-1101 to place the data you are going to download. Please note that the folder should be within the folder that contains the Torrent files. For example, create a folder named “BT”...
-
Page 35: Bittorrent Configuration
embedded functionality is provided for downloading authorized files only. Downloading or distribution of unauthorized materials may result in severe civil and criminal penalty. Users of this device are subject to the restrictions of the copyright laws and should accept all the consequences. 4.6.1 BitTorrent Configuration The configuration of BitTorrent can be setup here, fill in the settings in each blank then press apply to activate. -
Page 36: Download Configuration
Note: To download successfully, please make sure that the torrent files and the folder for restoring downloaded data to be in the same folder. (For example, if you place those Torrent files in folder “P2P”, the folder “BT” for placing downloaded data should be also in the folder “P2P”. BitTorrent Configuration You can specify any name for the file. -
Page 37: Add A Download Task
Torrent File Name and status hyperlink for each torrent file. D/L (%) The percentage of downloaded file. Size (MB) The data size. Start Time The time that download starts. Rate (Down/Up) The download/upload speed. Max Rate (Down/Up) The maximum download/upload speed. 4.6.2.1 Add a Download Task 1. - Page 38 4. Check the download parameters and click Apply to complete the procedures. Parameters Description Listen Port The port number of the P2P software. Time to Leave The allowed time to process a download task. The task will be terminated if the time expires.
-
Page 39: Web Server
If you want to terminate a download task, select the task and click the Inactive button. The specified process will be removed immediately. Web Server NAS-1101 provides a simple web server for user to construct a personal website. This website accepts HTML files only, it does not support ASP or JavaScript. - Page 40 192.168.1.1 and the port number of the web server is configured as 8080. Note: For WAN users to get access to the FTP or WEB server, you should link the NAS-1101 to a router with appropriate configuration. Please make sure that: 1.
- Page 41 Firewall device to secure your network from being invading.
-
Page 42: Chapter 5 Troubleshooting
Check your PC’s IP address, make sure that it has a static IP or connects with a router with DHCP Client. Use DEFAULT button to restore NAS-1101 to factory default and reboot. Q3. The NAS-1101 can’t find my HD and the Home page of Web-based UI display that the “HD unable to use. Ans: There are some possibilities, The HD is broken. - Page 43 Q6. I have accessed the HD installed in NAS-1101, but I can’t access to the shared folders. Ans: NAS-1101 is base on FAT32 file system. Therefore, the size of a single file is limited to no more than 2GB. However, there is an advantage of FAT32 file system. If the NAS-1101 is crashed due to some unexpected reasons, you can remove the hard drive inside and installed it to any Microsoft operating system.
Need help?
Do you have a question about the NAS-1101 and is the answer not in the manual?
Questions and answers