Table of Contents
Advertisement
Quick Links
Advertisement
Table of Contents

Related Manuals for Planet NAS-7100


Summary of Contents for Planet NAS-7100
- Page 1 1-Bay / 2-Bay SATA NAS Server NAS-7100 / NAS-7200 Quick Installation Guide...
-
Page 2: Table Of Contents
Chapter 1. Introduction ..................3 1.1 Before Installation ................3 1.2 System Requirements ................. 3 Chapter 2. System ................... 4 2.1 NAS-7100 - 1-Bay SATA NAS Server ............. 4 2.1.1 Package Content ................ 4 2.1.2 Front Panel ................4 2.1.3 Rear Panel ................. 5 2.2 NAS-7200 - 2-Bay SATA NAS RAID Server .......... -
Page 3: Chapter 1. Introduction
Chapter 1. Introduction Thank you for purchasing PLANET SATA NAS Server, NAS-7100/7200. In this installation guide, it illustrates the simply installation for user to install a HDD and install NAS-7100/7200 to Windows system. For more information, please also refer to the User’s manual in our CD-ROM. -
Page 4: Chapter 2. System
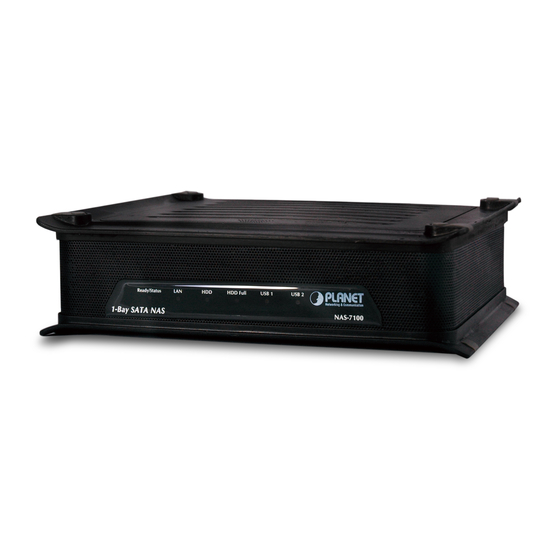
Chapter 2. System 2.1 NAS-7100 - 1-Bay SATA NAS Server 2.1.1 Package Content • NAS-7100 • Quick Installation Guide • Setup CD • Ethernet Cable • Power Adapter with Power Core • EMI core 2.1.2 Front Panel Ready (Green) • ON – Normal operation. -
Page 5: Rear Panel
ON - USB device connected to the USB port USB 2 OFF - No USB device installed Fast Blinking - Data being transferred to or from the USB device 2.1.3 Rear Panel This is a spring-loaded “Soft Switch”. If power is Off, press once to turn On. Power Switch If power is On, press once to start the Shutdown sequence. -
Page 6: Nas-7200 - 2-Bay Sata Nas Raid Server
2.2 NAS-7200 - 2-Bay SATA NAS RAID Server 2.2.1 Package Content • NAS-7200 • Quick Installation Guide • Setup CD • Ethernet Cable • Power Adapter with Power Core • EMI core 2.2.2 Front Panel... - Page 7 Ready (Green) ON – Normal operation. OFF – No power. Blinking – This LED blinking during startup and shutdown. Status (Amber) Ready/Status ON – This LED will be On during the Startup self-test; it will turn Off once the self-test is completed. If it stays ON, there is a hardware error.
-
Page 8: Rear Panel
2.2.3 Rear Panel This is a spring-loaded “Soft Switch”. If power is Off, press once to turn On. Power Switch If power is On, press once to start the Shutdown sequence. During Shutdown, the Ready LED will blink. When Shutdown is completed, all LEDs will turn off. -
Page 9: Chapter 3. Hdd Install/Remove
4. Pull up the HDD tray then slide and push the HDD into the tray, make sure connector well connecting 5. Push down the HDD tray 6. Put the top cover of NAS-7100 back to finish HDD install HDD Remove 1. Make sure the NAS-7100 is power off 2. -
Page 10: Nas-7200 - 2-Bay Sata Nas Raid Server
3.2 NAS-7200 - 2-Bay SATA NAS RAID Server The NAS-7200 supports two 3.5-inch Serial-ATA (SATA) hard drives. NAS-7200 does not support low profile or half high hard drive. HDD Install 1. Make sure the NAS-7200 is powered off 2. Open rear cover of NAS-7200 3. - Page 11 5. To install Disk 2 that located on right side (rear view), make sure HDD top face to right and connector side in front then slide the HDD into slot 6. Put the rear cover of NAS-7200 back to finish HDD install 7.
-
Page 12: Chapter 4. System Installation
2. Connect the supplied power adapter to a power outlet and plug the power cord into SATA NAS Server’s power input on the rear panel. 3. Power on. Locate the SATA NAS Server’s power switch on the NAS-7100 real panel. Press it once to power on the NAS 4. The SATA NAS Server self-test. -
Page 13: Chapter 5. Configuration
Chapter 5. Configuration • This procedure only needs to be done ONCE, by the SATA NAS Server’s Adminis- trator. • Other LAN users should follow the advice given in using your SATA NAS Server described in the following section. Quick Setup with the SATA NAS Server Wizard 1. - Page 14 A list of all the SATA NAS Server’s on your network will show on the left side. The right side displays details of the currently selected SATA NAS Server. If the desired SATA NAS Server is not listed, check the following: •...
- Page 15 5. You can configure the time settings in this screen. Please click “Next” after the configured. The Default Name is shown. You may change this if you Server Name wish. Workgroup Normally, this name should match the Workgroup name Name used by PCs on your LAN.
- Page 16 7. After click "Save", you will see the dialog box to prompt you again. Please click “OK” to save or click “Cancel to check the settings. 8. If you would like to install “Flash-Map” to helps you to mapping SATA NAS Server now, please click “Yes”...
-
Page 17: Chapter 6. Using Your Sata Nas Server
Chapter 6. Using Your SATA NAS Server To Use the SATA NAS Server 1. Open Network Neighborhood (or My Network Places). 2. Locate the SATA NAS Server. If it is not listed, double-click Entire Network. Then double-click the Workgroup that the SATA NAS Server is in. (By default, the SATA NAS Server is in Workgroup.) 3. - Page 18 4. Default IP address: DHCP client Default user name: admin Default password: empty (no password) Further Configuration If you want to configure more detail settings of NAS-7100/7200, please refer to the user manual in the CD disk.
- Page 19 This page is intentionally left blank...
- Page 20 This page is intentionally left blank...
Need help?
Do you have a question about the NAS-7100 and is the answer not in the manual?
Questions and answers