Fostex D-108 Quick Operation Manual
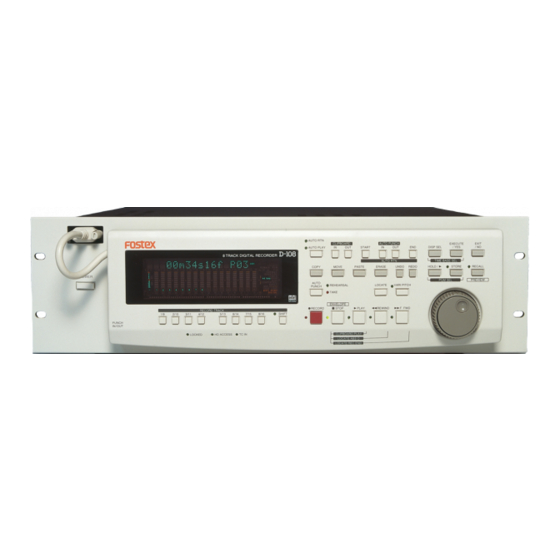
Eight-track digital recorder
Hide thumbs
Also See for D-108:
- Owner's manual (141 pages) ,
- Service manual (70 pages) ,
- Supplement owner's manual (2 pages)
Table of Contents
Advertisement
Quick Links
Download this manual
See also:
Owner's Manual
8288 435 000
Eight-Track Digital Recorder
Model
Quick Operation Guide
Welcome to D-108
Thank you for choosing the Fostex D-108.
The D-108 is an eight-track digital multitracker equipped with sixteen
additional tracks. It supports E-IDE hard disks and SCSI drive disks (such as
a Zip drive, MO drive, or fixed disk) as the recording and playback media.
Please read this Quick Operation Guide before using your D-108.
This Quick Operation Guide introduces basic operations and preparation
procedure. To make the best use of your D-108, please also read the Owner's
Manual for detailed information.
Advertisement
Table of Contents

Related Manuals for Fostex D-108


Summary of Contents for Fostex D-108
-
Page 1: Quick Operation Guide
Zip drive, MO drive, or fixed disk) as the recording and playback media. Please read this Quick Operation Guide before using your D-108. This Quick Operation Guide introduces basic operations and preparation procedure. To make the best use of your D-108, please also read the Owner’s Manual for detailed information. - Page 2 D-108 Quick Operation Guide...
-
Page 3: Table Of Contents
The D-108 is not equipped with recording media for recording and playback. Please read the section from page 4 to prepare the recording media to record, play back, and edit data on the D-108. For more information on a recording media supported by the D-108, refer to the “List of the drives with operation guaranteed”... -
Page 4: Package Contents
D-108 main unit Detachable controller The D-108 is not equipped with recording media (also called “a current drive” in this Guide), such as a hard disk. You need to prepare a current drive to make a recording. The D-108 supports an E-IDE hard disk (that can be installed in the included removable case), and an external SCSI drive (MO, Zip, or fixed hard disk drive) (that can be connected to the SCSI connector on the rear panel of the D-108). -
Page 5: Using An E-Ide Hard Disk
Using an E-IDE hard disk The D-108 has a slot for an optional hard disk. First you need to install a hard disk into the removable case included in the D-108 package before you install it into the slot. The following instructions assume that you have already purchased an E-IDE hard disk unit. Prepare the... -
Page 6: Connecting Cables
Choose a level and stable surface for installation. Be careful not to injure yourself. Fostex is not liable for any malfunction or damage to the hard disk caused by mishandling. • You need to set the DIP (Jumper) switch on the hard disk to “MASTER” before you install it into the removable case. - Page 7 Installing the removable case in the D-108 . Remove the blank panel that covers the slot for the disk on the front panel of the D-108. (Note: Do not insert your fingers into the slot when the slot cover is open. Otherwise, electrical shock or injury may occur.)
-
Page 8: Formatting A Disk
D-108 Quick Operation Guide After installing the hard disk in the D-108, you need to format the hard disk for recording and playback. (This applies to new disks and those that have been used with a computer.) Connect the D-108’s power cable to the AC outlet. -
Page 9: Checking The Available Recording Time (Remain) On A Formatted Disk
MTC offset value to the ABS time value. BAR/BEAT/ CLK indicates a position within a song of D-108’s tempo map based on the MIDI clock position pointer. You can switch to any of these units as follows. For more information on the Time Base, refer to the User’s Guide. -
Page 10: Using A Scsi Drive
D-108 Quick Operation Guide Using a SCSI drive The D-108 has a SCSI terminal to connect an external SCSI drive, which enables you to use an MO, Zip, or fixed drive as a current disk drive. For more information on SCSI drives supported by the D-108, refer to the “List of drives with guaranteed operation”... - Page 11 Be sure to install the SCSI terminator. <Notes on connection> • Before making connections, make sure that both the D-108 and the SCSI drive are turned off. • Up to two SCSI drives may be connected on a SCSI chain with the D-108.
-
Page 12: Formatting A Scsi Disk
D-108, you need to format a disk. The instructions here assume that only a removable SCSI drive is connected to the D-108 as the current drive, and an E-IDE hard disk is not installed. -
Page 13: Checking The Available Recording Time (Remain) On A Formatted Disk
Press and hold down the [RECORD] button and press the EXECUTE/YES key. When the D-108 starts formatting, it displays the size of the unformatted area on the disk, and counts down as formatting proceeds. Also, the segments in the “∞” column of the level meters light up, and turn off one by one starting at right, indicating the status of the format operation. - Page 14 D-108 Quick Operation Guide Press the EXIT/NO key or the STOP button. The D-108 quits the format menu in SETUP mode, and the display changes to ABS Time Base indication. Formatting in [8track format] mode: Track indicators 1-8 light up on the display.
-
Page 15: Using Two Current Drives
In addition to using an E-IDE hard disk or a SCSI drive as the sole current drive, you may also use an E-IDE hard disk installed in the D-108 along with a SCSI drive connected to the unit. To format these two current drives, follow the steps below. -
Page 16: Selecting A Current Drive
Selecting a current drive As explained earlier, turning on the power to the D-108 and both E-IDE and SCSI drives causes the E-IDE hard disk to start up as a current drive. If you wish to use the SCSI drive as a current drive, you need to set the [Drive Sel.?] (Selecting a current drive) menu in SETUP mode. -
Page 17: Connecting A Mixer
Connecting a mixer that has eight TAPE INs and eight BUSS OUTs (or GROUP OUTs) Connect TAPE INs 1-8 of the mixer to ANALOG OUTs 1-8 of the D-108, and connect BUSS OUTs (GROUP OUTs) 1-8 to ANALOG INs 1-8 of the D-108. With this example, you can make simultaneous eight-track recordings. - Page 18 Connecting a mixer that has eight TAPE INs and four BUSS OUTs (or GROUP OUTs) Connect TAPE INs 1-8 of the mixer to ANALOG OUTs 1-8 of the D-108, and connect BUSS OUTs (GROUP OUTs) 1-4 to ANALOG INs 1-4 of the D-108.
-
Page 19: Basic Recording
D-108. You need to reset all the controls on the D-108 to their initial settings according to the controls and switches on the mixer before you proceed to the next step. This procedure is called “Initialize” in this Guide and in the User’s Guide. -
Page 20: Sampling Frequency
(time value or bar/beat/clock) will be changed. The following procedure assumes that the D-108 is powered on and the top of Program 1 (ABS 0) is located and shown on the display. -
Page 21: Basic Analog Recording
The following explanation assumes that the D-108 has been connected to an external mixing console (as explained in the “Connecting a Mixer” section), and that the audio is input from the mixer’s BUSS OUT (or GROUP OUT) into the D-108’s ANALOG IN. -
Page 22: Undo And Redo Recording
* You make a new recording. * You perform a new edit (Copy/Paste, Move/Paste, Auto Punch in/out, Erase, etc.). * You turn off the power to the D-108. * You select a different Program. * You eject a disk. -
Page 23: Multitrack Recording Using Overdubbing
7 and 8 to set the tracks to READY mode. 3.Press the RECORD button once. (Rehearsal) 4.Play the Program on the D-108 from the beginning to send Tracks 1-6 sounds to Tracks 7 and 8, and adjust the recording level and the effect balance. -
Page 24: Mixdown
Guide for more information. 44.1kHz SURE? 4.Press the EXIT/NO key. The D-108 exits SETUP mode, and the top of Program 2 in ABS Time Base (ABS 0) appears. 44.1kHz SURE? Refer to the next page for more information on how to select the desired Program from multiple Programs on the disk. -
Page 25: Basic Locate Function
On the D-108, the top of the Program on the disk is called “ABS 0” and the end of the recorded area is called “REC END.” (If the Program has no data recorded, ABS 0 corresponds to REC END.) You can use this function to locate the ABS 0 or REC END point immediately, regardless of the current recorder position. -
Page 26: Playback Using The Vari-Pitch Function
• The Vari Pitch function is automatically turned off under the following conditions: 1. You have turned off and on the power to the D-108. (The pitch data will be reset to 0.0%.) 2. You have set “Slave mode setting” in SETUP mode to ON. -
Page 27: Owner's Manual Reference Pages
SCSI disk, and load the saved data back to the current drive. SETUP mode...106 This chapter explains how to change the default settings so that the D-108 will operate at the best condition. MIDI Implementation chart...125 This chart details various MIDI functions. - Page 28 FOSTEX CORPORATION 3-2-35, Musashino, Akishima-shi, Tokyo, Japan 196-0021 FOSTEX CORPORATION OF AMERICA 15431, Blackburn Ave., Norwalk, CA 90650, U. S. A. © PRINTED IN JAPAN DEC. 1998 8288 435 000 FX...
Need help?
Do you have a question about the D-108 and is the answer not in the manual?
Questions and answers