Fostex D2424LV Quick Operation Manual
24 track digital recorder
Hide thumbs
Also See for D2424LV:
- Reference manual (162 pages) ,
- Quick operation manual (28 pages) ,
- Brochure (5 pages)
Table of Contents
Advertisement
Quick Links
Quick Operation Guide
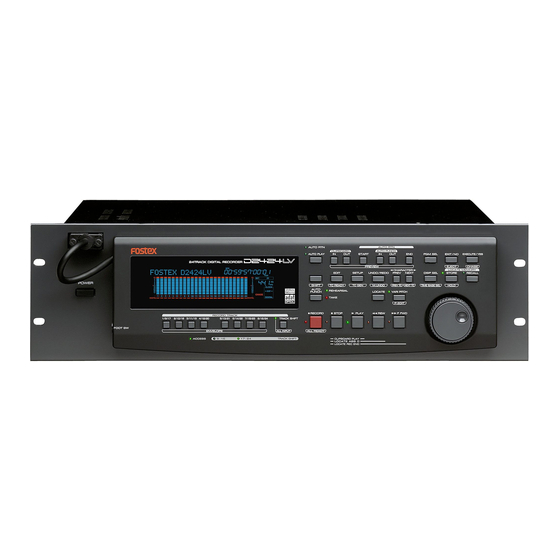
Model
POWER
FOOT SW
Items on "Preparation of the current drive," "Formatting the disk" and "Set up of
the internal clock," which must be carried out upon purchasing D2424, are ex-
plained in this Quick Operation Guide. Before operating D2424, please read this
manual and carry out preparations by carefully following the explanations.
Although fundamental operating methods are also given here, to obtain utmost
performance of D2424, it is also recommended to read the "Reference Manual"
which is the main text.
24 Track Digital Recorder
24TRACK DIGITAL RECORDER
RECORD TRACK
1/9/17
2/10/18
3/11/19
4/12/20
5/13/21
6/14/22
7/15/23
8/16/24
ENVELOPE
ACCESS
9-16
17-24
AUTO RTN
AUTO RTN
CLIPBOARD
AUTO PUNCH
AUTO PLAY
IN
OUT
START
IN
PREVIEW
EDIT
SETUP
UNDO/REDO
SHIFT
TC READY
TC GEN
M.UNDO
AUTO
REHEARSAL
24bit
LOCATE
PUNCH
96kHz
TAKE
OPTICAL
PLAY
RECORD
STOP
REW
TRACK SHIFT
ALL INPUT
ALL READY
TRACK SHIFT
CLIPBOARD PLAY
LOCATE ABS 0
LOCATE REC END
8288 468 000
PGM SEL
EXIT/NO
OUT
END
EXECUTE/YES
EJECT
CHASE
CHARACTER
LOCATE MEMORY
DISP SEL
STORE
RECALL
PREV
NEXT
PREV TC
NEXT TC
TIME BASE SEL
HOLD
VARI PITCH
P.EDIT
F FWD
Advertisement
Table of Contents

Related Manuals for Fostex D2424LV


Summary of Contents for Fostex D2424LV
-
Page 1: Quick Operation Guide
Quick Operation Guide Model POWER 1/9/17 2/10/18 FOOT SW Items on "Preparation of the current drive," "Formatting the disk" and "Set up of the internal clock," which must be carried out upon purchasing D2424, are ex- plained in this Quick Operation Guide. Before operating D2424, please read this manual and carry out preparations by carefully following the explanations. -
Page 2: Safety Instructions
Model D2424 Quick Operation Guide CAUTION RISK OF ELECTRIC SHOCK DO NOT OPEN CAUTION: TO REDUCE THE RISK OF ELECTRIC SHOCK, DO NOT REMOVE COVER (OR BACK). NO USER - SERVICEABLE PARTS INSIDE. REFER SERVICING TO QUALIFIED SERVICE PERSONNEL. "WARNING" "TO REDUCE THE RISK OF FIRE OR ELECTRIC SHOCK, DO NOT EXPOSE THIS APPLIANCE TO RAIN OR MOISTURE."... -
Page 3: Table Of Contents
4 to prepare the recording media to record, playback, and edit data on the recorder. <Damages> Fostex in not responsible for any direct or consequential damages caused by operating the recorder and/ or a connected E-IDE hard disk. <Copyrights>... -
Page 4: Package Contents
The updated information on the operation-confirmed HD and backup media for D2424 is mentioned in the following Fostex international web site. <http://www.fostex.co.jp/int/index.htm> For those who are not able to check our web site, please contact Fostex distributor in your territory. Package contents Recording media Caddy Install a hard disk into this case. -
Page 5: Preparation For The Current Drive
Be careful not to injure yourself. Fostex is not liable for any malfunction or damage to the hard disk caused by mishandling. • You need to set the DIP (Jumper) switch on the hard disk to “MASTER” before you install it into the caddy. -
Page 6: Connecting Cables
Model D2424 Quick Operation Guide Connecting cables .Connect the cables in the caddy to the connectors on the rear of the hard disk. As shown in the figure, first connect the power supply cable. Make sure that you connect the cables securely in the correct direction. - Page 7 Installing the removable case in the recorder . Install the caddy (containing a hard disk inside) into the slot. Push in the case with the correct side facing toward you. (Use both hands to push it in so that the surface of the case and the front panel become flush.) .
-
Page 8: Formatting A Hard Disk Drive
Model D2424 Quick Operation Guide Formatting a hard disk drive After installing a hard disk drive into the recorder, you must format the disk; otherwise you cannot record or playback any data. Note that the following explanation assumes that the disk is unformatted. - Page 9 Select this format type only when In general, it is best to select using a new hard disk that is this default format type. checked by FOSTEX. Model D2424 Quick Operation Guide 7. Press the [EXECUTE/YES] while holding down the [RECORD] button.
-
Page 10: Checking The Available Recording Time (Remain) On A Formatted Disk
Model D2424 Quick Operation Guide When you format the hard disk one Program (*1) is automatically set up, and “ABS 00m 00s 00f” (ABS Time Base - *2) appears, indicating that the top of the Program is located. Now, you can start recording, playback, and editing on this unit using the installed hard disk. -
Page 11: Setup Of The Internal Clock
Setup of the Internal Clock This recorder contains an internal clock function. Upon finishing format of the current drive, set internal clock to the present time by procedure explained below. Procedures below is explained on the assumption that current drive has been formatted, the program head (ABS 0) is displayed and this recorder is on standby. -
Page 12: Connecting A Analog Mixer
Model D2424 Quick Operation Guide Connecting a analog mixer Connection with the analog mixer 24 TAPE IN - 8 BUSS OUT (or GROUP OUT) or a 24 TAPE IN - 4 BUSS OUT analog mixer can be connected to D2424. <Note>... -
Page 13: Connecting A Digital Mixer
Connecting a digital mixer When making connections with a digital recording mixer, refer to the connectig example below. <CAUTION> • When connecting the recorder to a digital mixing console, make sure that the power of both units are off. • The connection examples shown below work only when the current drive of the recorder is formatted with the sampling frequency at 44.1 kHz or 48 kHz (regardless of quantization). -
Page 14: Initial Settings
Model D2424 Quick Operation Guide <Hints> * When connecting the recorder to a digital mixing console as shown in the example above, unlike connecting to an analog console, both digital devices must be synchronized with each other. To achieve this, use "word clock," the signal for synchronization. Word clock is used to synchronize all digital words in a system. -
Page 15: Basic Recording
After you finish preparing a recording media and connecting a mixer, you can start basic recording using this recorder. The following explanation assumes that this recorder has been connected to an external mixing console (as explained in the “Connecting a Mixer” section), and that the audio is input from the mixer’s BUSS OUT (or GROUP OUT) into this recorder’s ANALOG IN. -
Page 16: Undo And Redo Recording (Single Undo/Redo)
Model D2424 Quick Operation Guide Undo and redo recording (single undo/redo) Everybody makes mistakes. If you make a mistake in recording, you can restore and re-do the data that existed before the mistake occurred. These functions are called “Undo” and “Redo,” and are executed by the UNDO/REDO key on the control panel. -
Page 17: Basic Digital Recording
In the following, basic multi-recording of adat digital signals will be carried out on the assumption that a digital mixer is connected to D2424 (To output adat digital signals from the digital mixer, refer to the Operat- ing Manual of the digital mixer you are using). Prior to operation, D2424 must be set to the [Initial state]. Selecting Digital In <About Digital In selection>... -
Page 18: Setup Mode
Model D2424 Quick Operation Guide SETUP Flashing SETUP 5. Select “D.out adat” by using the [JOG] dial, and press the [EXECUTE/YES] key. Now the Digital Out is set to "adat". Setting the reference clock When setting "Digital In" (see the previous page) to an "Async"... -
Page 19: Multitrack Recording Using Overdubbing
Multitrack recording using overdubbing Multitrack recording is a term for the series of processes in which you record various sound sources to different tracks and combine them into two mixes (L and R). This recording involves an important process called “overdubbing,” in which you record additional sound sources to different tracks while monitoring the input sound and listening to the recorded sound. -
Page 20: Mixdown
Model D2424 Quick Operation Guide After overdubbing and ping-pong recording, you can mix all track data into two channel stereo data and record it onto your master recorder. This final process of multitrack recording is called “mixdown.” The mixdown signals are usually output from the mixer’s STEREO OUT L/R. Connect the master recorder Initialize the recorder. -
Page 21: Basic Locate Function
<Selecting the desired Program from multiple Programs> If you have set up multiple Programs on the disk, you first need to select the target Program prior to recording, playback, or edit. To select a Program, follow the steps below. Do not select a different Program until you finish the session. -
Page 22: Playback Using The Vari-Pitch Function
Model D2424 Quick Operation Guide Playback using the Vari-pitch function This section explains how to change the playback speed of the recorder using the Vari Pitch function. You can set the playback speed in the range of +6.0% to -6.0% in 0.1% increments. The VARI PITCH key turns Vari Pitch mode on and off. - Page 23 Chain Play function...57 Envelope function (Cue & preview function)...60 Preview function...62 Multiple Undo function...64 Editing tracks...66 MIDI sync function...75 Saving and loading song data...85 SETUP mode...105 MIDI implementation chart...131 MMC command list...132 Inquiry message list...132 Fostex MIDI system exclusive message...133...
- Page 24 FOSTEX CORPORATION 3-2-35, Musashino, Akishima-shi, Tokyo, Japan 196-0021 FOSTEX CORPORATION OF AMERICA 15431, Blackburn Ave., Norwalk, CA 90650, U.S.A. © PRINTED IN JAPAN AUG. 2000 8288 468 000 FX...
Need help?
Do you have a question about the D2424LV and is the answer not in the manual?
Questions and answers