Table of Contents
Advertisement
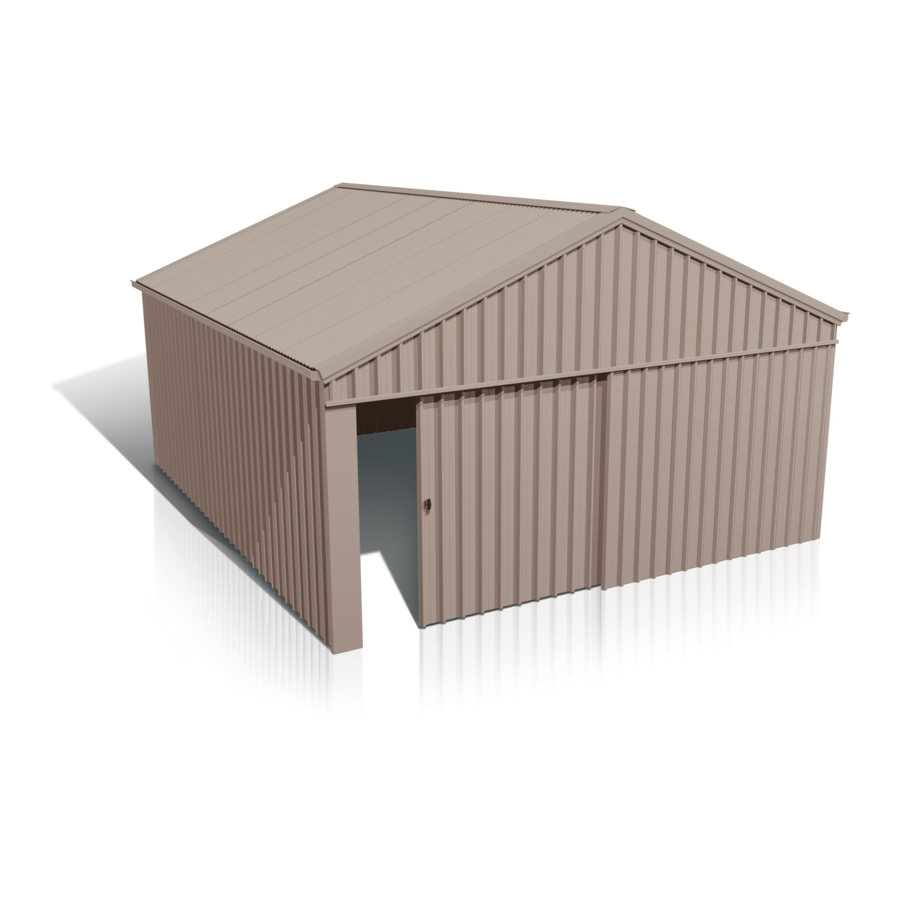
GUIDE
Gable Homesheds
™
FRAMEWORK
BEFORE YOU START
Council Approval
It is important to contact your local council before building your Stratco Gable Homeshed. You will have already
received a Council application form from Stratco, including an exploded view and a plan view of the proposed structure.
It is important to draw a plan view of your Homeshed on the second page of your "Council Copy" form. This view can
be copied from Figure 1 on page two. You must include the distances from the boundaries and existing buildings.
Before Starting
Confirm that all of the material listed on the delivery document has been supplied. Carefully read these instructions
to ensure you are familiar with all the steps involved. Ensure you have the correct tools and equipment for the job as
listed on page two.
Advertisement
Table of Contents

Related Manuals for Stratco Gable Homesheds


Summary of Contents for Stratco Gable Homesheds
-
Page 1: Before You Start
It is important to contact your local council before building your Stratco Gable Homeshed. You will have already received a Council application form from Stratco, including an exploded view and a plan view of the proposed structure. It is important to draw a plan view of your Homeshed on the second page of your “Council Copy” form. This view can be copied from Figure 1 on page two. -
Page 2: Tools Required
TOOLS REQUIRED Rivet Gun Vice Grips Step Ladder Tape Measure Spanner Hacksaw Pliers Spirit Level 5/16” Power Drill Hex Head Adaptor Permanent Marker Caulking Gun Silicone Sealant Tin Snips Gloves String Line SITE PREPARATION “D” m Determine the position of the Homeshed. If the ground is =82 mm (SC100) uneven or sloped, ensure that the slope does not exceed =108mm(SC150) - Page 3 FOOTINGS Pad Footing Sizes (mm) N1 (W28) N2 (W33) N3 (W41) Eaves Homeshed Soil Height Width With Slab Without Slab With Slab Without Slab With Slab Without Slab Type (mm) (mm) Diameter Depth Diameter Depth Diameter Depth Diameter Depth Diameter Depth Diameter Depth...
- Page 4 FOOTINGS Dig the column holes as specified in Figure 2 and Table 2. Before the concrete sets, score the top of the concrete and place a brick in the hole as illustrated in Figure 2 and If you are pouring a concrete slab, the slab must be a Figure 3.
- Page 5 Please Note: Girts will be supplied un-punched for Homesheds with non-standard lengths or non-standard bay spacings. Please refer to Table 1 on page 2 of this installation guide for a list of standard Homeshed lengths and bay spacings. Wall Girts Pan fix the Stratco Superdek wall sheets with 10x16mm ®...
- Page 6 GUTTER INSTALLATION Constructing the Gutters Gutter Brackets Rivet a left and right hand stop end to each length of Crest fix the gutter brackets to the wall sheets at gutter. Seal with silicone. approximately 1000mm centres with pop rivets (refer to Figure 7).
- Page 7 PERSONAL ACCESS DOOR Wall Sheet Cut Line Butt Hinge Under-lap Under-lap PA Door Flashing Door Frame Door Frame Wall Girt Wall Girt Door Mullions PA Door Angle Trimmer Figure 8 Cap bottom of the header sheets with the PA Door Header PA Door Gable End Flashing provided.
- Page 8 BUILDING THE FRAME Rafters The rafters are bolted together on the ground using a Rafter Rafter ridge bracket. Lay two rafters out, making sure there is M12x30mm a left and a right rafter. The C-section opening on each high tensile bolts rafter should open on the same side, with the purlin Eaves Bracket...
-
Page 9: Rear Walls And Roof Installation
REAR WALLS AND ROOF INSTALLATION End Columns Bolt the rear wall girts to the end column with one M12x30mm hex head bolt. The rear wall girts have been If your Homeshed is 5.4m or wider, attach the rear end pre-punched at the end column /girt intersection. column (100mm or 150mm C-section) to the rear truss with one M12x30mm hex head bolt as illustrated in Purlins... - Page 10 REAR WALLS AND ROOF INSTALLATION Roof Sheets Turn the valley flute of every corrugated roof sheet upwards as illustrated in Figure 18. This will aid in Fix the roof sheets, starting from one end of the water proofing the Homeshed. Homeshed.
- Page 11 FLASHINGS Ridge and Barge Cap Installation Screw the front and rear corner flashings at 600mm centres with 10x16mm self drilling screws. Corner Fix the front and rear barge capping to the roof sheets. flashings will require notching in line with the rafter pitch. Lap the barges at the ridge line and trim the outside piece to a vertical edge for a neat appearance.
-
Page 12: Maintenance
MAINTENANCE Your Stratco Homeshed will maintain its good looks for even longer with a simple wash and wipe down with a soft broom. Stratco Homesheds are produced from the highest quality materials and will provide many years of service if the important recommendations set out in the Stratco ‘Selection, Use and Maintenance’...
Need help?
Do you have a question about the Gable Homesheds and is the answer not in the manual?
Questions and answers