Miele CVA 4080 Operating And Installation Manual
Built-in coffee machine
Hide thumbs
Also See for CVA 4080:
- Operating and installation manual (88 pages) ,
- Technical information (131 pages)
Table of Contents

Related Manuals for Miele CVA 4080


Summary of Contents for Miele CVA 4080
- Page 1 Operating and installation instructions Built-in coffee machine CVA 4080 en - GB To avoid the risk of accidents or damage to the machine, it is essential to read these instructions before it is installed and used for the first time.
-
Page 2: Table Of Contents
Contents Caring for the environment ......... . 5 Description of the machine . - Page 3 Contents Settings: Customising your machine ....... . 29 Selecting a language ..........30 Time of day .
- Page 4 Contents Cleaning and care ..........51 Rinsing .
-
Page 5: Caring For The Environment
Caring for the environment Disposal of the packing Disposal of your old machine material Electrical and electronic machines often contain materials which, if The transport and protective packing handled or disposed of incorrectly, has been selected from materials which could be potentially hazardous to are environmentally friendly for human health and to the environment. -
Page 6: Description Of The Machine
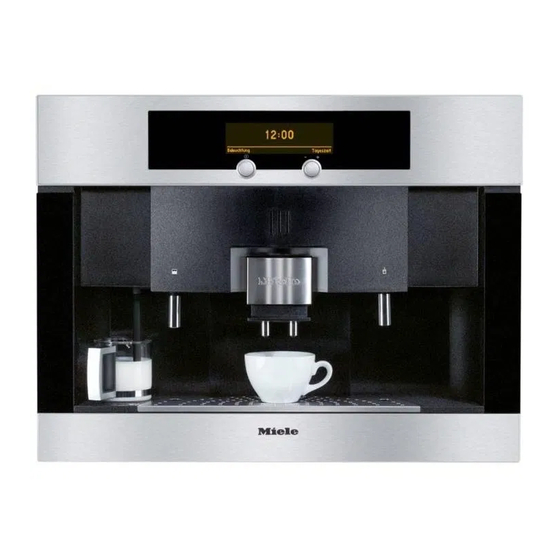
Description of the machine External view a Operating sensor controls. Lowest sensor = On / Off b Display c Operating sensor controls. Lowest sensor "+ C" = Clear d Upper lighting e Door handle f Hot water spout g Lower lighting h Plastic grille i Drip tray cover j Coffee spouts, height-adjustable... - Page 7 Description of the machine Interior view a Master switch b Ground coffee chute cover c Ground coffee chute d Slide control to select fineness of ground coffee e Coffee bean container f Drip tray with grid for easier carrying g Water container h Brew unit i Waste container...
-
Page 8: Warning And Safety Instructions
Warning and safety instructions Safety with children This machine conforms with all Keep children away from the relevant legal safety requirements. machine at all times. It is not a toy! To Improper use can, however, lead to avoid the risk of injury do not allow personal injury and damage to children to play with it or to use the property. - Page 9 The second electrical connection when Miele replacement parts are socket on the back of the machine may used. only be used for connecting a Miele EGW 4000-14 or 4000-29 plate warmer. The machine is only completely Connecting any other appliance would isolated from the electricity supply damage the machine.
-
Page 10: Correct Use
Sugar can damage the coffee Only use the descaling tablets machine. Only use pure coffee beans. supplied by Miele and follow the Do not use coffee beans which have instructions on the packet carefully. been treated with anything containing... - Page 11 Warning and safety instructions Depending on the natural oil content of the coffee used, the brew unit could become blocked. It is important therefore to clean the brew unit with a cleaning tablet after approx. 200 coffees. (A reminder will appear in the display).
-
Page 12: Brief Description
Brief description This machine can be used to prepare If two cups of coffee or espresso are espresso, coffee, cappuccino, milk required at the same time, the sensor froth and hot water . next to "2 portions" must be pressed twice briefly. - Page 13 Brief description To ensure that the flavour can develop fully and be maintained for longer the machine has an additional function to automatically rinse and pre-warm the system when the machine is cold. The same function is used to flush coffee remains out of the system and the spouts after use.
-
Page 14: Operating The Coffee Machine
Operating the coffee machine The following notes should help you get to know your coffee machine before starting to use it. Sensor controls This machine has sensor controls which react to touch. To operate the machine you only need to touch the relevant sensor. -
Page 15: Switching Off
Operating the coffee machine The welcome screen will be displayed each time the machine is switched on until the 5 drinks (including steam) have been prepared: Míele Willkommen When you use the machine for the very first time you will be prompted to select a language. -
Page 16: Adding Water, Coffee Beans Or Ground Coffee
Adding water, coffee beans or ground coffee Please clean the machine thoroughly before filling the water container and the coffee bean container, (see "Cleaning and care"). Filling the water tank The quality of the water plays an important part in the overall quality of the coffee. -
Page 17: Filling The Coffee Bean Container
Adding water, coffee beans or ground coffee ^ Take off the lid and fill the water container with cold, clean tap water up to the "Max." mark. A valve at the front of the water container will ensure that water cannot escape. ^ Put the lid back on and replace the container in the machine, pushing it right to the back until it clicks into position. -
Page 18: Adding Ground Coffee
Adding water, coffee beans or ground coffee Adding ground coffee If you want to use ready ground coffee, you can add ground coffee to the specially designed coffee chute. To do this: ^ Pull the cover for the coffee chute right out of the machine and open up the lid (1). -
Page 19: Making Coffee
Making coffee Important: the water piping must be rinsed through every day and the machine cleaned thoroughly before the first drink of coffee is prepared. Rinsing will take place automatically if the Automatic rinsing programme option has been set to "On" and the machine is cold. Hot water will run out of both spouts into the drip tray once the machine has heated up. -
Page 20: Pre-Warming Cups
Making coffee Pre-warming cups The cups should always be pre-warmed to allow the flavour to develop and be retained. The aroma of espresso does not react well to cold. The smaller the volume of coffee/espresso, the more important it is to pre-warm the cup. Use a plate warming drawer if you have one. -
Page 21: Preparing Espresso And Coffee From Freshly Ground Beans
Making coffee Preparing espresso and coffee from freshly ground beans ^ Place a cup under the coffee spouts. The coffee is always dispensed simultaneously from both spouts. ^ Touch the sensor beside espresso or coffee. The machine will now grind the coffee beans, pre-brew the ground coffee (if the programme option "Pre-brewing"... -
Page 22: To Prepare Two Cups At The Same Time
Making coffee To prepare two cups at the same time ^ Place a cup under each of the coffee spouts. ^ Touch the sensor beside espresso or coffee, and then touch the sensor beside "2 portions". The machine will now prepare a second portion of espresso or coffee a few seconds after the first one. - Page 23 Making coffee If you have not added any ground coffee, you must select "No". Otherwise the machine will assume that there is ground coffee in the chute and so only water will be dispensed the next time coffee is made! ^ Place a cup under the coffee spouts.
-
Page 24: Cappuccino And Milk Froth
Making coffee Cappuccino and milk froth Using for the first time or after descaling Before the coffee machine leaves the factory, the pipework is completely pumped out. This also happens during the descaling process. For this reason, water must be pumped into the pipework before using the machine to make a cappuccino or to froth milk for the first time or after descaling: ^ Place an empty cup under the Cappuccinatore spout. -
Page 25: Cappuccino
Making coffee Cappuccino To prepare a cappuccino you will need a large china or porcelain cup and a jug of milk. Froth is best made from cold milk. Any type of milk (cows, goats, rice, soya, etc) can be used to make froth. -
Page 26: Frothing Milk And Preparing Coffee / Espresso At The Same Time
Making coffee The machine begins to froth the milk, stops briefly and then some frothed milk is dispensed into the stainless steel jug. When you have sufficient frothed milk in the stainless steel jug, stop the milk frothing process by touching the sensor beside "ok". -
Page 27: Setting The Coffee Grinder
Setting the coffee grinder A good espresso or coffee with a thick, even crema (froth) depends not only on the quality, pressure and temperature of the water and the quality of the coffee beans, but also on the quantity of beans and how finely they are ground. The crema should have an even colour with dark stripes running through it. - Page 28 Setting the coffee grinder To alter the grinder setting ^ push the slide control to the left (for finer grinding) or to the right (for coarser grinding). You should be able to feel the notches when moving the slide control. If the slide refuses to move: ^ close the machine and dispense a cup of espresso coffee.
-
Page 29: Settings: Customising Your Machine
Settings: Customising your machine It is easy to customise your machine to suit your exact requirements. The following settings are available: Language: Czech, Danish, German, English, Spanish, French, Italian, Hungarian, Dutch, Norwegian, Polish, Portuguese, Finnish, Swedish, Turkish, Greek and Russian Time of day: You can set either a 24 hour or 12 hour clock and choose to have the Time of day display on or off Timer: You can activate the Timer and also adjust the... -
Page 30: Selecting A Language
Settings: Customising your machine Buzzer tones: Volume, Keypad tones Plate warmer: Automatic, On, Off Factory default: All settings, User profiles A more detailed explanation of the programme options is given in the individual sections. Selecting a language If you want to change the language used in the display, use the Settings menu and follow the flag symbol. -
Page 31: Time Of Day
Settings: Customising your machine Time of day ^ Touch the upper or lower sensor on the right until "Settings" is visible in the left of the display. ^ Touch the sensor beside "Settings". Settings ß Language F ß Time of day ß... -
Page 32: Setting The Time Of Day
Settings: Customising your machine Setting the time of day ^ Touch the sensor beside "Set". ^ First set the hours by touching the sensors on the right beside "+" or "-". Then touch the sensor beside "ok". ^ Now set the minutes by touching the sensors on the right beside "+"... -
Page 33: Switch Off After
Settings: Customising your machine If rinsing is set to "On", the machine will automatically carry out a brief rinse when it switches itself on. If the machine has switched itself on automatically 3 times and no drinks or hot water have been dispensed, the machine will not switch itself on again automatically! The programmed times will, however, remain in memory and can be reactivated after manually switching the machine... -
Page 34: Activate
Settings: Customising your machine ^ Touch the sensor beside "ok". If you activate the Timer, the coffee machine will switch off every day at the time you have set. If rinsing is set to "On" and the machine has been used for making drinks, it will automatically carry out a brief rinse before it switches itself off. -
Page 35: Create
Settings: Customising your machine Create To create a new User profile, ^ Touch the sensor beside "Create". ^ Touch the middle sensor on the right or left of the display until the first letter is highlighted. Then touch the sensor beside "Select character". -
Page 36: Change
Settings: Customising your machine Change You can programme the machine so that it always reverts to the Standard profile or so that it continues to operate using a User profile you have set. To set the profile to be used: ^ touch the sensor beside "Change". -
Page 37: Amount Of Coffee
Settings: Customising your machine Amount of coffee Both the flavour and the crema on the coffee depend on the quantity of ground coffee used. 6 to 14 grams of coffee beans are used per cup, depending on the type of coffee. The greater the quantity, the stronger the espresso, coffee or cappuccino. -
Page 38: Temperature
Settings: Customising your machine When the pre-brewing function is switched on, the freshly ground coffee is first moistened with a little hot water. Then the remaining water is forced through the moistened coffee at high pressure. When the pre-brewing function is switched off, the hot water is forced through the coffee immediately. -
Page 39: Automatic Rinsing
Settings: Customising your machine Settings ß Amount of coffee ß Pre-brewing ß Temperature ^ Touch the sensor beside "Temperature". You can set different temperatures for espresso, coffee, cappuccino and hot water. ^ Touch the sensor beside the type of drink for which you want to set the temperature. -
Page 40: Steam System
Settings: Customising your machine Settings ß Pre-brewing ß Temperature ß Automatic rinsing ^ Touch the sensor beside "Automatic rinsing". A tick will appear to show if the Automatic rinsing option is on or off. ^ Touch the sensor beside "On" or "Off" and then touch the sensor beside "ok"... -
Page 41: Lighting (With The Machine Switched On)
Settings: Customising your machine Lighting (with the machine switched on) The "Lighting" option in the "Settings" menu allows you to decide which type of lighting to have when the machine is switched on. The lighting can be switched on automatically, switched off or even dimmed. -
Page 42: Lighting (With The Machine Switched Off)
Settings: Customising your machine Lighting (with the machine switched off) 14:18 ß Lighting W ß "Lighting" in the initial menu (which is only visible if the time of day display has been set) allows you to select the type of lighting for when the machine is switched off. -
Page 43: Displaying The Number Of Cups Of Coffee Already Dispensed
Settings: Customising your machine These are the same as the settings for "Dim" when the machine is switched on. Touch the sensor beside "ok" to save the settings. Touch "+ C" to return to the previous options. Displaying the number of cups of coffee already dispensed (Total no. -
Page 44: Setting The Water Hardness
Settings: Customising your machine ^ Touch the sensor beside "On" and then the sensor beside "ok". The machine is now locked and cannot dispense. A closed lock symbol X will appear in the display. To deactivate the system lock ^ Touch the lower sensor on the right beside X. ^ Touch the sensor beside "Off"... - Page 45 Settings: Customising your machine ^ Dip the strip in your drinking water for approximately a second, then shake off any excess water. The result will be evident after about a minute. If the water is harder than 40 °d / 7.0 mmol/l, limescale will build up more rapidy than with soft water.
-
Page 46: Main Menu (Changing The Order)
Settings: Customising your machine ^ Touch the upper or middle sensor on the right until the correct water hardness is visible on the left of the display. ^ Touch the sensor beside the correct water hardness. A tick will appear beside the water hardness which is currently set. -
Page 47: Display
Settings: Customising your machine Display You can adjust both the contrast and the brightness of the display: ^ Touch the sensor beside "Settings". Settings ß User profile ß Main menu ß Display ^ Touch the sensor beside "Display". ^ Touch the sensor beside Contrast or Brightness and set the level with the middle sensor on the right or left of the display. -
Page 48: Plate Warmer
Settings: Customising your machine Plate warmer You can connect a Miele EGW 4000-14 or EGW 4000-29 plate warmer to the coffee machine using a special connection cable available as an optional accessory from your Miele Dealer or the Miele Spare Parts Department. -
Page 49: Factory Default
Settings: Customising your machine Factory default Selecting "Factory default" will take you into the sub-menu. You can then select whether you want to reset All settings back to the factory default settings (Timer, Automatic rinsing, Steam system, Lighting, System lock, Water hardness, Display, Plate warmer, the most recently selected type of coffee, User profiles and all the Standard settings), or to delete the User profiles. -
Page 50: Setting The Portion Sizes
Setting the portion sizes The flavour of the coffee produced depends on the type of coffee, the amount of coffee used, how finely the beans are ground and particularly, the quantity of water used. Not all cups are the same size. To ensure the machine uses the right amount of water to suit your taste and your cups, you can programme in the amount to be used. -
Page 51: Cleaning And Care
Cleaning and care Always allow the machine to cool down before cleaning. Danger of scalding. Do not clean the machine with a steam cleaner as this will damage the machine. Never use cleaners containing chlorides, acids, soda or scouring agents. These would damage the surface. It is important to clean the machine regularly, as the used coffee grounds will soon go mouldy. -
Page 52: Water Container
Cleaning and care Water container Empty the water container daily and fill with fresh, cold drinking water just before use. When cleaning, make sure that there is no soiling in the area around the valve. Otherwise the container will not sit correctly and this could result in water leaking from the machine. -
Page 53: Drip Tray
Cleaning and care ^ Also clean the now accessible area in the machine where the waste container sits, thoroughly. ^ Push the waste container fully back into the machine. Drip tray There is a sensor in the drip tray which causes a message to appear in the display when the drip tray is full and needs to be emptied. -
Page 54: Grille With Drip Tray Cover
Cleaning and care ^ Push the drip tray with the grid along the right hand edge back into the machine. ^ Close the machine door. Grille with drip tray cover ^ Take the grille and drip tray cover out and wash them. Coffee bean container The coffee bean container must be cleaned by hand with hot water and a little washing-up liquid. -
Page 55: Coffee Outlet Connection
Cleaning and care Coffee outlet connection The part which connects the brew unit and the coffee outlet is located on the inside of the machine door. ^ Clean this connection regularly with a damp cloth, taking care not to wipe the grease off the seal. ^ Lubricate the seal at least once a month with the grease supplied. -
Page 56: Brew Unit
Cleaning and care Brew unit The brew unit must be cleaned manually once a week because the moving parts are lubricated and the rubber seals could become brittle in a dishwasher. ^ Remove the water container, waste container and the coffee chute cover. - Page 57 Cleaning and care ^ Wipe any remaining coffee off the two filters. One filter is located in the funnel a and the other to the left of the funnel b. ^ Dry the funnel area a to prevent ground coffee from sticking to it.
-
Page 58: Degreasing The Brew Unit
These have been specially formulated for use in this coffee machine and are available from your Miele Dealer, from the Miele Spare Parts Department, or via the internet (depending on country). To remind you to degrease the brew unit, the message "Please run the cleaning programme"... -
Page 59: Cappuccinatore
Cleaning and care When Please place a cleaning tablet in the ground coffee chute appears in the display, ^ Remove the coffee chute cover and open the lid of the coffee chute. ^ Place a cleaning tablet into the coffee chute. ^ Close the lid, replace the coffee chute cover and close the machine door. -
Page 60: Thorough Cleaning In The Dishwasher
Cleaning and care ^ Touch the sensor beside "Maintenance". ^ Touch the sensor beside "Rinse Cappuccinatore". ^ Place a glass of water under the suction tube and a descaling funnel under the Cappuccinatore spout to direct the water safely into the drip tray and touch the sensor beside "ok". - Page 61 Cleaning and care ^ Dismantle the parts. Remove the part with the seals by turning and then pulling it. ^ Wash the parts in the dishwasher. After cleaning, lubricate the seals with the grease supplied. Make absolutely sure that none of the small holes in the parts are blocked (see arrow).
- Page 62 Cleaning and care ^ that all the guide points line up. ^ Place the Cappuccinatore in the machine from below a and turn the cover above the spout in the direction of the arrow b. Do not use the machine without the Cappuccinatore in place.
-
Page 63: Machine Front
Make sure that no water penetrates behind the display. E-Cloth A microfibre "E-Cloth" is available from the Miele UK Spare Parts Department, or via the internet (depending on country), which is suitable for cleaning surfaces such as stainless steel, glass, plastic and chrome without the use of chemicals. -
Page 64: Stainless Steel Fronts
Stainless steel fronts The machine front is susceptible to scratches and abrasion. Stainless steel surfaces can be cleaned using a Miele E-Cloth or with a proprietary non-abrasive cleaning agent designed specifically for use on stainless steel. N.B. Do not use stainless steel cleaning agents on the controls. -
Page 65: Descaling The Machine
These have been specially formulated for use in this coffee machine and are available from your Miele dealer, the Miele Spare Parts Department, or via the internet (depending on country). Other types of descaling agents will damage the machine and affect the taste. -
Page 66: To Run The Descaling Programme
Descaling the machine To run the descaling programme ^ If you want to descale the machine before it has heated up touch the sensor beside "Descale" in the initial menu to begin the descaling programme. ^ If you want to descale the machine without being prompted to do so by the reminder (because your water is very hard, for example), select the "Maintenance"... - Page 67 Descaling the machine ^ Fit the descaling funnels under the spouts as illustrated. The bottom of the funnel fits into the drip tray to enable the descaling agent to be collected in it. During the descaling programme, water containing descaling agent will run out of the hot water and the cappuccinatore spouts.
-
Page 68: Problem Solving Guide
^ Is the machine locked? ^ Has the lighting been switched off (see "Settings, Lighting")? ^ If not, then the lighting is defective. Call the Miele Service Department..the heating-up phase takes too long. If the door is opened during the heating-up phase, e.g. to fill the water container, the heating elements switch off. - Page 69 Problem solving guide . . . the machine suddenly switches itself off. The machine will switch itself off automatically after a certain length of time if it is not being used. This time depends on the switch off time which has been programmed. The water temperature could be too high.
- Page 70 There could be stones in amongst the coffee beans. ^ Switch the machine off immediately. ^ Contact the Miele Service Department..the coffee grinder makes less noise than usual. The coffee bean container is empty. A message will soon appear in the display.
- Page 71 Problem solving guide ^ Select a slightly coarser coffee grinder setting or a lower setting for the amount of coffee to be ground..the machine door will not close. ^ Are the containers in position correctly? . . . the steam system is switched off but steam is still available.
- Page 72 If the slide control for the grinder is set to very fine, too much residual "coffee water" can be left in the waste container. ^ If a very fine grinder setting has not been set, call the Miele Service Department.
- Page 73 Problem solving guide . . . the coffee machine makes loud noises during the descaling programme. During the descaling programme you will hear loud noises as water is flushed through the machine under high pressure. These are no cause for concern. .
- Page 74 If this fault message still continues to appear in the display, repeat the steps described above. If despite this, the fault message still appears in the display, call the Miele Service Department..the seal on the connection between the coffee outlet and the brew unit is damaged and is leaking.
- Page 75 (see "Cleaning and care - Brew unit"). ^ Replace the brew unit in the machine and close the door. If this fault message still continues to appear in the display, please call the Miele Service department, quoting the fault code.
- Page 76 Problem solving guide . . . the ground coffee chute cover cannot be pushed in properly. ^ Is the lid of the ground coffee chute closed? . . . it is not possible to make coffee/espresso using ground coffee. ^ Before making coffee or espresso using ready ground coffee, ensure that the main menu is showing in the display.
-
Page 77: After Sales Service
In the event of a fault which you cannot correct yourself, please contact: – your Miele Dealer – the Miele Service Department (see back cover for address). When contacting your Dealer or the Service Department, please quote the model and serial number of your machine. -
Page 78: Electrical Connection U.k., Za, Irl
Electrical connection U.K., ZA, IRL All electrical work should be carried out by a suitably qualified and competent person only, in strict accordance with current national and local safety regulations (BS 7671 in the UK). Installation, repairs and other work by unqualified persons could be dangerous. - Page 79 Electrical connection U.K., ZA, IRL Non-rewireable plugs BS 1363 The fuse cover must be refitted when changing the fuse, and if the fuse cover is lost, the plug must not be used until a suitable replacement is obtained. The colour of the correct replacement cover is that of the coloured insert in the base of the plug, or the colour that is embossed in words on the base of the plug (as applicable to the design of plug fitted).
-
Page 80: Installation
If the coffee machine is to be built in above another appliance, there must be a full-width, closed shelf between them (except when it is combined with a Miele built-in plate warming drawer). The plate warmer can be connected directly to a socket at... -
Page 81: Installation
Installation Installation Before installation make sure that there is no power supply to the machine. This also applies should it ever need to be taken out of its housing unit. The machine must be built in before it is operated. Two allen keys (size 3 and 5) are required for installation. - Page 82 Installation ^ Push it all the way into the niche until you feel resistance. ^ Open the machine door and partially tighten the side socket screws. ^ Carefully turn the lower socket screws a to centre the machine in the niche. ^ Tighten both upper socket screws b by hand to secure the machine in the unit.
-
Page 83: Adjusting The Door Hinges
Installation Adjusting the door hinges If the machine door becomes difficult to open or close after installation you can adjust the hinges to realign it: ^ To adjust the door in direction a, turn screw a. ^ To adjust the door forwards or backwards, (direction b), turn screw b. - Page 84 Alteration rights reserved / 2407 M.-Nr. 07 120 790 / 00 CVA 4080...
Need help?
Do you have a question about the CVA 4080 and is the answer not in the manual?
Questions and answers