
Related Manuals for ADDER AdderLink X2


Summary of Contents for ADDER AdderLink X2
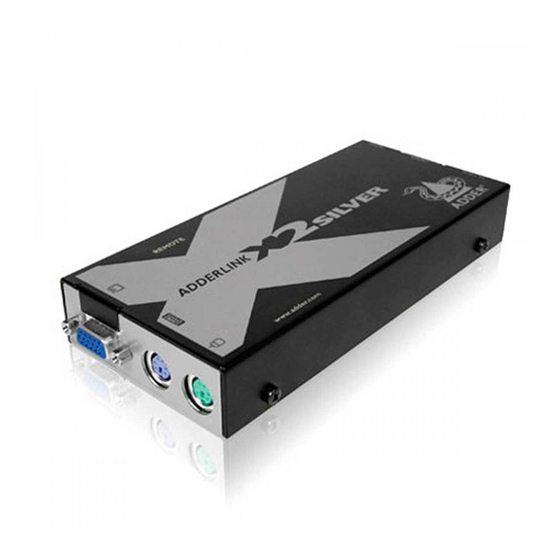
- Page 1 AdderLink X2-Series Remote Extenders ...
-
Page 2: Table Of Contents
Contents Welcome Special configuration Introduction .................2 Configuration ................11 Supplied items ................3 What are hotkeys? ............11 Entering, using and exiting configuration mode...11 Installation and operation Password setting ..............12 Password override..............12 Installation ...................4 Hot plugging and mouse restoration ........13 Stage A - Configuration switch settings ........4 Which restore setting do I use?........13 LOCAL module switches.............4 Microsoft and Logitech -specific mouse settings ....13... -
Page 3: Introduction
Welcome Introduction Thank you for choosing one of the AdderLink X2-Series products. These This table indicates the functional differences between the three variants within compact modules allow you to place the controlling keyboard, video monitor, the X2-Series: mouse and a serial device up to 300 metres from a computer system. The range... -
Page 4: Supplied Items
Supplied items Optional power supply connection Connection from Switch bank to computer RS232 determine certain serial port modes and functions Connection to REMOTE module Power Multi-cable for keyboard, and signal video, mouse and (X2-Gold activity only) audio connections indicator between computer and LOCAL module LOCAL X2 module Multi-cable... -
Page 5: Installation And Operation
ON: Set transparent mode. Use this setting if the GOLD modules are to be used with KVM switches that are not manufactured by Adder Technology. LOCAL module switches Cascaded KVM switches often use special signals to set or identify OFF: Normal operation conditions. -
Page 6: Remote Module Switches
REMOTE module switches REMOTE module switches (continued) REMOTE Switch 1 Determines configuration of hotkeys in conjunction OFF: Normal operation. with switch 3 ON: (Before power is applied) Places the REMOTE module into flash upgrade Reserved for mode so that the internal software can be changed. Please see the ‘Flash future use upgrade’... -
Page 7: Stage B - Mounting A Module - Desk Or Rack
Stage B - Mounting a module – desk or rack Installation Advice • For correct operation, the local and remote units must have ground The X2-Series extender modules can be situated on a desk (or floor) or connections. At the computer end, ensure that the computer or KVM switch alternatively, for larger installations, mounted within optional rack mount chassis that the LOCAL module is connected to has a ground connection. -
Page 8: Stage C - Connections
Pink (or maroon) the host system. If the keyboard connection will not be used then you will need to use an external power supply of the same type used for the REMOTE module. These are available from your Adder supplier. -
Page 9: Connections At The Remote Module
Connections at the REMOTE module Keyboard, video and mouse connections Twisted pair, power and serial connections The connections to the keyboard, video monitor and mouse are all made to the 1 Insert the connector sockets at one end of the REMOTE module. from the twisted pair cable link into the 1 Attach the lead from... - Page 10 Audio connections (X2-Gold only) On the X2-Gold REMOTE module, audio connections are available at the two Note: When the X2-Gold REMOTE module 3.5” jack sockets mounted on the side (same side as the switch bank). Note: is rack mounted, the audio connections must be made after the module has been The microphone input (labelled ) has a dual function whereby it can either...
-
Page 11: Operation
Operation Locking and unlocking the system Power and activity indicators In situations where the computer system (and the LOCAL module) can be locked On the front panel of both modules are small recessed indicators which away the X2-Series extender modules offer a viable security system to deter provide confirmation of power and unauthorised use. -
Page 12: Special Configuration
Special configuration Configuration Entering, using and exiting configuration mode You can alter the way that the X2-Series modules operate to suit your To enter and use configuration mode: requirements. This is done using the Configuration mode and you can affect the 1 Simultaneously press the currently configured following settings: hotkeys (by default,... -
Page 13: Password Setting
Password setting Password override Password protection allows you restrict access to the system only to authorised This mode allows you to override the password that has been set at the REMOTE personnel. A password first needs to be set and then, using the keyboard module and place it into configuration mode so that a new one may be set. -
Page 14: Hot Plugging And Mouse Restoration
Hot plugging and mouse restoration To restore mouse operation when hot plugging: It is strongly recommended that you switch off the computer system before attempting to connect it via the X2-Series extender modules. However, if this is 1 Carefully connect the X2-Series extender modules to the system and its keyboard, mouse, monitor, audio and serial device. -
Page 15: Image Controls - Sharpness And Brightness
Image controls - sharpness and brightness To use the image controls The X2-Series extender modules incorporate special controls to compensate for losses incurred within long cable links. Using these controls you can adjust the 1 Simultaneously, press the hotkeys (by default, ) along with to enter configuration mode. -
Page 16: Skew Adjustment (X2-Silver And X2-Gold Only)
To use skew adjustment Restore default 1 Insert the supplied Adder Installation CD-ROM into the CD player of the skew computer. settings 2 Within Windows, use the My Computer option (usually available as a desktop icon or within the Start menu) to view the contents of the CD-ROM. -
Page 17: Miscellaneous Settings
Miscellaneous settings The following are configuration settings within the modules that are not covered in other sections of this guide. These can be achieved once within configuration mode by pressing the indicated keys: Report X2-Series extender firmware version - Before initiating this command, ensure that the system is running an application that can display typed keys as screen characters - e.g. -
Page 18: Flash Upgrade
Adder products, software upgrades are occasionally made available. The existing contents that are no longer required. The write protect tab must be LOCAL and REMOTE modules both contain internal flash memory and Adder’s moved to the ‘unprotected’ position. Depending on your operating system, use... -
Page 19: Stage E - Return All Connections To Their Usual States
Stage C - Reconfigure the LOCAL connections and begin Stage D - Reconfigure the REMOTE connections and begin 1 On the computer from which you will run the upgrade, ensure that its BIOS 1 Disconnect all cables from the REMOTE module and take it to the computer. settings will allow it to boot from the floppy diskette drive, rather than 2 Use a ‘KVM switch-type’... -
Page 20: Further Information
Troubleshooting section then we provide a number of other solutions: • Check that the Category 5 (or higher) cable is wired correctly as per the diagram in the ‘Skew adjustment’ section in the ‘Special Configuration’ • Adder Technology website – www.adder.com chapter. -
Page 21: Safety Information
If the product should fail to operate correctly in normal use during the • single slot blanking plate (part code: X-RMK-BLANK) warranty period, Adder will replace or repair it free of charge. No liability can be • quad slot blanking plate (part code: X-RMK-BLANK4) accepted for damage due to misuse or circumstances outside Adder’s control. -
Page 22: Radio Frequency Energy
Radio Frequency Energy A Category 5 (or better) twisted pair cable must be used to connect the X2 modules in order to maintain compliance with radio frequency energy emission regulations and ensure a suitably high level of immunity to electromagnetic disturbances. - Page 23 © 2005 Adder Technology Limited All trademarks are acknowledged. Release 1.2c March 2005 Part No. ADD0056 Adder Technology Limited, Adder Corporation, Technology House, 29 Water Street, Newburyport, Trafalgar Way, Bar Hill, MA 01950, Cambridge, CB3 8SQ, United States of America...
Need help?
Do you have a question about the AdderLink X2 and is the answer not in the manual?
Questions and answers