Table of Contents
Advertisement
Quick Links
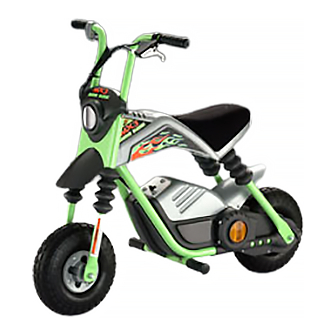
Product features may vary from this picture.
Protective equipment not included.
Please read this manual and save it with your original sales receipt.
Tools needed for assembly (not included): Two Adjustable Wrenches (or one Adjustable Wrench
and a
7
/
" Wrench and
9
/
" Wrench), Pliers, Phillips Screwdriver, and Safety Scissors.
16
16
Tool needed for assembly (included): Allen Wrench.
Use only with a Power Wheels
®
12 Volt Lead-Acid Rechargeable Battery and
a Power Wheels
®
12 Volt Charger with Type "12V" Connector (both included).
Fisher-Price, Power Wheels, and Power Wheels by Fisher-Price are U.S. trademarks of Mattel, Inc.
Owner's Manual
with Assembly Instructions
For Model 73535
Advertisement
Table of Contents

Related Manuals for Fisher-Price MX3 73535


Summary of Contents for Fisher-Price MX3 73535
- Page 1 12 Volt Lead-Acid Rechargeable Battery and a Power Wheels ® 12 Volt Charger with Type “12V” Connector (both included). Fisher-Price, Power Wheels, and Power Wheels by Fisher-Price are U.S. trademarks of Mattel, Inc. Owner's Manual with Assembly Instructions For Model 73535...
-
Page 2: Table Of Contents
• Your child must have experience and skill at riding a two wheel bicycle without training wheels before using this mini-bike. • This mini-bike is designed for use on dirt, grass or other hard surfaces;... -
Page 3: Electrical Hazard
ELECTRICAL HAZARD • Battery can fall out and injure a child if vehicle tips over. Always use battery clamp (cover). • PREVENT FIRE - Never modify the electrical system. Alterations could cause a fire resulting in serious injury and could also ruin the electrical system. - Use of the wrong type battery or charger could cause a fire or explosion resulting in serious injury. -
Page 4: Parts
• If you experience a problem with this product, or are missing a part, please call us at 1-800-348-0751, rather than return this product to the store. • Please identify all parts before assembly and save all packaging material until assembly is complete to ensure that no parts are discarded. -
Page 5: Battery Charging
ELECTRICAL HAZARD WARNING • Battery can fall out and injure a child if mini-bike tips over. Always use battery clamp (cover). • PREVENT FIRE - Never modify the electrical system. Alterations could cause a fire resulting in serious injury and could also ruin the electrical system. - Page 6 IMPORTANT! • Your new battery must be charged for at least 18 hours before you use it in your mini-bike for the first time. We recommend that you start charging your battery before beginning assembly of your new mini-bike. • The battery must be upright while charging. •...
-
Page 7: Assembly
WARNING Children can be harmed by small parts, sharp edges and sharp points in the mini- bike’s unassembled state, or by electrical items. Care should be taken in unpacking and assembly of the mini-bike. Children should not handle parts, including the battery, or help in assembly of the mini-bike. - Page 8 " Bolt - 2 BOTH SHOWN ACTUAL SIZE • Lift a handlebar to align the hole in the handlebar with the hole in the front fork. • Insert a 1 " screw through the outer edge of the front fork, handlebar and then out the inner edge of the front fork.
- Page 9 Foot Peg " Bolt - 2 BOTH SHOWN ACTUAL SIZE • Fit a foot peg to the end of the bar on the bottom of the mini-bike. • Turn the foot peg to align the hole in the foot peg with the hole in the bar.
- Page 10 Spacer Front Wheel • Fit a spacer into the hole on each side of the front wheel. Front Fork Ends Front Wheel • Fit the front wheel (with spacers inserted) between the ends of the front fork. • Insert the axle through one side of the front fork, the front wheel and out through the other side of the front fork.
-
Page 11: Adjusting The Brake
IMPORTANT! Check to be sure the brake is adjusted properly and is tight. Please follow these instructions carefully before you use this mini-bike. No Gap ✔ • From the front of the handlebar, examine the brake handle and the brake base. - If there is NO gap between the brake base and the brake handle, your brake is properly adjusted. -
Page 12: Adjusting The Brakes
Brake Compartment Cover • Turn the mini-bike on its side. • Loosen and remove the screws in the brake compartment cover. Brake Compartment • Turn the mini-bike over and remove the other two screws in the brake compartment cover. • Remove the brake compartment cover and locate brake cable, lock nut and adjustable knob. -
Page 13: Label Decoration
Label Decoration Proper label application will help to keep the labels looking their best! When applying labels, keep the following guidelines in mind: • Wash your hands before applying the labels. • Before applying the labels, wipe the surface of the mini-bike with a clean, dry cloth to remove any dust or oils. •... -
Page 14: Battery Installation
IMPORTANT! Use only a Power Wheels Use of any other battery will damage your mini-bike. Make sure that you charge the battery for at least 18 hours using the enclosed Power Wheels ® 12 volt charger before operating your mini-bike for the first time. Charge the battery for at least 14 hours after each use of the mini-bike. -
Page 15: Battery Care And Disposal
Care If a battery leak develops, avoid contact with the leaking acid and place the damaged battery in a plastic bag. See information on this page for proper disposal. If acid comes in contact with skin or eyes, flush with cool water for at least 15 minutes and call a physician. -
Page 16: Rules For Safe Riding
IMPORTANT! Please carefully read the owner’s information in this manual and teach your child about proper mini-bike operation and rules for safe riding before allowing operation of this mini-bike. RIDING RULES WARNING Direct Adult Supervision Required • To prevent injury, keep away from cars, streets, steep inclines, steps, swimming pools and other bodies of water. -
Page 17: How To Operate Your Mini-Bike
How to Operate Your Mini-Bike IMPORTANT! For a smooth start, place one foot on a foot peg and push off a few steps with the other foot. • Press the throttle button and then place your other foot on the other foot peg. •... -
Page 18: Caring For Your Mini-Bike
Tire Valve • Maximum tire air pressure is 30 lbs. • Do not over inflate the tires. • Check all screws, cap nuts and protective coverings regularly and tighten as required. Check plastic parts on a regular basis for cracks or broken pieces. •... -
Page 19: Problems And Solutions Guide
Problems and Solutions Guide IMPORTANT! If you experience a problem with your mini-bike, first check the Problems and Solutions Guide below. If you still experience a problem, please contact Power Wheels between 8 AM and 6 PM (EST) Monday through Friday. Or, contact your local Power Wheels For the location nearest you, please refer to the Authorized Service Center list beginning on page 23. - Page 20 Problems and Solutions Guide Problem Mini-bike was running but Loose wire or loose connectors suddenly stopped Low battery voltage; battery needs charging Tripped thermal fuse Brake is not properly adjusted Short run time (less than Undercharged battery 1 - 3 hours per charge) Overcharged battery Battery is old and will not accept full charge...
- Page 21 Problems and Solutions Guide Problem Mini-bike runs sluggishly Sometimes the mini-bike doesn’t run, but other times it does When the throttle button is pressed, the mini-bike won’t run without a push Charger gets warm during use Battery makes a sizzling or gurgling noise when charging If, after reviewing the Problems and Solutions Guide, the mini-bike still fails to operate, please contact your nearest authorized service center (see page 23) or contact Power Wheels...
-
Page 22: Limited Warranty
*One year limited warranty from the date of purchase on the Power Wheels Six month limited warranty on the 12 volt battery. For the original purchaser, this one year limited warranty covers the Power Wheels Power Wheels ® ) against defects in materials and workmanship. The six month limited warranty applies only to the 12 volt battery included by Power Wheels This warranty covers normal use and does not cover the Power Wheels neglect, accident, abuse, misuse, improper service or other causes not arising out of defects in materials or workmanship. -
Page 23: Authorized Service Centers
WOODSTOCK - All City Appliance Inc., 8477 Highway 92 Suite 110, 30189, (770) 924-2375 HAWAII HONOLULU - McCully Bicycle & Sporting Goods, 932 Hausten Street, 96826, (808) 946-1192 WAILUKU (MAUI) - Tom’s Appliance Sales & Service, 1816 Mill Street, Suite 104, 96793, (808) 244-6278 WAIPAHU - Gary’s Bike World, 94-910 Moloalo Street,... - Page 24 INDIANA EVANSVILLE - Electro Hygiene Co., 1614 S Kentucky, 47714, (812) 425-2671 FT. WAYNE - Southside Vacuum Co. Inc., 3702 South Calhoun Street, 46807, (260) 745-7788, (888) 209-8113 INDIANAPOLIS - Brand Service Center, 1827 N. Meridian Street, 46202, (317) 924-1386 INDIANAPOLIS - Sullivan Hardware Do-It Center, 7021 N.
- Page 25 NEW YORK ALBANY - Lake Electronic Service, 1650 Central Avenue, 12205, (518) 869-8424, (800) 585-3777 BAYSHORE, L.I. - Turnpike Appliance of Suffolk, Inc., 1253 Sunrise Highway, 11706, (631) 665-8311 BRONX - Home Appliance Vacuum Word, 5902 Riverdale Avenue, 10471, (718) 884-4600 BUFFALO (WILLIAMSVILLE) - Hector’s Hardware, 876 Maple Road, 14221, (716) 688-4488 BUFFALO (HAMBURG) - K-Technologies,...
- Page 26 SAN ANTONIO - Texas Shaver & Appliances, 8121 Callaghan Road, 78230, (210) 344-8577 TEMPLE - Master Tech Repairs, 2819 West Avenue North, 76504, (817) 773-8991 WICHITA FALLS - Allens Appliance Service, 2403 10th Street, 76309, (940) 766-2635 UTAH OREM - The Mending Shed, 1735 South State Street, 84058, (801) 225-8012, (800) 339-9297 SALT LAKE CITY - Appliance Service Center, Inc., 1475 South Main, 84115, (801) 467-6361,...
- Page 28 DO NOT Return your Mini-Bike to the Store ! Over 400 Authorized Service Centers Fisher-Price, Inc., a subsidiary of Mattel, Inc., East Aurora, New York 14052 U.S.A. Printed in China If you are missing parts or need assistance, please call us toll-free:...
Need help?
Do you have a question about the MX3 73535 and is the answer not in the manual?
Questions and answers