Table of Contents
Advertisement
Quick Links
Download this manual
See also:
Owner's Manual
Advertisement
Table of Contents

Subscribe to Our Youtube Channel
Related Manuals for Precor 903


Summary of Contents for Precor 903
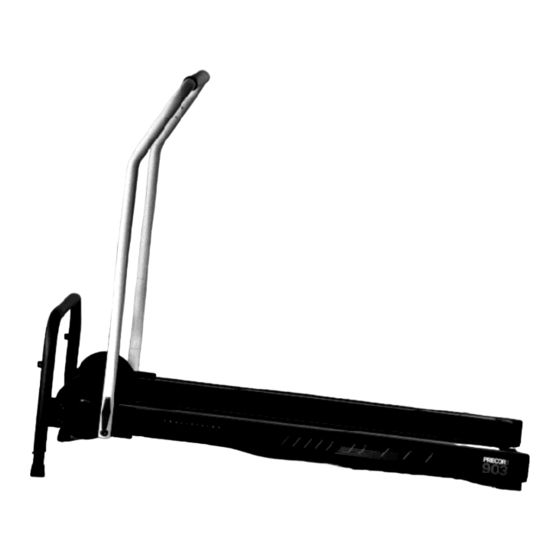
- Page 1 Manual Treadmill Owner’s Manual Assembly and Operation...
-
Page 2: Safety Information
• Do not allow children on or near the 903 treadmill. Do not leave children unsupervised around the treadmill. • Check the 903 treadmill before each use. Be sure all assembly bolts and T-knobs are tightened and secure. -
Page 3: Table Of Contents
Assembly Instructions ................. Adjusting the Elevation Tube ............... Checking the Alignment of the Running Belt ........Using the Precor 903 Manual Treadmill............ 10 Beginning Your Workout ..............10 Ending Your Workout ................10 Working Out on the 903 Treadmill ............10 Adjusting the Resistance Level ............ -
Page 4: Unpacking The 903 Manual Treadmill
CAUTION: Place the hex key 1/4" hex key in a safe and secure place. If If any items are missing, contact your authorized Precor dealer. For the dealer the running belt should move nearest you, call 1-800-4-PRECOR. off-center, you can use the 1/4"... -
Page 5: Assembling The 903 Manual Treadmill
Bothell, WA 98041-3004 • Set up the 903 treadmill on a solid, flat surface. Do not install the treadmill on hardwood floors because the wheels might scratch or damage the surface. If the treadmill is placed on a hardwood floor or a carpeted, deep-pile surface, place a piece of heavy cardboard, plywood, or other smooth, flat surface under the unit to protect the floor and treadmill. - Page 6 Diagram 2 Installing the Front Lift Bar assembly. Flywheel Running belt Washer Bolt Side rail mount Front lift bar Height adjustment pin Locking portion of pin Elevation tube Re-insert the bolts and washers as shown in Diagram 2. Tighten the bolts securely using the hex key provided.
-
Page 7: Adjusting The Elevation Tube
Adjusting the Elevation Tube The elevation tube is set at the factory at the lowest setting. To receive optimal performance, reposition the height adjustment pin by taking the following steps: Determine the proper Elevation Tube setting. (Table 1) The elevation tube provides six different settings. - Page 8 Diagram 4 Placing treadmill onto front lift bar. Micro-adjustment knob Front lift bar Running belt Handrail CAUTION: Be sure that the Position the Treadmill on Its Side. (Diagram 4) Place your hands on T-knobs are secure and locked either side of the handrail and gently tip the treadmill onto its side opposite into position on both sides of the micro-adjustment knob.
-
Page 9: Checking The Alignment Of The Running Belt
Before working out on your treadmill, you need to check the alignment of the running belt. The running belt on the 903 treadmill has been fully adjusted at the factory and should track straight on the deck. However, if the running belt... -
Page 10: Using The Precor 903 Manual Treadmill
In addition to providing an excellent cardiovascular workout, one of the advantages of the 903 Manual Treadmill is that it is simple to use. With very little time or practice, you can learn how to use it effectively. This section provides information about the following areas: •... - Page 11 Photo 1 Working out on the 903. CAUTION: Before beginning To use the 903 treadmill, follow these steps: any fitness program, you Hold onto the handrail and step onto the running belt. should have a complete physical examination by your Begin walking as shown in Photo 1.
-
Page 12: Adjusting The Resistance Level
Micro-adjustment knob Front lift bar T-knob Diagram 6 shows the location of the micro-adjustment knobs on the 903 treadmill. Note: Remember that the running belt should move freely while you maintain a comfortable momentum (without holding onto the handrail). -
Page 13: General Aerobic Training Information
General Aerobic Training Information A workout on the Precor 903 Manual Treadmill provides excellent and efficient cardiovascular conditioning, while strengthening and toning the thighs, calves, and hips. Darkened areas in Diagram 7 indicate the muscles that can be improved. Diagram 7 Muscles exercised during a cycle workout. -
Page 14: How Hard Should I Exercise
Diagram 8 HEART RATE TRAINING ZONE Training zones MAX. HEART RATE 80% OF MAX. HEART RATE 65% OF MAX. HEART RATE YOUR AGE How Hard Should I Exercise? Studies show that to achieve the benefits of aerobic exercise, it is necessary to work out hard enough raise your heart rate to a certain minimum level, called the “training zone.”... -
Page 15: How Long Should I Exercise
Once you locate your pulse, look at the time and count the beats for six seconds. Multiply that number by 10 to determine the total number of beats per minute. For example, if you count 14 beats over six seconds, the total number of beats per minute is 140. -
Page 16: Maintaining The 903 Manual Treadmill
Storing the Treadmill The 903 treadmill has wheels at the rear of the treadmill for moving and storage purposes and provides locking mechanisms for the handrail. To store the treadmill in a horizontal (base on floor) position, keep in mind that you need a vertical clearance of 14 to 20 inches if you plan to store it underneath some- thing. -
Page 17: Aligning The Running Belt
Diagram 9 Storing the treadmill. Deck Side rail Running belt Handrail T-knob Front lift bar CAUTION: Do not try to lift the To store the treadmill in a vertical position as shown in Diagram 9 and free up rear of the treadmill by floor space when the treadmill is not in use, take the following steps: holding onto the rear roller as Follow steps 1 through 3 above to lock the handrail into its lower position... - Page 18 To check the alignment of the running belt, take the following steps: Walk on the treadmill while holding onto the handrail for balance. Observe the running belt for a couple minutes. If the running belt tracks off center or the belt moves toward either flywheel, you need to align the belt.
-
Page 19: Lubricating The Running Belt
Lubrication kits can be obtained through your local dealer. Obtaining Service While servicing the 903 treadmill is possible, do not attempt to service the 903 Manual Treadmill yourself unless you have purchased the 903 Service Manual and carefully read through the servicing instructions. - Page 20 U.S. and foreign patents for both the mechanical construction and the visual aspects of its product design. Any party contemplating the use of Precor’s product designs is hereby forewarned that Precor considers the unauthorized appropriation of its proprietary rights to be a very serious matter.
Need help?
Do you have a question about the 903 and is the answer not in the manual?
Questions and answers