Table of Contents
Advertisement
Rev.: A1
FCC Notes:
This equipment generates, uses, and can radiate radio frequency
energy and, if not installed and used in accordance with the instructions manual, may cause
interference to radio communications. It has been tested and found to comply with limits for a
Class A digital device pursuant to subpart J of Part 15 of FCC Rules, which are designed to
provide reasonable protection against interference when operated in a commercial environment.
Operation of this equipment in a residential area is likely to cause interference in which case the
user at his own expense will be required to take whatever measures to correct the interference.
CE manufacturer's Declaration of Conformity
(EC Council Directive 89/336/EEC of 3 May 1989)
This product has been designed and manufactured in accordance with the International Standards
EN50081-1/01.92 and EN50082-1/01.92 following the provisions of the Electro Magnetic
Compatibility Directive of the European Communities as of May 1989
Warranty Limits:
Warranty terminates automatically when any person other than the authorized technicians opens
the machine. The user should consult his/her dealer for the problem happened. Warranty voids if
the user does not follow the instructions in application of this merchandise. The manufacturer is by
no means responsible for any damage or hazard caused by improper application.
About This Manual:
Posiflex has made every effort for the accuracy of the content in this manual. However, Posiflex
will assume no liability for any technical inaccuracies or editorial or other errors or omissions
contained herein, nor for direct, indirect, incidental, consequential or otherwise damages, including
without limitation loss of data or profits, resulting from the furnishing, performance, or use of this
material.
This information is provided "as is" and Posiflex Technology, Inc. expressly disclaims any
warranties, expressed, implied or statutory, including without limitation implied warranties of
merchantability or fitness for particular purpose, good title and against infringement.
The information in this manual contains only essential hardware concerns for general user and is
subject to change without notice. Posiflex reserves the right to alter product designs, layouts or
drivers without notification. The system integrator shall provide applicative notices and
arrangement for special options utilizing this product. The user may find the most up to date
information
of
the
hardware
from
web
sites:
http://www.posiflex.com
or
http://www.posiflex.com.tw or http://www.posiflexusa.com
All data should be backed-up prior to the installation of any drive unit or storage peripheral.
Posiflex will not be responsible for any loss of data resulting from the use, disuse or misuse of this
or any other Posiflex product.
All rights are strictly reserved. No part of this documentation may be reproduced, stored in a
retrieval system, or transmitted in any form or by any means, electronic, mechanical, photocopying,
or otherwise, without prior express written consent from Posiflex Technology, Inc. the publisher of
this documentation.
© Copyright Posiflex Technology, Inc. 2010
All brand and product names and trademarks are the property of their respective holders.
P/N: 19780900030
Advertisement
Table of Contents

Subscribe to Our Youtube Channel
Related Manuals for POSIFLEX AURA 6800


Summary of Contents for POSIFLEX AURA 6800
- Page 1 Rev.: A1 FCC Notes: This equipment generates, uses, and can radiate radio frequency energy and, if not installed and used in accordance with the instructions manual, may cause interference to radio communications. It has been tested and found to comply with limits for a Class A digital device pursuant to subpart J of Part 15 of FCC Rules, which are designed to provide reasonable protection against interference when operated in a commercial environment.
-
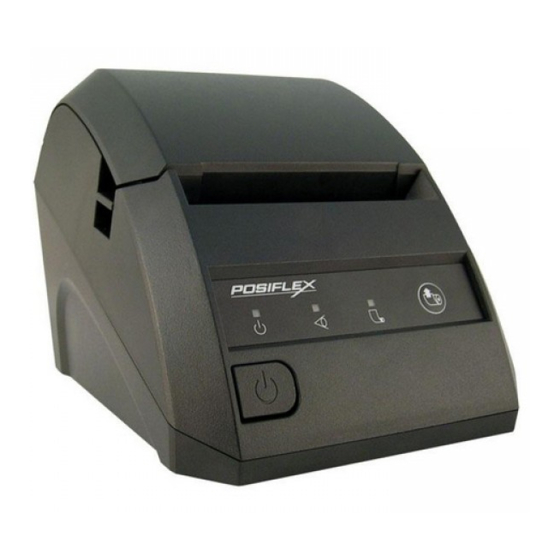
Page 2: Getting Start
GETTING START PRODUCT BRIEFING Posiflex Aura-6800 series is an easy loading, low noise, high resolution, and trustworthy thermal printer. Additionally, clearing a paper jam in the Posiflex Aura-6800 series printer is an easiest thing. The paper jams (in most cases) can be solving by push the “Hood Release Button”... -
Page 3: Product Pictures
2). One tests thermal paper roll 80 mm wide. 3). 58 mm paper spacing plate (P/N: 19710303013/6). 4). One of the interface cables: Serial cable with 9 pin D sub Female to 9 pin D sub Male connectors for Aura-6800 serial model Parallel cable with 25 pin D sub Male to 25 pin D sub Female connectors for Aura-6800P parallel model No interface cable for Aura-6800L... - Page 4 Front View Power Switch Bottom Cover Bottom View Setup Window Plate Rubber Foot Window Plate Screw Rubber Foot Mounting Hole Mounting Hole Rear View (I/O Area for Aura -6800P) (I/O Area for Aura-6800) Parallel Adaptor Parallel Port Fixation Screw (I/O Area for Aura -6800L) Power Connector Serial Port Peripheral Port...
-
Page 5: Quick Start-Up
INDICATORS * Power LED: Green. * Error LED: Red (brief lit indicates printer busy). * Paper out LED: Red. QUICK START-UP LOADING PAPER Desk Top Application Release Button Pix. 3 Pix. 2 Pix. 1 Press down the hood release button to release the top hood as in Pix. 1. Raise the released hood wide open manually as in Pix. -
Page 6: Connecting Cables
Furthermore, during the standby mode (not in the power off mode), it can straight to replace the paper roll. The printer will automatically cut the unnecessary paper right after the top hood closed. CONNECTING CABLES Serial Connection All the external connectors are in the recessed area at the rear bottom for Aura- 6800 series. - Page 7 Peripheral Connection The peripheral controller is a 6-pin RJ11 type modular jack. With use of Posiflex cash drawer cable come with cash drawer, this port can control a Posiflex cash drawer CR3100 or CR3200 or CR4000 or CR4100 or CR-6310. If a Posiflex special split cable is used instead, this port can control two cash drawers of above models.
-
Page 8: Special Adjustments
The header is printed in text mode and the rest part of this slip is printed in page mode. If FEED button is pressed at this moment, a font table will be printed in text mode again. To exit the test printing, please turn the printer off and on again. -
Page 9: Installing Driver
Paper Cutting Generally, after paper printed and automatically cut every time, printer will retract the paper roll in order to reduce the paper loss. When the auto-cut function enable, the printer will leave the advance paper in 4.8 mm long. Incase the user applies cut without paper feed through DIP switch and setting change to have something such as a logo printed on top of each slip, the advance paper will be in 4.8 mm. -
Page 10: Operation Guide
LAN POS Printer Manager This utility can be used to manage multiple Aura-6800L’s connected in same network under Windows as long as there is no conflicting IP in the network. This utility can assign to each LAN printer a different device name for easy recognition. -
Page 11: General Cleaning
* When handling the interior of the thermal printer, please pay attention not to be hurt by any sharp edge of the metal parts. GENERAL CLEANING Please use soft hairbrush or compressed air to clear away any dust or paper scraps accumulation inside the printer. - Page 12 Nothing can be printed with ERROR LED ON – Check the Paper Out LED. If it is ON, most probably either the paper roll is not installed or the paper roll is at or near the end. Install a new paper roll. If the Paper Out LED is OFF, please check if the print hood is properly closed.
-
Page 13: Useful Tips
release button is pressed. Should the cutter jam be so serious to interfere the hood release operation, please re-close the hood and try opening it again. Never force open the top hood. Please also clear away any contaminants accumulated in the cutter track above the thermal elements. Auto Cutter Track Thermal Elements Advanced Analysis Tool... -
Page 14: Specifications
* Do not touch the areas around the print head and motor during or right after printing. It can be very hot. * Do not allow the cut receipt to slide back into the cutter during the operation. As this would lead to multiple cutting at the lower edge of a receipt and the multiple cut thin slips tend to cause mechanical malfunction. -
Page 15: Power Adaptor
Thermal head configuration 512 dots / line(Maximum 576 dots/line) Printing speed 150 mm / sec. max. Paper feed method Friction auto-feed Paper load method Drop and use Auto-cutter capability Partial cut (1 point at center left) Manual cutter Saw tooth blade Dot Pitch 0.125 x 0.125 mm Input power type... - Page 16 printer density and others. Following explanation is going to descript these two switches setting. DIP Switch On bottom cover of the Aura-6800 series thermal printer, there is screwed a metal plate for setup window. In this window, there is an 8-position DIP switch for printer setup.
- Page 17 For switch position 5, if the switch is set to “ON”, the busy signal set to host only when input buffer is full. When it is set to “OFF”, busy signal is sent to host whenever the input buffer is full or an off line status occurs. Therefore, signals including the paper near end detect will generate busy signal to the host.
- Page 18 Switch position Print Density (Normal, High Quality or Light) Enable paper auto-cut at top hood Disable paper auto-cut at top hood close and switch on the printer. close and switch on the printer. Full-cut mode. Partial-cut mode. Raster Bitmap Print by buffer Raster Bitmap Print by line print.
- Page 19 Switch position 6 defines the parity check regulation in serial interface. In Aura-6800, it is selectable between even and none. For switch position 7 can choice the handshaking method in serial interface. When it is set to ON, the printer transmits an “XOFF” for busy and sends an “XON”...
- Page 20 refreshment periodically. When the printer is engaged in such operations there will be a brief period of time that the printer is busy without externally apprehensible cause. In other words, the printer will lit the ERROR LED briefly once in a while even when no external communication is in process and that is definitely normal.
Need help?
Do you have a question about the AURA 6800 and is the answer not in the manual?
Questions and answers