Advertisement
Table of Contents
- 1 Table of Contents
- 2 Important PRECAUTIONS
- 3 Before You Begin
- 4 Assembly
- 5 Instalung Receiver for Chest Pulse Sensor
- 6 How to Operate the Exercise Cycle
- 7 Maintenance and Troubleshooting
- 8 Exerchse Guhdelhnes
- 9 PART List
- 10 Nt007940 Exploded Drawing
- 11 Exploded Drawhng
- 12 How to Order Replacement Parts
- 13 Limited WARRANTY
- Download this manual
Patent P ending
ModelNo.NT007940
Soda1 No.
SeriaU N umber
DecaU
QUESTIONS?
As a manufacturer,
we are com-
mitted to providing
complete
customer
satisfaction,
if you
have questions,
or if there are
missing
parts, we wil! guarantee
satisfaction
through
direct assis-
tance from our factory.
TO AVOID DELAYS, PLEASE
CALL DIRECT TO OUR TOLL-
FREE CUSTOMER NOT LINE.
The trained technicians
on our
customer
hot line will provide
immediate
assistance,
free of
charge to you.
CUSTOMER HOT LINE:
1 °888°825-2588
Non.=Fd., 6 a.m.=6 p.m. MST
ACAUTION
Read all precautions
and instruc-
tions in this manual before using
this equipment.
Keep this manual
for future reference.
US
®
:visit ourw÷bsite at
www.nordictrack.com
new products,
prizes,
fitness
tips, and much
more r.
Advertisement
Table of Contents

Related Manuals for NordicTrack SL710 NTC07940


Summary of Contents for NordicTrack SL710 NTC07940
- Page 1 CUSTOMER HOT LINE: 1 °888°825-2588 Non.=Fd., 6 a.m.=6 p.m. MST ACAUTION :visit ourw÷bsite at Read all precautions and instruc- tions in this manual before using www.nordictrack.com this equipment. Keep this manual for future reference. new products, prizes, fitness tips, and much...
-
Page 2: Table Of Contents
HOW TO OPERATE THE EXERCISE CYCLE ........... MAINTENANCE AND TROUBLESHOOTING ........... EXERCHSE GUHDELHNES ..............PART LiST ................EXPLODED DRAWHNG ..............HOW TO ORDER REPLACEMENT PARTS ..........Back Cover LiMiTED WARRANTY .............. Back Cover NordicTrack is a registered trademark of iCON Health & Fitness, inc. -
Page 3: Important Precautions
iMPORTANT PRECAUTmONS A WARN ING: To reduce the .skofserious read t he precau- injury, following important tions before using the exercise cycle. Read aH instructions in this manuaJ before Wear euitabJe clothing when using the using the exercise cyeJe. Use the exercise exercise cycle;... -
Page 4: Before You Begin
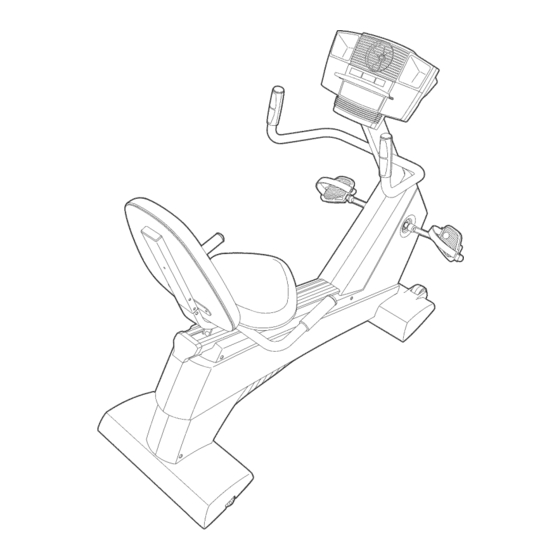
The NordicTrack _ SL 710 offers an impressive array calling, The model number is NTC07940, The serial number can be found on a decal attached to the exer-... -
Page 5: Assembly
ASSEMBLY Assembly requires two persons. Hace all parts of the exercise cycle in a cbared area and remove the packing materiab, Do not dispose of the packing materiab until assembly is compbted, Assembly requires the included tools and your own adjustable wrench ©___./_. - Page 6 2, While another person Hfts the rear of the Frame (1), attach the Rear Stabilizer (16) to the Frame with four M8 x 40mm Button Screws (54) and four M8 Split Washers (55), 3, While another person hoHds the Upright (2) in the posi- tion shown, connect the Upper Wire Harness (97) to the Lower Wire Harness (43), Gently puHH the upper end of the Upper Wire Harness to remove any shack...
- Page 7 5, Have another person hoUdthe Consob (4) near the Upright (2), Bookrack Connect the Upper Wire Harness (97) to the wire har- ness on the Consob (4), Connect the Pube Wire (3) to the puUsewire on the Consob, Next, bcate the two ground wires that are connected with a screw to the Upright (2), and connect the ground wires to the two smallest wires on the Consob,...
- Page 8 Attach the Backrest (62) and the Seat Back (98) to the Backrest Frame (42) with two M6 x 20mm Button Screws (20), an M6 x 45mm Button Screw (80), and an M6 Washer (60), Slide the Backrest Frame (42) onto the Seat Frame (7), Attach the Backrest Frame with four M8 x 25mm Button Screws (79) and four M8 Split Washers (55), identify the Left Pedal (22), which is marked with an...
-
Page 9: Instalung Receiver For Chest Pulse Sensor
mNSTALUNG THE RECEmVER FOR THE OPTmONAL CHEST PULSE SENSOR if you purchase the optional chest pulse sensor (see page 21), follow the steps below to install the receiver included with the chest pulse sensor, Remove the access door from the underside of the Console (4). -
Page 10: How To Operate The Exercise Cycle
HOW TO OPERATE THE EXERCISE CYCLE HOW TO MOVE AND LEVEL THE EXERCmSE HOW TO ADJUST THE SEAT CYCLE The seat can be Stand in back of the exercise cycHe,and Hft the exer- adjusted to the posi- Seat tion that is the most cise cycHe until it can be moved on the front wheeHs, Move the exercise cycHe to the desired Hocation and comfortabHe for you,... - Page 11 CONSOLE DIAGRAM Left DispUay Matrix Training Zone Bar Heart Rate Cot_trol Prograt_s HEART RATE to so_/o max II Weight L_Jss TRAIL BLAZER I TiME SPEED "_ Resistance & Pace Programs 1o 85%ma_ J_[l_ (er,t_r your 11 AerobiG VICTORy HILL AWARNUNG : Toreduce riskof FAT CALS.
- Page 12 tots around the track wiii light in succession until HOW TO USE THE MANUAL MODE the entire track is lit, The track wiii then darken and the indicators wiii again begin to light in suc- cession, Press any button on the consoJe or begin peda[ing to turn on the console.
- Page 13 Note: The console When your pulse is detected, the heart-shaped TIME SPEED can display speed indicator in the right display wiii flash each time I ° and distance in either your heart beats, one or two dashes (- -) will miles or kilometers, appear, and then your heart rate will be shown, To find which unit of...
-
Page 14: How To Use Resbtance/Pace Programs
setting for the cur- HOW TO USE RESBTANCE AND PACE rent segment, The PROGRAMS lit indicators in the TRAmNmNG 7ONES bar will show your ® o _£ FAT BURN FNudRANCE PERF actual pace. if an Press any button on the consob or begin indicator to the pedaling... - Page 15 Turn on the fan if desired. Enter your age. When a heart rate See step 6 on page 13, T_ME SPEED program is selected, the word "AGE" and CI E When the program is finished, the console wilt automatically turn off. the current age set- ting will flash in the D_STANCE...
- Page 16 rate setting for the Note: During the program, you can override the current segment, resistance setting, if desired, by pressing the The Ht indicators TRAINING ZONES Resistance buttons, However, when the next in the bar wHU F--_BU--_N E_xNP-_:-- segment begins, the resistance will change if a different resistance setting is programmed for the show your actuaU pace, When you...
- Page 17 HOW TO CONNECT YOUR PORTABLE STEREO HOW TO CONNECT YOUR CD PLAYER, VCR, OR COMPUTER Note: If your stereo has an RCA-type AUDIO OUT jack, see instruction A betow. If your stereo has a 1/8" LINE OUT jack, see instruction B.
-
Page 18: How To Connect Home Stereo/Computer
HOW TO CONNECT YOUR HOME STEREO HOW TO CONNECT YOUR COMPUTER Note: If your stereo has an unused LINE OUT jack, Note: If your computer has a 1/8" LINE OUT jack, see instruction A below, mfthe LmNEOUT jack is see instruction A. - Page 19 HOW TO CONNECT YOUR VCR B, Hug one end of the audio cabUe into the jack beneath the consoUe, Hug the other end of the Note: if your VCR has an unused AUDIO OUT jack, came into the adapter, Hug the adapter into an see instruction A below, if the AUDIO OUT jack is RCA Y-adapter (avaHaMe at eUectronics stores),...
- Page 20 your workout, Simply follow your personal trainer's HOWTO USE mFmT.COM CD AND VmDEO instructions, PROGRAMS The program wiii function in almost the same way as a resistance and pace program (see step 3 on To use iFUT, com CDs or videocassettes, the exercise page 14), However, an electronic "chirping"...
- Page 21 Return to the exercise cycle and begin HOW TO USE PROGRAMS DIRECTLY FROM pedaling. OUR WEB StaTE When the on-screen countdown ends, the pro- gram wiii begin, The program wiii function in Our Web site at www, iFIT, com allows you to play almost the same way as a resistance and pace iFIT, com audio and video programs directly from the program (see step 8 on page 14), However, an...
-
Page 22: Maintenance And Troubleshooting
MAINTENANCE AND TROUBLESHOOTING Unspect and properUy tighten aH parts of the exercise Locate the Reed Switch (46), Turn the Right Crank cycle reguUarUy, T o dean the exercise cycUe, use a Arm (23) until the Magnet (30) is aligned with the Reed Switch, Loosen, but do not remove, the indicat- soft, damp cloth, Keep Hquids away from the consoUe and keep the consoUe out of direct sunlight,... -
Page 23: Exerchse Guhdelhnes
EXERCmSE GUIDEUNES Fat Burning _WARNING: To burn fat effectively, you must exercise at a relative- ly low intensity level for a sustained period of time, - Before beginning this or any exercise pro= During the first few minutes of exercise, your body gram, consult your physician. - Page 24 SUGGESTED STRETCHES The correct form for several basic stretches is shown at the right, Move slowly as you stretch--never bounce, 1. Toe Touch Stretch Stand with your knees bent slightly and slowly bend forward from your hips, Allow your back and shoulders to relax as you reach down toward your toes as far as possible, Hold for 15 counts, then relax, Repeat 3 times, Stretches: Hamstrings, back of knees and back,...
-
Page 25: Part List
PART LiST--Model No. NT007940 Rt203A Key No. Qty. Description Key No. Qty. Description Frame Seat Carriage Endcap Upright BoUtSet PuUse Wire M8 x 40mm Button Screw Consob M8 Split Washer Seat Rail M4 x 38mm Screw PuUse Sensor/Wire M4 x 16mm Screw Seat Frame Carriage Bushing Seat Rail Endcap... -
Page 26: Exploded Drawhng
EXPLODED DRAWING--Model No. NT007940 n12O3A... - Page 27 ,'_'At_::JJ NTC07940 R1203A...
-
Page 28: How To Order Replacement Parts
,, the KEY NUMBER and DESCRUPTUON of the part(s) (see pages 25, 26, and 27) LiMiTED WARRANTY WHAT IS COVERED--The entire NordicTrack '_ SL 710 exercise cycle ("Product") is warranted to be free of all defects in material and workmanship. WHO IS COVERED--The original purchaser or any person receiving the Product as a gift from the original purchaser.
Need help?
Do you have a question about the SL710 NTC07940 and is the answer not in the manual?
Questions and answers