Table of Contents
Advertisement
Operator's
Manual
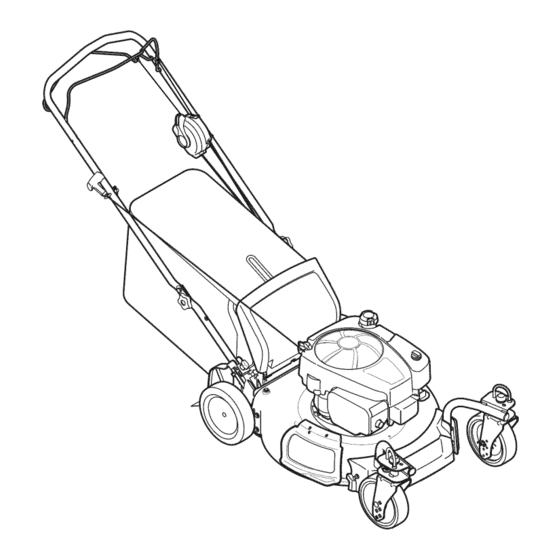
21" LAWN MOWER
Model No. 247,374860
CX
IES
CAUTION"
Before
using this
product,
read this manual
and
follow
all safety
rules and operating
instructions,
o SAFETY
ASSEMBLY
OPERATION
MAINTENANCE
PARTS LIST
o ESPANOL
Sears Brands
Management
Corporation,
Hoffman
Estates,
IL 60179, U.S.A.
Visit our website:
www.craftsman.com
FormNo. 769-08574
(December19,2012)
Advertisement
Table of Contents

Related Manuals for Craftsman CX series 247.374860


Summary of Contents for Craftsman CX series 247.374860
- Page 1 SAFETY ASSEMBLY OPERATION MAINTENANCE CAUTION" Before using this PARTS LIST product, read this manual o ESPANOL follow all safety rules and operating instructions, Sears Brands Management Corporation, Hoffman Estates, IL 60179, U.S.A. Visit our website: www.craftsman.com FormNo. 769-08574 (December19,2012)
- Page 2 Fortwo years from thedateofpurchase, thisproduct i swarranted against a nydefects in material o rworkmanship. A defective product w ill receive free repairorfreereplacement if repairisunavailable. Thiswarranty applies for onlyoneyearif this product i severusedwhileproviding commercial services o rif rented to anotherperson. Forwarrantycoverage d etails to obtainrepairorreplacement, visitthewebsite:www.craftsman.com. Thiswarranty covers ONLY d efects in material a ndworkmanship. Warranty coverage d oesNOT include: •...
- Page 3 Thissymbolpointsout importantsafety instructionswhich, if not Thismachinewasbuilt to beoperatedaccordingto the safeoperation followed, could endangerthe personalsafetyand/or property of practicesin this manual.Aswith anytype of powerequipment, yourself and others.Readandfollow all instructions in this manual carelessness o r error on the part of the operatorcanresultin seriousinjury. beforeattempting to operatethis machine.Failureto complywith these Thismachineiscapableof amputating fingers, hands,toesandfeet and instructions m ay resultin personalinjury.Whenyou seethis symbol, HEED...
- Page 4 Ifthe equipment should start tovibrate abnormally, stop t he engine Keep childrenout of the mowingareaandunderwatchfulcareof a check immediately for t he cause. Vibration is generally awarning oftrouble. responsible a dultotherthanthe operator. Shut the e ngine off a nd w ait until the blade comes to acomplete stop b efore Bealertandturn moweroff if a childentersthe area.
- Page 5 General Service: DO NOT MODIFY ENGINE Never r unan engineindoorsor inapoorlyventilated area.Engine exhaust Toavoid seriousinjuryordeath,do notmodifyenginein anyway.Tampering contains carbonmonoxide, a nodorless a nddeadlygas. with the governorsetting can leadto a runaway engineandcauseit to operateat unsafespeeds. N evertamperwith factory setting of engine Beforecleaning, r epairing, o r inspecting, makecertainthe bladeandall governor.
- Page 6 SAFETY SYMBOLS Thispage depicts and describes safety symbols that may appear on this product. Read, understand, and follow all instructions on the machine before attempting to assembleand operate. READ THE OPERATOR'S MANUAL(S) Read, understand, and follow all instructions in the manual(s) before attempting to assemble operate DANGER -- ROTATING BLADES...
- Page 7 15° Slope 15° Slope (OK) (TOO STEEP) _- _. Figure1 Figure 2 _O._daShed._ fine USETHiS SLOPE GAUGE TO DETERMINE iF A SLOPEiS TOOSTEEP FORSAFEOPERATION! Tocheckthe slope, proceedas follows: 1. Removethis pageand fold alongthe dashedline. Locatea vertical object on or behindthe slope(e.g. a pole, building,fence, tree, etc.) Align either side of the slope gaugewith the object (SeeFigure1 and Figure2 ).
- Page 8 IMPORTAN_ T hisunit isshipped without gasoline or oil inthe engine.Becertainto service enginewithgasoline andoil asinstructed in the Operation sectionbefore startingor runningyourmachine. flOTE: R eference t o right andleft handsideof the LawnMowerisobserved from the operatingposition. OPENING CARTON Cuteachcorner of thecartonverticallyfrom top to bottom. Remove a ll looseparts.
- Page 9 Followthe stepsbelowto completehandleassembly: Pullupwardon the handleuntil holesinlowerhandle(shownin Figure 3deckcutaway) l ineup with holesinhandlebracket. S ee Figure 4. NOTE: Whenpullingupwardon handle,makesureto not pullhandleall the wayout. Insertthe T-boltsremoved in stepearlierthroughthe handle brackets a ndlowerhandle andtightensecurely to secure the handle inplace.SeeFigure 4. Reattach wingnutsandcarriage boltsremoved earlierinto lower holesof handle asshownin Figure 5.
- Page 10 Attaching the Grass Catcher Followstepsbelowto assemble the grass catcher. M akecertainbagisturned rightsideout before assembling (warninglabelwill beonthe outside). Place bagoverframesothat its black plasticsideisat the bottom. Slipplastic channel of grass bagoverhooks on theframe.See Figure 7. Followstepsbelowto attachgrass catcher: Liftreardischargedoor. Place grasscatcher i nto the slotsinthe handlebrackets asshownin Figure 8.
- Page 11 Adjustments CuttingHeight Therearwheelcuttingheightadjustmentleverislocated above the rearleft wheel. SeeFigure IOAinsert. Pullleverout andawayfrom mower. Moveleverforwardor back fordesiredcuttingheight. Release l evertowardsmowerdeck. Thefront wheelcutting heightisdetermined byselecting oneof sixpositions on eachcaster assembly. Toadjustfront cutting height,referto Figure lOBandproceed asfollows: Remove w ing nut fromaxlebolt. Slide axlebolt andwavewasher fromthe assembly a ndselect a cutting height.
- Page 12 Therecoilstarterisattached to the rightupperhandle.Stand behindthe unitand Thecuttingheightadjustment l everislocated above the left rearwheel.Toadjust pull the recoil s tarterropeto startthe unit. the cuttingheight,referto the Adjustments Section. MeetsANSI S afety Standards Craftsman LawnMowers conformtothe safetystandard of the American National S tandards I nstitute (ANSI).
- Page 13 GAS ANDOILFILL-UP IMPORT,4flI_ Thisunit isshippedwithoutgasoline oroil inthe engine.Becertainto service enginewith gasoline andoil asinstructed inthis sectionbefore startingor runningyourmachine. OU(one 18ounce bottleshipped withunit) FirstTime Use Remove o il fill dipstick(G). S eeFigure14. Withthe moweronlevelground,emptyentirecontents of oil bottle provided intothe engine oil fill (H). Replace o il fill dipstickandtighten.
- Page 14 Besurenooneother than the operator isstandingnearthe lawnmower while starting engine or operating mower.Neverrunengine indoors or inendosed, poorlyventilated areas.Engine exhaust containscarbon monoxide,an odorlessanddeadlygas. Keephands,feet, hair andloose clothing away from any moving parts on engine andlawn mower. TOSTART ENGINE Standing behindthe mower, s queeze the bladecontrol h andleagainstupper handle.
- Page 15 IMPORTANT: If youareshiftingspeeds whilethe mowerisstationary it maybe Using GrassCatcher difficult to shift intofirst speed undercertainconditions.Thisiseasilyremedied by Youcanusethe grass catchertocollectclippingswhileyouareoperatingthe brieflyengaging the drivelever. mower. Attachgrasscatcher f ollowinginstructionsinthe "Assembly" s ection. G rass clippingswill automatically collectinbagasyourun mower.Operate mower Theoperationof any lawn mowercan resultinforeign objectsbeing until grassbagisfull.
- Page 16 MAINTENANCE SCHEDULE Followthe maintenance s chedule givenbelow.Thischartdescribes s ervice guidelines only.Use the Service Logcolumn to keeptrackofcompleted maintenance t asks.Tolocatethe nearest S ears Service C enter o r to schedule service, Beforeperforming any type of maintenance/service, d isengageall controls andstop the engine.Wait until all moving parts havecometo a complete simplycontactSears at 1-800-4-MY-HOME ®.
- Page 17 Alwaysstop engine,disconnectsparkplug wire, andground againstengine before performing anytype of maintenanceon your machine. Porcelain Electrode GENERAL RECOMMENDATIONS Always observe safetyruleswhenperforminganymaintenance. Thewarrantyonthislawnmowerdoesnotcoveritems that havebeen subjected to operatorabuse or negligence. Toreceive full valuefrom warranty, o peratormustmaintainthe equipment a s instructed here. Changing of engine-governed s peed will voidengine warranty. All adjustments shouldbe checked a t leastonceeachseason.
- Page 18 Check Engine Oil Check o il levelbeforeeachoperation. B esureoil levelismaintained. Check t he oil withthe enginestoppedandlevel. Remove t he oil fill dipstickandwipeit clean. Insertandtightendipstick.Remove i t to check the oil level. If the oil levelis nearor belowthe lowerlimit markonthe dipstick,remove the oil filler cap/dipstick, a ndfill with the recommended o il to the upper Oil Fill/Di limit mark.Donot overfill.
- Page 19 DeckWash Your m ower'sdeckisequippedwithawaterport on its surface aspartof its deck washsystem. Use the deckwashto rinsegrass clippingsfrom thedeck'sunderside andprevent the buildupof corrosive chemicals. Complete the followingstepsAFTER E ACH MOWING: Push the mowertoa level,clearspotonyourlawn,nearenough for your garden hoseto reach.Remove t he grassbagif attached. Makecertain the mower'sdischarge chute isdirectedAWAY from your house, g arage,parkedcars,etc.
- Page 20 Neverstore lawn mowerwith fuel in tank indoors or in poorlyventilated areaswhere fuel fumes mayreachan openflame, spark,or pilot light ason afurnace,water heater,clothesdryer, or gasappliance. PreparingThe Engine PreparingTheLawnMower Clean a nd lubricate m ower t horoughly asdescribed in thelubrication Forengines storedover30 days: instructions.
- Page 22 Disconnect the spark plugwire andground itagainst t heengine to prevent unintended starting. Before performing anytypeofmaintenance/service, disengage allcontrols andstoptheengine. W aituntilall moving p arts have come toa complete s top. Always wearsafety glasses during operation or whileperforming anyadjustments or repairs. Thissectionaddresses minorserviceissues. T olocatethe nearestSearsServiceCenteror to schedule service, s imply contact Searsat 1-800-4-MY-HOME _. 1.
- Page 23 Mower willnotmulch grass 1. Wetgrass. 1. Donotmowwhengrassiswet; waituntil laterto cut. 2. Excessively highgrass. 2. Mowonceat ahighcuttingheight,thenmowagainatdesired heightor makeanarrower c uttingpath. 3. Dullblade. 3. Sharpen o r replace blade. Uneven cut 1. Wheels not positioned correctly. 1. Place frontandrearwheels insameheightposition. S eeCutting HeightinAssembly s ection.
- Page 24 CraftsmanMower-- Model No,247.374860...
- Page 25 720-04113 634-04714 Rear Wheel, 8 x 2 Adjustment Knob 634-04733 720-05031 Front Wheel, 7 x 2 Foam Grip 750-06036 710-04998 Carriage Screw ,5/16-18 Caster Hub, Long 750-06065 710-1205 Caster Hub, Short Rope Guide 712-04064 747-06137A-4044 Grass Catcher Frame Nut, Flange Lock, 1/4-20 964-05024 720-0279 Knob...
- Page 26 Craftsman Engine Model No. 111PO2-OOOS-FI ForCraftsmanMower Model No.247.374860 I 48 SHORT B,OCK I I IOSSOPFR,_TO_'_M,_NUA, I1329_FP,ACFMENTF_G,_F 1330_F_,_,_,_UA, I 562__ 324 32t 1376 1264 1263...
- Page 27 Craftsman Engine Model No. 1 11PO2-OOOS-FI C raftsmanMower Model No.247.374860 I022 _029 121 CARBURETOROVERHAUL KIT I022 358 ENGINE GASKET SET 163_ 883A_ I022...
-
Page 28: Parts List
Craftsman Engine Model No. 1 11PO2-OOOS-F1 C raftsmanMower Model No.247.374860 1095 VALVE GASKET SET 1026 1022 1036 EMISSIONS LABEL 334A 621 _... - Page 29 Craftsman Engine Model No. 1 11PO2-OOOS-F1 C raftsmanMower Model No.247.374860 137_ 276 _ 276_ 365A...
- Page 30 Craftsman Engine Model No. 1 11PO2-OOOS-FI C raftsmanMower Model No.247.374860 796596 Gasket-Intake 798948 Cylinder Assembly 299819s Seal-Oil (Magneto Side) 697316 Rope-Sta rter 493279 Sump-Engine 799716 Grip-Starter Rope 796471 Head-Cylinder 691736 Washer (Flywheel) 796475 Gasket-Cylinder Head 793480 Screw (Flywheel Guard) 796478...
- Page 31 Craftsman Engine Model No. 1 11PO2-OOOS-FI C raftsmanMower Model No.247.374860 Base-Air Cleaner 796499 Armature-Magneto 796492 Gasket-Exhaust 793454 Screw (Magneto Armature) (M6x27mm) 793497 Gasket-Exhaust 334A 796537 Screw (Magneto Armature) 883A 796677 591039 Plug-Spark 796474 Gasket Kit-Cylinder/Plate 692390 Wire-Stop 692135 Spring-Brake 796634...
- Page 32 CraftsmanMower Labe(s -- Mode(No.247.374860 777S33353 777S33350 777120793 777120745 777120292 777125102...
- Page 33 (This p age applicable intheU.S.A. and Canada only.) Sears Brands Management Corporation (Sears), the California Air Resources Board (CARB) and the United States Environmental Protection Agency (U,S, EPA) Emission Control System Warranty Statement (Owner's Defect Warranty Rights and Obligations) EMISSION CONTROL WARRANTY COVERAGE...
- Page 34 Congratulations onmakingasmartpurchase. YournewCraftsman ®productisdesigned andmanufactured f or yearsof dependable operation. B utlikeall products, i t mayrequire repairfromtime to time.That'swhenhaving a Repair P rotection Agreement c ansave youmoneyandaggravation. Here'swhat the Repair ProtectionAgreement _ includes: 10,000 [] Expertservice byour professional repairspecialists [] Unlimitedservice and nocharge for partsandlaboronallcovered repairs [] Productreplacementupto $1500 if yourcovered productcan'tbefixed [] Discount o f 25%from regular priceof service andrelatedinstalled p artsnot covered bythe agreement;...
- Page 35 Esta garantfa esv_lidas61o p or unafiosJ esteproducto seutilizamientras quela prestaci6n d eservicios c omerciales o sJ sealquila a otrapersona. Para obtener i nformaci6n sobre elalcance dela garantfa y solicitarlareparaci6n o el reemplazo, visJte el sJtio Web: w ww.craftsman.com. Esta garantfa cubreONICAMENTE losdefectos enlosmateriales y en la manodeobra.Esta garantfa NOcubre:...
- Page 36 Lapresendade este simboloindica quesetrata de instrucdones Estam_quinafue construida parasetoperadadeacuerdoconlasreglas importantes de seguridadquesedebenrespetarparaevitar poneren de seguddadcontenidaseneste manual.AI igual queconcualquiertipo peligro suseguddadpersonaly/o materialy lade otras personas.Leay siga de equipo motodzado,un descuidoo error pot parte del operadorpuede todaslasinstrucciones de este manualantesde poner enfundonamiento produdr lesionesgraves.Estam_quinaescapazde amputar manosy pies esta m_quina.Sino respetaestasinstrucdonespodriaprovocarlesiones y de arrojar objetoscon gran fuerza.Deno respetarlasinstrucdonesde...
- Page 37 Nunca operelapodadora enc_sped humedo. S iempre est_seguro de su No haga Io siguiente: equilibdo.Sitropiezay caepuedelesionarse gravemente. Si s ienteque Nocorteelc_sped cerca de pozos, h undimientos, b ancos, p odr[a perderel pierdeelequilibrio,suelteinmediatamente l amanijadecontrol d e la equlllbrlo. cuchilla y lacuchilla dejar_degiraren tressegundos. Nopodependientes mayores d e 15grados comoIoindicael medidor d e Corteelc_sped solamente conluzded[ao conunabuenaluzartificial.
- Page 38 Nunca recargue eltanquede combustible. L leneeltanquenom_sde I Nocambielaconflgurad6n delregulador delmotorniacelere demadado el pulgadapordebajode labase del cuellodellenadoparadejarespadoparala mismo. E lregulador controlalaveloddadm_ximasegura deoperad6ndel motor. expansi6n delcombustible. Vuelva acolocar latapadelagasollna y ajfistelablen. Verifiquefrecuentemente lalineade combustible, eltanque,eltapbn,y los accesorios buscando rajaduras o pdrdidas. R eemplace desernecesario. Limplelagasollna derramada sobre el motory elequipo.Traslade l a m_quina aotrazona.Espere 5 mlnutosantesde encender e lmotor.
- Page 39 S|MBOLOSDESEGURIDAD Esta p_gina representa y describe la seguridad los simbolosque pueden parecer en este producto. Lea, comprenda, y siga todas instruccionesen la m_quina antes procurar para reunir y operar. LEA EL MANUAL(S) DEL OPERADOR Lea, comprenda, y siga todas instrucciones en el manual (manuales) antes procurar para reuniry operar.
- Page 40 15 ° Pendiente 15° Pendiente (DEMASIADO ESCARPADO) (ACEPTAR) _- _. Figura1 Figura 2 " " "- 15°/fneadisco t. USO BE ESTE PENBiENTE BE CALIBREPARA BETERrvIINAR SiUNA PENDIENTE ES DEMASIADO ESCARPADO PARA UNA OPERACION SEGURA! Para comprobar la pendiente, haga Io siguiente: Borrar esta p_gina y doble a Io largo de la linea discontinua.
- Page 41 IMPORT,4NTE: Estaunidadseenviasingasolina ni aceiteenelmotor.Antesde comenzar o correrlam_quina cargueelmotorcongasolina y aceitecomoseindica enlasecddn de operaddn deestemanual. NOT,4: Lasreferendas a losladosderecho e izquierdo delacortadora dec_sped se hacen observando l am_quina desde laposiddndeoperaddn. APERTURA BELACAJA BECARTON Cortecadaunade lasesqulnas de lacaja verticalmente, d elapartesuperior alabase. Saque todaslasplezas sueltas.
- Page 42 Sigalossiguientes pasos paracompletar c onjuntodel mango: Tirehadaarribaenelasahastaagujeros enlamanija(quese muestra en laFigura 3cortede lacubierta) s ealineanconlos agujeros enelmangosoporte.YealaFigura 4. flOTA:AItirar hadaarribala palanca, asegtirese d equeno tire demanejar todoelcamino. InserteelT-pernos quit6anteriormente atrav_sdelmango corchetes y asainferiory aprietebienparaasegurar e lmangoensu lugar.VealaFigura 4. Vuelva acolocar tuercas y pernosdetransporte retirarseantesen unareducdbndelosagujeros de lamanijacomosemuestra en la Figura 5.
- Page 43 Para acoplar e l colector d ec_sped: Levante lapuertadedescarga posterior. Lugardecolecd6n dec_sped en [asranuras en elmangoentre corchetes c omosemuestra enlaFigura 8. Suelte lapuertade descarga d emodoquedescanse s obreelcolectordec_sped. Para quitaral receptor d ehierba,levante lapuertadedescarga t rasera enel cortac#sped. Ascensor c#sped y fueradelasranuras enel mangoentrepar#ntesis. Elreverso deliberad6ndescarga lapuertaparapermitirqueellocerrara laapertura trasera delcortac#sped.
- Page 44 Ajustes Altura de corte Lapalanca deajustedealturadecorteseublcaporendmade larueda[zqulerda trasera. V eaelrecuadro dela Flgura IOA. Tiredela palanca haciaafuera de lacortadora. Mueva la palanca haciaadelante o haciaarrasparalaalturade torte deseada. Liberelapalanca hadala plataforma de lacortadora. Laalturadecortede laruedafrontalsedetermlnaselecdonando u nade lasseis posiciones e nelmontajedecadaruedita.Para ajustarlaalturade torte frontal, consulte laFlgura lOBy reallceIoslgulente: Extraiga latuercade mariposa delpernodeleje.Deslice elpernodelejey la arandela ondulada fueradelmontajey selecdone laalturade corte.
- Page 45 El a rrancador d eretroceso est_i u nidoa lamanijasuperior d erecha. P ara encender l a unidad col6quese detkisdela mismay tire de lacuerdadelarrancador de retroceso. Lapalanca de ajustedealturadecorteseubicaporendmade laruedaizquierda trasera. P ara ajustarlaalturadetorte, sereflerena lasecd6n de Montaje. Cumpleconinsnormas de seguridad de ANSi Lascortadoras d ec#sped Craftsman c umplenconlasnormas deseguridad delInstituto Estadounidense deNormas Nadonales ( ANSI).
- Page 46 LLENADO D EGASOUNA Y ACEITE Aceite (se envia unabotella juntocon la unidad) Primer uso Saque lavarilladel niveldeaceite(G). V eala Figura 14. Con lacortadora dec_sped ubicada ensuelonivelado,viertaelaceite lentamentepordentrodeltubode llenado deaceitedelmotor(H). Vuelva acolocar lavarilladellenado de aceitey ajustela. Usosposteriores Use aceiteparamotorde 4tiemposquecumplaosobrepase l osrequisitos p ara laclasificaci6n d eservidoAPISF, %, SH, S Joequivalente.
- Page 47 Asegurese d e queninguna personaaparte del operadorpermanezca cercade la cortadoramientrasarrancael motor u operala misma.Nunca enciendael motor en espacioscerradosoen unazonaconpocaventilaci6n. Elescape del motor contienemon6xidode carbono,un gasinodoro y fetal. Mantengalasmanos,lospies,el cabelloy la ropasueltaalejadosde las partesm6viles del motory de lacortadora. PARA ENCENDER ELMOTOR Col6quese d etr_sde lapodadora, aprietela manijade control d elacuchilla y sost6ngala c ontralamanijasuperior.
- Page 48 Usodei Colectorde C sped Puede utilizarelcolector d ecdsped pararecoger d ichosrecortes mientras operala A[operar unacortadorade c_spedesposiblequeobjetos e×traffossean podadora. arrojadosa losojos,Io cual puededaffarlosgravemente. Otilicesiempre galasdeseguridad durantela operaci6ndela cortadora dec_sped o Acopleelcolector d ec_sped siguiendo lasinstrucciones e n lasecci6n de mientras[aajusta orepara. Montaje.
- Page 49 PROGRAMA D EMANTENIMIENTO Siga elcronograma d e mantenimiento quesepresenta a continuaci6n. Esta tabla s61o describe pautas de servicio. U tilicelacolumnaRegistro d e Servidoparahacerel Antesde realizar cualquiertipo de mantenimiento o servicio,desenganche seguimiento delastareas de mantenimiento completadas. Para ubicarelCentro de todos loscontrolesy detengael motor. Espere a quesedetengan Servido Sears m_scercano o paraprogramar u nservicio, s implemente comuniquese conSears alteBfono1-800-4-MY-HOME ®.
- Page 50 MANTENIMIENTO D EL MOTOR Bujiadeencendido Para un buenfundonamiento, l abujiadebeestaradecuadamente abiertay Iibrede Eiectrodo Porcelana dep6sitos. R eemplace labujiaanualmente. Desconecte e lcapuch6n d e labujiay retire cualquier s uciedad del_reade _sta. UselaIlavedebujiasdeltamaffo adecuado paraextraerla. NOTA: Reemplazar conunaChampion ®RC12YC bujia. Compruebe e lentrehierroconun calibrador d e alambre. L aseparad6n correcta es0,020in.(0,51mm).VealaFigura17.
- Page 51 Comprobar el aceite del motor Comprobar elnivelde aceiteantesdecadaoperaci6n. Asegtirese d equeelnivelde aceitesemantiene. Revise elaceiteconelmotorparado y nivelado. Quitelatapadeldep6sito deaceite/varilla medidoradelniveldeaceitey limpiela. FUtrode aire Coloque y ajustelavarillaindkadora.Luego quitelapararevisar e l nivelde Tap6n de aceite. aceite/varUla medici6n del nivel Sielnivelde aceite est_cercaopordebajodelamarcadelimite bajodela de aceite varillamedidora delniveldeaceite, q uitelatapadeldep6sitodeaceite/ varillamedidora delniveldeaceitey II_nelo conelaceiterecomendado h asta...
- Page 52 LVBRICACION "I" Controlde la cuchilla Lubdque conaceite ligero lospuntos d epivote delcontrol delacuchilla al menos u na vez cada estad6n. Este controle d ebe fundonar l lbremente enambas dlrecdones. Vea laFlgura 2 0. Lavadode la Plataforma Laplataforma desupodadora est_equipada conunpuertode aguasobre su superfidecomopartedelslstema delavadode laplataforma.
- Page 53 Cuidadode ia cuchUla Adaptador dela Misma Cuando saque la cuchillade corte paraafilarla o reempiazarla, prot_jaselas manosusando unpar deguantes paratrabajo rudoo untrapo grueso para sostener[a cuchilla. Inspecdone peri6dicamente e ladaptador d elacuchilla en busca derajaduras, especialmente cuando golpeeun objetoextra_o.Realice l osreemplazos queresultennecesados.
- Page 54 Nuncaalmacenelacortadorade c_spedconcombustibleen eltanque en un espaciocerradooen _reasconpocaventilaci6n, dondelosgases del combustiblepuedanalcanzarelfuego,chispaso unaluz piloto comolaque tienen algunos homos,calentadoresde agua,secadores de ropao algun otro dispositivoa gas. Preparaci6ndei Motor Preparaci6n de ia Cortadora de C_sped Yaquelosmotores almacenaron m _sde 30dias: Limpiey lubriquelacortadora comosedescribe enlasinstrucciones lubricad6n.
- Page 56 Antesde realizarcualquiertipo del mantenimiento/servicio,suelte todos losmandosy pare el motor. Espere h astaquetodaslaspartesde movimiento hayan venidoa unaparadacompleta.Desconecte el alambre de bujia y b_selocontrael motor paraprevenir elcomienzoinvoluntario. Siemprellevepuestoscristalesinastillables d urante laoperad6n o realizando cualquierajusteo reparaciones. Estasecci6n seocupade cuestiones de menor importanciadel servkio. Para localizar el m_s cercanoCentro de Servkio Sears,o para programar un servkio,simplemente p6ngase en contacto con Searsal 1-800-4-MY-IIOME o El m otornoarranca 1.
- Page 57 Elmotorfundonamalenmarcha 1. Bujiaatorada, averiadaoexcesodeseparad6n. 1. Limpie, r eemplaceoreajustelaseparad6n. lenta 2. El f iltro dealreest_sudo. 2. Consulte l asecd6n Mantenlmlento d elmanual. Demasiada vlbrad6n 1. Cuchllla d ecorteflojaodescentrada. 1. Aprietelacuchilla yel adaptador B alancee lacuchilla. 2. Cuchllla a bollada. 2. Camblelacuchllla. Lacortadora d ec_sped noregresa 1.
- Page 58 (Esta p_igina seaplicas6loen EE.UU. y Cana&i). Sears Brands Management Corporation, el Consejo de Recursos Ambientales de California (CARB) y la Agencia de Protecci6n Ambiental de los Estados Unidos (EPA) Declaraci6n de garantia del sistema de control de emisiones (derechos y obligaciones de la garantia de defectos del propietario)
- Page 59 Felicitaciones por haberrealizadouna adquisicidn inteligente.EI productoCraftsman ® que haadquiridoestddise#adoy fabricado para brindarmuchosa#os de funcionamientoconfiable. P erocomotodoslosproductosa vecespuederequerirde reparaciones. E s en esemomento cuandoeldisponerde un Acuerdodeproteccidn para reparaciones l epuede ahorrardineroy problemas. Acontinuad6nse detailan lospuntosinduidosen el Acuerdo: [] Servido experto prestado por nuestros 10,000 espedalistas e nreparadones p rofesionales [] Servido Uimitado sincargo paralaspiezas y la manodeobraentodaslasreparadones c ubiertas [] Reemplazodel producto hasta1500d6lares sinoesposiblereparar el productocubierto [] Descuento de 25%del predonormaldelservkioy delaspiezas reladonadas c onel mismoquenoest_ncubiertas por...
- Page 60 Your Home For troubleshooting, product manuals and expert advice: managernylife www.managemylife.com For repair - in your home - of all major brand appliances, lawn and garden equipment, or heating and cooling systems, no matter who made it, no matter who sold it! For the replacement parts, accessories owner's manuals that you need to do-it-yourself.
Need help?
Do you have a question about the CX series 247.374860 and is the answer not in the manual?
Questions and answers