
Related Manuals for Festool ATF 55E


Summary of Contents for Festool ATF 55E
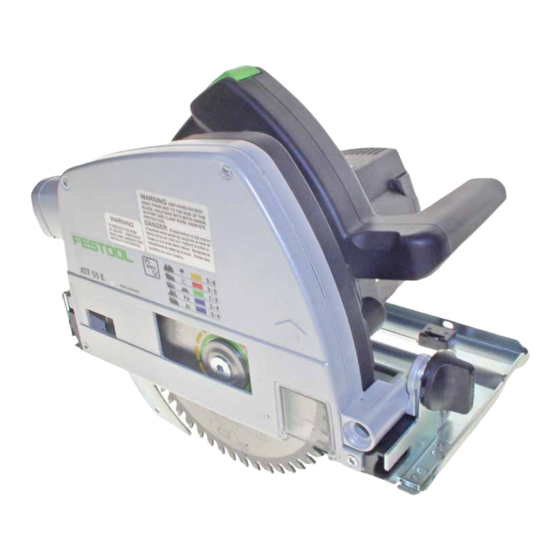
- Page 1 ATF 55E Circular Saw Instruction Manual Important: Read and understand all instructions before using this tool.
-
Page 2: Table Of Contents
Changing the Motor Brushes ... 18 Accessories... 19 Sawblades ... 19 Guide Rail Accessory Kit ... 20 Rip Fence... 20 Universal Tool (Toolie)... 20 Warranty ... 21 Conditions of 1+2 Warranty ... 21 Festool Limited Warranty... 21 Liability Statement... 21 ATF 55E Circular Saw... -
Page 3: General Safety Rules
Use only extension cords rated for the amperage of this tool ► and the length of the cord. Using too small of an extension cord can cause the saw to lose power and damage the saw. Extension Cord Ratings Cord Length <50 Ft. -
Page 4: Specific Safety Rules For Circular Saws
Causes and Prevention of Kickback Kickback is a sudden reaction to a pinched, bound, or misaligned saw blade that causes an uncontrolled saw to lift up and out of the workpiece toward the operator. When the blade is pinched or bound tightly by the kerf closing down, the blade stalls and the motor reaction drives the unit rapidly back toward the operator. -
Page 5: Tool Description
1-e Dust Extraction Port. Bevel Lock Knobs. The knobs lock the bevel setting. There is one at the front and one at the rear of the saw. 1-g Arbor Access Hole. During a blade change, the arbor screw can be accessed through this opening. -
Page 6: Motor Controls
(using the guide rail) Bevel Angle Certifications Figure 4 4-a Speed Control Knob. The ATF 55E has electronic variable speed control that maintains a constant speed under varying loads. Turn this dial to change speed from 2100 to 5100 RPM. -
Page 7: Systainer (System Container)
Systainer (System Container) Every Festool product is shipped in its own unique system container, called a "Systainer". This provides protection and storage for the tool and accessories. All Systainers are stackable and can be interlocked together, including stacking and locking atop Festool dust extractors. -
Page 8: Adjusting The Guide Rail Gibs
The guide rail gibs keep the saw's sole plate tightly aligned with the rib of the guide rail system. There is one adjustment gib at the front of the saw and one at the rear. Both need to be adjusted. -
Page 9: Setting The Blade Perpendicular To The Sole Plate
The most accurate method for checking the square of the blade is to make a cut with the saw and examine the resulting cut. For even greater accuracy, the procedure below uses a method that amplifies a small measurement into a larger measurement to make it easier to observe. -
Page 10: Adjusting The Blade Position
Distance and Blade Skew. Both of these adjustments are completed at the factory and should be altered only if the saw is damaged, modified, or needs to match other Festool products. Figure 12 12-a Sole Plate Rear Adjustment Screws. -
Page 11: Replacing The Splinter Guard
Instruction Manual If an adjustment is necessary, loosen the rear bevel locking knob and move the back of the saw until the 0.15mm gap is achieved. Retighten the bevel locking knobs before removing the saw from the guide rail, and then retighten the other screws. -
Page 12: Changing The Sawblade
(16-b). Remove the sawblade out the bottom of the saw. Replacement Procedure Insert the new blade up through the bottom of the saw, and place it on the arbor. Make sure the blade teeth are pointing forward as shown. -
Page 13: Speed Control
Speed Control The ATF 55E has electronic speed control so the speed of the blade remains constant regardless how much the motor is loaded. The speed of the motor should be set according to the type of material being cut. -
Page 14: Dust Extraction
21-b Dust Port 21-c Retaining Ribs The ATF 55E can be used with the standard dust extraction diverter or with a vacuum system. When not in use, the diverter is stored on the sole plate of the saw (21-a). For best performance, a vacuum system is recommended. -
Page 15: Making Plunge Cuts
Set the plunge depth (page 12). Set the motor speed (page 13). Place the saw on the guide rail and behind the start of the cut as shown in figure 23. Press upward on the plunge release lever and pull back on the power trigger. -
Page 16: Troubleshooting
Make sure the outlet has power. Check the circuit breaker or try another outlet. ► If used with a Festool dust extractor, make sure the selector switch is pointing ► to "Auto". The auxiliary outlet on the dust extractor has power only when the selector is at Auto. -
Page 17: Maintenance
It is important to keep moving parts cleared of abrasive dusts. As a general rule, keep the saw clean of all dust and ► debris. Even soft-wood dust can be abrasive over time. -
Page 18: Changing The Motor Brushes
Changing the Motor Brushes This procedure should be completed only by an authorized Festool service representative. Opening the motor cover WILL void your warrantee. This procedure is presented as informational only. The motor brushes are graphite bars that provide an electrical connection between the motor controller and the rotating armature. -
Page 19: Accessories
Accessories Sawblades Description Coarse Crosscut With a low tooth count and a high Purpose hook angle, this blade easily cuts through general construction materials. Tooth Type ATB, 12 teeth Hook Angle Item Number 487 377 Description Fine Crosscut With a high tooth count, this blade provides excellent, chip-free Purpose crosscutting of lumber and fine... -
Page 20: Guide Rail Accessory Kit
Item Number: 490 833 This single tool contains all of the drivers and keys necessary to adjust any Festool tool. (Exception: Note that the arbor bolt on the saw uses a special hex key for changing blades. Using the Toolie can damage the arbor bolt.) Contains: 2.5, 4.0, 5.0, 6.0 mm Hex Keys;... -
Page 21: Warranty
Conditions of 1+2 Warranty You are entitled to a free extended warranty (1 year + 2 years = 3 years) for your Festool power tool. Festool shall be responsible for all shipping costs during the first year of the warranty. During the second and third year of the warranty...
Need help?
Do you have a question about the ATF 55E and is the answer not in the manual?
Questions and answers