Festool TS 55 EQ Instruction Manual
Festool usa instruction manual circular saw ts 55 eq
Hide thumbs
Also See for TS 55 EQ:
- Instruction manual (40 pages) ,
- Original operating manual/spare parts list (78 pages) ,
- Brochure (14 pages)

Related Manuals for Festool TS 55 EQ


Summary of Contents for Festool TS 55 EQ
- Page 1 TS 55 EQ Circular Saw Instruction Manual Important: Read and understand all instructions before using this tool.
-
Page 2: Warranty
Proprietary Notice All drawings and information herein are the property of Festool, TTS Tooltechnic Systems AG & Co. KG. All unauthorized use and reproduction is prohibited. Written and Illustrated by Rick Christopherson. -
Page 3: Table Of Contents
Contents Warranty ...2 Conditions of 1+2 Warranty ...2 Festool Limited Warranty ...2 Liability Statement ...2 Proprietary Notice...2 General Safety Rules...4 Work Area Safety ...4 Electrical Safety ...4 Extension Cords ...4 Personal Safety ...4 Tool Use and Care...4 Service...5 Specific Safety Rules for Circular Saws...5 Causes and Prevention of Kickback ...5... -
Page 4: General Safety Rules
Many accidents are caused by poorly maintained tools. Use only accessories that are recommended by the ► manufacturer for your model. Accessories that may be suitable for one tool may become hazardous when used on another tool. Size (AWG) TS 55 EQ Circular Saw... -
Page 5: Service
Causes and Prevention of Kickback Kickback is a sudden reaction to a pinched, bound, or misaligned saw blade that causes an uncontrolled saw to lift up and out of the workpiece toward the operator. When the blade is pinched or bound tightly by the kerf closing down, the blade stalls and the motor reaction drives the unit rapidly back toward the operator. -
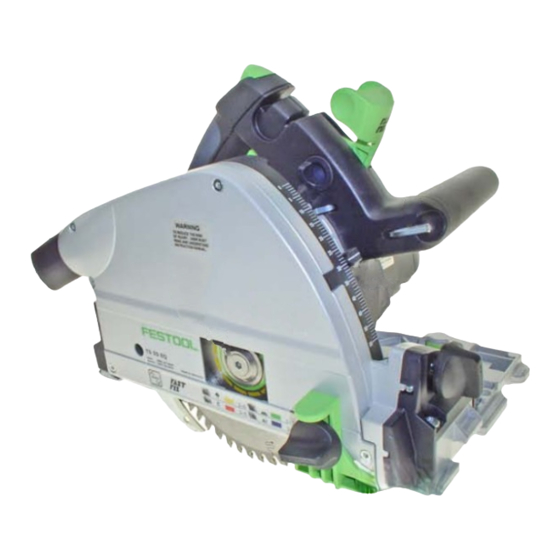
Page 6: Tool Description
(such as what happens with a pinched blade), the motor is temporarily disabled to protect itself. The motor is automatically reset when the power trigger is released. TS 55 EQ Circular Saw... -
Page 7: Single-Point Entry
There are some simple setup procedures to follow before a new saw can be used. Follow this sequence of inspections and adjustments before using the saw for the first time. It is important that these instructions be followed sequentially before cutting the zero-clearance splinter guards. -
Page 8: Adjusting The Guide Rail Gib Cams
Adjusting the Guide Rail Gib Cams The guide rail gib cams tighten against the rib of the guide rail to remove any side-play from the saw during a cut. Thumbwheels on the top of the cams permit easy adjustment. 1. Place the saw on the guide rail. -
Page 9: Trimming The Outrigger Splinter Guard
Replace if bent. 1. Unplug the saw for safety. 2. Raise the FastFix latch lever and plunge the saw until it locks into position (see page 10 for more information on the FastFix lever). -
Page 10: Changing The Sawblade
Changing the Sawblade The TS 55 saw features the FastFix system for easier blade changing. The FastFix system is engaged by raising the FastFix latch lever and plunging the saw down. The system includes the following features: For safety, the power switch is locked out. -
Page 11: Setting The Blade Perpendicular To The Sole Plate
The most accurate method for checking the square of the blade is to make a cut with the saw and examine the resulting cut. For even greater accuracy, the procedure below uses a method that amplifies a small measurement into a larger measurement to make it easier to observe. -
Page 12: Adjusting The 45º Bevel Stop
Matching the TS 55 to an Existing Guide Rail If you have more than one Festool saw, and you want them to share the same guide rails, you can adjust the TS 55 to match the cutting position of a previous saw. -
Page 13: Operation
A Note About Speed Control When you first turn on the saw and there is no load on the sawblade, you may notice a slight “growling” sound from t saw. This is normal, and is a result of the motor’s gears Speed reacting to the speed control. -
Page 14: Turning On The Saw
Before the saw can be started, the plunge release must be engaged. 1. Insert the Plug-it cord into the saw with the keyway lined up with the key, and twist the end to lock it in place. -
Page 15: Setting The Bevel Angle
The anti-kickback lip engages with the sole plate of the saw to prevent the back of the saw from lifting up at the beginning of a plunge cut. 1. Slide the guide stop onto the T-slot of the guide rail with the embossed arrow pointing toward the front of the saw. -
Page 16: Using Dust Extraction
For best results, however, a dust extraction system (such as the Festool CT 22 shown below) should be used. Festool dust extractors have the added features of variable speed, and sensing when the saw is turned on. The vacuum will... -
Page 17: Applications
The TS 55 is capable of performing a wide variety of tasks. The following sections provide information on some of these tasks. This is intended to be an introduction to the capabilities of the saw, but should not be considered as a comprehensive list of its capabilities. -
Page 18: Crosscutting And Trimming
Crosscutting and Trimming No other saw on the market can outperform a Festool for splinter-free, fine crosscutting. With other saws, the problem is two-fold; getting a straight cut, and achieving a splinter- free cut. The TS 55 handles these problems effortlessly. -
Page 19: Plunge Cutting
General Procedure 1. Place the guide rail on the cutline. 2. Place the saw on the guide rail, and position it at the start of the cut. 3. Install the guide stop on the guide rail, slide it up to the back of the saw, and lock it in place. -
Page 20: Cutting Non-Wood Materials
(see image to the right). Use the negative hook angle, aluminum-cutting blade, and ► a moderate speed setting. Be prepared for the blade to catch unexpectedly as the ► cutting angle changes with each facet of the extruded shape. TS 55 EQ Circular Saw... -
Page 21: Accessories
Accessories Sawblades Description Coarse Crosscut With a low tooth count and a high Purpose hook angle, this blade easily cuts through general construction materials. Tooth Type ATB, 12 teeth Hook Angle Item Number 487 377 Description Fine Crosscut With a high tooth count, this blade provides excellent, chip-free Purpose crosscutting of lumber and fine... -
Page 22: Guide Rails
Guide, Guide Rail Connection Bars, Guide Rail Clamps, Systainer. Rip Fence (Parallel Guide) Item Number: 491 469 Use the rip fence instead of the guide rail for making a rip using the edge of the workpiece as a reference. TS 55 EQ Circular Saw... -
Page 23: Systainer (System Container)
Systainer (System Container) Every Festool product is shipped in its own unique system container, called a "Systainer." This provides protection and storage for the tool and accessories. All Systainers are stackable and can be interlocked together, including stacking and locking atop Festool dust extractors. -
Page 24: Troubleshooting
2. Make sure the outlet has power. Check the circuit breaker or try another outlet. 3. If used with a Festool dust extractor, make sure the selector switch is pointing to "Auto". The auxiliary outlet on the dust extractor has power only when the selector is at Auto. -
Page 25: Maintenance
It is important to keep moving parts cleared of abrasive dusts. As a general rule, keep the saw clean of all dust and ► debris. Even soft-wood dust can be abrasive over time. -
Page 26: Replacing The Guide Rail Gib Cams
Replacing the Guide Rail Gib Cams If the gib cams are over tightened, or the saw is used in an environment with abrasive dust, the cams may develop flat spots and should be replaced. Maintaining proper adjustment and keeping the saw clean will increase the life of the cams. -
Page 27: Changing The Motor Brushes
Changing the Motor Brushes The motor brushes wear out over time and need to be replaced by an authorized service center. Festool does not condone brush replacement by the end-user. Completion of this procedure by an unauthorized service center will void the tool's warranty.
Need help?
Do you have a question about the TS 55 EQ and is the answer not in the manual?
Questions and answers