Hitachi X200 Series Quick Reference Manual
Hide thumbs
Also See for X200 Series:
- Instruction manual (305 pages) ,
- Instruction manual (306 pages) ,
- Connection manual (47 pages)

Related Manuals for Hitachi X200 Series


Summary of Contents for Hitachi X200 Series
- Page 1 X200 Series Inverter Quick Reference Guide • Single-phase Input 200V class • Three-phase Input 200V class • Three-phase Input 400V class Hitachi Industrial Equipment Systems Co., Ltd. Manual No. NT3011XB • Sep 2007...
- Page 2 Caution: Be sure to read the X200 Manual and the X200 Manual Addendum, and follow their Cautions and Warnings for the initial product installation. This Quick Reference Guide is intended for reference use by experienced users in servicing existing installations. Power Circuit Terminals Inverter models X200-002SFEF/NFU, -004SFEF/NFU SFEF...
-
Page 3: Control Circuit Terminals
Control Circuit Terminals Alarm relay AL2 AL1 AL0 Analog Analog Logic Logic inputs output inputs outputs L PCS P24 CM2 11 Jumper Terminal Name Description Ratings and Notes +24V for logic inputs 24VDC supply, 30mA max. (Notes: Do not use for network power. -
Page 4: Basic Wiring Diagram
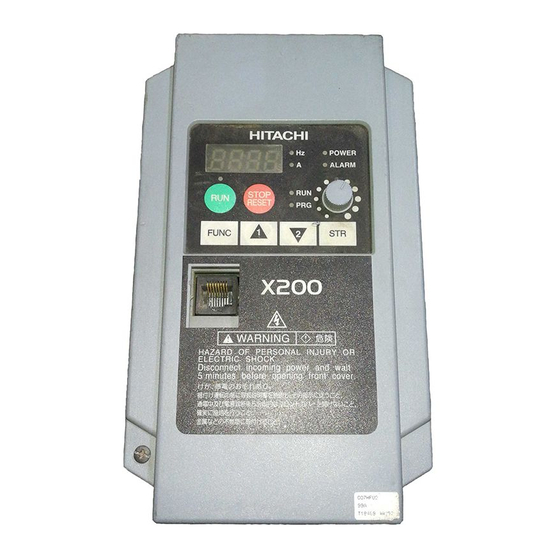
Basic Wiring Diagram The following wiring diagram shows the power and motor connections for basic operation. The optional signal input wiring supports external Fwd and Rev Run command, and a speed potentiometer. X200 series (L1) (T1) From 3-phase or single-phase power input source Motor (See specifications label... - Page 5 Inverter Keypad Operation Display Units (Hertz / Amperes) LEDs Power LED Parameter Display Alarm LED POWER Run/Stop LED ALARM Run key Enable LED Potentiometer Enable LED STOP Run key RESET Potentiometer Stop/Reset key Program/Monitor LED FUNC Function key Up/Down keys Store key •...
- Page 6 Keypad Navigation Map Monitor Mode Program Mode PRG LED=OFF PRG LED=ON Display Data Select parameter Edit parameter Power down Store as FUNC powerup Select default Function or Group Increment/ decrement value Edit FUNC FUNC FUNC Write data to EEPROM Return to parameter list - 5 -...
-
Page 7: Powerup Test
Powerup Test The Powerup Test procedure uses minimal parameter settings to run the motor. The procedure describes two alternative methods for via the inverter keypad, or via the logic commanding the inverter: terminals. Check power input and motor output wiring (see page 3 diagram). If using logic terminals for testing, verify correct wiring on [PCS], [FW], [H], [O] and [L] (bottom row) per the diagram on page 3. -
Page 8: Error Codes
Error Codes The X200 series inverters will trip on over-current, over-voltage, and under-voltage to protect the inverter. The motor output turns OFF, allowing the motor to free-run to a stop. Press the Stop/Reset key to reset the inverter and clear the error. Basic Error Codes Error Name... - Page 9 Error Trip Conditions Use function code d081 to access the error trip conditions for the current error as shown in the table below. Use the Up and Down arrow keys to scroll through the trip condition parameters. Step Display 1. Access d081 d081 2.
-
Page 10: Restoring Factory Default Settings
Restoring Factory Default Settings Action Display Function/Parameter Press b- - - FUNC “B” Group selected needed b001 Press First “B” Group parameter FUNC Country code for b085 Press/hold until… initialization selected 00 = Japan Press . If setting is FUNC 01 = Europe correct, then skip next step. -
Page 11: Parameter Tables
Parameter Tables “D” group: Monitoring Functions Func. Name / Description Units Code D001 Output frequency monitor D002 Output current monitor D003 Rotation direction monitor − Forward Stop Reverse Direction D004 Process variable (PV), PID feedback monitor D005 Intelligent input terminal status −... -
Page 12: Trip History And Inverter Status
Trip History and Inverter Status No error Monitor Mode Error exists? Display data FUNC FUNC Error code Output frequency at trip point FUNC Motor current at trip point DC bus voltage at trip point Cumulative inverter operation time at trip point Cumulative power-ON time at trip point... -
Page 13: "F" Group: Main Profile Parameters
Parameter tables for user-settable functions follow these conventions: Some parameters have 2nd motor equivalents, indicated by the x2xx parameter codes in the left-most column. Some parameters specify an option code. Where applicable, the option codes will be in a bulleted list in the Name/Description column. The default values apply to all models unless otherwise noted for each parameter…... -
Page 14: "A" Group: Standard Functions
“A” group: Standard Functions Func. Default Name / Description Code -FE/-FU value A001/ Frequency source setting 01/00 A201 00 Keypad potentiometer 01 Control terminal 02 Function F_01 setting 03 RS485 Modbus communication 10 Calculate function output A002/ Run command source setting 01/00 A202 01 Input terminal FW or RV (assignable) - Page 15 Func. Default Name / Description Code -FE/-FU value A045/ V/f gain setting 100. A245 A051 DC braking enable 00 Disable 01 Enable 02 Freq.detection A052 DC braking frequency setting A053 DC braking wait time A054 DC braking force during deceleration A055 DC braking time for deceleration A056...
- Page 16 Func. Default Name / Description Code -FE/-FU value A296 A097 Acceleration curve selection 00 Linear 01 S-curve A098 Deceleration curve selection 00 Linear 01 S-curve A101 [OI]-[L] input active range start frequency A102 [OI]-[L] input active range end frequency A103 [OI]-[L] input active range start current A104 [OI]-[L] input active range end current...
-
Page 17: "B" Group: Fine-Tuning Functions
“B” group: Fine-tuning Functions Func. Default Name / Description Code -FE/FU value B001 Selection of automatic restart mode 00 Alarm output after trip, automatic restart disable 01 Restart at 0Hz 02 Resume operation after frequency pull-in 03 Resume previous freq. after freq. pull-in, then decelerate to stop and display trip info B002 Allowable under-voltage power failure time... - Page 18 Func. Default Name / Description Code -FE/FU value B083 Carrier frequency setting B084 Initialization mode (parameter or trip history) 00 Trip history clear 01 Parameter initialization 02 Trip history clear and parameter initialization B085 Country code for initialization 01/02 00 Japan version 01 Europe version 02 US version B086...
-
Page 19: "C" Group: Intelligent Terminal Functions
“C” group: Intelligent Terminal Functions Func. Default value Name / Description Code -FE/FU value C001/ Terminal [1] function Thirty one option C201 codes available (See page 20) C002/ Terminal [2] function C202 C003/ Terminal [3] function 02/16 C203 C004/ Terminal [4] function 03/13 C204 C005/... -
Page 20: "H" Group: Motor Constants Functions
Func. Default value Name / Description Code -FE/FU value 04 Decelerate to a stop C077 Communication error time-out 0.00 C078 Communication wait time C081 O input span calibration 100.0 C082 OI input span calibration 100.0 C086 AM offset calibration 100.0 C091 Debug mode enable 00 No Display... - Page 21 Intelligent Input Terminal Listing Symbol Code Input Terminal Name Forward Run/Stop Reverse Run/Stop Multi-speed select, Bit 0 (LSB) Multi-speed select, Bit 1 Multi-speed select, Bit 2 Multi-speed select, Bit 3 (MSB) Jogging External DC braking Set (select) 2 motor data 2-stage accel and decel Free-run stop External trip...
-
Page 22: Analog Input Configuration
Analog Input Configuration The following tables show the parameter settings required for various analog input signal types. A005 AT input Active [OI] [OI] If [AT] is not assigned to any intelligent input terminal, it means AT=OFF in above table. Note: Analog input O and OI cannot be used at the same time. - Page 23 ® Cautions, Warnings, and Instructions Wiring Warnings for Electrical Practices and Wire Sizes The warnings and instructions in this section summarize the procedures necessary to ensure an inverter installation complies with Underwriters Laboratories® guidelines. WARNING: “USE 60/75°C Cu wire only” or equivalent. For models X200-005S, -007S, -011S, -022S, -007N, -015N, -015L, -022L, -037L, -055L, -075L.
- Page 24 Terminal Tightening Torque and Wire Size The wire size range and tightening torque for field wiring terminals are presented in the tables below. Power Terminal Motor Output Torque Input Inverter Model Wiring Size Voltage Ft-lbs (N-m) Range (AWG) X200-002SFE/NFU X200-004SFE/NFU (75°C only) 0.55 X200-005SFE...
- Page 25 X200-040HFE/HFU X200-055HFE/HFU X200-075HFE/HFU Motor Overload Protection Hitachi X200 inverters provide solid state motor overload protection, which depends on the proper setting of the following parameters: • B012 “electronic overload protection” • B212 “electronic overload protection, 2nd motor” Set the rated current [Amperes] of the motor(s) with the above parameters. The setting range is 0.2 * rated current to 1.0 * rated current.
Need help?
Do you have a question about the X200 Series and is the answer not in the manual?
Questions and answers