
Related Manuals for Fluke Biomedical medTester 5000C


Summary of Contents for Fluke Biomedical medTester 5000C
- Page 1 medTester 5000C Biomedical Tester Operators Manual PN 2243153 February 2006 2006 Fluke Corporation, All rights reserved. Printed in USA All product names are trademarks of their respective companies.
- Page 2 Fluke Biomedical. This warranty does not apply if the product has been damaged by accident or misuse or as the result of service or modification by other than Fluke Biomedical.
-
Page 3: Unpacking And Inspection
Fluke Biomedical. Copyright Release Fluke Biomedical agrees to a limited copyright release that allows you to reproduce manuals and other printed materials for use in service training programs and other technical publications. If you would like other reproductions or distributions, submit a written request to Fluke Biomedical. - Page 4 United Parcel Service, Federal Express, or Air Parcel Post. We also recommend that you insure your shipment for its actual replacement cost. Fluke Biomedical will not be responsible for lost shipments or instruments that are received in damaged condition due to improper packaging or handling.
- Page 5 Fluke Biomedical. Changes made to the information in this document will be incorporated in new editions of the publication. No responsibility is assumed by Fluke Biomedical for the use or reliability of software or equipment that is not supplied by Fluke Biomedical, or by its affiliated dealers.
-
Page 7: Table Of Contents
Biomedical Test System Contents Table of Contents G E N E R A L I N F O R M A T I O N SAFETY CONSIDERATIONS ............1-1 General..................1-1 Safety Symbols ................1-1 Introduction ..................1-2 How to Use This Manual...............1-3 If You’ve Used The medTester 5000C Before......1-3 If You’re New to The medTester 5000C... - Page 8 Date and Time Setup ..............2-3 Audio Transducer................. 2-4 Enabling Modules ................. 2-5 Confirming Module Installation ..........2-7 I N S T R U M E N T F A M I L I A R I T Y Know Your medTester 5000C ............3-1 Top Panel Controls, Displays, and Connectors.......
- Page 9 Biomedical Test System Contents What You See in an Autosequence..........6-2 How to Customize..............6-3 Customizing a Blank Safety Autosequence .........6-7 Test Record Header..............6-7 Customizing Your Autosequence Prompts........6-8 Turning Prompts On and Off ............6-9 Renaming Prompts ..............6-10 Pausing ..................6-11 Test Tag Configuration...............6-11 Summary of Stored Records............6-12 Customizing Bar Code Record Data Entry .........6-13 Resetting Autosequences to Default Settings......6-14...
- Page 10 Run a Checklist ..............11-7 Items in a Checklist .............. 11-9 View or Print a Checklist ............ 11-12 Remote Control of Fluke Biomedical Testers ......11-13 1 2 : R E M O T E O P E R A T I O N Local Versus Remote Mode ............
- Page 11 Biomedical Test System Contents Local Input Mode ................12-3 Local Output for Records and Tags ...........12-4 Record Output................12-5 Test Tag Output ..............12-5 Remote Mode................12-6 Going Remote ................12-6 File Transfer Protocol ............12-9 Remote Commands List ............12-12 Port Diagnostics ............... 12-17 1 3 : T H E W E D G E A D A P T E R...
- Page 12 For the Oxitest PLUS: .............. 15-13 For CardioSat 100: ..............15-16 For the Index 2XL:..............15-19 Posttest Prompts..............15-22 Customizing SPO2 Autosequences.......... 15-22 Make Your Own Autosequence ........... 15-22 Configuring for Your SPO2 Simulator........15-23 Making an Autosequence ............ 15-23 1 6 : T R A N S C U T A N E O U S P A C E M A K E R...
-
Page 13: Safety Considerations
General This instrument and related documentation must be reviewed for familiarization with safety markings and instructions before you operate the instrument. Refer to the medTester 5000C Operators Manual for operating instructions. Safety Symbols The symbol to the left is the operators manual symbol. When you see this symbol on the instrument, refer to the operators manual. -
Page 14: Introduction
medTester 5000C Operators Manual Introduction This manual is written for the biomedical technician or clinical engineer responsible for testing hospital equipment, or the plant maintenance technician responsible for maintenance records. The medTester 5000C is an automated biomedical equipment test system and a portable data acquisition unit that can be controlled with a computer. -
Page 15: How To Use This Manual
How to Use This Manual Your medTester 5000C Operators Manual is designed for you. Whether you are an experienced medTester operator or someone new to medTester, please read this section before using your medTester 5000C. -
Page 16: Where To Find Help
If you have questions not answered in this manual, please refer to the following Fluke Biomedical sources: medTester 5000C Service Manual, Part No. 2243166. Fluke Biomedical Customer Service Department. Telephone 800-648-7952 Safe current limits for electromedical apparatus, (ANSI/AAMI ES1), © 1993, Association for the Advancement of Medical Instrumentation. -
Page 17: Features
Biomedical Test System General Information Features The medTester 5000C is an automated biomedical equipment test system designed for you to do electrical safety and performance testing. With the medTester, you can run customizable automatic sequences of tests, called autosequences. You can print stored test records or upload them to a computer. -
Page 18: Computer Control
12, Remote Operation, discusses the methods you can use to control the medTester 5000C and to manage test data. If you use other Fluke Biomedical analyzers, such as the Impulse 4000 or IPT- 1, you can control them with the medTester 5000C. By connecting an analyzer to the medTester 5000C’s COM2 port, you gain a two-way... -
Page 19: Medtester 5000C Optional Modules
Biomedical Test System General Information Checklists are complete sets of preventive maintenance procedures for equipment testing. They can contain prompts to the medTester 5000C user to make physical inspections of the EUT and to take individual safety measurements. A checklist can include one or more safety and performance autosequences that automatically execute. - Page 20 medTester 5000C Operators Manual These modules are software enabled for use by the medTester’s firmware. The firmware is held in EPROM (erasable programmable read-only memory). When you purchase one or more of the modules described below, you receive a 3.5-inch floppy diskette containing the software functions of the module. To load the module software, attach the appropriate serial cable from a communications port on your personal computer to a communications port on the medTester.
-
Page 21: General Information
Biomedical Test System General Information medTester 5000C Modules medTester Functions Enabled medTester Required for... 5000C Prerequisites for Use of Module Name Module Data Transfer File Transfer RS-232/Printer Module. Checklist usage. Protocol used to Memory—100 Records transfer checklists Module. into and out of the medTester 5000C. - Page 22 Module. Data Transfer Module. Pacer Transcutaneous RS-232/Printer Module. 10 autosequences for testing Pacemaker transcutaneous pacemakers Memory—100 Records autosequences. with the Fluke Biomedical Module. Impulse 4000. Expanded Memory Including Pacer Module. autosequences in checklists. Data Transfer Module. NIBP Non-Invasive Blood RS-232/Printer Module.
-
Page 23: Features
Biomedical Test System General Information Features Fully automated electrical safety testing 12–lead ECG/arrhythmia simulation Dedicated “autosequence” testing for performance testing of defibrillators, infusion pumps, etc. 20-ampere testing with GFCI protection Meets ANSI/AAMI ES1–1993 test load requirements Load current measurement Programmable test limits Automatic record storage Bar code compatibility Optional Accessories... -
Page 24: Medtester 5000C Instrument Specifications
medTester 5000C Operators Manual medTester 5000C Instrument Specifications Line Voltage and Measurements Hot to Neutral. Neutral to Ground. Hot to Ground. Range: 200.0 V RMS. Accuracy: ±5% of range. Leakage Current Leakage current is measured through a 1 k AAMI load RMS or DC measured and displayed in microamperes. -
Page 25: Equipment Current
Accuracy—±1% of range. Test Current—100 mA Isolated Power This feature allows the use of the Fluke Biomedical Model 202A Isolation Test Module to make current measurements on an isolated power system. For more information, see Chapter 4, Manual Tests. 1-13... -
Page 26: Toolbox
medTester 5000C Operators Manual Toolbox Toolbox allows for the use of external measurement adapters for: Tachometer—with a range of 100 to 20,000 RPM. Temperature—with a range of 0 to 200 F or 0 to 100 C. Humidity—ranging from 15% to 90% relative. For more information about Toolbox, see Chapter 4, Manual Tests. -
Page 27: Ground Fault Circuit Interrupter
Biomedical Test System General Information Ground Fault Circuit Interrupter The test receptacle is protected by a ground fault circuit interrupter. In the event of a fault in the EUT (when the test receptacle is powered on) which causes a current imbalance in the hot and neutral lines of greater than 5 mA, the interrupter triggers. -
Page 28: General Specifications
medTester 5000C Operators Manual General Specifications Parameter Specification Power Requirement: 115 V ±10%, 60 Hz only Temperature Ranges: Operating: 15 to 35 C (59 to 95 F) Storage: 0 to 50 C (32 to 122 F) Display: 80-character (40 x 2 lines) backlit Liquid Crystal Display Weight: 5 kg (11 lb) Dimensions: 25.4 cm L x 35.0 cm W x 10.2 cm H... -
Page 29: Accessories
Biomedical Test System General Information Accessories Standard Part # 2195732 20/15–amp Adapter 2392617 Two Kelvin Cable 2242165 Two Ground Pin Adapters 2243153 Operator Manual 2392871 Accessory Pouch Optional Part # RS-232; Female DB25 to 2392186 Interface Cable, medTester to Female DB25 RS232;... - Page 30 medTester 5000C Operators Manual Optional (continued) Part # Serial Cable; Male DB25 to Printer Cable, medTester to 2200577 Centronics standard PC printer Printer, white and yellow 2245515 TLS Test Tag Printer Kit vinyl labels, black vinyl printer ribbon, serial cable, adapter and US power source 2220045...
-
Page 31: Medtester 5000C Module Upgrades
Biomedical Test System General Information medTester 5000C Module Upgrades Part # Factory Installed 2246094 Module 2, Service, RS-232/Printer 2246100 Module 3, Service, 100 Records 2246117 Module 4, Service, Expanded Memory 2246121 Module 5, Service, Waves/Extended Test 2246139 Module 6, Service, Data Transfer 2246142 Module 7, Service, medCheck 2246156... - Page 32 medTester 5000C Operators Manual 1-20...
-
Page 33: I N S T A L L A T I O N Factory Default Settings
In this chapter you will find information about the default (factory) settings, power-up sequence, setting the time and date, and using the beeper. Factory Default Settings The medTester 5000C is shipped from the Fluke Biomedical factory with the settings described below. FACTORY DEFAULT SETTINGS Condition Name... -
Page 34: Power-Up Sequence
When you turn on the medTester 5000C, the following power-up sequence takes place: Introductory Message—These items below appear in the medTester 5000C display: The text FLUKE BIOMEDICAL MEDTESTER 5000C The serial number. The firmware version number. Tests—The medTester tests the condition of its internal battery and the condition of the line voltage into which the medTester 5000C is connected. -
Page 35: Initialization
Biomedical Test System Installation medTester 5000C Power-Up Condition Messages Message Condition Indicated LOW BATTERY, SERVICE REQUIRED! Internal battery (used for memory and clock backup) level is low. LOW LINE VOLTAGE! Hot to neutral is less than (<) 90 V. HIGH LINE VOLTAGE! Hot to neutral is greater than (>) 135 V. -
Page 36: Audio Transducer
medTester 5000C Operators Manual After entering date and time, insert a thin, non-metallic device in the “clock set enable switch” slot (labeled on the right side of the medTester) to depress the switch and enter the following menu STORE command to store this information: Press to escape this procedure and to keep current settings. -
Page 37: Enabling Modules
Biomedical Test System Installation Enabling Modules If it should become necessary to reinstall modules 2 through 14, perform the steps described below. You need to install each module from its separate diskette. Installation requires running a program on an IBM-compatible personal computer. - Page 38 medTester 5000C Operators Manual Note If running Windows 95 or 98, with the mouse you can click and hold the Start button, then select Programs and MS-DOS Prompt. If running Windows 2000 or XP, with the mouse click the Start button, select Programs, Accessories, and Comnmand Prompt.
-
Page 39: Confirming Module Installation
Biomedical Test System Installation To install more than one module, repeat steps seven (7) through nine (9) for each module which has an installation disk. Install them in numerical order. If necessary, return to Windows from Command Prompt by typing: at the DOS prompt. - Page 40 medTester 5000C Operators Manual...
-
Page 41: I N S T R U M E N T F A M I L I A R I T Y Know Your Medtester 5000C
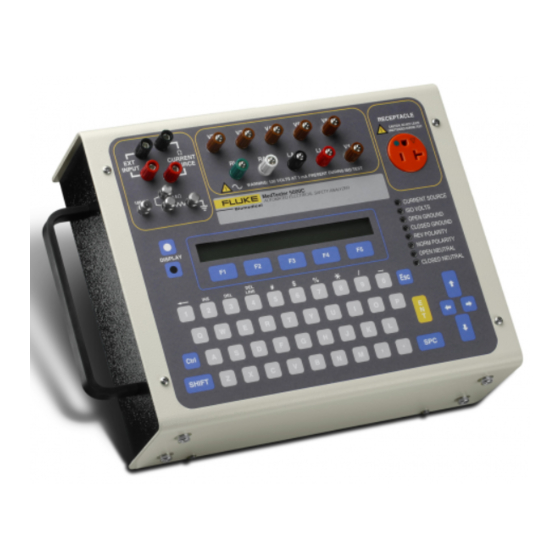
Chapter 3 Instrument Familiarity This chapter familiarizes you with the medTester 5000C. Know Your medTester 5000C The medTester 5000C has two major control and interface sections—the top panel and the rear panel. Below is a list of the controls, displays, and connectors on these two panels. - Page 42 medTester 5000C Operators Manual Figure 3-1. MedTester 5000C Top and Rear Panel Locator...
-
Page 43: Rear Panel Controls, Displays, And Connectors
Biomedical Test System Instrument Familiarity ARROW KEYS —Control cursor movement when entering data into the display from the keyboard and scroll through menus horizontally. See Navigating the Menus later in this chapter. KEYBOARD —Standard QWERTY -type keyboard with numeric characters 0-9 and full alpha character list. The spacebar key is positioned at the lower right-hand corner, and there is one shift key and one control key. -
Page 44: Power Up
medTester 5000C Operators Manual COM1 PORT —Receives input locally from the optional keyboard, bar code scanning gun, or personal computer or terminal. Outputs data to a personal computer or terminal. With a Wedge adapter, this port is used by the external PC keyboard interface. FUSE —Twenty (20) ampere, slow-blow type, 250 V. - Page 45 Biomedical Test System Instrument Familiarity 00/00/00 MENU 2 00:00:00 MEMORY TOOLBOX CUSTOM The display now shows menu two. Remember that menu two is an extension of menu one. Menu-two menu items are at the same level as menu one items. Menu two contains a left arrow which indicates that there are menu items which you can scroll to by using the left arrow key.
- Page 46 medTester 5000C Operators Manual...
-
Page 47: M A N U A L T E S T S Performing Manual Tests
Chapter 4 Manual Tests Learn to use the medTester 5000C to manually perform electrical safety tests for line voltage, leakage current, equipment current, and resistance. Performing Manual Tests The medTester 5000c has all the features of a manual safety tester. You can access these features from the items under MANUAL on Menu 1. -
Page 48: Leakage Current
medTester 5000C Operators Manual Hot to Neutral Enter menu commands: MANUAL VOLTS HOT-NEUT Neutral to Ground Enter menu commands: MANUAL VOLTS NEUT-GND Hot to Ground Enter menu commands: MANUAL VOLTS HOT-GND Leakage Current All leakage current measurements are taken through a 1–k AAMI load RMS or DC. - Page 49 Biomedical Test System Manual Tests External Case Leakage See Figure 4-2, Case External Leakage. Plug the EUT (equipment under test) into the test receptacle. Connect the dual banana-plug end of a Kelvin cable to the two red external meter posts. Connect the alligator-clip end of the Kelvin cable to a grounded point on the case of the equipment under test.
-
Page 50: Ecg Lead Leakage
medTester 5000C Operators Manual POLARITY—normal or reversed, NEUTRAL—open or closed. The respective condition LEDs light, and the display reads the current leakage in A. This is a test of leakage current for double insulated devices equipped with a three-conductor power plug. The ground connection is held open. - Page 51 Biomedical Test System Manual Tests Lead isolation, all leads. Lead isolation, single lead Note For all lead-to-ground and lead-to-lead leakage measurements, you can configure the test receptacle with open or closed ground, normal or reverse polarity, and open or closed neutral by toggling GROUND, POLARITY, NEUTRAL...
- Page 52 medTester 5000C Operators Manual —right leg, —right arm, —left arm, —left leg, and —V1 through V6 leads tied together. You can measure V leads individually. Displayed measurements are in A. Note If you receive abnormally high leakage current measurements with V1-V6 leads tied together, you can inspect individual V leads by removing the other leads.
- Page 53 Biomedical Test System Manual Tests Isolation Lead Leakage See Figure 4-7, ECG Lead Isolation Test: All Leads and Individual Leads. You can do the following two tests in an all-lead or individual-lead mode. The selected lead or leads are connected to the AAMI load with line voltage applied to the lead(s).
-
Page 54: Equipment Current
medTester 5000C Operators Manual Select the keyboard function key that corresponds to the lead you wish to test. ISOV ON To begin the measurement, press . The test begins, and the ISO VOLTS annunciator lights. The reading is displayed for up to 15 seconds. - Page 55 Biomedical Test System Manual Tests Power Cord Resistance See Figure 4-9, Power Cord Resistance Test. Plug the equipment under test into the TEST RECEPTACLE at the top of the medTester 5000C. Connect the dual banana-plug end of a Kelvin cable to the two red external meter posts.
-
Page 56: Isolated Power And Ground Fault Test
Isolated Power and Ground Fault Test See Figure 4-11, Isolated Power System and Ground Fault Test. This test requires the Fluke Biomedical Model 202A Isolated Power Test Module plugged into the test receptacle of the medTester 5000C. The Model 202A introduces faults on isolated power systems and grounded systems. -
Page 57: Toolbox
Biomedical Test System Manual Tests Toolbox Toolbox consists of measurements that require the use of three adapters. These adapters, available from third-party suppliers, are used to perform the following tests: Tachometer—to calculate the speed of rotating devices, such as centrifuges; Temperature—to verify hospital environment conditions for temperature;... - Page 58 medTester 5000C Operators Manual Temperature Plug the temperature adapter test leads into the EXT INPUT jacks on medTester’s front panel. Set the adapter’s power switch to the desired temperature scale, Fahrenheit or Celsius. It must match the medTester selection. Enter menu commands from MENU 2 TOOLBOX TEMP...
- Page 59 Biomedical Test System Manual Tests Figure 4-1. Three Types of Line Voltage Measurements 4-13...
- Page 60 medTester 5000C Operators Manual Figure 4-2. Case External Leakage 4-14...
- Page 61 Biomedical Test System Manual Tests Figure 4-3. Case Internal Leakage 4-15...
- Page 62 medTester 5000C Operators Manual Figure 4-4. External Leakage Current 4-16...
- Page 63 Biomedical Test System Manual Tests Figure 4-5. ECG Lead Leakage to Ground: All Leads to Ground and Individual Lead to Ground 4-17...
- Page 64 medTester 5000C Operators Manual Figure 4-6. ECG Interlead Leakage 4-18...
- Page 65 Biomedical Test System Manual Tests Figure 4-7. ECG Lead Isolation Test: All Leads and Individual Leads 4-19...
- Page 66 medTester 5000C Operators Manual Figure 4-8. Equipment Load Current 4-20...
- Page 67 Biomedical Test System Manual Tests Figure 4-9. Power Cord Resistance Test 4-21...
- Page 68 medTester 5000C Operators Manual Figure 4-10. External Resistance 4-22...
- Page 69 Biomedical Test System Manual Tests Figure 4-11. Isolated Power System and Ground Fault Test 4-23...
- Page 70 medTester 5000C Operators Manual 4-24...
-
Page 71: A U T O S E Q U E N C E S What Is An Autosequence
(available in the Waveform/Extended Testing Module) in Chapter 6, Customize Your medTester 5000C. Optional autosequences are available now for testing the following types of medical equipment with Fluke Biomedical analyzers connected to the COM2 serial port on the medTester 5000C:... -
Page 72: Description Of Standard Safety Autosequences
Defibrillators—Using Fluke Biomedical defibrillator analyzers Impulse 3000 and Impulse 4000 (see Chapter 9, Defibrillator Module). IV Pumps—Using Fluke Biomedical IV pump tester models IDA 4 Plus, the IPT-1 or the IPT MC IV(See Chapter 10, IV Pump Module). Electrosurgical Units—Using the Fluke Biomedical electrosurgical analyzer Model 454A or Model RF303 . -
Page 73: Autosequence Selection
See Keyboard Shortcut Command also in the following table. Bar Code Scan Gun—Use the Fluke Biomedical bar code Scan gun or barcode wand, if an older unit and so equipped, to select a keyboard shortcut command. -
Page 74: Standard Safety Autosequence Names
medTester 5000C Operators Manual Standard Safety Autosequence Names You can access autosequences from either medTester menu commands or from the keyboard shortcut commands. See the list of autosequences below. SAFETY AUTOSEQUENCES Keyboard Autosequence Function Menu Command Shortcut Name From medTester 5000C Main Menu Commands (MENU 1) 10LD X... -
Page 75: Autosequence Device Prompts
Biomedical Test System Autosequences SAFETY AUTOSEQUENCES TEMPMON Temperature TOOLBOX TEMPMON Monitor HUMMON Humidity TOOLBOX HUMMON Monitor Autosequence Device Prompts After you select an autosequence, medTester prompts you to enter the following information for the device that you want to test. Entry information can be any combination of alpha or numeric characters. - Page 76 medTester 5000C Operators Manual Note All these pre-test prompts can be turned off. However, if using the medTester with an Equipment Management System, at a minimum you will want to leave the Control Number on for the proper work order closure. Important Special Character Rules Remember these rules when typing characters: The double quote (“) and tilde (~) characters are illegal and are...
-
Page 77: Autosequence Steps
Biomedical Test System Autosequences Autosequence Steps If you have autosequence prompts turned on, you enter the appropriate information. After responding to prompts, you see this message appear on the medTester 5000C display: PLUG IN EUT, ATTACH KELVIN CABLE AND PATIENT LEADS This message is telling you to: Plug the EUT into the test receptacle. -
Page 78: System Line Voltage
medTester 5000C Operators Manual System Line Voltage Measurements included are: Hot to neutral, Neutral to ground, and Hot to ground. Power Cord Resistance After taking measurements of line voltage, the autosequence moves to the power cord resistance measurement. The medTester offers you the option of skipping the test. -
Page 79: Leakage Current Measurements
Biomedical Test System Autosequences Leakage Current Measurements After the power cord resistance test, the autosequence moves to leakage current measurements with a message: TURN EUT POWER OFF Note This message appears only if the power-off test prompt is turned on and the power-off tests are enabled. Leakage current tests are always executed with power on and can not be turned off. -
Page 80: Ecg Performance Waveforms
medTester 5000C Operators Manual ECG Performance Waveforms If you have the Waveform/Extended Testing module installed on your medTester 5000C, and you have performed a lead test, this message appears: OUTPUT PERFORMANCE WAVES? This is a prompt to output an autosequence of performance waves to a patient monitor from the patient leads attached to the medTester 5000C. -
Page 81: End-Of-Test Prompts
Biomedical Test System Autosequences Note See Chapter 7, Performance Waves, for detailed instructions about performance waveform output. End-of-Test Prompts At the end of the autosequence, the medTester prompts you for the following data. After each entry press the key. PERFORMANCE WAVE COMMENTS— This prompt appears only if performance waveforms are output to the EUT. - Page 82 medTester 5000C Operators Manual This prompt appears only if you enable the prompt in the CUSTOM menu. See Chapter 6, Customize Your medTester 5000C, for information about turning autosequence prompts on and off. If you choose to print a test tag, the following fields print if you have them turned on: Header—The current active header (e.g.
-
Page 83: Test Tag Printer
This section describes the setup and operation for printing Test Tags through the medTester 5000C, using an optional Test Label Printer. Either the Brady TLS PC Link (PN 2245515), the Fluke Biomedical Model TLP-1 or TLP-2 label printers are compatible with the medTester 5000C. - Page 84 Replace the ribbon when it has been used up. Selecting a label printer The medTester 5000C defaults to the Fluke Biomedical Model TLP-1 & 2 printer. To select a different printer, use the menu path.
-
Page 85: Optional Monitoring Autosequences
Biomedical Test System Autosequences From the menu, press ) as before to configure your CONFIG test tag (test tag lines on/off), or press ) to select a PRINTER label printer. From the ( ) menu press ) to select Fluke PRINTER Biomedical TLP printers (TLP-1 or TLP-2), or ) to... -
Page 86: Line Voltage Monitor
medTester 5000C Operators Manual Menu Selection Procedure AUTO Both monitoring autosequences are found under . Press the right arrow key on the medTester keyboard to access either autosequence. SAFETY DEFIB IV PUMP SP02 NIBP blank LINEMON ENVMON Line Voltage Monitor LINEMON After you select from the menu, medTester prompts—... -
Page 87: Environmental Monitor
Biomedical Test System Autosequences OP CODE—The operator is the person doing the testing. This code can consist of a maximum of three characters which can be entered from the medTester keyboard or barcode Scan Gun. An example of an operator code could be a person’s initials or employee number. - Page 88 BOTH NEITHER Select MEMORY if you want to store the test record. This requires optional Fluke Biomedical memory modules. Select PRINT if you want to print the test record. Select if you want to store and print the record. BOTH The medTester will prompt you to enter the following information.
-
Page 89: Toolbox Monitors
Biomedical Test System Autosequences End-of-Test Prompts At the end of the autosequence, medTester prompts you for the following data: (prompts can be turned off) COMMENTS NEXT TEST DUE DATE USER TIME STORE RECORD? (if memory was selected), or PRINT? (if print was selected Toolbox Monitors The toolbox menu on the medTester 5000C main menu contains monitoring... - Page 90 medTester 5000C Operators Manual For resetting the maximum reading to become the minimum, press the RESET (F1) key. The medTester will prompt you to enter the following information. Entry information can be any combination of alpha or numeric characters. After each entry press the key: OP CODE—The operator is the person doing the testing.
-
Page 91: Humidity Monitor
Biomedical Test System Autosequences Humidity Monitor You can monitor the level of relative humidity over periods of time, print the results, and store the results in memory. To access the monitor from the keyboard, enter: TOOLBOX HUMMON Selections then display as: RUN HUMIDITY MONITOR A19 TO: MEMORY PRINT... - Page 92 medTester 5000C Operators Manual CYCLE TEST TIME IN MINUTES—Enter the time between measurements (1-9 minutes). TRIGGER LEVEL—Enter the trigger threshold, that is the percent of deviation in relative humidity that causes an automatic measurement (1-9 percent). Measurements of the relative humidity begin and display on the top line. Line two of the display indicates the measurement interval and the trigger point percentage.
-
Page 93: C U S T O M I Z E Y O U R M E D T E S T E R How To Customize A Preprogrammed Safety Autosequence
Chapter 6 Customize Your medTester In this chapter you learn how to customize safety autosequences and how to customize the prompt information that appears before, during, and after the tests execute. You can customize the ten standard preprogrammed autosequences and the five blank safety autosequences. -
Page 94: What You See In An Autosequence
medTester 5000C Operators Manual After pressing this function key, you can begin scrolling through the steps in the sequence by using your up and down arrow keys. Continue viewing our example sequence below. What You See in an Autosequence As you scroll through autosequence A1, you see the following: 1 CASE EXT, NORM POL, CLSD GND, CLSD NEU 2 CASE EXT, NORM POL, OPEN GND, CLSD NEU 13 ALL -GND, NORM POL, CLSD GND, CLSD NEU... -
Page 95: How To Customize
Biomedical Test System Customize Your medTester You can press to move out of view and back to the previous menu choices, or you can print the autosequence. If you have the medTester 5000C RS-232/Printer module installed with a printer connected to your medTester, do the following to print this autosequence: From the main menu, MENU1... - Page 96 medTester 5000C Operators Manual Customizing Menu Steps As you step through the customizing menu, the medTester asks you to enter information. Note There are prompts that appear before, during, and at the end of the autosequence. For information about these prompts and Customizing Autosequence how to customize them too, see Prompts...
- Page 97 Biomedical Test System Customize Your medTester LEAKAGE CURRENT TESTS Test Item Legend rev—reverse iso—isolated RA—right arm pol—polarity norm—normal LA—left arm clsd—closed lds—leads LL—left leg gnd—ground All—all leads V1/6—vector 1-6 neu—neutral RL—right leg Case External, norm pol, clsd gnd, clsd neu Case External, norm pol, open gnd, clsd neu Case External, rev pol, clsd gnd, clsd neu Case External, rev pol, open gnd, clsd neu...
- Page 98 medTester 5000C Operators Manual LEAKAGE CURRENT TESTS Test Item Legend rev—reverse iso—isolated RA—right arm pol—polarity norm—normal LA—left arm clsd—closed lds—leads LL—left leg gnd—ground All—all leads V1/6—vector 1-6 neu—neutral RL—right leg LA—gnd, rev pol, open gnd, clsd neu LL—gnd, rev pol, open gnd, clsd neu V1-6—gnd, rev pol, open gnd, clsd neu RL—lds, norm pol, clsd gnd, clsd neu RA—lds, norm pol, clsd gnd, clsd neu...
-
Page 99: Customizing A Blank Safety Autosequence
Biomedical Test System Customize Your medTester Customizing a Blank Safety Autosequence If your medTester 5000C contains the Waveform/Extended Testing Module option (5), you have autosequences A11-A15. On your autosequence menu these are listed as blank . You can customize each of these in the same manner as described in How to Customize above. -
Page 100: Customizing Your Autosequence Prompts
medTester 5000C Operators Manual Customizing Your Autosequence Prompts In an autosequence, the medTester 5000C prompts you for information that is included on the test record, which you can print and/or store in memory. Prompts appear before, during, and after the autosequence executes. There are 17 of these prompts in all. -
Page 101: Turning Prompts On And Off
Biomedical Test System Customize Your medTester medTester Autosequence Prompts Prompt # Prompt Name/ Description Renameable? (Yes or No) NEXT TEST DUE Enter the next test due date. Maximum of nine characters. DATE (No) USER TIME (No) Enter the time used by the user to perform the tests in hours. The format can be six (6) digits, including a decimal point. -
Page 102: Renaming Prompts
medTester 5000C Operators Manual 1. OP CODE NEXT Select OFF, . Then press NEXT to move to prompt two. If this is the only prompt or the last prompt that you want to configure, press To store your prompt settings, you next see this message: STORE AUTOSEQUENCE PROMPTS? Press F5 if you want to store your customized prompts. -
Page 103: Pausing
Biomedical Test System Customize Your medTester Pausing Between tests in a safety autosequence, you can insert a pause for three, six, or nine seconds, or until you press any key (also called single step), so that you can view a displayed measurement for a longer or shorter period. Configure the pause or single-step feature using the menu command: CUSTOM PAUSE... -
Page 104: Summary Of Stored Records
medTester 5000C Operators Manual Any or all of these fields can be turned on (to appear on the test tag) or turned off on the printed test tag. When you finish, press . You can then store your tag settings. You can set the number of lines on a test tag from this menu: UTIL PRTPAGE... -
Page 105: Customizing Bar Code Record Data Entry
Biomedical Test System Customize Your medTester CUSTOM RECSUM The medTester displays the number of the first field to appear on each record line in the summary. Press to scroll through the list of field names to select the first field definition; that is, which field name appears first. Use the up or down arrow keys to adjust the number of characters that each field can contain. - Page 106 medTester 5000C Operators Manual Follow directions, such as cycling power after reprogramming the scanner. The scanner remains programmed after cycling power on the scanner and/or the medTester. Of the medTester autosequence prompts, you can configure eleven of them to accept multiple labels when entering data from a bar code reader. The eleven include the following: medTester Bar Code Configurable Prompts Prompt Name...
-
Page 107: Resetting Autosequences To Default Settings
Biomedical Test System Customize Your medTester Resetting Autosequences to Default Settings You can always return medTester 5000C autosequences to the default settings by reinitializing the medTester. Safety autosequences require you to indicate whether you want to include power-off tests, reverse polarity tests, and open neutral tests. - Page 108 medTester 5000C Operators Manual 6-16...
-
Page 109: P E R F O R M A N C E W A V E S Outputting Performance Waves
Chapter 7 Performance Waves In this chapter, you learn how to output performance waveforms to test patient monitors using the medTester 5000C. Outputting Performance Waves With the Waveform/Extended Testing module installed on your medTester 5000C, you can output performance waves. To verify whether your medTester has this option, do the following. -
Page 110: Waveform Groups
medTester 5000C Operators Manual Waveform Groups You can generate any of the waveforms listed in the five groups in the table below for the testing of patient monitors. The table’s first column lists the names of the waveforms as they appear in the medTester 5000C display. Column two describes the display names, and column three shows the remote command for each waveform. - Page 111 Biomedical Test System Performance Waves WAVEFORM GROUPS medTester 5000C Description Remote Command Display Wave Menu Name PAIR A Pair or Couplet of PVCs W024 Group Name: ARRHY3 RUN5 Run of 5 PVCs W025 RUN11 Run of 11 PVCs W026 RBBB Right Bundle Branch Block W027 VTACH...
-
Page 112: Running Waveforms From The Waves Menu
medTester 5000C Operators Manual Running Waveforms from The WAVES Menu To turn on any of the waveforms, follow these instructions: Attach the patient leads from the EUT (patient monitor) to the binding posts on the medTester 5000C. Power on the EUT. Note that, for your convenience, you can plug the patient monitor into the medTester’s test receptacle since test receptacle power is on when running any waveform. -
Page 113: Conducting Waveform Tests In Safety Autosequences
Biomedical Test System Performance Waves Conducting Waveform Tests in Safety Autosequences You can execute performance wave tests at the end of any safety autosequence. The medTester 5000C prompts you to begin or to skip these tests. When performance waveforms are generated within a safety autosequence, they follow this sequence for the listed periods of time: Performance Waveforms in Safety Autosequences Waveform Name... - Page 114 medTester 5000C Operators Manual...
-
Page 115: M E M O R Y Introduction
Chapter 8 Memory This chapter acquaints you with the medTester 5000C memory module options you may have installed on your medTester. Introduction The medTester 5000C offers you two memory module options that you can use to store test records—100 Record (3) and Expanded Memory(4). If you’re unsure if your medTester has a memory module installed, do this: From the main menu, MENU1... -
Page 116: Viewing A Single Record
medTester 5000C Operators Manual Note All medTester memory functions begin on MENU2 as described above. Viewing A Single Record You can view recorded tests from the medTester display. VIEW Enter the menu command: The medTester prompts you: RECORD # TO VIEW . -
Page 117: Print A Range Of Records
Biomedical Test System Memory Print A Range of Records RANGE Enter the menu command: The display prompts you to PRINT FROM RECORD # with the total number of stored record numbers displayed in parentheses. Enter the number of the first record you want to print. The display then prompts you to enter the number of the last record you want to print with this message: PRINT THROUGH... - Page 118 medTester 5000C Operators Manual Next access the type of records you want to print. From menu one, you can access these types: SAFETY Prints all stored safety record results. DEFIB Prints all defibrillator records. IVPUMP Prints all IV pump records. Prints all ESU records.
-
Page 119: Printing A Summary Of Records
Biomedical Test System Memory Printing A Summary of Records You can print a summary of all records stored from the menu command: SUMMARY The summary prints one line of text per record which you can program for your specific needs; see Chapter 6 Customize Your medTester 5000C. Each line can contain six fields with as many as 20 characters per field. -
Page 120: Deleting Records
medTester 5000C Operators Manual Deleting Records If you want, you can delete a single record with this command: DELETE The medTester asks you to enter the number of the record to delete. You then see this prompt: ARE YOU SURE YOU WANT TO DELETE RECORD xxx? Press to confirm or to cancel the command and to escape. -
Page 121: Searching For Records
Biomedical Test System Memory Free Memory—In bytes. Total Memory and Checklists—Amount of total memory and the amount used by checklists. Total Test Record Memory—Shows you total bytes of test record memory, the number of bytes used, and the number of bytes free. -
Page 122: Searching For Records With Test Failures
medTester 5000C Operators Manual That indicates the number of the first record which contains the string. You can view or print the data in the found record. You can press NEXT to search for the same string in subsequent records. You can then view or print the next record. -
Page 123: Keyboard Shortcut Commands
Biomedical Test System Memory Keyboard Shortcut Commands In addition to accessing memory functions through menu commands, you can also enter keyboard shortcut commands directly into the medTester 5000C at either main menu one (1) or two (2). You enter these commands as text strings and directly arrive at the function rather than stepping through the menu. - Page 124 medTester 5000C Operators Manual 8-10...
-
Page 125: D E F I B R I L L A T O R M O D U L E Defibrillator Autosequences
By installing the Defibrillator module (8) in your medTester 5000C, you have the capability of using a set of 20 autosequences for testing defibrillators with a Fluke Biomedical defibrillator analyzer and collecting test data. The Fluke Biomedical Impulse 4000 or Impulse 3000 connects to the COM2 Port or... - Page 126 medTester 5000C Operators Manual Note Consult your Impulse 3000 or Impulse 4000 operators manual for proper operation of your Impulse model. To discover if you have the Defibrillator module installed on your medTester 5000C, enter these menu commands: AUTO DEFIB If defibrillator autosequences are installed, you see this message displayed: SELECT DEFIB AUTOSEQUENCE TO RUN The autosequence names appear below the message.
-
Page 127: Defibrillator Autosequence Names
Biomedical Test System Defibrillator Module Defibrillator Autosequence Names You can begin any of the autosequences listed below from the medTester menu commands or by entering the keyboard shortcut command directly into the medTester. You can also include defibrillator autosequences as items in checklists. - Page 128 medTester 5000C Operators Manual DEFIBRILLATOR AUTOSEQUENCES Autosequence Keyboard Menu Commands Name Shortcut from Command AUTO DEFIB M/D2J M/D2J 78670A 78670A 43100A 43100A ZOLL ZOLL LP10 LP10 blank A47-A49 blank (user-defined) F3-F5...
-
Page 129: Running Defibrillator Autosequence Tests
RS-232 serial port on the Impulse model you have. Note Refer to Chapter 1, General Information- Accessories , or the current Fluke Biomedical Price List for the correct serial cable part number needed. From the medTester 5000C defibrillator menu, select the autosequence name for the autosequence you wish to run. -
Page 130: Pretest Device Prompts
medTester 5000C Operators Manual Pretest Device Prompts There are eight prompts for information that can appear in the autosequence test record. After selecting the desired autosequence, the medTester 5000C prompts you to enter device prompts. If you have some or all prompts turned off, the autosequence still gives you the opportunity to enter device information with the message: Press F5 for all device info prompts... -
Page 131: Test Sequence
Biomedical Test System Defibrillator Module Note See Chapter 5, Autosequences, for a complete explanation of working with prompts. You can turn individual prompts on or off and rename prompts six through eight (6-8) from the list above. Chapter 6, Customize Your medTester 5000C, explains how to customize prompts. - Page 132 medTester 5000C Operators Manual Sternum Paddle. The sternum paddle test is similar to the APEX paddle test. Two (2) leakage measurements are taken, again with closed ground and with open ground. Both measurements are taken under normal polarity and closed neutral conditions.
- Page 133 Biomedical Test System Defibrillator Module Out-of-Limits Reading When a reading is out of limits, a # sign appears next to the reading with the statement: Out of limits . Both the high and low limits will appear. Whenever this occurs, you can repeat the test or continue with the remaining steps. Press to repeat the test or to continue to the next step.
- Page 134 medTester 5000C Operators Manual MAX Energy Test. This test measures the maximum length of time the EUT requires to charge to its maximum energy level. The test also measures the actual energy level. To perform this test do the following: Simultaneously push START (F5) and start charging the...
- Page 135 Biomedical Test System Defibrillator Module The table below supplies specific information about the tests for each autosequence. Autosequence Energy Energy Paddle Energy Steps Name Step High Step Low Energy Energy Leakage (Joules) Limit Limit High Low Limit and/or Limit Cardioversion (Joules) (Joules) Cardioversion...
-
Page 136: Posttest Prompts
medTester 5000C Operators Manual Posttest Prompts When all tests are completed, the medTester 5000C can prompt you for: COMMENTS NEXT TEST DUE DATE USER TIME PRINT TEST TAG STORE or PRINT TEST RECORD Customizing Defibrillator Autosequences (For detailed information about customizing autosequences, please refer to Chapter 6, Customize Your medTester 5000C.) To begin customizing defibrillator autosequences, you can view any of your current ones by entering these menu commands:... - Page 137 Biomedical Test System Defibrillator Module Begin by accessing the custom, autosequence, defib menu as described earlier. This time, select: MAKE Next select the name of the autosequence you want to customize or create. Follow these steps, providing the desired information: Name—This is the name you want to give to the autosequence, with a maximum of six characters.
- Page 138 medTester 5000C Operators Manual Reinitialize Factory Default Settings Any customized autosequences can be returned to the factory default settings. To do this, enter these medTester commands: From the medTester 5000C main menu, MENU 1, press the right arrow to access MENU2 CUSTOM Enter the command:...
-
Page 139: Iv Pump Module
IV Pump Autosequences If your medTester 5000C includes the Intravenous (IV) Pump Module (9), you have ten autosequences for testing IV pumps with a Fluke Biomedical IV pump analyzer. You can use the IDA 4 Plus, the Infutest 2000 Series D, the IPT-1, or the IPT-MC IV pump analyzer. -
Page 140: Basic Test Format
IV Pump Analyzers You can use any of four Fluke Biomedical IV pump analyzers to run IV pump tests. Please refer to the analyzer operator's manual for more information. - Page 141 Biomedical Test System IV Pump Module Infutest 2000 Series D The Infutest can run three types tests: single rate tests, dual rate tests, and PCA (patient controlled analgesia) tests. Even though the Infutest 2000 series D can run up to 4 channels simultaneously, the medTester 5000C is only able to control one channel.
- Page 142 medTester 5000C Operators Manual Note In order to take advantage of IV pump autosequences, your medTester 5000C requires the IV Pump Module, RS- 232/Printer module and the Expanded Memory module. Other helpful modules include medCheck (for downloading checklists from and uploading checklist records to a data management system) and Data Transfer (for transfer of autosequence test record files to a data management system).
-
Page 143: Iv Pump Autosequence Names
Biomedical Test System IV Pump Module The above display format and testing protocol is formatted for the Infutest 2000 Series D IV Pump Analyzer. If you wish to use one of the other IV pump analyzers, go to the following section of this chapter “Customizing IV Pump Test-Configuring for your IV Pump Analyzer”. - Page 144 medTester 5000C Operators Manual IV Pump Autosequences for IPT-1 Autosequence Keyboard Menu Commands Name Shortcut from (Type of Test) Command AUTO IVPUMP MENU 1 LINEAR LINEAR PULSED PULSED HIGH HIGH EVAL EVAL Menu Command MENU 2 blank A55-A59 blank (user-defined) F1-F5 10-6...
- Page 145 Biomedical Test System IV Pump Module IV Pump Autosequences for IPT-MC Autosequence Keyboard Menu Commands Name Shortcut from (Type of Test) Command AUTO IVPUMP MENU 1 PUMP1 PUMP 1 PUMP2 PUMP 2 HIGH HIGH EVAL EVAL Menu Command MENU 2 blank A55-A59 blank...
-
Page 146: Running Iv Pump Autosequences
Note Refer to Chapter 1, General Information – Accessories , or the current Fluke Biomedical Price List for the correct serial cable part number needed. Each preprogrammed IV pump autosequence has at least one step, and each step includes a flow rate test and a pressure (occlusion) test. The medTester 5000C displays measurements communicated to it by the IV pump analyzer. - Page 147 Biomedical Test System IV Pump Module OP CODE—This is the operator code for the person doing the testing. This code can consist of a maximum of three characters which can be entered from the medTester keyboard. An example of an operator code could be a person’s initials or employee number.
-
Page 148: Iv Pump Tests
medTester 5000C Operators Manual IV PUMP TESTS After you respond to prompts, the autosequence tests begin. For each step in the autosequence, the medTester will run a flow test and then an optional pressure test. The flow tests will be different depending on which IV pump analyzer is being used and which flow test type is selected: Infutest 2000 Series D On entering the test steps, the medTester checks that the Infutest is... - Page 149 Biomedical Test System IV Pump Module Dual Rate Test The dual rate test measures the delivery of two sequential fluid volumes pumped at different flow rates by the IV pump. This fluid delivery technique is typically referred to as “piggybacking” in the clinical environment.
- Page 150 medTester 5000C Operators Manual The medTester displays test results on 3 screens. Press F5 NEXT to go to the next screen. Finally, you can repeat the test or continue on to the pressure test. PCA Test The PCA (patient controlled analgesia) test measures the delivered IV fluid boluses administered by the patient using the PCA IV Pump handheld pushbutton control.
-
Page 151: Ipt-Mc
Biomedical Test System IV Pump Module IPT-1 With the IPT-1, you can perform 2 types of flow tests: steady flow and high accuracy. Use the steady flow selection to measure linear or continuous flow profiles and the high accuracy flow selection to measure pulsatile flow profiles or when a larger sample volume (~1 ml) is desired to be used for flow rate computation. -
Page 152: Ida 4 Plus
medTester 5000C Operators Manual For each test step, the medTester prompts you with the test type and conditions. Press F5 NEXT to continue. Next, the medTester prompts you to prime the IPT-MC. It must be primed or it cannot start a test. The IPT-MC displays “START” when it is primed. - Page 153 Biomedical Test System IV Pump Module Wait for the IDA 4 Plus to display on channel 1. Using a priming PRIME syringe, prime IV line into IDA 4 Plus until the IDA 4 Plus displays After pressing ), the medTester 5000C displays START START FLOW FOR IDA 4P AUTO-START.
- Page 154 medTester 5000C Operators Manual In a dual rate test, the medTester starts testing the secondary rate, indicated by “SEC” in the upper right corner of the display. It displays the elapsed time (ET=), the average flow rate (A=), and the cumulative volume (V=).
- Page 155 Biomedical Test System IV Pump Module The IDA 4 Plus will measure delivered bolus volumes 0.5 ml with no basal (or background) fluid flow. It is recommended not to use the initial “LOADING” medication dose function on the PCA IV Pump. If you desire to use this function, select “LOADING’...
-
Page 156: Pressure Test (Infutest, Ipt-1, Ipt-Mc And Ida 4 Plus)
medTester 5000C Operators Manual Pressure Test (Infutest, IPT-1, IPT-MC and IDA 4 Plus) After completing the flow test, the autosequence continues by offering to perform a pressure test. The pressure test measures the peak occlusion pressure and the elapsed time to reach the peak. Press F1 YES to run the pressure test or F2 NO to skip it and go to the next flow test step. - Page 157 Biomedical Test System IV Pump Module INFUTEST 2000 Series D AUTOSEQUENCE TESTS Nominal Test Type High End Type Ending Quantity Flow Rate Limit Limit (manual, If Applicable (ml per (ml per (ml per volume, (ml for volume or hour) hour) hour) or timed) hours:minutes...
- Page 158 medTester 5000C Operators Manual IPT-1 AUTOSEQUENCE TESTS Nominal Test Type High End Type Ending Quantity Flow Rate Limit Limit (manual, If Applicable (ml per (ml per (ml per volume, (ml for volume or hour) hour) hour) or timed) hours:minutes for timed) Autosequence Name (Test Type): LINEAR Keyboard Shortcut Command: A50 60.0...
- Page 159 Biomedical Test System IV Pump Module IPT-MC AUTOSEQUENCE TESTS Nominal High End Type Ending Quantity Flow Rate Limit Limit (manual, If Applicable (ml per (ml per (ml per volume, (ml for volume or hour) hour) hour) or timed) hours:minutes for timed) Autosequence Name (Test Type): PUMP 1 Keyboard Shortcut Command: A50 60.0...
-
Page 160: Customizing Iv Pump Tests
medTester 5000C Operators Manual Customizing IV Pump Tests (For detailed information about customizing autosequences, please refer to Chapter 6, Customize Your medTester 5000C.) To begin customizing IV pump autosequences, you can view any of your current ones by entering these menu commands: From the main menu, MENU1 , press the right arrow to access... -
Page 161: Infutest
Biomedical Test System IV Pump Module Name—This is the name you want to give to the autosequence, with a maximum of six characters. Flow Tests—Up to 10 steps. The tests available are different for each of the IV pump analyzers: Infutest For Infutest, there are 3 types of tests available. - Page 162 medTester 5000C Operators Manual SECONDARY RATE HIGH LIMIT: Enter the high limit for the flow rate. 0000.0 turns off high limit checking. SECONDARY RATE LOW LIMIT: Enter the low limit for the flow rate. 0000.0 turns off low limit checking. PRIMARY FLOW RATE: Enter the nominal flow rate, 0000.1 to 0999.0 ml/hr.
-
Page 163: Ipt-Mc
Biomedical Test System IV Pump Module RATE LOW LIMIT: Enter the low limit for the flow rate. 0000.0 turns off low limit checking. TEST END TYPE: Select MANUAL to end the test by pressing a key. TIMED to end the test after a programmed time: END TIME: Enter the elapsed time that will end the test, 00:01 to 99:59 (hours:minutes). -
Page 164: Reinitialize Factory Default Settings
medTester 5000C Operators Manual PRINT Reinitialize Factory Default Settings Any customized autosequences can be returned to the factory default settings. To do this, enter these medTester commands: From the medTester 5000C main menu, MENU 1, press the right arrow to access MENU 2 CUSTOM Enter the command:... -
Page 165: M E D C H E C K M O D U L E Tap Your Medtester's Potential
Chapter 11 medCheck Module In this chapter you will find information about checklists—what they are, how they are used, running them in the medTester 5000C, and reporting test record data. Tap Your medTester’s Potential With the medCheck option installed in memory on your medTester 5000C, you can tap into the medTester’s capability to become a total equipment management solution. -
Page 166: What's A Checklist
COM1 or COM2 port or Wedge Adapter port and the RS-232 port on the Fluke Biomedical analyzer or tester. See the section Remote Control of Fluke Biomedical Testers at the end of this chapter. -
Page 167: Understanding And Using Checklists
Below is an example checklist for a commonly used defibrillator. This defibrillator is connected to a Fluke Biomedical Impulse 4000 Defibrillator Analyzer. The Impulse 4000 in this example is, in turn, connected to a medTester 5000C through its COM2 port with a serial cable. - Page 168 medTester 5000C Operators Manual ABC HOSPITAL Defibrillator Checklist Checkitem Description Control Code Chassis and housing…General condition medTester Battery and charger…Check operation Autosequence Number Fuses/circuit breakers…ratings OK? Hardware…condition and integrity Control Codes (see explanations below) Indicators and displays…operation P—Pass or Fail Controls and switches…check condition I—Input requested.
- Page 169 Biomedical Test System medCheck Module As you can see, some checkitems appear in the medTester as prompts to the operator to do something, for example, a physical inspection of the EUT or a check of some function. Other checkitems are autosequences. Autosequence 46 is a customized (user defined) autosequence that can execute a variety of performance tests on this defibrillator.
-
Page 170: You've Made A Checklist-Now What
medTester 5000C Operators Manual You’ve Made a Checklist—Now What? While the process of making a checklist takes place in your CMMS, using it takes place inside the medTester with the medCheck option. This begins with loading the checklist files into the medTester. There are three files that comprise a checklist and that your CMMS downloads to the medTester: IDN File: Containing equipment identification control numbers and the checklist names themselves, each associated with a checklist... -
Page 171: Find A Checklist
Biomedical Test System medCheck Module This message shows you that checklists have been loaded into the medTester 5000C. The characters XXXXXX take the place, in this example, of a control number. Find a Checklist From the check menu, you can enter either a control number, which references a checklist name, or the name of the checklist you want from the IDN file. - Page 172 medTester 5000C Operators Manual OP CODE—This is the operator code for the person doing the testing. This code can consist of a maximum of three characters which can be entered from the medTester keyboard. An example of an operator code could be a person’s initials or employee number.
-
Page 173: Items In A Checklist
Biomedical Test System medCheck Module Note Turning off pretest prompts for checklists helps save time in executing checklists on several pieces of equipment. After you have all equipment set up and connected, simply enter the control number for the EUT. If you want to run a checklist on a piece of equipment that has not been assigned a control number, press to enter all device information—including a control... - Page 174 medTester 5000C Operators Manual Input Requested (I) Category This checkitem tells the operator to check something or to do something and then input a comment or data. After responding to the prompt, press move to the next checkitem. Both P&I (B) Category This checkitem combines both pass or fail and input.
- Page 175 Biomedical Test System medCheck Module If an external command is followed by the number 0, the medTester will not expect or look for a response from the external analyzer. It stores nothing in the test record for that checkitem. Note Remote commands begin with alphabetic characters.
-
Page 176: View Or Print A Checklist
medTester 5000C Operators Manual Posttest Prompts Posttest prompts that have been switched on appear upon completion of the checklist. After responding to any posttest prompts, the medTester asks you to store or print the test record. Checklist Records The number of checklist records that the medTester 5000C creates is dependent upon the structure of the checklist. -
Page 177: Remote Control Of Fluke Biomedical Testers
Remote Control of Fluke Biomedical Testers You can have the medTester 5000C control other instruments, such as the Fluke Biomedical Impulse 4000 Defibrillator Analyzer or the IDA 4 Plus Infusion Pump Tester. The medTester 5000C controls these devices through a serial cable connected to the COM2 port on the medTester 5000C and the RS-232 port on the analyzer or tester. - Page 178 medTester 5000C Operators Manual 11-14...
-
Page 179: R E M O T E O P E R A T I O N Local Versus Remote Mode
The medTester 5000C has two serial ports located on the back panel, COM1 and COM2. COM1 COM2 Functions Input in Local Mode—for example, the Fluke Biomedical keyboard option, bar code scanning gun, or a personal computer or terminal. Output in Local Mode—for printing test records to a personal computer or compatible terminal device, or test tags to a serial printer. -
Page 180: Communications Settings
medTester 5000C Operators Manual Additional COM2 Functions Two-way Communications—for commands to and responses from Fluke Biomedical testers and analyzers and other instruments connected to this port and controlled through the medTester 5000C. Note You can expand COM2 with the Wedge adapter to a total of eight (8) ports. -
Page 181: Local Input Mode
Biomedical Test System Remote Operation COM2 baud rates are selected from: COM2 Note If you have enabled the Wedge adapter, there will be additional baud rate menus for COM2-1 through COM2-8. See Chapter 13, The Wedge Adapter. After selecting the desired port, the medTester displays the following message: SET COM# BAUD RATE: 9600... -
Page 182: Local Output For Records And Tags
medTester 5000C Operators Manual You can connect the optional RS-232 keyboard or laser bar code gun to either serial port. Input from this keyboard appears on the medTester display identical to the appearance of input displayed from the medTester 5000C keyboard. -
Page 183: Record Output
Biomedical Test System Remote Operation Record Output If you enter RECORDS , you see a display similar to this: RECORD COM1 COM2 PRINTER STORE OUTPUT: Configuring Ports for Record Output Configure any of these three ports for output by pressing the desired port’s function key. -
Page 184: Remote Mode
medTester 5000C Operators Manual Configuring Ports for Test Tag Output Configure any of these three ports for test tags as described above for record output. Press the port function keys to turn individual COM or printer ports on or off. Store your settings with the key. - Page 185 Biomedical Test System Remote Operation Forcing A Port An alternative to the above procedure is forcing a port. For example, if you want COM1 to be the remote port, type or send remote1 . This will force COM1 to act as the remote port. To force COM2, type or send remote2 If you have made a remote connection, the medTester responds by sending: REMOTE MODE...
- Page 186 medTester 5000C Operators Manual UNIT of MEASUREMENT ABBREVIATIONS Abbreviation Unit of Measurement V RMS Volts RMS A RMS Amperes RMS µA RMS Microamperes RMS µA DC Microamperes DC OHMS Ohms Revolutions per minute DEG F Degrees Fahrenheit DEG C Degrees Centigrade Percent Error Responses If you issue an incorrect or nonexistent remote command, the medTester...
-
Page 187: File Transfer Protocol
Biomedical Test System Remote Operation ERROR RESPONSES Error Statement Explanation the file has a name embedded into it, the wrong file was transferred. ERR=24,LINE COUNT WRONG For a file-up transfer command, the expected line count received did not agree with the count sent. ERR=25,LINE COUNT WRONG For a measurement command, the reading exceeds the range of the... - Page 188 medTester 5000C Operators Manual Uploading Here is the file upload process: The medTester receives an uploading command from the computer in the form of a MUPUP, SDFUP, or AUTOSEQUP. medTester sends the expected line count to the computer. medTester receives the verified expected line count from the computer.
- Page 189 Biomedical Test System Remote Operation Downloading The medTester 5000C receives file download commands from the remote computer in the form of a AUTOSEQDOWN or CHECKDOWN. CHECKDOWN involves the transmission of three files. Each file follows this sequence: medTester sends the acknowledgment response of a * to the remote computer.
-
Page 190: Remote Commands List
medTester 5000C Operators Manual Remote Commands List Commands sent to the medTester from a remote computer include: General Administrative Commands, File Transfer Commands, Setup Commands, Measurement Commands, and Wave Commands. GENERAL ADMINISTRATIVE COMMANDS Command Explanation REMOTE Begins a remote mode session on the medTester 5000C. -
Page 191: Remote Operation
Biomedical Test System Remote Operation FILE TRANSFER COMMANDS (Note: Usage of these commands is described earlier.) Command Explanation AUTOSEQUP Upload the file containing medTester autosequences. AUTOSEQDOWN Download the file containing medTester. MUPUP Upload all test records in the MUP file format. SDFUP Upload all test records in the SDF file format. - Page 192 medTester 5000C Operators Manual MEASUREMENT COMMANDS Note: These commands set up a measurement, according to global variables as needed, and after a 0.5 second settling time, return the measurement reading. The measurement remains set up, so that additional readings can be taken with the REPEAT command. Global variables can be changed while the measurement remains set up, then more readings can again be taken with the REPEAT command.
- Page 193 Biomedical Test System Remote Operation MEASUREMENT COMMANDS (µA RMS or DC) LALD ECG leakage current, Left Arm to leads. (µA RMS or DC) LLLD ECG leakage current, Left Leg to leads. (µA RMS or DC) VLLD ECG leakage current, V leads to leads. (µA RMS or DC) EISO ECG leakage current, All leads isolation.
- Page 194 medTester 5000C Operators Manual WAVE COMMANDS Note: The following commands turn on the specified wave. The wave continues to run until it is changed by another wave command, or it will be turned off and disconnected by any non- wave command or the EXIT command. All wave commands return OK.
-
Page 195: Port Diagnostics
Biomedical Test System Remote Operation Port Diagnostics You can test the input and output of COM1 and COM2, as well as the output of the printer through the utilities menu on the medTester 5000C. From the main menu, MENU1 , press: UTIL Next, from this menu press the right arrow to access the menu options: DIAG... - Page 196 medTester 5000C Operators Manual 12-18...
-
Page 197: T H E W E D G E A D A P T E R Features Of The Wedge
Chapter 13 The Wedge Adapter In this chapter you learn about the Wedge adapter and how to use it, how to attach it to the medTester 5000C, and how to configure ports to meet your needs. The medTester 5000C Wedge adapter is a medTester 5000C accessory that expands the number of available medTester 5000C serial communication ports from two to eight. -
Page 198: Serial Port Expansion
Keyboard Interface With the Wedge you can connect any PC-style keyboard. Accepted keyboards include the Fluke Biomedical Mini AT-Style PC Keyboard accessory or any AT or PS/2 keyboard. The keyboard interface is on the side of the Wedge and includes both the AT and the PS/2 connector inputs. - Page 199 Biomedical Test System The Wedge Adapter When you execute a checklist, the medTester 5000C directs any M-type commands through the device connected to the checklist port. If the command requires a measurement response, for example, that input returns to the medTester through the checklist port as part of the test record. In addition, one or more ports can be used for autosequences.
-
Page 200: Installing The Wedge
medTester 5000C Operators Manual Wedge Port Configurations Wedge Port Description Name (Default Wedge Port No.) Non-Invasive Blood Execute medTester 5000C NIBP autosequences. Pressure (NIBP) Specific to the CuffLink NIBP Analyzer. Autosequences Both preprogrammed and user-configured autosequence types. See Chapter 17, Non-Invasive Blood Pressure (NIBP) Module. Checklist Used when executing equipment-specific checklist, M-type checkitems and any medTester 5000C commands. -
Page 201: Disassembly Of The Medtester 5000C's Feet And Tilt Bail
Biomedical Test System The Wedge Adapter Disassembly of the medTester 5000C’s Feet and Tilt Bail Disassemble the medTester 5000C feet and tilt bail. Prior to disassembly, clear the work area of any objects that could scratch or puncture the top of the medTester. - Page 202 medTester 5000C Operators Manual FROM: Wedge Port (9-pin connection) TO: medTester 5000C (25-pin connection) MEDT COM1 COM1 MEDT COM2 COM2 Note The COM1 cable is only needed if you want to use the Wedge keyboard interface. This cable routes the keyboard signal from the Wedge to the medTester.
-
Page 203: Operating The Wedge
Biomedical Test System The Wedge Adapter Operating the Wedge Operating the medTester 5000C with the Wedge consists of enabling the wedge, configuring your ports, setting baud rates, establishing output, and connecting your equipment. Knowing the equipment you want to connect to the Wedge helps determine how you may want to configure ports. - Page 204 medTester 5000C Operators Manual Configuring the Normal Port The Wedge normal port functions identically to the local input and output modes of the medTester 5000C’s COM2 port. Therefore, configuring a normal port on the Wedge gives you another port for local mode input and output and for remote operation.
- Page 205 Biomedical Test System The Wedge Adapter Configuring an Autosequence Port You can execute defibrillator, IV pump, ESU, and SPO2 autosequences through a Wedge port in the same manner that you can execute them through the medTester 5000C’s COM2 port. This allows you, for example, to connect both a defibrillator analyzer such as the Impulse 3000 or the Impulse 4000 and an IV pump tester such as the IDA 4 to defined ports on the Wedge.
- Page 206 For example, a 30Z command can only be executed in the Fluke Biomedical 214B Patient Simulator, and the medTester 5000C will direct that command to the checklist port. Not connecting the 214B to this port will result in an error message appearing in the medTester 5000C display.
-
Page 207: Configuring One Port For Two Purposes
Biomedical Test System The Wedge Adapter After selecting the normal port, press to store your selection. Changing the Checklist Port In order to direct external (M) commands in checklists to a different Wedge port, you include a special checkitem command in the checklist that changes the checklist port for all subsequent external M commands. - Page 208 medTester 5000C Operators Manual Note Autosequences always communicate at a fixed baud rate; therefore, you don't need to set the rate for any port used only for autosequences. To set a Wedge port baud rate: From the medTester 5000C main menu, MENU 1 , press: UTIL...
-
Page 209: Setting Output Ports
Biomedical Test System The Wedge Adapter After setting the baud rate for the port, press to store the setting. Setting Output Ports To configure a Wedge port for test record or test tag output, follow the directions below. This procedure sets the port output for test records and applies as well to setting a port for test tag output: From the medTester 5000C main menu, MENU 1... - Page 210 medTester 5000C Operators Manual 13-14...
-
Page 211: Esu Autosequences
With the ESU module installed in your medTester 5000C, you have the capability of using a set of 10 autosequences to test and store test measurements on today’s ESUs with a Fluke Biomedical ESU analyzer. Fluke’s model 402A, 454A and RF303 electrosurgical analyzers connect to the medTester’s COM2 or designated Wedge port. - Page 212 Manual. Remember that you must use autosequences that are within the capability of the Model 402A. When you connect a Fluke Biomedical ESU analyzer to your medTester and run ESU autosequences, the medTester displays prompts for your ESU setup and testing and test execution. The ESU analyzer returns measurement readings to the medTester, which displays them for you.
- Page 213 Biomedical Test System ESU Module Note Refer to your ESU analyzer operators manual for additional information regarding operation and range of available features. To discover if you have the ESU module installed on your medTester 5000C, enter these menu commands: AUTO If ESU autosequences are installed, you see this message displayed: SELECT ESU AUTOSEQUENCE TO RUN...
-
Page 214: Esu Autosequence Names
medTester 5000C Operators Manual ESU Autosequence Names You can begin any of the autosequences listed below from the medTester menu commands or directly by entering the keyboard shortcut command into the medTester. You can also include ESU autosequences as items in checklists. -
Page 215: Running Esu Autosequence Tests
RS232 PORT Note Refer to Chapter 1, General Information - Accessories, or the current Fluke Biomedical Price List for the correct serial cable part number needed. From the medTester 5000C ESU menu, select the autosequence name for the autosequence you wish to run. The name and number of the selected... -
Page 216: Pretest Device Prompts
medTester 5000C Operators Manual To accept previously input prompt information, press , and go to the Test Sequence section. If you choose , go to the Pretest Device Prompts section that follows. Pretest Device Prompts There are eight prompts for information that can attach to test records. After selecting the desired autosequence, the medTester 5000C prompts you to enter device prompts. -
Page 217: Test Sequence
Biomedical Test System ESU Module PHYSICAL INSPECTION—You have two physical inspection lines, each of which can consist of a maximum of 40 characters. After entering data for the first prompt, the second prompt appears. Note See Chapter 5, Autosequences, for a complete explanation of working with prompts. - Page 218 medTester 5000C Operators Manual The setup screen prompts the user to set up the ESU for power setting, mode, and output. Push F5 READY when the setup is complete. Connect the ESU device output leads to the ESU analyzer for a generator output measurement.
- Page 219 Biomedical Test System ESU Module CQM (Contact Quality Monitor) Test The CQM test measures the resistance needed by the ESU device to activate the CQM alarm. For this test the 454A requires an auxiliary module, either the REM/ARM module or the combined REM/ARM and Return Fault module (RARF).
-
Page 220: Esu Autosequence Descriptions
medTester 5000C Operators Manual ESU Autosequence Descriptions Autosequence Number: A60 Autosequence Name: ASPENX Step and Test Load ESU Mode Output Power Expected Power Limits Type Setting Electrode 300 Ohms Monopolar Pure Cut 120 W Generator Output 300 Ohms Monopolar Pure Cut 300 W Generator Output 300 Ohms... - Page 221 Biomedical Test System ESU Module Autosequence Number: A61 Autosequence Name: VLF30 Step and Test Load ESU Mode Output Power Expected Power Limits Type Setting Electrode 300 Ohms Monocoag Dessicate 200 W Generator Output 300 Ohms Monocoag Fulgurate 150 W Generator Output 300 Ohms Monopolar Pure Cut...
- Page 222 medTester 5000C Operators Manual Autosequence Number: A62 Autosequence Name: VLF40 Step and Test Load ESU Mode Output Power Expected Power Limits Type Setting Electrode 300 Ohms Monocoag Spray 150 W Generator Output 300 Ohms Monopolar Pure Cut 300 W Generator Output 300 Ohms Monopolar Blend 1...
- Page 223 Biomedical Test System ESU Module Autosequence Number: A63 Autosequence Name: VLF4BF Step and Test Load ESU Mode Output Power Expected Power Limits Type Setting Electrode 300 Ohms Monocoag Spray 50 W Generator Output 300 Ohms Monocoag Spray 120 W Generator Output 300 Ohms Monocoag Soft...
-
Page 224: Posttest Prompts
medTester 5000C Operators Manual Autosequence Number: A64 Autosequence Name: VLSSE4 Step and Test Load ESU Mode Output) Power Expected Power Limits Type Setting Electrode 300 Ohms Monocoag Spray 25 W Generator Output 300 Ohms Monocoag Spray 120 W Generator Output 300 Ohms Monocoag Soft... -
Page 225: Customizing Esu Autosequences
Biomedical Test System ESU Module Customizing ESU Autosequences (For detailed information about customizing autosequences, please refer to Chapter 6, Customize Your medTester 5000C.) To begin customizing ESU autosequences, you can view any of your current ones by entering these menu commands: From the main menu, , press the right arrow to access MENU1... - Page 226 medTester 5000C Operators Manual Begin by accessing the custom, autosequence, ESU menu as described above. This time, select: MAKE Next, select the name of the autosequence you want to customize or create. Follow these steps, providing the desired information: Name—This is the name you want to give to the autosequence, with a maximum of six characters.
- Page 227 Biomedical Test System ESU Module Expected Power: Enter the power expected to be generated by the ESU, from 0 to 500 W. Power high limit (00% = off) Power low limit (00% = off) RF Leakage Test Type Electrode: Select either Active or Dispersive electrodes to test.
- Page 228 medTester 5000C Operators Manual STORE Print Your Autosequence Printing any autosequence is accomplished through this menu command: PRINT User Output Names You can provide your own names for ESU Output. There are 16 names which can be programmed as desired. From the ESU custom autosequences menu described above, select: USEROUT The display shows each User Output Name.
-
Page 229: S P O
With the SPO2 module installed in your medTester 5000C, you have the capability of using a set of 10 autosequences to test and store test measurements on today’s pulse oximeters with a Fluke Biomedical SPO2 simulator. The medTester is compatible with the Oxitest PLUS Pulse Oximeter Tester (Oxitest PLUS or Oxitest PLUS 7), the CardioSat 100 and the Index 2XL SPO2 Simulator. - Page 230 medTester 5000C Operators Manual PLUS 7), the CardioSat 100 or Index 2XL. All autosequences stored by initialization, customization, or remote download will only work with the instrument for which they were designed. When you connect the SPO2 simulator to your medTester and run SPO2 autosequences, the medTester controls the simulator, which simulates SPO2 conditions for the pulse oximeter to measure.
- Page 231 Biomedical Test System SPO2 Module If SPO2 autosequences are installed, you see this message displayed: SELECT SPO2 AUTOSEQUENCE TO RUN ADULT1 ADULT2 ADULT3 NEO1 NEO2 The above display format and testing protocol is formatted for the Oxitest PLUS pulse Oximeter Tester. If you wish to use the CardioSat 100 pulse Oximeter Tester or Index 2XL SPO Simulator, go to the following section of this chapter “Customizing SP02 Test-Configuring for your pulse Oximeter Tester”.
-
Page 232: Spo2 Autosequence Names
medTester 5000C Operators Manual SPO2 Autosequence Names You can begin any of the autosequences listed below from the medTester menu commands or directly by entering the keyboard shortcut command into the medTester. You can also include SPO2 autosequences as items in checklists. - Page 233 Biomedical Test System SPO2 Module SP02 AUTOSEQUENCES FOR INDEX 2XL Autosequence Keyboard Menu Commands Name Shortcut from Command AUTO SPO2 Menu Command MENU 1 NELLCR NELLCR OHMNOV OHMEDA HPMERLN DATEX DATEX GENERC GENERC Menu Command MENU 2 blank BLANK blank BLANK blank BLANK...
-
Page 234: Running Spo2 Autosequence Tests
medTester 5000C Operators Manual SP02 AUTOSEQUENCES FOR CARDIOSAT 100 Autosequence Keyboard Menu Commands Name Shortcut from Command AUTO SPO2 Menu Command MENU 1 NELLCR NELLCR OHMEDA OHMEDA HPMERLN HPMERLN DATEX DATEX GENERC GENERC Menu Command MENU 2 blank BLANK blank BLANK blank BLANK... - Page 235 Wedge Port Expander. Note Refer to Chapter 1, General Information – Accessories, or the current Fluke Biomedical Price List for the correct serial cable part number needed. From the medTester 5000C SPO2 menu, select the autosequence name for the autosequence you wish to run.
-
Page 236: Pretest Device Prompts
medTester 5000C Operators Manual Pretest Device Prompts There are eight prompts for information that you can attach to test records. After selecting the desired autosequence, the medTester 5000C prompts you to enter device prompts. If you have some or all prompts turned off, the autosequence still gives you the brief opportunity to enter device information at the test’s initiation with the message: Press F5 for all device info prompts... -
Page 237: Test Sequence
Biomedical Test System SPO2 Module Note See Chapter 5, Autosequences, for a complete explanation of working with prompts. You can turn individual prompts on or off and rename prompts six through eight (6-8) from the list above. Chapter 6, Customize Your medTester 5000C, explains how to customize prompts. - Page 238 medTester 5000C Operators Manual Each autosequence can contain up to ten SPO2 simulation steps, except the INDEX 2XL which can contain up to 15 SPO2 steps. After those, several special tests will be performed if they have been programmed into the autosequence.
- Page 239 Biomedical Test System SPO2 Module You should now observe the readings on the pulse oximeter for SPO2 and heart rate. You can enter test results in two ways: You can make a judgment yourself and press F1 PASS FAIL to store with the record. FAIL is stored with a "#". Or you can press F3 DATA to enter the actually observed pulse...
-
Page 240: Probe Test
medTester 5000C Operators Manual Probe Test For the Oxitest PLUS, there is no probe test built-in. However, it is still possible to include a probe test in an autosequence. In this case, simply test the probe some other way and record the test result during the autosequence by pressing PASS or FAIL. -
Page 241: For The Oxitest Plus
Biomedical Test System SPO2 Module For the Oxitest PLUS: SPO2 Autosequence Number: A70 Autosequence Name: ADULT1 Settling Time: 25 Beats Heart Rate Limit: 4 BPM (beats per minute) Step Number SPO2 SPO2 Limit Heart Rate Amplitude Artifact ( in percent) (in percent) (in BPM) (in percent) - Page 242 medTester 5000C Operators Manual For the Oxitest PLUS: SPO2 Autosequence Number: A72 Autosequence Name: ADULT3 Settling Time: 25 Beats Heart Rate Limit: 4 BPM (beats per minute) Step SPO2 SPO2 Limit Heart Rate Amplitude Artifact Number (in percent) (in percent) (in BPM) (in percent) Movement...
- Page 243 Biomedical Test System SPO2 Module For the Oxitest PLUS: SPO2 Autosequence Number: A74 Autosequence Name: NEO2 Settling Time: 25 Beats Heart Rate Limit: 6 BPM (beats per minute) Step SPO2 SPO2 Limit Heart Rate Amplitude Artifact Number (in percent) (in percent) (in BPM) (in percent) Movement...
-
Page 244: For Cardiosat 100
medTester 5000C Operators Manual For CardioSat 100: SPO2 Autosequence Number: A70 Autosequence Name: NELLCR Manufacturer: Nellcor Settling Time: 25 Beats Heart Rate Limit: 4 BPM (beats per minute) Step Number SPO2 SPO2 Limit Heart Rate Amplitude (in percent) (in percent) (in BPM) (in percent) Starting Alarm Value for SPO2: 96%... - Page 245 Biomedical Test System SPO2 Module For CardioSat 100: SPO2 Autosequence Number: A72 Autosequence Name: HPMRLN Manufacturer: Hewlett Packard Merlin Series Settling Time: 25 Beats Heart Rate Limit: 4 BPM (beats per minute) Step Number SPO2 SPO2 Limit Heart Rate Amplitude (in percent) (in percent) (in BPM)
- Page 246 medTester 5000C Operators Manual For CardioSat 100: SPO2 Autosequence Number: A74 Autosequence Name: GENERC Manufacturer: Generic–Not Specified Settling Time: 25 Beats Heart Rate Limit: 4 BPM (beats per minute) Step Number SPO2 SPO2 Limit Heart Rate Amplitude (in percent) (in percent) (in BPM) (in percent) Starting Alarm Value for SPO2: 96%...
-
Page 247: For The Index 2Xl
Biomedical Test System SPO2 Module For the Index 2XL: SPO2 Autosequence Number: A70 Autosequence Name: NELLCR Manufacturer: Nellcor Settling Time: 25 Beats Heart Rate Limit: 4 BPM (beats per minute) Step Number SPO2 SPO2 Limit Heart Rate Amplitude Base TLC (in percent (in percent) (in BPM) - Page 248 medTester 5000C Operators Manual For the Index 2XL: SPO2 Autosequence Number: A72 Autosequence Name: PMS Manufacturer: PMS M1190 Settling Time: 25 Beats Heart Rate Limit: 4 BPM (beats per minute) Step Number SPO2 SPO2 Limit Heart Rate Amplitude Base TLC (in percent (in percent) (in BPM)
- Page 249 Biomedical Test System SPO2 Module For the Index 2XL: SPO2 Autosequence Number: A74 Autosequence Name: GENERC Manufacturer: Generic–Not Specified Settling Time: 25 Beats Heart Rate Limit: 4 BPM (beats per minute) Step Number SPO2 SPO2 Limit Heart Rate Amplitude Base TLC (in percent (in percent) (in BPM)
-
Page 250: Posttest Prompts
medTester 5000C Operators Manual Posttest Prompts When all tests are completed, the medTester 5000C prompts you for: COMMENTS NEXT TEST DUE DATE USER TIME User time is required EMS/CMMS system users: PRINT TEST TAG STORE or PRINT TEST RECORD Customizing SPO2 Autosequences (For detailed information about customizing autosequences, please refer to Chapter 6, Customize Your medTester 5000C.) To begin customizing SPO2 autosequences, you can view any of your current... -
Page 251: Configuring For Your Spo2 Simulator
Biomedical Test System SPO2 Module Note You can find detailed information about customizing autosequences in Chapter 6, Customize Your medTester 5000C. Configuring for Your SPO2 Simulator The medTester can only be configured for one type of SPO2 Simulator at a time, either the Oxitest PLUS (including Oxitest PLUS 7), the CardioSat 100 or the Index 2XL. - Page 252 medTester 5000C Operators Manual Not Specified Criticare Datascope Datex Hewlett Packard Nellcor Nihon Kohden Novametrix Ohmeda Respironics NDEX ANUFACTURER Not Specified 4000 1100 Criticare 1150 Datascope 1024 Datex 3030 PMS M1190 3500 Masimo 4000 Nellcor 3500 Nihon Kohden 1024 Ohmeda & Nova 3520 Respironics 4095...
- Page 253 Biomedical Test System SPO2 Module Note If you choose "Not Specified", you can keep it generic. However, you must manually set the SPO2 simulator to the manufacturer being tested at run time. Press F5 OK to enter your selection. SETTLING TIME: Enter the number of heartbeats to wait after starting a simulation, for the pulse oximeter to settle its readings (0-99).
- Page 254 medTester 5000C Operators Manual MORE to select more steps, or to end your selections. STARTING ALARM VALUES: Enter starting values for the alarm tests for: SPO2 HEART RATE AMPLITUDE (For the Index 2XL, enter amplitude from 0% to 20% with the thirty-three selections offered) Note Even if you do not intend to perform any alarm tests, you still have to go through the starting alarm values.
- Page 255 Biomedical Test System SPO2 Module Print Your Autosequence From the SPO2 custom autosequences menu described above, printing any autosequence is accomplished through this menu command: PRINT Reinitialize Factory Default Settings All ten autosequences can be returned to the factory default settings. To do this, enter these medTester commands: From the medTester 5000C main menu, 1, press the...
- Page 256 medTester 5000C Operators Manual 15-28...
-
Page 257: Pacer Autosequences
10 autosequences for testing transcutaneous pacemakers with a Fluke Biomedical transcutaneous pacemaker analyzer and collecting test data. The Fluke Biomedical Impulse 4000 connects to the COM2 or designated Wedge port on your medTester which then lets you test the pacers that are on the market today and store test measurements in the medTester 5000C for your equipment management system. - Page 258 medTester 5000C Operators Manual For related information, see these chapters in this manual: Chapter 5, Autosequences. Chapter 6, Customize Your medTester 5000C—for customizing autosequences. Chapter 8, Memory—for test record storage and printing. Note Consult your Impulse 4000 operators manual for proper operation.
-
Page 259: Pacemaker (Pacer) Module Pacer Autosequence
Biomedical Test System Transcutaneous Pacemaker (Pacer) Module Pacer Autosequence Names You can begin any of the autosequences listed below from the medTester menu commands or by entering the keyboard shortcut command directly into the medTester. You can also include pacer autosequences as checkitems in checklists. -
Page 260: Running Pacer Autosequence Tests
Impulse 4000. Note Refer to Chapter 1, General Information – Accessories, or the current Fluke Biomedical Price List for the correct serial cable part number needed. From the medTester 5000C Pacer menu, select the autosequence name for the autosequence you wish to run. The name and number of the selected... -
Page 261: Pretest Device Prompts
Biomedical Test System Transcutaneous Pacemaker (Pacer) Module Pretest Device Prompts There are eight prompts for information that can appear in the autosequence test record. After selecting the desired autosequence, the medTester 5000C prompts you to enter device prompts. If you have some or all prompts turned off, the autosequence still gives you the brief opportunity to enter device information at the test’s initiation with the message: Press F5 for all device info prompts... -
Page 262: Test Sequence
medTester 5000C Operators Manual Note See Chapter 5, Autosequences, for a complete explanation of working with prompts. You can turn individual prompts on or off and rename prompts six through eight (6-8) from the list above. Chapter 6, Customize Your medTester 5000C, explains how to customize prompts. - Page 263 Biomedical Test System Transcutaneous Pacemaker (Pacer) Module Pulse Tests For each of the pulse test steps, 1 through 10, the medTester prompts you through the step and controls the Impulse 4000 to perform the test. First, the medTester prompts you to set up the transcutaneous pacemaker to the programmed pacer current and pacing rate.
- Page 264 medTester 5000C Operators Manual Demand Test The demand test checks that in the demand mode, the pacer will pulse interactively with ECG waveforms at different rates. The demand test requires that the pacer is in the demand mode and that the pacer ECG monitor leads are connected to the ECG posts of the Impulse 4000.
- Page 265 Biomedical Test System Transcutaneous Pacemaker (Pacer) Module Async Test The async test checks that in the asynchronous, or non-demand, mode, the pacer will pulse correctly even with an ECG waveform at a high rate. The async test requires that the pacer is in the async mode and that the pacer ECG monitor leads are connected to the ECG posts of the Impulse 4000.
- Page 266 medTester 5000C Operators Manual Pacer Autosequence Number: A20 Autosequence Name: LP12P Load: Internal 50 Ohms Step Number Current Rate (in milliamperes) (in PPM, pulses per minute) Pulse Tests: Current Limit: Rate Limit: 5 PPM Demand Test: 80 PPM Underdrive: 30 BPM Ovedrive: 160 BPM Async Test: No Refractory Period Test: No...
- Page 267 Biomedical Test System Transcutaneous Pacemaker (Pacer) Module Pacer Autosequence Number: A21 Autosequence Name: LP9PM Load: Adapter Module TQA-16, External 700 Ohms Step Number Current Rate (in milliamperes) (in PPM, pulses per minute) Pulse Tests: Current Limit: Rate Limit: 5 PPM Demand Test: 60 PPM Underdrive: 30 BPM Ovedrive: 160 BPM...
- Page 268 medTester 5000C Operators Manual Pacer Autosequence Number: A22 Autosequence Name: HPCMPM Load: Adapter Module TQA-12, External 400 Ohms Step Number Current Rate (in milliamperes) (in PPM, pulses per minute) Pulse Tests: Current Limit: Rate Limit: 5 PPM Demand Test: 80 PPM Underdrive: 30 BPM Ovedrive: 160 BPM Async Test: 80 PPM...
- Page 269 Biomedical Test System Transcutaneous Pacemaker (Pacer) Module Pacer Autosequence Number: A23 Autosequence Name: MDE3PM Load: Adapter Module TQA-6, External 600 Ohms (Note: In Step 11 substitute 1000 Ohms.) Step Number Current Rate (in milliamperes) (in PPM, pulses per minute) Pulse Tests: Current Limit: Rate Limit: 5 PPM...
-
Page 270: Posttest Prompts
medTester 5000C Operators Manual Pacer Autosequence Number: A24 Autosequence Name: ZOLLPM Load: Adapter Module TQA-2, External 1000 Ohms Step Number Current Rate (in milliamperes) (in PPM, pulses per minute) Pulse Tests: Current Limit: Rate Limit: 5 PPM Demand Test: 80 PPM Underdrive: 30 BPM Ovedrive: 160 BPM Async Test: No... -
Page 271: Customizing Pacer Autosequences
Biomedical Test System Transcutaneous Pacemaker (Pacer) Module Customizing Pacer Autosequences (For detailed information about customizing autosequences, please refer to Chapter 6, Customize Your medTester 5000C.) To begin customizing pacer autosequences, you can view any of your current ones by entering these menu commands: From the main menu, MENU1 , press the right arrow to access... - Page 272 medTester 5000C Operators Manual Begin by accessing the custom, autosequence, pacer menu as described earlier. This time, select: MAKE Next select the name of the autosequence you want to customize or create. Follow the following steps, providing the desired information: Name—This is the name you want to give to the autosequence, with a maximum of six characters.
- Page 273 Biomedical Test System Transcutaneous Pacemaker (Pacer) Module Reinitialize Factory Default Settings Any customized autosequences can be returned to the factory default settings. To do this, enter these medTester commands: From the medTester 5000C main menu, MENU 1, press the right arrow to access MENU2 CUSTOM Enter the command:...
- Page 274 medTester 5000C Operators Manual 16-18...
-
Page 275: Nibp Autosequences
By installing the NIBP module in your medTester 5000C, you have the capability of using a set of 10 autosequences for testing NIBP monitors using the Fluke Biomedical CuffLink NIBP analyzer to collect test data. The Fluke Biomedical CuffLink connects to the COM2 or designated wedge port on... - Page 276 medTester 5000C Operators Manual For related information, see these chapters in this manual: Chapter 5, Autosequences. Chapter 6, Customize Your medTester 5000C—for customizing autosequences. Chapter 8, Memory—for test record storage and printing. Note Consult your CuffLink operating manual for proper operation. To discover if you have the NIBP module installed on your medTester 5000C, enter these menu commands: From the main menu,...
-
Page 277: Nibp Autosequence Names
Biomedical Test System Non-Invasive Blood Pressure (NIBP) Module NIBP Autosequence Names You can begin any of the autosequences listed below from the medTester menu commands or by entering the keyboard shortcut command directly into the medTester. You can also include NIBP autosequences as checkitems in checklists. -
Page 278: Running Nibp Autosequence Tests
CuffLink. Note Refer to Chapter 1, General Information - Accessories, or the current Fluke Biomedical Price List for the correct serial cable part number needed. From the medTester 5000C NIBP menu, select the autosequence name for the autosequence you wish to run. The name and number of the selected... -
Page 279: Pretest Device Prompts
Biomedical Test System Non-Invasive Blood Pressure (NIBP) Module Pretest Device Prompts There are eight prompts for information that can appear in the autosequence test record. After selecting the desired autosequence, the medTester 5000C prompts you to enter device prompts. If you have some or all prompts turned off, the autosequence still gives you the opportunity to enter device information with the message: Press F5 for all device info prompts... -
Page 280: Test Sequence
medTester 5000C Operators Manual Note See Chapter 5, Autosequences, for a complete explanation of working with prompts. You can turn individual prompts on or off and rename prompts six through eight (6-8) from the list above. Chapter 6, Customize Your medTester 5000C, explains how to customize prompts. - Page 281 Biomedical Test System Non-Invasive Blood Pressure (NIBP) Module The medTester records the following test parameters from the CuffLink for the test record: Peak Pressure Total Time Inflation Rate and Time Deflation Rate and Time You should now observe the blood pressure and heart rate readings displayed on the NIBP monitor.
- Page 282 medTester 5000C Operators Manual PRESSURE TEST The pressure test allows you to document up to three static pressure levels generated by the CuffLink. You can then compare the NIBP monitor reading. You can press F1 START to start one of the three pressure test steps or F2 SKIP to skip a step.
- Page 283 Biomedical Test System Non-Invasive Blood Pressure (NIBP) Module LEAK TEST The leak test measures the rate of leakage in the NIBP measurement system after it is inflated to a fixed pressure level. Press F1 START to start the leak test. On starting a leak test, initially the medTester commands the CuffLink to inflate up to 200 mmHg.
- Page 284 medTester 5000C Operators Manual NIBP Autosequence Number: A80 Autosequence Name: ADULT1 Step Number Blood Pressure Heart Rate in BPM Envelope Gain Envelope Shift (beats per minute) 120/80 (90) ADULT 100% 80/50 (62) ADULT 100% 150/100 (115) ADULT 100% NIBP Test Limits: NIBP: Heart Rate: 4 BPM...
-
Page 285: Posttest Prompts
Biomedical Test System Non-Invasive Blood Pressure (NIBP) Module NIBP Autosequence Number: A83 Autosequence Name: NEONT1 Step Number Blood Pressure Heart Rate in BPM Envelope Gain Envelope Shift (beats per minute) 80/50 (62) NEONT 100% 60/30 (40) NEONT 100% 100/65 (75) NEONT 100% NIBP Test Limits: NIBP:... -
Page 286: Customizing Nibp Autosequences
medTester 5000C Operators Manual Customizing NIBP Autosequences (For detailed information about customizing autosequences, please refer to Chapter 6, Customize Your medTester 5000C.) To begin customizing NIBP autosequences, you can view any of your current ones by entering these menu commands: From the main menu, MENU1 , press the right arrow to access... - Page 287 Biomedical Test System Non-Invasive Blood Pressure (NIBP) Module Begin by accessing the custom, autosequence, NIBP menu as described earlier. This time, select: MAKE Next select the name of the autosequence you want to customize or create. Follow the following steps, providing the desired information: Name—This is the name you want to give to the autosequence, with a maximum of six characters.
- Page 288 medTester 5000C Operators Manual After customizing your autosequence, the medTester prompts you to store the autosequence: STORE Print Your Autosequence From the NIBP custom autosequences menu described above, printing any autosequence is accomplished through this menu command: PRINT Reinitialize Factory Default Settings Any customized autosequences can be returned to the factory default settings.
- Page 289 Biomedical Test System Index Index test record header, 6-87 AAMI load, 1-13 Accessories, 1-17 Date and Time Setup, 2-3 Audio Transducer, 2-4 Defibrillator autosequences Autosequences limits, 9-11 defined, 5-1 names and command list, 9-3 monitoring running, 9-5 test sequence, 9-7 environmental, 5-17 line voltage, 5-16 optional monitoring, 5-15...
- Page 290 medTester 5000C Operators Manual checklists, using, 11-3 Settings Memory factory default, 2-1 checking contents of, 8-6 reinitalize defibrillator Menus autosequences, 9-14, 15-29 navigating, 3-4 reinitalize ESU autosequences, 14-18 Modules, list of, 1-8 renitialize IV pump autosequences, modules, optional 10-26 overview, 1-2 resetting autosequences to defaults, Modules,how to find, 1-7 6-94...
- Page 291 Biomedical Test System Index installing, 13-4 setting baud rates, 13-11 operating, 13-7 setting output ports, 13-13 Index-3...
- Page 292 medTester 5000C Operators Manual Index-4...
Need help?
Do you have a question about the medTester 5000C and is the answer not in the manual?
Questions and answers