Table of Contents
Advertisement
Owner's Manual
CRAFTSMAN®
3i)
Sander
Model No.
~11633
CAUTION:
Before using this Pad
Sander, read tbis manual
and follow all fts SafetY
Rules and Operating
Instructions.
•
Safety Instructions
• . Assembly
•
Operation
•
'Maintenance
•
Parts List
• . Espanol
Sears, Roebuck
andCo.,
Hoffman Estates, IL 60179 U.S.A.
Part No. 184116331001 Rev. 0
05/07/03
•
Advertisement
Table of Contents

Summary of Contents for Craftsman 911633
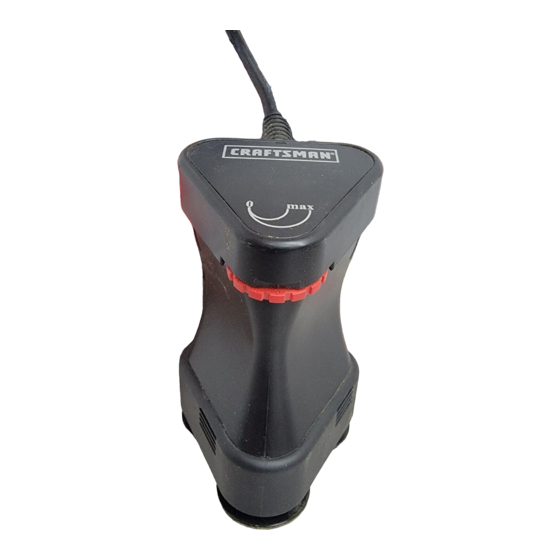
- Page 1 Owner's Manual CRAFTSMAN® Sander Model No. ~11633 CAUTION: • Safety Instructions Before using this Pad • . Assembly Sander, read tbis manual • Operation and follow all fts SafetY • 'Maintenance Rules and Operating • Parts List Instructions. • . Espanol andCo.,...
-
Page 2: Specifications
TABLE OF CONTENTS PAGE SECTION SECTION PAGE Product Specifications ... Accessories Warranty. ________ Unpacking Power Tool Safety ..Assembly & 11 -15 Operation ..3D Sander Safety. __.. Maintenance .. Symbols ....SPECIFICATIONS Motor Rating __.. 120 V, 60 Hz, AC Amperes 0.5A 800 - 2,600 RPM... -
Page 3: Full One Year Warranty
WARRANTY FULL ONE YEAR WARRANTY 3D Sander fails due to a defect in material or workmanship within one year of date of purchase, Sears reolace it free of charge. Return this Sander place purchase replacement. -~ s warranty gives you specific legal rights, and you a so have other rights which may vary from state to ~,a) -
Page 4: Electrical Safety
POWER TOOL SAFETY ELECTRICAL SAFETY Do not abuse the cord. Never use the cord to carry the tools or pull the plug from an outlet. Double insulated tools are Keep cord away from heat, oil, equipped with a polarized plug (one blade is wider than the sharp edges or moving parts. - Page 5 POWER TOOL SAFETY PERSONAL SAFETY TOOL USE AND CARE Contain long hair. Keep your Use clamps or other practical hair. clothing and gloves away way to secure and support from moving parts. Loose workpiece to a stable platform. clothing. jewelry or long hair can Holding the work by hand or be caught in moving parts.
-
Page 6: Specific Safety Rules
3D SANDER SAFETY POWER TOOL SAFETY TOOL USE AND CARE SERVICE Maintain tools with care. Keep Tool SeJVICe IlXIst cutting tools sharp and clean. performed only by qualified Properly maintained cutting tools personnel Service or with sharp cutting edges are less performed by 1T\CL~'lCe likely to bind and are easier to... - Page 7 3D SANDER SAFETY SPECIFIC SAFETY RULES After changing the backing pads, make sure they are fully . Always make sure the work . pushed into place. Loose surface. is free from nails and backing pads can come off and other foreign objects.
-
Page 8: Symbols
SYMBOLS WARNING Some of the following symbols may be used on your tool. Please study them and learn their meaning. Proper interpretation of these symbols will allow you to operate the tool beHer and safer. volts amperes hertz watt kilowatts f.lF microfarads litres... - Page 9 SYMBOLS alternating or direct current class II construction splash proof construction •• watertight construction protective earthing at earthing ® terminal, Class I tools revolutions or reciprocations per ."/min minute '£1 Diameter Off position Arrow & Waming symbol This symbol designates that this tool is listed with U.S.
- Page 10 KNOW YOUR 3D SANDER Coolinq Vents Backing Pad Sanding Disc AVAILABLE ACCESSORIES CARTON CONTENTS WARNING WARNING Use only sanding discs and If any part is missing backing pads recommended damaged, do not plug the 3D for this 3D sander. Follow sander into the power source instructions that accompany...
-
Page 11: Operation
ASSEMBLY OPERATION & To install backing pads, SANDING DISCS align the slot in the backing pad (2) with the drive pin (3) in the sander. To remove sanding discs, peel discs (1) off backing Press the backing pad onto pads (2) (see Fig. 1). the sander until it snaps into place over the drive pin. -
Page 12: Assembly And Operation
ASSEMBLY & OPERATION NOTES SANDING HINTS a) Slower speeds allow greater control over the sander and For extremely small remove material slowly. surfaces, remove one or two b) Higher speeds remove backing pads. material more quickly and produce a smoother surface. Check condition of sanding discs often. -
Page 13: Maintenance
MAINTENANCE CLEANING Consequently, it recommended that this 1001 DO NOT use solvents when used for extended work on any fiberglass matenal, wallboard, cleaning plastic parts. Most plastics are susceptible to spackling compounds or plaster damage from various types of During any use on Ihese commercial solvents and may be materials it is exllemely damaged by their use.


Need help?
Do you have a question about the 911633 and is the answer not in the manual?
Questions and answers