Table of Contents
Advertisement
Quick Links
/
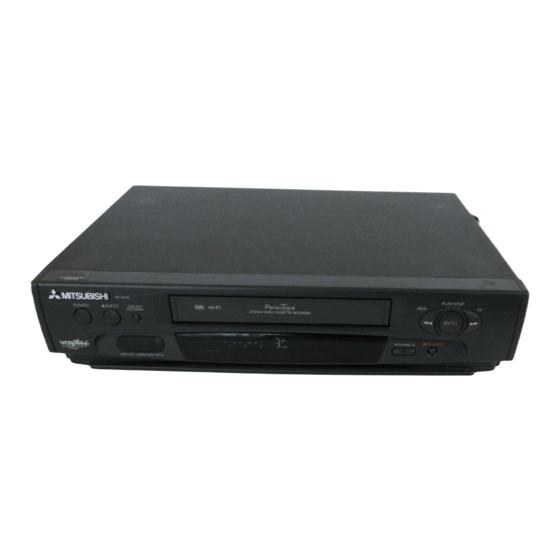
MITSUBISHI
Video
Cassette
Recorder
Owner's
Guide
00
w/Cable
WChannel
•
Changer
VCR Plus+ and PlusCode are trademarks of Gemstar Development Corporation. The VCR Plus+
system is manufactured under license from Gemstar Development Corporation.
With the VCR Plus+C a system, this video cassette recorder can automatically
select the
appropriate channel on your compatible cable box or satellite receiver. C aand VCR Plus+C a are
trademarks of Gemstar Development Corporation.
[VgS]
This Video Cassette Recorder is based on the VHS format. Only video cassette tapes with the [_
mark may be used with this model.
Advertisement
Table of Contents

Related Manuals for Mitsubishi HS-U570


Summary of Contents for Mitsubishi HS-U570
- Page 1 MITSUBISHI Video Cassette Recorder Owner's Guide VCR Plus+ and PlusCode are trademarks of Gemstar Development Corporation. The VCR Plus+ system is manufactured under license from Gemstar Development Corporation. w/Cable WChannel • Changer With the VCR Plus+C a system, this video cassette recorder can automatically select the appropriate channel on your compatible cable box or satellite receiver.
- Page 2 RISK OFELECTRIC SHOCK DONOT OPEN CAUTION: TO REDUCE THE RISK OF ELECTRIC SHOCK, DO NOT REMOVE COVER (OR BACK). NO USER-SERVICEABLE PARTS INSIDE. REFER SERVICING TO QUALIFIED SERVICE PERSONNEL. The lightning flash with arrowhead symbol, within an equilateral triangle, is intended to alert the user to the presence of uninsulated...
-
Page 3: Table Of Contents
Adding and deleting channels ....34 Selecting a channel ......... Preface Using the Audio and Video Functions ..36 Welcome to Mitsubishi ....... Descriptions of audio functions ....37 Unpacking Your VCR ........Descriptions of video functions ....38 Selecting... -
Page 4: Important Safeguards
IMPORTANT SAFEGUARDS PLEASE READ ALL THESE INSTRUCTIONS REGARDING YOUR VCR AND RETAIN FUTURE REFERENCE. FOLLOW ALL WARNINGS AND INSTRUCTIONS MARKED ON THE VCR. Read Instructions All the safety and operating instructions should be read before the product operated. Retain Instructions The safety and operating instructions... - Page 5 13. Power-Cord Protection Power Lines Power-supply cords should be routed An outside antenna system should not be that they are not likely to be walked on or located in the vicinity of overhead power pinched by items placed upon or against lines or other electric !ight or power circuits,...
- Page 6 Irnpodant S afeguards Replacement Parts PROTECTTHE POWER CORD When replacement parts are required, Do not damage the power cord. Damage to the sure the service technician has used power cord may cause a fire or shock hazard. replacement parts specified by the manu- When unplugging the power cord, please...
-
Page 7: Preface
Welcome to Mitsubishi PREFACE Congratulations on your purchase of this Mitsubishi Video Cassette Recorder. Your new VCR produces superior sound and a high resolution VHS picture available. It includes VHS Hi-Fi audio recording and playback, delivering compact disc-quality audio. Your VCR also includes... -
Page 8: Chapter One
CHAPTER Gettingto KnowYourVCR Now that you have unpacked your player and read through safety information, it's time to become familiar with the buttons and controls. If you are experienced with using VCRs, you may just want to glance at this section and refer to it later. -
Page 9: Fluorescentdisplay
(_) play and stop button (PLAY/STOP) When you are not using these input terminals, Press this button to play a tape and press make sure you attach the supplied terminal cover. again to stop the tape. A]so press to stop tape related functions or to resume... -
Page 10: Overviewof The Remotecontrol
Chapter 1: GettingIo KnowYourVCR Fluorescent Display(cont.) (_) VCR light (VCR) satellite receiver, this area can display This will light up when the VCR/TV satellite channel you are receiving. button is set to "VCR." It indicates that cable tuning light (m) will light up when the antenna signal is being routed your VCR is receiving... - Page 11 Press this button to use two times play- viewing a tape. back, to use the VCR's super quick view ® feature, or to use a Mitsubishi TV's quick shuttle ring view feature. When a tape is playing, turn this ring to...
- Page 12 (PIP SOURCE, PIP) Use these buttons to control the picture- in-picture functions of a Mitsubishi off-timer and one-touch recording button (OFF-T/OTR) This button has two functions: • If the remote is set up to operate Mitsubishi...
-
Page 13: Rear Panelterminals
Use this terminal to attach an external Use these terminals to connect the VCR to ' antenna or cable. This "brings in" an other Mitsubishi products that have Active A/V Network terminals or A/V outside signal. • antenna out (ANTENNA... -
Page 14: Connectingthe Antennaor Cable To The Vcr
o in our Now that you're familiar with some of your VCR's features, you're ready to connect the antenna and the television. You won't have to complete all of the connections you see in this chapter -- make only those connections that apply to your equipment. -
Page 15: Connectingother Antennas
connecting cablewitha cablebox If your cable system requires you to use a cable box, follow the directions below to connect your cable box to your VCR: Disconnect the cable box from the TV. Connect the cable coming from the cable box to the AN- TENNA IN terminal on the back of your VCR. -
Page 16: Connectingseparate Uhf/Vhfantennas
Chapter 2: Connecting YourVCR Connecting theAntenna or Cableto theVCR(cont.) Follow the procedures for connecting the kind of leads your antenna has, then go to page 15, "Connecting the Television." connecting anantennawitha 3gO-ohm flattwin lead (If you have a 300-ohm fiat twin lead, you will need to purchase 300-75 ohm adapter at your local hardware or electronics... -
Page 17: Connecting The Television
To connect your antennas: Disconnect the antennas from the back of the TV. Connect the antenna leads onto the combiner. Screw or push the combiner onto the ANTENNA IN terminal on the VCR. See "Connecting the Television," below. VHF Antenna - UHFAntenna --300 Ohm Flat Twin Lead... -
Page 18: Connectingan Older Tv To The Vcr
Chapter 2: Connecting Your VCR Connecting the Television (cont.) If the TV's antenna terminal ... then you will need splitter that looks like this. looks likethis,., ® No splitter needed ANTENNAIN O© ® From ANTENNA OUT on VCR on TV O©... -
Page 19: Connecting A Tv With Audio And Video Inputs
Connecting a TV with audio and video inputs Because you purchased a Hi-Fi VCR, you will want to take advantage of its superior sound capability and connect it to a stereo TV system with audio and video inputs. Before you begin this section: •... - Page 20 You can purchase these cables at your Mitsubishi dealer or at your local electronics store. before you begin, you should: • have completed...
-
Page 21: Connecting The An Network
If they still don't appear, you will need to obtain an IR emitter (part name: IR EMITTER) from your Mitsubishi dealer. [_Important: If you use a cable box and a satellite receiver, be sure to connect the IR emitter described below. - Page 22 NETWORK IN or ACTIVE A/V NETWORK BACK PANEL BACK PANEL BACK PANEL (VCR) (Other Mitsubishi component) (Mitsubishi TV' _CTIVE AN NETWORK AJV NETWORK _/V NETWORK ® ® o€ [:>Important: Never connect your A/V Network in a loop, as shown below.
-
Page 23: Chapter Three
CHAPTER THREE Operating YourVCR Now that you've completed your antenna, VCR, and TV connec- tions, you're ready to start enjoying your equipment. To get the most satisfaction out of your VCR, you should carefully read the two sections, "Setting Up Your VCR for the First Time" and '_Viewing the Picture Coming from Your VCR?' Then you can start exploring... -
Page 24: Setting Up Your Vcr If You Are Using A
Setting up your VCR if you are using a TV equippedwith Audio and Video Inputs (ModernTV) Turn on your TV and switch it to the correct external input. (For most Mitsubishi TVs, this means pressing the TV's INPUT button until you see the words "Ext-]"... - Page 25 While within 23 feet of the VCR, point the remote control toward the VCR and press the buttons you desire. usingoneremoteto operate two Mitsubishi VCRs If you have another Mitsnbishi VCR in addition to your HS-U570, you can use the HS-U570...
- Page 26 Chapter3: Operating YourVCR Using the Remote Control(cont.) Brand of TV Brand code settingup yourremotecontrolto operateyourTV buttons Mitsubishi 1, 2, 3 Turn offyour Fisher G.E. CANCEL On the HS-U570 remote control, press the TV button. Goldstar 2, 9 Hitachi While holding...
-
Page 27: Viewingthe Picturecomingfrom Yourvcr
(See page 65.) Viewingthe picture comingfrom your VCR if you are using a modernTV Turn on your TV and switch it to the correct external input. (For most Mitsubishi TVs, this means pressing the TV's INPUT button until you see the words "Ext-l"... -
Page 28: Loading And Unloadingtapes
Chapter 3: Operating YourVCR i Loading and UnloadingTapes Loadinga tape [:>Important: Tapes can be loaded into your VCR as long as the VCR is plugged in. Even when the VCR POWER is off, loading a tape will auto- matically turn the VCR on. Use only tapes that have a •... -
Page 29: Playinga Tape
Playinga Tape Now that your VCR is connected and properly set up, and you know how to view a picture coming from your VCR, it's time to play a tape. This section describes: • Playing back a tape, and • Using basic playback controls. -
Page 30: Selecting The On-Screen Language
Chapter3: Operating YourVCR Playing a Tape(cont.) controlling vibration duringstillframe If the picture vibrates during still frame, press the CHANNEL buttons on the front panel until the picture is steady. * Selectingthe 0n-screen Language You can set your VCR to display on-screen messages, menus,... - Page 31 Turn the shuttle ring to the right. The "First Time Set-Up" menu will appear. The "Set the clock" will be highlighted. Your choices are: Turn the shuttle ring to the right. _Memorize channels Add/delete channels Plus+ Guides ¸¸7¸¸7¸¸?¸¸ You will see the "Set the clock" menu. The words "Daylight savings"...
-
Page 32: Programming The Vcr To Receivetv Channels
_>Important: ings to be sure they are set to the correct times. If you have a Mitsubishi TV with both Active A/V Network "StarSight" features, you don't have to set the time on your VCR. - Page 33 Programmingchannelsautomatically Using this process, your VCR will automatically memorize all of the television stations available to you. You can later get rid of unwanted .or unused stations. A special note to If your local cable box company scrambles some or all stations, cable box subscribers and/or requires you to use a cable box, then your ability...
-
Page 34: Adding And Deleting Channels
Chapter3: Operating YourVCR Programming theVCRto Receive TV Channels (cont.) Using the list below as a reference, turn the ADJUST dial to select the kind of antenna you connected. What tyPe sources connecZed to the VCR? • If you are using a cable box that sends signals to your VCR Sat. - Page 35 If it does not, try repositioning or moving the satellite receiver. they still don't appear, you will need to obtain an IR emitter (part name: IR Emitter) from your Mitsubishi dealer. _>Important: Automatic programming may include vacant channels if there are stray signals or noise on those channels.
-
Page 36: Channels
Chapter3: Operating YourVCR Programming theVCRto Receive 1"4Channels (cont.) Using video mute When you turn video mute ON, any blank section of tape, or any station with a weak signal, will be replaced by a blue screen. sound will also be turned off If there is a time when you would like to try to tune in a weak station, turn video mute OFF. - Page 37 You will see the screen for adding or deleting channels. the ADJUST dial to select the channel that you want to add or delete. Press the ENTER button or turn the shuttle ring to No3t 9 £n memory[ Channel the right to add the channel; press the CANCEL button turn the shuttle ring to the left to delete it.
-
Page 38: A Channel
Chapter3: Operating YourVCR Programming t he VCRto Receive TV Channels (cont.) selecting channels directly Use the number buttons on the remote control. For example, choose channel 23, press the "2" button, then the "3" button. To select a single digit channel, such as channel 5, press the "0"... -
Page 39: Of Audio Functions
This section will teach you about: • Descriptions of audio functions, • Descriptions of video functions, • Selecting and adjusting the audio and video functions. The audio functions you can select are: -- audio monitor, -- normal record. The video functions you can select are: -- record speed, -- tape,... -
Page 40: Video Functions
SP produces the best picture quality and records up to two hours of video on a T-120 tape• Mitsubishi's EP speed has only slightly poorer qual- ity, and records up to six hours on a T-120. tape(Tape) Adjust this function... -
Page 41: Your Vcr To Record
Before you begin, you need to know: • how to view the picture coming from your VCR (page 25). Press the AUDIO button on the remote control to see the audio function menu, or press the VIDEO button on the remote control to see the video function menu. - Page 42 Chapter3: Operating YourVCR SettingtheVCR Plus+GuideChannelNumbers (cont.) have chosen "Cable" when you memorized channels), will need to set all of the VCR Plus+ Channel Guides to the channel on which your cable box sends a signal (usually channel 3 or 4). Then, when you program, leave your cable box turned ON, tuned...
-
Page 43: The Vcr Plus+ Guide Channel
Co1.1 Channel Col,2 Using the VCR Plus+ Channel Guide List you obtained step _, write the VCR Plus+ Channel Guide for each channel 32 / ESPN in the left column. When the numbers in both columns are the 4 ,/ WPGH same, mark them with a check mark. -
Page 44: With The Vcr Plus
Chapter 3: Operating YourVCR SettingtheVCR Plus+GuideChannelNumbers (cont.) PRIMESTAR channels. (The letter "S" will display next to the channel number.) Plus Guide Channel • If you are using a cable box that the VCR cannot control, _Q32 enter the channel on which your cable box sends signals , 033 B_E_-_tt_ your VCR (usually channel... - Page 45 VCR will eject the tape and briefly display an error message on your TV screen. Programmingyour VCR to record You can program your VCR to record with the help of Mitsubishi's on-screen operating system. You can schedule up to eight record- ing "events"...
- Page 46 Chapter 3: Operating YourVCR Recording (cont.) You will see the "Program to record" menu. Turn the ADJUST dial to choose the channel you would like to record (for ex- ample, channel 2). Turn the shuttle ring to the right. _Start time --:-- •...
- Page 47 The minute numbers of the stop time will flash. Turn the ADJUST dial to set the minutes when you wish recording Channel ..stop. Turn the shuttle ring to the right. speed <_Record AUTO Turn the ADJUST dial to set the recording speed (SP, EP, or auto recording speed (AUTO)).
- Page 48 Chapter 3: Operating YourVCR Recording (cont.) Programmingwith the VCR Plus+ system The VCR Plus+ system allows you to program your VCR to record by simply entering a PlusCode programming number. You can find this number in TV Guide or (possibly) your local TV listings.
-
Page 49: Using Quick Program
One Key Programming. Quick Program is also an "Active A/V Network" feature. If you have a Mitsubishi TV with Active A/V Network, see page 65 for more information. To use quick program: Press the QUICK PROGRAM/VCR... - Page 50 Chapter 3: Operating YourVCR Recording (cont.) If the VCR's memory is full, you will see the recap screen CHDAY (left) instead of the VCR Plus+ "Program to record" screen. 2H017 ll:30a I:30pSP You will need to use the CANCEL button to erase an entry IOTH20...
-
Page 51: Recording (Otr)
If you are using a cable box that the VCR does not control, select channel 3 or 4 on the VCR, and change the channel the cable box. Press the REC/OTR button on the front panel twice. The first time you press the button, recording will begin. - Page 52 Chapter 3: Operating YourVCR Recording (cont.) To use One-Key Programming: Load a tape with its erasure tab intact into the VCR. If you have not yet recorded on this tape, the VCR will test the tape with the PerfecTape feature. For more information on this feature, please...
- Page 53 Press the ONE KEY PROGRAM button to choose the hour when you wish recording to stop. Then, wait for 4 seconds. The minute numbers will begin to flash. Press the ONE KEY PROGRAM button to choose the minute when you wish recording to stop.
-
Page 54: Notesabout Programmedrecording
Chapter 3: Operating YourVCR Recording (cont.) Notesabout programmedrecording Important: lit. If you want to use the VCR before programmed recording begins, press the POWER button on the remote once. This turns the programmed recording light off and the VCR on. If you use the POWER button on the front panel for this purpose,... - Page 55 AUTO. If you want to use auto speed programming in this pro- gramming slot, you don't need to change anything. {_ Important: Make sure that the "Tape" video function matches the kind of tape you are using. (See "Selecting and adjusting the audio and video functions"...
- Page 56 Chapter3: Operating YourVCR Recording (cont.) canceling a programmed recording Press the MENU button on the remote control. Your VCR will turn on and the "VCR Main Menu" appears on your screen. Use the ADJUST dial on the remote control to select "Pro- gram to record."...
-
Page 57: The Advanced Features
CHAPTER FOUR Using theAdvanced Features Now that you've learned about the basic operation of your VCR, you're ready to discover its advanced features. You'll find infor- mation Usingthe Advanced PlaybackControls Using the AdvancedRecordingControls Searching Techniques UsingtheAdvanced Options Using the ActiveAN Network Features Making a Copyofa Tape Using Child Lock Before you use the advanced... - Page 58 Chapter 4: UsingtheAdvanced Features Usingthe Advanced Playback Controls (cont.) _>Important: After about five minutes in the still or slow-motion mode, the VCR will automatically stop to avoid damage to the tape. Depending on the type of TV you are using, the picture vibrate vertically when you pause...
-
Page 59: The Tracking
Adjustingthe tracking automatic tracking D (digital tracking) light Your VCR automatically adjusts the tape to give you the best quality picture. When you press the PLAY or PLAY/STOP button, IIII sP[;_j] the DIGITAL TRACKING light (D) will flash, showing that the I.I .1"... -
Page 60: Recording Controls
• Displaying the present time. Using the PerfecTape feature PerfecTape is an exclusive Mitsubishi feature that tests the quality of your video topes. After each test, the VCR will adjust its internal circuitry in order to make the best possible recording on your tape. - Page 61 Load a tape thathas not been recordedintothe VCR. Bsnd The VCR willdisplaythe testing statusscreen. When testing, theVCR recordsforone second,then evaluatestherecording Hish ..itmade. The entire testtakes about eightseconds. During Mid..thistime,the "PT" light on the frontpanel willflash. Ifyou ..wish tocancelthe test, pressthe STOP buttonon the remote control while the"PT"...
-
Page 62: The Present Time
Chapter 4: UsingtheAdvanced Features UsingtheAdvanced Recording Controls (cont.) Time gauge Displayingthe time gauge and the remainingtime The time gauge is a graphic representation of your position on a S1;op video tape. The left side of the gauge is the start (S) of the tape, S[:!Z:::::::_ and the right side is the end (E) of the tape. -
Page 63: Techniques
SearchingTechniques The VCR lets you search through a tape in a number of ways. These include: • Quick searching, • Speed searching, • Using counter zero stop, and • Index search techniques. Quick searching This feature lets you skip over the tape you are playing in about 30 second intervals. -
Page 64: Zero Stop
Chapter 4: UsingtheAdvanced Features Searching Techniques (cont.) picture. It is normal for the number of noise bars on the screen increase and roll from top to bottom as the visual search speed increases. Using counter zero stop Counter zero stop is useful to quickly access to the beginning of a... -
Page 65: Options
Once the VCR finds an index mark, it will begin playing back the tape from that point. Lookins • or index+ You can press the plus (+) or minus (-) buttons up to 19 times SE!]Z_I_Z3E to search for that many index marks. For example, to find the 1:40... - Page 66 Chapter 4: UsingtheAdvanced Features Usingthe Advanced Options (cont.) Sunday in April, and change from 3 AM back to 2 AM on the last Sunday in October. Remember that when you programmed, your recording length may be affected because the VCR clock auto- Your are: choices...
-
Page 67: Using The Active A/V Network Features
PLAY button. $ Usingthe ActiveAN Network Features The Active A/V Network is a benefit of certain Mitsubishi and VCRs. The Active A/V Network allows you to use many of the commonly used features of your system at the press of one button. -
Page 68: Copy Of A Tape
Chapter4: UsingtheAdvanced Features UsingtheActive AN Network Features (cont.) Turn the shuttle ring right to set "A!V Network" to ACTIVE. Press the MENU button two times to turn offthe menus. whattheActiveAN Network does The Active A/V Network makes it easier and faster to use the VCR's Quick Program, MENU, and Play commands. -
Page 69: Using Your Hs-U570 To Record From
In this section you'll learn: • Using your HS-U570 to record from another ¥CR, and • Using your HS-U570 to play back to another VCR. Usingyour HS-U570to recordfrom anotherVCR [ PLAYBACK I HS-U570 i RECORDING] VIDEO IN_AUDIO IN R AUDIO OUT R---_0 _--VIDEO OUT _AUDIO IN L/MONO AUDIO OUT L_... -
Page 70: Vcr
Chapter 4: UsingtheAdvanced Features Makinga Copyofa Tape(cont.) Using your HS-U570to play back to another VCR [ pLAYBACK] HS-U570 IRECORDING] VIDEO IN_AUDIO AUDIO OUT R_ AUDIO IN R Connect one RCA audio cable to the Set the input of the other VCR to "Exter- AUDIO INPUT terminal on the other... -
Page 71: Usingchildlock
# UsingChildLock The child lock feature prevents others from using your VCR. To lock the VCR: Press and hold down the DISPLAY button on the remote LOCK light control for about 8 seconds. The LOCK light on the fluores- I', "11"1,'l 1"1 _ -I sP cent display will light up. - Page 72 CHAPTER FIVE Troubleshooting Problems Possible Solutions For More Information The VCR won't turn on. Check the power cord and the AC outlet• See Chapter 1, "Getting to • Is the LOCK light ON? If so, press and hold Know Your VCR." the DISPLAY button for more than 8 seconds...
- Page 73 Problems Possible Solutions ForMoreInformation Check the remote mode of the VCR VCR remote does not See Chapter 3, "Operating function Your VCR" Press the VCR button and the corresponding button on the remote control before operating your VCR Press the TV button on the remote control before operating...
-
Page 74: Index
Index Connecting Your VCR ..12 A/V Network: connecting Important Safeguards ... 2 active ........ A/V Network ....index connecting ......marks ....... antenna ....12, 13, 14 terminals ......cable ......... search ....... adding channels ....cable box ......search buttons .... - Page 75 sensor ......... picture-in-picture (PIP) tracking ....... buttons ......TV button ......using ......... picture, viewing the one repaired tapes ..... two times playback ..... 56 coming from your VCR ..25 repeat playback ..... 38, 63 PIP source button ....rewind button ....
- Page 76 _Guia de Operacidn Bdsicade la Videograbadora Funcionesbdsicasde los botones ® bot6n de modalidad VCR (VCR) Oprima este bot6n para usar el control remoto para controlar la videograbadora. POWER oj..o o ® bot6n de grabaci6n (REC, REC/OTR) --_ EJECT Utilice este botSn para comenzar grabaci6n.
- Page 77 C6mo seleccionarel idioma de el sistema operativo de mendsen pantalla Si nunca se ha usado la videograbadora, vaya al paso _. Oprima el botSn TIMER RESET en el panel trasero de la videograbadora. Oprima el bot6n POWER para encender la videograbadora. Oprima el botSn MENU en el control remoto.
- Page 79 DOES NOT COVER damage caused by: modification, alteration, repair or service of this product by anyone other than an authorized MITSUBISHI service center; physical abuse to, or misuse of, the VCR; operation in a manner contrary to the instructions which accompany the VCR;...
- Page 80 MITSUBISHI MITSUBISHI ELECTRONICS AMERICA, INC. 6100 Atlantic Boulevard Norcross, GA 30071-1305 © 1996 Mitsubishi Electronics America, Inc.
Need help?
Do you have a question about the HS-U570 and is the answer not in the manual?
Questions and answers