Table of Contents
Advertisement
Available languages
Available languages
Kitchen_kid
®
30" (76.2 CM) AND 36" (91.4 CM)
SLIDE-OUT RANGE HOOD
.... .............
_' # __°_/__,,_
_i!!
HOIIE
D'ASPIRATION
AVEC MODULE DE
COMMANDE
EXTRACTIBLE DE 30" (76,2 CM)
ET 36" (91,4 CM)
Table of Contents/Table
des matieres .............................................................................
2
iMPORTANT: READ AND SAVE THESE iNSTRUCTIONS.
FOR RESIDENTIAL
USE ONLY.
iMPORTANT
: LIRE ET CONSERVER CES INSTRUCTIONS.
POUR UTiUSATiON
R#SiDENTELLE
UNiQUEMENT.
W10342488A
Advertisement
Table of Contents

Related Manuals for KitchenAid KXU2836YSS0


Summary of Contents for KitchenAid KXU2836YSS0
- Page 1 Kitchen_kid ® 30" (76.2 CM) AND 36" (91.4 CM) SLIDE-OUT RANGE HOOD ...._' # __°_/__,,_ _i!! HOIIE D'ASPIRATION AVEC MODULE DE COMMANDE EXTRACTIBLE DE 30" (76,2 CM) ET 36" (91,4 CM) Table of Contents/Table des matieres ................iMPORTANT: READ AND SAVE THESE iNSTRUCTIONS. FOR RESIDENTIAL USE ONLY.
-
Page 2: Table Of Contents
TABLE OF CONTENTS TABLE DES MATIERES SECURITE DE LA HOTTE D'ASPIRATION ........ 17 RANGE HOOD SAFETY ..............INSTALLATION REQUIREMENTS ..........EXIGENCES D'INSTALLATION ........... Tools and Parts ................Outils et pieces ................Location Requirements ..............Exigences d'emplacement ............Venting Requirements ..............Exigences concernant I'evacuation ........... - Page 3 iMPORTANT SAFETY iNSTRUCTiONS WARNING: TO REDUCE THE RISK OF A RANGE TOP WARNING: TO REDUCE THE RISK OF FIRE, ELECTRIC GREASE FIRE: SHOCK, OR INJURY TO PERSONS, OBSERVE THE FOLLOWING: [] Never leave surface units unattended at high settings. Boilovers cause smoking and greasy spillovers that may [] Use this unit only in the manner intended by the ignite.
-
Page 4: Tools And Parts
INSTALLATION REQUIREMENTS _?' i_: _ _._1:_ t'i} Sa:O _"_*" Gather the required tools and parts before starting installation. IMPORTANT: Observe all governing codes and ordinances. Read and follow the instructions provided with any tools listed Have a qualified technician install the range hood. It is the here. - Page 5 Product Dimensions 6" (15.2 cm) _._! front edge to damper centerHne 2¾" (7.0 cm) _%6" - 1¾" (2.4 cm - 4.4 cm) trim extension 111/lO" (28.1 cm) 67/8 '' (17.5 cm) with screen extended Cabinet Dimensions 15" (38.1 cm) • Vent system must terminate to the outside, except for non- min.
-
Page 6: Range Hood Safety
Cold weather installations Example vent system - 6" (15.2 cm) An additional back draft damper should be installed to minimize Wall cap backward cold air flow and a thermal break should be installed to minimize conduction of outside temperatures as part of the vent 6 ft (1.8 rn) system. -
Page 7: Installation Instructions
Observe all governing codes and ordinances. If the house has aluminum wiring, follow the procedure below: Ensure that the electrical installation is adequate and in conformance with National Electrical Code, ANSI/NFPA 70 (latest 1. Connect a section of solid copper wire to the pigtail edition), or CSA Standards C22.1-94, Canadian Electrical Code, leads. - Page 8 Transfer measurement A to the cabinet back wall. Measure If the cabinet bottom is recessed above a support frame, wood filler strips need to be installed on the right and left from the underside of the cabinet or wood filler strips, if used. sides of the cutout to provide sides of clearance for the Mark the cutout as shown.
-
Page 9: Range Hood Care
For non-vented (recirculating) installations, charcoal filters are 10. Place the round damper into the vent opening of the range hood and attach with 2 - 9 x 9.5 mm TORX ®screws. necessary. See the "Range Hood Care" section for instructions on installing charcoal filters. - Page 10 7. Install a lower bracket with a 3.5 x 9.5 mm screw. Be sure to Install 2 - 3.5 x 9.5 mm mounting screws. Leave approximately 1/4"(0.6 cm) space between the screw heads position the bracket slot as shown. and hood to slide the brackets into place..A A.
-
Page 11: Connect The Vent System
IL', Fire Hazard Electrically ground the blower. Electrical Shock Hazard Use copper wire. Disconnect power before servicing. Connect ground wire to green ground screw in terminal box. Replace all parts and panels before operating. Failure to do so can result in death, fire, or Failure to do so can result in death or electrical shock. -
Page 12: Controls
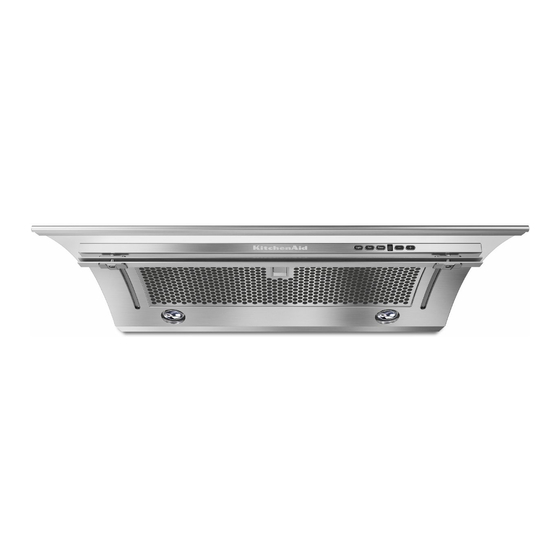
RANGE HOOD The range hood is designed to remove smoke, cooking vapors and odors from the cooktop area. For best results, start the range hood before cooking and allow it to operate several minutes after the cooking is complete to clear all smoke and odors from the kitchen. i Light i rTimor ] Fan Control... -
Page 13: Cleaning
RANGE HOOD CARE To Install Charcoal Filter 1. For non-vented (recirculating installations), fit the charcoal filter on the rear side of the metal grease filter. IMPORTANT: Clean the range hood and grease filter frequently 2. Secure the charcoal filter in place with the metal brackets according to the following instructions. -
Page 14: Wiring Diagram
WIRING DIAGRAM SEL0015013 MotorCharacteristics PowerSupply 120V Frequency 60 Hz PowerAbsorption 230W UserInterface Speed 4 Ec======_ oF---7 MainBoard Speed 3 Ec======_ Speed 2 N • (1.) ® L " Cq__ BR Speed Motor Resistance (Ohms) Y/G (_e BU/W 45.1 Min. Co w _._e BU/R 37.7... -
Page 15: Assistance Or Service
Filters Pages. (for non-vented installations only) Order Part Number W10356922 For further assistance If you need further assistance, you can write to KitchenAid with any questions or concerns at: KitchenAid Brand Home Appliances Customer eXperience Center 553 Benson Road Benton Harbor, MI 49022-2692... -
Page 16: In The U.s.a
YOU SPECIFIC LEGAL RIGHTS, AND YOU MAY ALSO HAVE OTHER RIGHTS WHICH VARY FROM STATE TO STATE OR PROVINCE TO PROVINCE. If outside the 50 United States and Canada, contact your authorized KitchenAid dealer to determine if another warranty applies. If you need service, first see the "Troubleshooting"... -
Page 17: Securite De La Hotte D'aspiration
SECURITE DE LA HOTTE D'ASPIRATION Votre securite et celle des autres est tres importante. Nous donnons de nombreux messages de s_curit_ importants dans ce manuel et sur votre appareil m_nager. Assurez-vous toujours lire tous les messages de s_curit_ et de vous y conformer. Ce symbole d'alerte de s_curit_ vous signale les dangers potentiels de d_c_s et de blessures graves &... - Page 18 llVIPORTANTES iNSTRUCTiONS DE Sl CURITl AVERTISSEMENT : POUR MINIMISER LE RISQUE AVERTISSEMENT : POUR REDUIRE LE RISQUE D'UN FEU DE GRAISSE SUR LA CUISINIF:RE : D'INCENDIE, CHOC ¢:LECTRIQUE OU DOMMAGES CORPORELS, RESPECTER LES INSTRUCTIONS [] Ne jamais laisser un 616ment de surface fonctionner & SUIVANTES puissance de chauffage maximale sans surveillance.
-
Page 19: Exigences D'installation
EXIGENCES D'INSTALLATION Sachet de quincaillerie : Piece numero W10369160. Comprend d_ __ _ _i_,_ Instructions d'installation et Guide d'utilisation et d'entretien Rassembler les outils et pieces necessaires avant d'entreprendre I'installation. Lire et observer les instructions fournies avec 2 supports de nivellement inferieurs chacun des outils de la liste ci-dessous. - Page 20 Dimensions du produit 2¾" (7,0 crn) Prolongernent d_coratif 1%_,,. 1¾" (2,4 crn - 4,4 cm) 111/lO" (28,1 crn) Avec ecran depmoye 67/8 '' (17,5 crn) Dimensions du placard • Le circuit d'evacuation doit d_charger I'air & I'ext_rieur, _---] F_ .._ Hauteur minirname excepte pour les installations sans decharge &...
- Page 21 Installations pour r_gions _ climat froid Calcul de la Iongueur effective du circuit d'_vacuation On doit installer un clapet anti-retour supplementaire a I'arriere pour minimiser le reflux d'air froid et incorporer un el6ment Pour la realisation du circuit d'evacuation, on recommande d'isolation thermique pour minimiser la conduction de chaleur...
- Page 22 Installation sans d_charge & I'ext_rieur (recyclage) travers le soffite/placard S'il n'est pas possible d'evacuer les fumees et vapeurs de Observer les dispositions de tousles codes et reglements en cuisson & I'exterieur, on peut employer la version sans decharge vigueur. I'exterieur (recyclage) de la hotte, dotee d'un filtre a charbon. Verifier que I'installation electrique a ete correctement effectuee...
-
Page 23: Instructions D'installation
INSTRUCTIONS D'INSTALLATION II est recommande que I'installation du circuit d'evacuation 3. Relever les mesures appropriees et tracer les axes tel soit realis6e avant celle de la hotte, qu'indiqu& Utiliser une scie sauteuse ou scie & guichet pour decouper I'ouverture & travers le fond du placard. •... - Page 24 Installation sans d_charge & I'ext_rieur (recyclage) D_charge & I'ext_rieur, & travers le mur travers le soffite/placard Assembler le circuit d'evacuation qui sera utilise sur I'ouverture de decharge. Ne pas raccorder le circuit Relever les mesures appropriees et tracer une ouverture d'evacuation &...
- Page 25 Mesurer I'epaisseur du plancher du placard, en incluant les cales en bois si celles-ci sont utilisees. Si I'epaisseur est inferieure & 3/4"(1,9 cm), installer des cales en bois d'une Iongueur minimale de 5" (12,7 cm) contre le fond du placard. Le support de montage peut _tre ajuste entre 3/4"(1,9 cm) et 1W' (3,8 cm) pour la prise en compte des cales en bois.
- Page 26 Placer un support superieur de fagon & ce que la partie large 8. Installer 2 vis de reglage de 5 x 18 mm. des encoches en forme de trou de serrure se trouve par- dessus les vis de montage. Pousser ensuite le support vers I'arriere de la hotte la hotte pour engager les vis dans la partie etroite des encoches.
- Page 27 ....Installations avec d_charge & I'ext_rieur 1. Reinstaller les filtres metalliques. Voir la section "Entretien de la hotte". 2. Connecter le circuit d'evacuation sur I'ouverture de decharge de la hotte. Serrer le point de connexion avec des brides. Risque d'incendie 3.
-
Page 28: Affichage
UTILISATION DE LA HOTTE ka hotte de cuisiniere est con(;ue pour extraire fumee, vapeurs de cuisson et odeurs de la zone de la table de cuisson. Pour des resultats optimaux, mettre la hotte en marche avant d'entreprendre une cuisson, et la laisser fonctionner pendant plusieurs minutes apr_s une cuisson afin d'evacuer toute odeur de cuisson et fumee de la cuisine. -
Page 29: Entretien De La Ho'r'e
ENTRETIEN DE LA HOTTE Installation du filtre _ charbon 1. Pour les installations sans decharge & I'exterieur (recyclage), installer le filtre & charbon sur la partie arriere du filtre IMPORTANT : Nettoyer frequemment la hotte et le filtre & graisse graisse metallique. -
Page 30: Schemas De C.&,Blage
SCHEMAS DE CABLAGE SEL0015013 Caracteristiquesde moteur Alimentation _lectrique 120 V Fr_quence 60 Hz Puissance absorbee 230 W Interfaceutilisateur Vitesse 4Et=======_ oF--q GRIS Vitesse 31_====_- Rf _= Vitesse 2 Carte principale Vitesse 1 Lampe Neutre Neutre Neutre N • JANE '-'t ®... -
Page 31: Assistance Ou Service
References aux marchands Iocaux, aux distributeurs pieces de rechange et aux compagnies de service. Les techniciens de service designes par KitchenAid Canada sont formes pour remplir la garantie des produits et fournir un service apres la garantie, partout au Canada. -
Page 32: Au Canada
CONF#RE DES DROITS JURIDIQUES SP¢:CIFIQUES ET VOUS POUVEZ €:GALEMENT JOUIR D'AUTRES DROITS QUI PEUVENT VARIER D'UNE JURIDICTION A UNE AUTRE. Si vous residez a I'exterieur du Canada et des 50 €:tats des €:tats-Unis, contactez votre marchand KitchenAid autorise pour determiner si une autre garantie s'applique.
Need help?
Do you have a question about the KXU2836YSS0 and is the answer not in the manual?
Questions and answers