
Related Manuals for Kenmore 385.12014


Summary of Contents for Kenmore 385.12014
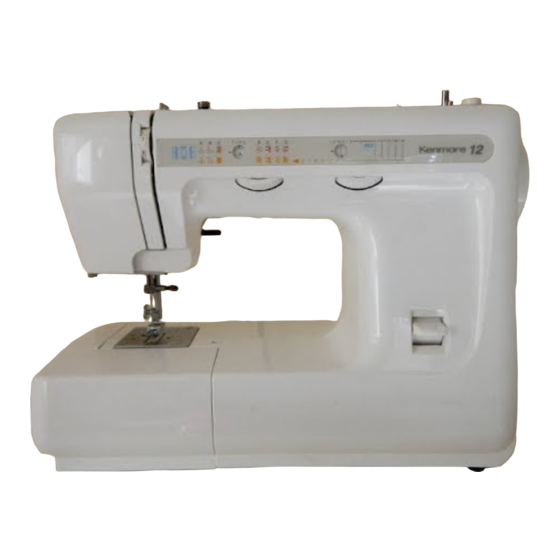
- Page 1 OWNER'S MANUAl MANUEL D 'INSTRUCTIONS MANUALDEINSTRUCCIONES SEWING MACHINE A COUDRE MAQUINAS DE COSER...
- Page 2 OPERATING INSTRUCTIONS "For appliances with a polarized plug (one blade wider than the other). To reduce the risk of electric shock, this plug is intended to fit in a potanzed outlet only one way. If the plug does not fit tully in the outlet, reverse the plug.
- Page 3 SEARS, ROEBUCKANDCO. Dear Customer: You have just invested in a very fine zigzag sewing machine. Before using your new Kenmore machine, please pause for a moment and carefully read this booklet which contains instructions on how to operate and care for your machine.
- Page 4 Machine _ coudre Kenmore Marquez dans les espaces ci-dessous, les num_ros de modkle et de sdrie de votre machine, lls sont inscrits sur ia plaque signaldtiq ue, dont remplacement...
- Page 5 Estlmado Cliente: Usted ha invertido en una muy buena mfiquma de coser con puntada de zigzag. Antes de usar su nueva mziquma Kenmore, por favor det_ngase por un momeuto y lea cuidadosamente este manual el cual contlene mstrucclones de c6mo manejar y cuidar su mfiquma.
- Page 6 IMPORTANT SAFETY Never operate the sewing machine with any e;rropening blocked. Keep ventilatien openings of the sewmg machine and toot controller tree from accumulation INSTRUCTIONS of lint, dust, and loose cloth+ 5. Never drop or insert any object into any opening. Your sewing machine is designed and constructed only for HOUSEHOLD use.
- Page 7 Consignes de Sdcuritd Importantes d'aerage Janlats mettre nlaclline service avee ouvertures btoqu_es. Maintentr les ouvertures d' adras de ta machine etla pYdale cottunande en _tat eA-entpt de la peluche, de ia poussiOre et des piOees Votre machine {t coudre est congue untquement pour l usage m¢;nager.
- Page 8 INSTRUCCIONES DE SEGURIDAD 4. Nunca opere Ia mfiquina coil cualquier salida de aire bloqueada. Mantenga las abErturas de venfilaci6n de la mfiquina de coser y el control IMPORTANTES de pe0al libres de acumulacidn de pelusa, polvo y reslduos de tela. 5.
-
Page 9: Table Of Contents
TABLE OF CONTENTS SECTION KNOW THE MACHINE Left Needle Position .............. • Sew in a Zipper ............39 - 40, 43 A Portable Case or Cabinet is Available ........• Use the Darning Plate ............Locate and Identify the Parts ............•... - Page 10 TABLED ES MATIERES SECTION CONNAISSEZ VOTRE MACHINE " R_gtage h gauche de l'atgaille ..........• Pose desfermentres fi glissibre ........ 39 -40, Mallette de transport et meuble de machine h coadre ....4 • PlamTa b repnser..............• ldentificatton des ptece ..............
- Page 11 COMTENIDO • Pasici6n izquierdade ia Aguja ..........38 SECCION CONOZCA SU MAQUINA • Colocaci6n de Cremallera ..........41 ~ 43 Gabmete o Estuche Portfitil para Mfiquma De Coser ....4 • Uso de la Tapa Zurcidora ............46 Localice e Identifique fas Partes ............ 4 Puntadas en Zigzag ..............
-
Page 12: Know The Machine
Gablnete 0 Estuehe Portfitil Para Mfiquina de Coser En su tienda Sears mOs cercana a su donuciIio se cuenta con una l_nea completa de gabinetes para su m_quina de coser Kenmore. Otra opci6n es un estuche ..su maqmna Kenmore... -
Page 13: Identify The Accessories
Sdtecteur depomt Selector de puntada Stitch Selector Control puntada de reverse Piquage en artiste Reverse Stitch Control Ventana de patr6n de puntada Fen_tre du S_lecteur des potnts Stitch Pattern Setting Window Control largo de puntada R_gfage de longueur du point Stitch Length Control Ventana de largo de puntada Fen_tre... -
Page 14: Prepare The Machine For Sewing
PREPARE THE MACHINE FOR SEWING PRE, PARATION DE LA MACHINE A COUDRE Powe_ supply plug Cordonglectriaue Power supply I_ "] courant awing light ""_L_ 4mpouJe FOol contfof d'_cJatrage P_dale de wtesse - Foot Control The toot control regulates the speed at which Power switch _"_"... - Page 15 PREPARE SU MAQUINA PARA COSER Clavija _Foco Pedal " Control del Pedal El control del pedal regula ta velocidad a la cual se cose. [ntermplor Encendido/Apagado Para aumentar la velocidad, preslone hacia Clavija de la maquma abajo suavemente con la punta del pie....
-
Page 16: Setting Spool Pins
Normal up position ,"'" ,,_,__x ___.__. High position _ ll _ Po.,.o,,h.,.. Norma_ up position .7 "" ..Position de retevage "'°'°°=a' Levter de relevage Paianca deI pm prensalelas • Thread Cutter • Adjust the Presser Foot Lever • Setting Spool Pin You don't need a pair ol scissors to cut the The Presser Foot Lever raises and lowers your presser toot. -
Page 17: Free Arm Sewing: The Removable Extension Table
side away _fom Choose the Needle and Thread • Accessory Storage • Free-Arm Sewing: • Change the Presser Foot Removable Extension Table The lid of the accessory.storagebox lifts Use the correct presser foot for • To Change the Needle open toward you. the stitch you wish to sew. - Page 18 t..., vis de -..(., La pattie plate du talon ver_ l*arri_re Choix du f!l et de l'aiguille • Cbangement de pied presseur . Utilisatlon du bras fibre • Logement des accessoires Utilisez tOlUOUrS le pied • Changement d'aiguille Le couvercie du logement Pour enlever la rallonge qtte vous...
- Page 19 Tomillo de su.teci6n de ta aguja Lado piano lejano a usted '-.,..• Cala para Guardar Accesorios - Brazo para Costura Tubular. • Camblo de Pie Seleccion de Aguja e Hilo Remoci6n La tapa de ia caja de accesonos se Utilice prensateias , Para Cambiar su Aguja...
-
Page 20: Checkthe Needle
Buttonhole Twist 16-PURPLE top-stitching on these fabrics, Decorative top-stitching (6-8 stitches (Use as top thread only) I_GREEN on at1 types of fabnc per inch) Kenmore replacement needles are available at your nearest Sears store. Polyester CoretCotton Stretch Fabric: 11-BLUE 2-2.5... - Page 21 • Tableau des _toffes, aiguilles, fils et longueur du point AIGUILLE: LONGUEUR E" TOFFE N'_ET DE POINT COULEUR RECOMMANDEE Tissus fins: batiste, z@hyre, f Colon sur dine polyester synth_tique, dentetle fine, 11 ORANGE Colon mereertsd (12 points organza, crOpe de sole, Sole A au pouee ) taffetas,...
- Page 22 • Tabla para Coordinar la Aguja, el Hilo y la Tela TAMAlqO Y TIPO DE AJUSTE LARGO TELA COLOR DE HILO DE PUNTADA LA AGUJA Nfieieo de Poli6ster] LIGERAS: Batmta, Cotonia, Chif6n, Forro de Algod6n puntadas por Sedas, Jerseys, Sintetieos, Encaje I .,====== NARANJA Fino, Organza, Crepe, Tafeta, Gasa,...
-
Page 23: Prepare The Bobbin
Prepare the Bobbin ° Wind the Bobbin • To Remove the Bobbin Case from the Machine Release clutch by turning the clutch Remove the extension table from To remove bobbin case from shuttle, knob inside the handwheel toward the machine by pulling it to the left. pull open latch of bobbin case. - Page 24 ...J • Wind the Bobbin (Continued) Place bobbin onto bobbin winding Wind thread until winder stops. Draw thread from spool through bobbin Pull end ot thread through ho_e in spindle with end of thread coming from Push bobbin wmdhg spindle to the left bobbin, as shown.
- Page 25 NOTE: The bobbin w inder stopper canbeadiusted fortheamount ofthread n eeded onthebobbin ( example 1/2full, f ull, e tcj.Tomake the adiustment use your l arge screw driver and loosen t he screw one turn orless. This will a llow you toadjust the position ofbobbin winder stopper.
-
Page 26: Insert The Bobbin Into The Bobbin Case
• Insert the Bobbin into the Bobbin Case Holding latch open, position Case should lock into place Place bobbin in bobbin case Pull thread through slot of case Pull thread under tension spring when latch is released. case into shuttle and release as shown. -
Page 27: Prepare The Top Thread
Raise take-up lever to its highest position by turning handwheel toward you, Raise presser foot lever. Place spool on spool pin as shown, with thread coming from the back of the spool, (!) Draw thread into thread guide using both hands, (_ While holding thread near spool, draw thread down into the tension area and then around the check spdng holder. - Page 28 Los pasos enumerados siguen la secuencia num_rica de las ilustraciones. Las |ineas punteadas muestr_,mlos sitios donde el hilo se afloja para luego set halado firmemente. Eleve ta palanca iirahilo a su pos_ci6n mils alta girando manualmente el volante hacia usted. Alce la palanca de pie prensatelas.
-
Page 29: Pick Up The Bobbin Thread
......• Pick Up the Bobbin Thread 3. Pull both threads under and to the back 1. Raise presser foot lever. Hold top thread 2. Bring bobbin thread up by pulling top loosely in left hand and rotate handwheel thread. of the presser foot, leaving 4 to 6 inches of thread c{ear. - Page 30 • Tomando la Hebra de la Bobina 3. Tire ambas hebras por debajo y hacia I. Levante la palanea del pie prensatelas, 2. Traiga hacia arriba el hilo de ta bobina arrasdel pie prensatelas, dejando la hebm Sostenga floja la hebra de ta aguja con su halando la hebm de arriba.
-
Page 31: Adiust The Top Thread Tension
Adjust the Top Thread Tension Choose the Correct Tension: The best tension will depend on; Top side o! Iabnc the stiffness and thickness of the fabric Setting mark the number of fabric layers the type of stitch LOOSen Top- thread The top thread The lop thread is [0o |oose. - Page 32 Rdglage de tension du fil de dessus Rdglage gzla tenston eorrecte. La tension du f!I d_pend essentiellement: de la rtgidit_ et de 1'_paisseur de l'_toffe Repere du hombre de couches h assembler de Iaforme du point Fil d" aiguille trop lSche, Fil d'atguille trop tender.
- Page 33 Ajuste la Tensi6n del Hilo Superior Escoja ]a tension correcta: La tension peffecta depende de: Lado de arriba de la tela El grosor y tersura de la tela Ma_apara_ar E! nfimero de capas de tela El tipo de puntada Suelto La hebra (o hiM/ hilo supertor...
-
Page 34: Reverse Stitch Control
Reverse Stitch Control For Z!gzag Stitch In a correct zigzag stitch, the bobbin threads will not show on the top side of fabric and the top threads will show slightly on the bottom side. See below for the correct appearance. To match this appearance, adjust the top tension. Top tension Top tension Too Tight... - Page 35 Piquage en arri_re Avec le potnt ztgzag Lorsqu'un point zigzag est effectu_ correctentent, le f!l de dessous ne para_t jamais sur [e dessas du tissu et le fil de dessus paraft a petne sur la surface tnf_rieure du tissu. Reportez-vous attx figures ci-dessous pour...
- Page 36 Control de la Puntada de Retroceso Puntada Zigzag En la puntada correcta de ztgzag, los hilos de la bobina no aparecer_ en la pane superior de la tela y los hitos supenores se ver_n ligeramente en la pane de abajo. Vea el aspecto correcIo en los itustraciones siguientes.
-
Page 37: Stitch Selector
Stitch Selector Model ModUle 12014 The stitch selector control not only determines the stitch you select, but also regulates the stitch width for regular Modelo zigzag. Se_lmg ma_k Repdre de r_gtage The different types of stitches are designated by color. Marca de aj_aste : ,"_ - - _ -..., Straight, Zigzag and Utility Stitches are red. -
Page 38: Stitch Length Control
Setting mark //" "_% i' / ..E N G T ..Stitch Length Control Rdgtage de tongneur du point Stitch Lenglh Control Adjusting Stretch Stitch Balance R@fllage de longaeur du porto To select Stretch Stitches, set this control at Y position. (Model 11608) (Model 12014) In stretch stitch sewing, the Stitch Length Control should be in the detent... - Page 39 Marca de ajuste "_x "N "_',,,..._'_..,.._ Controlde al'_o de puntada Con{rol de largo Ajuste Equilibrado de la Puntada Elfistica de puntada (Mod. t2014) (Mod. f I608) Para selecclonar tas puntadas rectas, ajuste este control en posici6n _' En la costura de puntadas el',istlcas, el control de largo de puntada debera estar Control de Largo de Puntada...
-
Page 40: Starting To Sew
Starting To Sew Now that you are familiar with the controls on your machine and with the accessories provided for the machine, you are ready to start sewing with your new Kenmore sewing machine. Below are some good habits to follow each time you sit down to sew: t. - Page 41 A vant de commencer Maintenant que vous conna_ssez tous tes dispositifs de r@tage de votre machine a coudre Kenmore, ainst que ses divers accessotres et teur fonctton, vons allez pouvoir vous en servtr. Adoptez des le ddbut de bonnes habitudes...
- Page 42 Iniciando la Costura Ya que se encuentm famitianzado con los distintos controles de su mfiquma y con los accesorios que se entregan con la m_tquma,estfi listo para empezar a coser con su mfiquma de coser. A continuaci6n algunos buenos hfibitos que debe segmr cada vez que se siente a cosec I.
-
Page 43: Learn The Stitches
LEARN THE STITCHES Set the Machine Stitch S[ilch _elec[or TYPE Top thread tension Stitch length Corne_rng Guide control 2 to 6 controt red LENGTH • Use the Seam Guides Straight Stitches 7. At the end of the seam, you may The seam guides on the needle plate want to reverse to lock the stitch. - Page 44 CONNMSSEZ LES POINTS R_glages Point S_lecteur de point TYPE Tenswn dufif Marqtte._ de _'otn d_atguitle, 2 a 6 Longueur du point, k ....• Lignes de gnidage Points droits Z Une fois la couture terminde, vous Des lignes de guidage h m_me la platine pouvez piquet en arriOre pour arr_ter de l'aiguille permettent...
- Page 45 APRENDA LAS PUNTADAS Ajustes Pumada Selector de las pumadas TYPE[ Control del tensi6n del hilo superior de 2 a 6 Control largo de Guia de • Uso Ins Guias de Costura Puntadas Rectas 7. A1 pnncipto y af final de ta costura Las guias de costum que se encuentran - Puntada Recta puede coser en retroceso para rematar...
-
Page 46: Topstitching
• Topstitching Set the Machine Stitchselector !° R_glages The Stitch and Its Uses Sglecteur de point Ajustes Selector de las puntadas Topstitching emphasizes the lines of TYPE Stitch selector Stitch your garment and keeps seams Sdleetettr de pomt Polnt Selector de las puntadas edges flat and crisp. -
Page 47: Sew In A Zipper
• Sew in a Zipper ( Set the Machine Zipper teeth Mailles R_glages Fabric Preparation: Stitch selector" Zipper tape Stitch SEtecteur de pmnl Put the right sides of the fabric together Pottt¢ TYPE sew to the end of the zipper opening. - Page 48 14. Stop about 2"" from the top o! the 11. To sew the right side ot the zipper, t0. Close the zipper and turn the fabric 8. Open the zipper. zipper. set the zipper foot on the right side ot right side up.
- Page 49 • Coiocaci6n deCremallera Ajuste De 0.2 Dienles de cremallera Preparaci6n delatela: a 0.3 cms Seieclor de la puntadas Punlada Cinta de TYPE Coloque loslados d earriba d elatela uno juntoatottoy cosa hasta e l final d ela apertura d ela cremallera. Utilicela puntada e n reversa pararematar t as punladas.
- Page 50 de arriba de tela de fa letn 8. Abra la cremallera. 1 i.Retire el pie de la cremallera 14.Pare unos 5 ems. antes de la punta 10. Cierre ia cremallera y voltee hacla arriba et derecho de la tela. superior de la eremallera. co|oque ]a barra prensatelas a los 9.
- Page 51 INVISIBLE ZIPPER AND CORDING INVISIBLE ZIPPER CORDING Adjust the foot so the needle is sewing through The _ipper foot can also be used to make the center hole of the toot and one groove of the cording for slipcovers, etc. Cover a cord with a foot is riding on the teeth of the z_pper as shown.
-
Page 52: Use The Darning Plate
Set the Machine Stitch selector Stitch TYPE Stitch length Top thread tension eon_ro_any number con_rot 1 1o 4 (no! necessary adiust) • Use the Darning Plate LENGTH Sometimes when you sew, you want to control the tabfic yourself. The Darning Plate covers the teed dogs so that they do not touch the •... - Page 53 Rdglages S_lecteur de point Point TYPE Tension duf!l d'aiguille, l a 4 Longueur du paint, art chuix (pas de • Platine _t repriser rdglage obligatoweJ LENGTH -® [l se peut parfots que vous vouliez contr6ler [e mouvement du ttssu que vous cottseT..
- Page 54 Ajusles Selector de la puntadas Punlada TYPE Control del tensi6n Control del largo de puntada en del hilo superior dela4 eualqmer numero mo requlere de - Uso dela Tapa Zurcidora a luste) LENGTH -® Algunas veces al coser, usted desea ejercer el control sobre la tela. La Tapa zurcidora cubre los dientes det impelente para que 6stos no puedan Aprenda c6mo hacerlo: tocar la tela.
- Page 55 Zigzag Stitches Set the Machine Rdglages • Basic Zigzag S_itch seleclor Stitch 3_lecteur de point The Stitch and Its Uses Pof_U TYPE -© The zigzag stitch is one of the most common and most versatile stitches on your machine. It can be a utility stitch for sewing buttons, buttonholes, hemming,...
- Page 56 Puntadas en Zigzag Ajllstes • Zigzag Bfisico Seleclor de Ins punladas Punlada TYPE La puntada y sus usos -© La puntada en zigzag es una de las puntadas mils comunes y m_ts vers_tiles que le ofrece su m_quina. Es una puntada de servicio para pegar botones, hacer...
-
Page 57: Zigzag Stitches
Zigzag Stitches (Continued) Zigzag width: Set the Machine Largeur point zigzag: Close to Rdglages • Satin Stitch Ancho del Zigzag Pres de 0 0 Ajustes Cerca a Stitch selector The Stitch and Its Uses Stitch S_leeteur de point Point The Satin stitch is a versatile and often Selector de ias puntadas Puntada TYPE... -
Page 58: Applique
r Set the Machine Machine R_glages R_glages Ajustes Ajustes Stitch selector Stitch selector Stitch Stitch SElecteur de poinl Sdfecteur de point Point Point Selector de Ins puntadas Selector de las puntadas Puntada Puntada TYPE TYPE TOp thread tension • Bar Tacking Top thread tension •... -
Page 59: Sew A Button
Set the Machine R_gtages Stitch seleclor Stitch Sdtecteur de point Point TYPE Stitch {epxjt h cont{ol thr_a_ t,ei_a_3n any number (not control 1 to 4 necessary to adjust) Tenston du fit d'aJgaille, i a 4 au chmx (pas de Zigzag Stitches (Continued) r_glage obligatotre) - Page 60 Ajustes Selector de ias pumadas Puntada TYPE Control del tensi6n Control del largo de de! hilo superior puntada en coalqumr de 1 a4 nHm_ro (no requiem de aJuste) LENGTH Puntadas en Zigzag (Continuaci6n • Costura de Botones Pare Dar Mayor Rigidez a la Costum Use la placa para zurcido.
-
Page 61: Overcasting Stitch
• Overcasting Stitch [Set the Machine Rdglages The Stitch and Its Uses Ajustes Stitch selector This zigzag variation is very useful in Stitch Sdlecteur de point garment construction and in finishing Pomt Selector de las puntadas Puntada raw edges of any sewing project. TYPE Top thread tension Stitch length... -
Page 62: Three-Step Zigzag
• Three-Step Zigzag " Set the Machine The Stitch and Its Uses R_gtages Ajustes The three-step zigzag is a combination Stitch selnclor Slit@ zigzag and straight stitch. You may use Sgleeteur de point Pomt the three-step Zigzag everywhere Selector de las puntadas Punlada TYPE would use the basic zigzag stitch. -
Page 63: Lace Work
F Set the Machine R_dages Ajustes Stitch selector Sdlecteur de pomt Stitch po#_t Setcctor de tas puntadas Puntada TYPE Top lhread tension ¢onlrol t to 4 Stilch lenglh Tensrvn & ,till control 1 Io 3 d'afftuilfe, i d 4 Longueur du paint, Comte[ del tensi6n delbile superior... -
Page 64: Bfind Hemming
t14" Set the Machine R_gtages Stitch seSectar Stitch S_lecteur de pomt Point "TYPE Heavyweight 1!4- Fabric [RegWar) (Non extensibfe) Stitch length thread tension control 1 to 3 controi 1 to4 Longueur du point, Te,,srondufil J i_3 d'atguifleo I a 4 LENGTH •... - Page 65 Ajustes pumada Selector de las puntadas TYPE (Regular) Control de[ ten_i6n del hilo superior Control del largo de la puntada de l a 3 LENGTH Tela pesada • Puntada Ciega de Dobladilio de Ojo Pie zigzag 1. Termine et lado burdo de su dobladillo sobre el lado que quiera.
-
Page 66: Shell Stitching
Voiei comment - Shell Stitching "Set the Machine 1. Pour obtenir les meilleurs r_sultats: The Stitch and Its Uses R_glages Ajustes Stitch selector rdglez le sdleeteur de longuenr The Shell Stitch is formed by sewing a blind Stitch S_lecteur de point hem over folded fabric. -
Page 67: Stretch Stitches (Model 12014 On_Y)
Stretch Stitches Le potnt droit extensible a de Set the Machine Rgglages nontbreuses applications, nt_nte • Straight Stretch (Model 12014 only} Ajustes avec los ttssus non extensibles. Stitch selector The Stitch and Its Uses recomntande pour Stitch Sdlecteur de point This stitch is the stretch variation of the straight Point... -
Page 68: Rick-Rack Stretch (Model 12014 Only)
Set the Machine R_glages Ajustes Stitchselector Stitch S_lectettr depoint Polm Selector de ]as puntadas Puntada TYpE Stitch _ength Top thread tension conlro[ yellow control _ to 4 stretch stilch Tenston du f!l position d'atguille 1 h 4 Longueur du point, •... -
Page 69: Overcast Stretch Stitching
• Overcast Stretch Stitching Set the Machine (Model 12014 onlyj R_glages Stitch selector EorF The Stitch and Its Uses Sdlecteur de point Stitch E ou F This stitch can be used for sewing Peter TYPE seam with an overcast finish. The seam is formed and finished in one operation. - Page 70 - Puntada Elfistica de Fileteado Ajustes (Mod. 12014 solamente) Selector de las pumadas Pumada La puntada y sus Usos TYPE Se puede utilizar esta puntada para coser una costura con terminado de fileteado. La costura se realiza y se le da el terminado en una sola operaci6n.
-
Page 71: Sergmg Or Pine Leaf Stretch Stitching (Model 12014 Only)
Votci continent • Serging or Pine Leaf Stretch r Set theMachine Rdglages Stitching (Model 12014 only) Glissez te ttssu sous [e pied-de-biche Ajustes The Stitch and Its Uses pour tes ptqares soient faites Stitch seisctor directentent contre te bord des ttsstts. Stiich Sdlecteur de point... -
Page 72: Buttonholes
Set the Machine Stitch selector Slitch TYPE ® Top thread tenmon Stitch length control control 1 to 5 blue zone ==:== LENGTH 2. a. Move the slider (A) toward you so 3. a. Set the stitch selector at _. 1. a. Carelully mark the buttonhole that the top mark (C) on the slider length on your garment. - Page 73 Rdgtages SYlectear de point Point TYPE ® (I 030 Tet_ston du fil Longueur du point, d'_tgaille, t d 5 Zone bteue _:i/i i:_ LENGTH ® i. a. Tracez sotgneusentent la longueur 2. a. Tirez sttrle curseur (A ) et mettez te 3.
- Page 74 Ajustes Selector de tas puntadas Puntada TYPE ® Control del tensi6n Control del largo del him supermr de la puntada en zona azu| €==, LENGTH ® 3. a. ColOclueel selector de la puntada en 2. a. Mueva la corredera (A) hacia usted 1.
- Page 75 4. a. Set the stitch selector at 5. a. Set the stitch se]ecter at [_ 7. Remove the fabric and cut the hole 6, a. Set the stitch selector at _. b. Sew 4 to 6 stitches. b. Sew until you reach the back b.
-
Page 76: Feather Stitch (Model 12014 Only)
• Feather Stitch (Model 12014 only) Set the Machine • R_glages The Stitch and Its Uses Ajustes Stitch selector This stitch is strong, useful and decor- Stitch SEtecteur de point ative. Selectorde las puntadas pottff Pumada TYPE It can reintorce stretch and woven tabncs. -®... -
Page 77: Decorate With Geometric Parterres
• Decorate with Geometric Patterns Set the Machine Commentfqwe Rdglages The Stitches and Their Uses 1. Rdgler ta fargeur etla tonrueur Ajustes Stitch setector point confine VOltSvoudrez. These stitches are purely decorative. Hert Stitch Sdlecteur de point pottzt You can sew one row or several or vary 2, Appliquer fe point sur tot/tlorceau H ou 1... -
Page 78: Performance Problems Chart
PERFORMANCE PROBLEMS CHART What to Do When PROBLEM PROBABLE CAUSE CORRECTION Incorrect size needte. Choose correct size needle tot thread and fabric. Skipping Stilches Bent or b]unt needle. Insert new needle. incorrect needle instatation. Reinstall needle. Tight upper thread tension. Loosen upper thread tension. - Page 79 CONSEILS EN CAS DE DIFFICULTES Quoi faire et quand ..DEFA UT CA USE PROBABLE REMEDE Aiguille ne convenant Chotstssez une alguille atlant avec ie fil et le tlssu. Passez les fils Enfilage mal fatt conmte indiquL Fil de dessus ldche Augmentez I(1 tension...
- Page 80 CUADRO DE PROBLEMAS DE FUNCIONAMIENTO Qu6 Hacer y Cufindo CORRECCION CAUSAPROBALE PROBLEMA Escoja el tamafio exacto de la aguja para la te;a y el hilo. Tamafio meorrecto de la aguja Vuelva a enhebmr la maquina. Mai enhebrado. Ajuste la tensi6n del hilo superior Tensi6n del hilo superior floja.
-
Page 81: Care For The Machine
CARE FOR THE MACHINE ENTRETIEN DE LA MACHINE Gleaning the Machine To insure that your machine operates at its best. you need to keep the essential parts clean at all times. The feed dogs and shuttle race areas can attract dust and ]int. Your machine can become sluggish or knock loudly if a thread is caught. - Page 82 EL CUIDADO DE SU MAQUINA Limpieza del Sujetador de la Bobina Para asegurarse de que su rn_quina trabaja a cabalidad necesita queen todo momento las partes esenclales de ella se encuentren limpias. El _rea de la bobina atrae et polvo y las hilachas. Su m,_quina puede volverse perezosa o golpear ruidosamente si una hebra se queda atascada.
-
Page 83: Clean The Shuttle Race
• Clean the Shuttle Race This area must be kept free of dust, lint and occasional tangled thread. Clean the shuttie race area about every three months. • Nettoyage de la coursi_re La navette dolt _tre gardde exempte de poussi_re, de charpie et de bouts de fil emm_l_s. - Page 84 • Limpieza de la Corredera de la Lanzadera Esta _trea aeberfi mantenerse fibre de polvo, pelusa y de ocasionales hilos atorados. Limple el firea de la corredera de la lanzadera. Limpie el firea de la corredera de la lanzadera carla tres meses aproximadamentes.
-
Page 85: Oiling The Machine
One or two drops of oil is sufficient. Remove excess oil, otherwise it may stain fabric. Kenmore sewing machine oil is available at your nearest Sears retail store. NOTE: Unplug the machine before oiling. Remove needle and put needte bar in fufl down position. -
Page 86: Huilage De La Machine
Essuyez l'exces d'huile, sinon il y a danger de tacher les liSSttS. L'huile a machine a condre Kenmore est offerte a votre magasin Sears le phts proche. Ddbranehez ta machine a coudre avant de la hniler, En}evez l'aiguille... - Page 87 Lubricaci6nde la Mfiquina Lubnque la mfiquina, por [o menos una vex al afio, en todas ilustradas de esta pfiglna; de io contrario la mfiquina podria operar lentamente o producir un gotpeteo. Si utiliza la m_quma frecuememente, lubrlque ta maquma debajo de ta cubierta superior cada tres meses aproxlmadamente. En caso de que la m:.iqulna no se use durante un periodo largo, fubriquela antes de imelar ta costura.
-
Page 88: List
PARTS LIST NOMENCLATURE PIECES LISTA DE PARTES All parts listed herein may be ordered from any Sears store or service center. WHEN ORDERING REPAIR PARTS, ALWAYS GIVE THE FOLLOWING INFORMATION: 1. PART NUMBER 2. PART DESCRIPTION 3. MODEL NUMBER 4. NAME OF ITEM If the parts you need are not stocked locatly, your order will be electronically transmitted... -
Page 89: Puntada Recta
Toutes ces pibees peuvent _tre commanddes darts un magasm Seat's. Todas las partes listadas aquf se pueden ordenar de cualqmer Tieuda o Centro de SerViclos Sears Roebuck y Co. JOIGNEZ TOUJOURS A VOTRE COMMANDE LES RENSEIGNEMENTS SUtVANTS: CUANDO ORDENE REPUESTOS, StEMPRE SUMNISTRE LA SIGUIENTE INFORMACION: 1. - Page 90 WARRANTY FULL 25-YEAR WARRANTY ON SEWING MACHINE HEAD For 25 years from the date of purchase, Sears will, tree of charge, repair defects in material or workmanship which appear in the mechanical components of the sewing machine head. FULL TWO YEAR WARRANTY ON ELECTRICAL EQUIPMENT...
- Page 91 ÷ ÷ GARANTIE ÷ GARANTIE TOTALE DE 25 ANS SUR LE MECANISME DE LA MACHINE ÷ Pendant une dar_e de 25 ans, cotnptde a parttr de la date d'achat, Sears rdparera gratuitement tout ddfaut de matdriau oa de fabrication qui appara_tra clans le m_cattisttte de votre machine.
- Page 92 GARANTIA GARANTIA COMPLETA POR 25 AlqOS EN LA CABEZA DE LA MAQUINA DE COSER Darante 25 a_os desde la feclm de ia compra, Sears ofrece, libre de costo, reparar los defectos en material o de manufactura que puedan presentarse en los componentes mec_nicos de la cabeza de la mfiquina de coser. GARANTIA COMPLETA POR 2 ANOS EN EQUIPO...
- Page 93 DE COSER Ahom que usted ha compr'ado su Mfiqu ma de Coser Kenmore, sl se presenta la necesidad de repuestos o serviced, s_mplemente contacte su Centro de Serviclos Sears m_ cercano. Asegfirese de proveer toda la mformaci6n pemnente euanflo nos llame o v_stte.
Need help?
Do you have a question about the 385.12014 and is the answer not in the manual?
Questions and answers