KitchenAid KSB655 Instructions Manual
5 speed blender
Hide thumbs
Also See for KSB655:
- Instructions manual (64 pages) ,
- Instructions manual (64 pages) ,
- Instructions manual (64 pages)
Table of Contents
Advertisement
Available languages
Available languages
Quick Links
Advertisement
Chapters
Table of Contents

Related Manuals for KitchenAid KSB655


Summary of Contents for KitchenAid KSB655
- Page 1 KitchenAid ° SPEED VITESSE VELOCIDAD BLENDER INSTRUCTIONS MI_LANGEUR INSTRUCTIONS LICUADORA INSTRUCClONES KSB655 / KSB755 USA: 1-800-541-6390 Canada: 1-800-807-6777 Mexico: 01-800-002-2767 KitchenAid.com KitchenAid.ca KitchenAid.com.mx FOR THE WAY IT'S MADE?
- Page 2 Proof of Purchase & Product Registration Always keep a copy of the sales receipt us to contact you in the unlikely event of showing the date of purchase of your a product safety notification and assist us Blender. Proof of purchase will assure you in complying with the provisions of the of in-warranty service.
-
Page 3: Table Of Contents
Table of Contents INTRODUCTION Proof of Purchase & Product Registration Card........Inside Front Cover Blender Safety ......................... Important Safeguards ..................... Electrical Requirements ....................FEATURES AND OPERATION Blender Features ......................Preparing the Blender for Use..................Before First Use ....................... Blender Assembly ....................Using the Blender ...................... - Page 4 How to Arrange for Service Outside these Locations ............. How to Order Accessories and Replacement Parts............NOTE: DUE TO THE UNIQUE CONTAINER AND BLADE DESIGN, READ THESE INSTRUCTIONS BEFORE USING YOUR NEW KITCHENAID _ BLENDER TO ACHIEVE MAXIMUM PERFORMANCE RESULTS.
-
Page 5: Blender Safety
Blender Safety Your safety and the safety of others are very important. We have provided many important safety messages in this manual and on your appliance. Always read and obey all safety messages. This is the safety alert symbol. This symbol alerts you to potential hazards that can kill or hurt you and others. -
Page 6: Important Safeguards
12. Always operate Blender with cover in place. 13. The use of attachments, including canning jars, not recommended by KitchenAid cause a risk of injury to persons. 14. When blending hot liquids, remove center piece of two-piece cover. 15. Flashing light indicates ready to operate. -
Page 7: Electrical Requirements
Electrical Requirements Volts: 120 Volts A.C. only. Hertz: 60 Hz NOTE: Your Blender has a 3-prong grounded plug. To reduce the risk of electrical shock, this plug will fit in an outlet only one way. If the plug does not fit in the outlet, contact a qualified electrician. -
Page 8: Blender Features
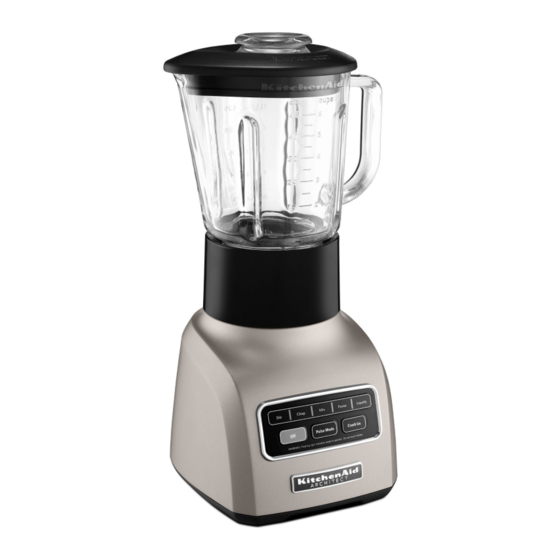
Blender Features Stay-Put Lid with Clear, 2 oz. (60 ml) Ingredient 24 oz. (0.75 L) Accessory Jar* Accessory Easy Pour Jar Lid with 48 oz. (1.5 L) Drizzle Cap* Glass Pitcher Patented Stainless Steel Blade Locking Collar and Blade Assembly Speed Selection Buttons... - Page 9 Stay-Put Lid with Clear 2 oz, (60 ml) through density changes when ingredients Ingredient are added. This advanced KitchenAid design Provides a strong seal. The flexible lid will maintains an optimal blending speed for maintain its tight seal throughout the each culinary task and control-pad setting.
-
Page 10: Preparing The Blender For Use
Preparing the Blender for Use Before First Align the pitcher or accessory jar tabs with the slots of the locking collar. Before using your Blender for the first time, wipe Blender base with a warm sudsy cloth, then wipe clean with a damp cloth. Drywith a soft cloth. - Page 11 Preparing the Blender for Use Put pitcher or accessory jar assembly 7. To attach pitcher lid, push firmly into onto the Blender base. place. To attach the accessory jar lid, twist to lock onto the accessory jar. Electrical Shock Hazard NOTE: When properly positioned, Plug into a grounded 3 prong pitcher or accessory jar assembly will rest...
-
Page 12: Using The Blender
IMPORTANT: If blending hot foods or liquids, remove the center ingredient cup. Pitcher or Accessory Jar Operate only on STIRspeed. The KitchenAid _ Blender has five speeds: B. To turn off the Blender, press OFR STIR,CHOP,MIX, PUREEand LIQUEFY.In The Off button will stop any speed... -
Page 13: Pulsemode
PULSE MODE fresh mayonnaise, salsa or pesto, Your KitchenAid _ Blender offers PULSE and just the right MODE, which allows a "Pulse-at-any size for single Speed" feature. NOTE: PULSEMODE will not work with the CRUSH ICEfeature. -
Page 14: Speed Control Guide
Speed Control Guide Item Speed Finely chopped fresh vegetables .... Liquefy Blended ice drink ..... Liquefy Frozen chopped fruit Cheesecake....Liquefy (defrost slightly until Chopped fruits ... Pulse on Stir it can be probed Chopped vegetables ..Pulse on Stir with a knife tip) ... -
Page 15: Careand Cleaning
Care and Cleaning The Blender pitcher, accessory jar, locking Clean Without Disassembly collar and blade assembly can be easily Put the pitcher or accessory jar on the cleaned as individual components Blender base, fill half full with warm together without disassembly. -
Page 16: Troubleshooting
"click." This will allow the pitcher assembly or accessory jar to engage the coupler. See page 8 for Blender Assembly. If the problem cannot be fixed with the steps provided in this section, contact KitchenAid or an Authorized KitchenAid Service Center. USA/Puerto... -
Page 17: Quick Tips
Blender Tips How To ... Quick Tips Reconstitute frozen juice: For a 6 oz. ° In order to produce a smoother texture, (175 ml) can of orange juice concentrate, blend with CRUSHICE if you're making combine the juice and correct amount of beverages using ice. - Page 18 Blender Tips Chop fruits and vegetables: Put 2 cups Combine flour and liquid for (475 ml) of fruit or vegetable chunks in thickening: Place flour and liquid in pitcher or accessory jar. In PULSEMODE, pitcher or accessory jar. Cover and blend on cover and blend on STIR,pulsing a few STIRuntil smooth, about 5 to 10 seconds.
-
Page 19: Kitchenaid Rblender Warranty
IF THIS PRODUCT FAILS TO WORK AS WARRANTED, CUSTOMER'S SOLE AND EXCLUSIVE REMEDY SHALL BE REPAIR OR REPLACEMENT ACCORDING TO THE TERMS OF THIS LIMITED WARRANTY. KITCHENAID AND KITCHENAID CANADA DO NOT ASSUME ANY RESPONSIBILITY FOR INCIDENTAL OR CONSEQUENTIAL DAMAGES. -
Page 20: Hassle-Free Replacement Warranty Bo United States And District Of Columbia
Hassle-Free Replacement Warranty- 50 United States and District of Columbia We're so confident the quality of our If your KitchenAid R Blender should fail products meets the exacting standards within the first year of ownership, simply call our toll-free Customer... -
Page 21: How To Arrange For Service After The Warranty Expires All Locations
Authorized Service Center near you. How to Arrange for Service Outside these Locations Consult your local KitchenAid dealer or the For service information in Mexico, store where you purchased the Blender for call toll-free information on how to obtain service. - Page 23 Table des mati res INTRODUCTION Preuved'achat et enregistrement du produit ......Deuxi@mede couverture S6curit6 du m61angeur....................Consignes de s6curit6 importantes ................Alimentation 61ectrique....................CARACTERISTIQUES ET FONCTIONNEMENT Caract@istiques du m61angeur ..................Avant de se servir du m61angeur................... Avant la premiere utilisation .................. Assemblage du m61angeur ..................
- Page 24 Comment commander des accessoires et des pi6ces de rechange ......... REMARQUE : EN RAISON DU MODI_LE UNIQUE DU CONTENANT ET DE LA LAME, LISEZ CES INSTRUCTIONS AVANT D'UTILISER VOTRE NOUVEAU MELANGEUR KITCHENAID _R POUR OBTENIR DES RESULTATS DE PERFORMANCE MAXIMUM.
-
Page 25: S6Curit6 Du M61Angeur
S curit du m langeur Votre securite et celle des autres est trbs importante. Nous donnons de nombreux messages de s_curit_ importants dans ce manuel et sur votre appareil m_nager. Assurez-vous de toujours lire tousles messages de s6curit6 et de vous y conformer. Voici le symbole d'alerte de s6curit&... -
Page 26: Consignes De S6Curit6 Importantes
12. Utilisez toujours le m61angeur avec le couvercle en place. 13. L'utilisation d'accessoires, dont les bocaux de conserve, non recommand6s par KitchenAid peut pr6senter un risque de blessure. 14. Enlevez la piece centrale du couvercle _ deux pi_ces si vous m61angez des liquides chauds. -
Page 27: Alimentation 61Ectrique
Alimentation lectrique Volts: 120 volts de c.a. seulement. Hertz: 60 Hz REMARQUE : Votre m61angeur a une fiche mise a la terre _ 3 broches. Pour r6duire le risque de choc 61ectrique, cette fiche entre dans une prise seulement d'une mani@e. Si la fiche n'entre pas enti@ement dans la prise, contacter... -
Page 28: Caract@Istiques Du M61Angeur
Caract ristiques du m langeur Couvercle <<Stay-Put >_avec capuchon doseur d'ingredients transparent contenant 60 ml (2 oz) 24 oz. (0,75 L) Bocal d'accessoires* Couvercle de bocal Facile _ verser d'accessoires avec 48 oz. (1,5 L) capuchon doseur* Recipient verre Lame en acier inoxydable brevetee... - Page 29 Ce m61angeur a 6t6 fabriqu6 et test6 selon Lame en acier inoxydable brevetee les normes de qualit6 de KitchenAid pour Les dents surdimensionn6es une performance optimale et une vie tranchantes sont plac6es sur quatre Iongue et sans probl6me.
-
Page 30: Avant De Se Servir Du M61Angeur
Caract ristiques du m langeur Fonction de melange Soft Start <°_ d'ingr#dients. Quatre pieds de caoutchouc sur le socle large et solide fournissent Le mdangeur commence _ une vitesse plus une prise antid@apante sans rayure. Le lente pour attirer les aliments dans la lame, puis augmente rapidement... - Page 31 Avant de se servir du m langeur Pressez et tournez le r6cipient ou le REMARQUE : Lorsqu'il est bien plac6, bocal d'accessoires dans le sens horaire le r6cipient ou I'assemblage du bocal d'environ _/4de tour jusqu'a ce que vous d'accessoires reposera enti_rement sentiez deux niveaux de r6sistance.
-
Page 32: Utilisation Du M61Angeur
Les r6glages peuvent Le m61angeur KitchenAid _ a cinq vitesses : _tre chang6s sans arr_ter I'appareil en STIR (BRASSER), CHOP (BROYER), MIX appuyant un nouveau bouton de vitesse. -
Page 33: Pulsemode (Mode D'impulsions)
PULSE MODE (MODE D'IMPULSION) 5. Pour arr_ter la fonction PULSEMODE (MODE D'IMPULSION), appuyez le Votre m61angeur KitchenAid _ offre le bouton << OFF >> (arr_t). Le m61angeur MODE PULSE(MODE D'IMPULSION), qui est maintenant pr6t pour une permet d'avoir une fonction <<... -
Page 34: Capuchon Doseur (Mod61E Ksb755)
Utilisation du m langeur Capuchon doseur pour attirer les aliments dans la lame, puis (rnodele KSB755) augmente rapidement au r6glage de vitesse choisi pour une performance optimale. Ce capuchon a multiples usages REMARQUE : La fonction de m61ange convient pour le couvercle du r6cipient Soft StarV ne fonctionne... -
Page 35: Nettoyage Des Les Composants Individuels
Entretien et nettoyage Le r6cipient, le bocal d'accessoires, Pour nettoyer sans demonter I'assemblage de col de verrouillage et de 1. Placez le r6cipient ou le bocal lame du m61angeur se lavent facilement d'accessoires sur le socle du comme composants individuels m61angeur, remplissez _ moiti6... -
Page 36: D6Pannage
Rico : Canada : Mexique 1-800-541-6390 1-800-807-6777 01-800-002-2767 Consultez la section Garantie et r6paration des produits KitchenAid de la page 38 pour obtenir plus de d6tails. Ne retoumez pas le mdangeur au d6taillant il ne foumit pas le service. -
Page 37: Conseilssur Le Melangeur
Conseils sur le m langeur Conseils rapides pas la main nue sur le couvercle transformant les liquides chauds. ° Pour obtenir une texture plus lisse, ° Arr_tez et v6rifiez la consistance m61angez avec la fonction CRUSH aliments apr_s quelques secondes pour ICE (BROYAGE DE GLA_ONS) si vous... - Page 38 Conseils sur le m langeur Preparer des miettes de biscuits Combiner les ingredients liquides (crackers) : Suivez la proc6dure pour pour les produits de boulangerie les biscuits. Utilisez comme garniture p_tisserie : Versez les ingr6dients liquides comme ingr6dient dans les casseroles de dans le r6cipient ou le bocal d'accessoires.
- Page 39 Conseils sur le m langeur Preparer de la nourriture de bebe partir de la nourriture d'adulte : Placez la nourriture d'adulte pr@ar6e dans le r6cipient ou le bocal d'accessoires. Couvrez et m61angez _ STIR(BRASSER)environ 10 secondes. M61angez ensuite _ PUREE environ 10 _ 30 secondes.
- Page 40 PARTICULIER, LESLIMITATIONSCI-DESSUSPEUVENTDONC NE PASS'APPLIQUER A VOUS. SI CETAPPAREILNE FONCTIONNE PASCOMME GARANTI, LE SEULET EXCLUSIF RECOURSDESCLIENTSESTLA REPARATION OU LE REMPLACEMENTSELON LES DISPOSITIONSDE LA GARANTIE LIMITEE.KITCHENAID ET KITCHENAID-CANADA N'ASSUMENT AUCUNE RESPONSABILITE EN CAS DE DOMMAGES ACCESSOIRES OU INDIRECTS.Cette garantie vous conf@e des droits sp6cifiques auxquels peuvent s'ajouter...
- Page 41 8 la qualit6 de nos produits satisfait aux normes exigeantes de KitchenAid que, si le h a 20 h (heure de I'Est) ou le samedi de 10 h a 17 h. Fournissez votre adresse de...
- Page 42 Demandez a votre distributeur local Pour obtenir de I'information sur les KitchenAid ou au d6taillant o0 le reparations au Mexique, m61angeur a 6t6 achet6 o0 le faire r6parer. appelez le num@o sans frais...
- Page 43 Tabla de contenidos INTRODUCCION Comprobante de compra y registro del producto ......Reverso de la car&tula Seguridad con la licuadora .................... Medidas de seguridad importantes ................Requerimientos el6ctricos ....................CARACTERiSTICAS Y OPERACION Caracterfsticas de la licuadora ..................Preparaci6n de la licuadora para su uso ................ Antes del primer uso .....................
- Page 44 Iocalidades ............C6mo ordenar el servicio fuera de estas Iocalidades ............Como ordenar accesorios y piezas de repuesto ............. NOTA: DEBIDO AL DISENO0NICO DELCONTENEDORY LA CUCHILLA, LEA ESTAS INSTRUCCIONES ANTES DE USAR SU NUEVA LICUADORA KITCHENAID '_ PARA LOGRARLOS MEJORESRESULTADOS.
-
Page 45: Seguridad Con La Licuadora
Seguridad con la licuadora Su seguridad y la seguridad de los demas es muy importante. Hemos incluido muchos mensajes importantes de seguridad en este manual yen su electrodom_stico. Lea y obedezca siempre todos los mensajes de seguridad. Este es el simbolo de advertencia de seguridad. Este simbolo le llama la atenci6n sobre peligros potenciales que pueden ocasionar la muerte o una lesi6n a usted y a los demas. -
Page 46: Medidas De Seguridad Importantes
12. Siempre haga funcionar la licuadora con la tapa. 13. El uso de accesorios como potes enlatados no recomendados por KitchenAid pueden ocasionar lesiones alas personas. 14. Cuando procese liquidos calientes, retire la parte central de la tapa de dos piezas. -
Page 47: Requerimientos El6Ctricos
Requerimientos el ctricos Voltaje: 120 Voltios CA 0nicamente. Frecuencia: 60 Hz NOTA: La licuadora tiene un enchufe de tres entradas con conexi6n a tierra. Para disminuir el riesgo de sufrir una descarga el6ctrica, 6ste enchufe entra en un tomacorriente en un solo sentido. el enchufe no entra en el tomacorriente, comun[quese con un electricista calificado. -
Page 48: Caracterfsticas De La Licuadora
Caracteristicas de la licuadora Tapa fija con taza para ingredientes transparente 2 onzas (60 ml) Vaso accesorio* de 24 oz. (0.75 L) Tapa del Jarra de vidrio vaso accesorio de 48 oz. (1.5 sobretapa* f,icil de vaciar Cuchilla patentada acero inoxidable seguridad y ensamblaje... - Page 49 Collar de seguridad y ensamblaje de acuerdo con las normas de calidad de de cuchillas KitchenAid para un 6ptimo rendimiento y La duradera cuchilla de una pieza est& una larga duraci6n sin problemas. integrada al collar de seguridad para un f&cil manejo y limpieza.
-
Page 50: Preparaci6N De La Licuadora Para Su Uso
Caracteristicas de la licuadora Base de metal fundido Panel de control Clean Touch La pesada base de metal fundido Puede limpiarse en un instante. El panel de control liso no tiene hendiduras o huecos garantiza una operaci6n estable y silenciosa al licuar una jarra completa de donde puedan quedar atrapados los ingredientes. - Page 51 Preparacion de la licuadora para su uso NOTA: Presione hacia abajo y gire la jarra o Cuando est& colocado el vaso accesorio en el sentido de las correctamente, el ensamblaje de la agujas del reloj, aproximadamente jaffa o del vaso accesorio se asienta de vuelta pot dos pasos de resistencia.
-
Page 52: Uso De La Licuadora
Opere s61oen la con la jarra o el vaso accesorio velocidad REVOLVER. La Licuadora KitchenAid Rtiene cinco 5. Para apagar la licuadora, pulse OFF El velocidades: REVOLVER, P ICAR, MEZCLAR, bot6n OFF detendr& cualquier opci6n PUREy LICUAR.Adem&s, tiene la funci6n... -
Page 53: Modo De Pulso
Vaso accesorio MODO DE PULSO (Modelo KSB755) La licuadora KitchenAid _ ofrece MODO DE El vaso accesorio PULSO,que puede utilizar con cualquiera de las velocidades. es ideal para NOTA: El MODO DE PULSOno funciona licuar los aderezos con la funci6n para PICARHIELO. -
Page 54: Guia Para El Control De La Velocidad
Guia para el control de la velocidad Producto Velocidad Producto Velocidad Bebida helada licuada ... Licuar Fruta troceada congelada (Descongele levemente Tarta de queso ....Licuar hasta que pueda Frutas picadas ..... Revolver en separarla con la punta modo de pulso de un cuchillo) ... -
Page 55: Cuidado Y Limpieza
Cuidado y limpieza La jarra de la licuadora, el vaso accesorio, Limpieza sin desensamblar el collar de seguridad y el ensamblaje 1. Coloque la jarra o el vaso accesorio cuchillas se pueden limpiar f&cilmente la base de la licuadora; Ilene hasta la por separado o juntos, sin tenet que... -
Page 56: Resoluci6N De Problemas
Vea las instrucciones sobre c6mo ensamblar la licuadora, en la p&gina 48. Si no se puede resolver el problema mediante los pasos proporcionados en esta secci6n, p6ngase en contacto con KitchenAid o con un Centro de Servicio Autorizado de KitchenAid. EE, UU/Puerto Rico:... -
Page 57: Consejos R&Pidos
Consejos para licuar Consejos r_pidos Consejos pr_cticos ° Para obtener una textura m&s suave, Reconstituir jugos congelados: Para licue con la funci6n de PICARHIELO si una lata de concentrado de jugo de est& preparando bebidas con hielo. naranja de 6 oz. (175 ml), combine el °... - Page 58 Consejos para licuar Preparar migajas de pan: Parta el Combinar ingredientes liquidos pan en trozos de aproximadamente 1V2 paraproductos de pasteleria: Vierta los ingredientes liquidos en la jarra o vaso pulgadas (3.75 cm) de di&metro. Siga el procedimiento para las galletas dulces. accesorio.
- Page 59 Consejos para licuar Lavar el vaso de la licuadora: Llene Preparar avena para bebes: Coloque copos la jarra o el vaso accesorio con agua de avena sin cocer en la jarra o vaso accesorio. En MODO DE PULSO, licue en velocidad tibia hasta la mitad.
- Page 60 SI ESTEPRODUCTONO FUNCIONA SEGON SE GARANTIZA, EL 0NICO Y EXCLUSIVO RECURSO DEL CLIENTESER#,LA REPARACIONO EL REEMPLAZOSEGON LOS TERMINOS Y LAS CONDICIONESDE ESTAGARANTiA LIMITADA. KITCHENAIDY KITCHENAID CANAD#, NO ASUMEN NINGUNA RESPONSABILIDADPORDANOS INCIDENTALESO CONSIGUIENTES.Esta garantia le otorga derechos legales especificos y es posible que...
- Page 61 KitchenAid al 1-800-541-6390, nuestros productos cumple con las exigentes de lunes a viernes de 8 a.m. a 8 p.m. normas de KitchenAid, que si la licuadora (Hora del Este), o los s&bados, de 10 a.m. presentara alguna falla durante el primer a 5 p.m.
- Page 62 Centro de servicio t6cnico autorizado cercano a su domicilio. Como ordenar el servicio fuera de estas Iocalidades Consulte su distribuidor de KitchenAid Para information del servicio local o a la tienda donde compr6 en Mexico, licuadora para obtener...
- Page 64 The shape of the stand mixer is a registered trademark/La forme du batteur sur socle est une marque d6pos6d La forma de la batidora con base es una marca registrada KitchenAid, U.S.A. KitchenAid Canada licensee in Canada/Emploi sous licence par KitchenAid Canada au Canada.
Need help?
Do you have a question about the KSB655 and is the answer not in the manual?
Questions and answers