Table of Contents
Advertisement
Available languages
Available languages
Quick Links
Room
air conditioners
for
double
hung
windows
&
through-the-
wall
installation
Acondicionadores
de aire para
ventanas
de gui#otina
y
empotrados
en la pared
ENGLISH
Important
Safety
Instructions
..................................
2
Installation
Window
installation
.....................................
3
Thru [he wall
installation
......................................
5
Operation
Electronic
controls
..............................................
6
Cleaning
the air filter ..............................................
7
Service/Troubleshooting
........................................
8
Warranty
.................................................................
9
ESPARIOL
Instrucciones
importantes
de seguridad
................
] 0
Instalaci6n
Instalaci6n
en la ventana
..
11
Instalacion
empotrado
en la pared ......................
13
Funcionamiento
Co ntroles electronicos
.....................................
14
I_impieza
del filtro
del aire ..................................
16
Servicio/Localizaci6n
y Soluci6n
de averias
..........
1 7
Garantia
................................................................
] 8
Ciimadseurs
- lnstMlation
clans
un mur
ou une fen_tre
guillotine
FRANGAIS
Directivesde s{}curit{}
important ..........................
19
Installation
Installation
dans une fenc_tre ..............................
20
Installation
_ travers
un tour ................................
21
Utilisation
Commandes
_lectronique
.................................
23
Nettoyage
du filtre
_ air ......................................
25
D_ pannage/Guide
de diagnostic
............................
26
Garantie
................................................................
27
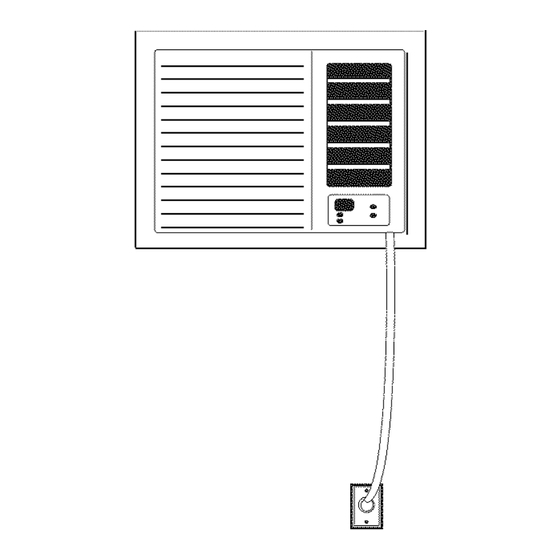
Write
down
the model
and serial
numbers
The model and serial numbers
can be found
on the side of the
cabinet
near the control
panel.
Use these
numbers
in any
correspondence
or
service
calls
concerning
your
air
conditioner.
Escriba
el numero
de modelo
y de serie
El n(mnero de modelo
y de serie se encuentran
en el costado
del gabinete
cerca del panel de control.
Use estos n(_meros en
toda
la correspondencia
o Ilamadas
de servicio
relacionadas
(-on su acondicionador
de aire.
_@u_
'_ ©e_'_u_'_'_@_'_
u_'_6_qeupe
Inscrivez
les numeros
de modele
et de serie
Noter
ci-contre
les num_ros
de modNe
et de s6rie
(on les
trouve
sur le c6t6 de la grille d6corative
avant, pros du tableau
de commande).
Communiquer
ces
num6ros
Iors de toute
correspondance
ou appel au service
apr_s-vente
ayant trait au
climatiseur.
Model No., No. de Modelo, N ° de module
Serial No., No. de Serie, N ° de s@rie
Date of Purchase,
Fecha de Compra, Date d'achat
Advertisement
Table of Contents

Related Manuals for Fedders 23-23-0355N-005


Summary of Contents for Fedders 23-23-0355N-005
- Page 1 Room air conditioners ENGLISH double hung windows & Important Safety Instructions ........Installation through-the- wall installation Window installation ........Thru [he wall installation ........Operation Electronic controls ..........Cleaning the air filter ..........Service/Troubleshooting ........Warranty ..............Acondicionadores de aire para ESPARIOL ventanas de gui#otina...
-
Page 2: Wire Gauge
Press reset button again for use 20 AMP #12 MINIMUM 30 AMP #10 MINIMUM If above test fails, stop using the air ©©©© conditioner and contact customer service by calling the following toll-free number: 1-800-332-6658 125V 250V 250V 250V or email: customerservice@fedders.com... - Page 3 '-INSTALLATION-'} WINDOW INSTALLATON Before start: Window Requirements: This air conditioner is factory prepared for installation ill standard double- hung windows with actual opening width of 26 7/8" to 41 5/8" and clear, vertical opening of 15 5/8" minimum from bottom of sash to sill.
-
Page 4: Installation
'"INSTALLATION -"_ WINDOW INSTALLATDN Window Installation (cont.) • Open window, by raising lower window sash, and mark the center of window sill. Carefully place cabinet window and align center hole on the bottom bar with center mark on the window sill. - Page 5 _f-TINSTALLATIO N " ] HRU-WALL INSTALLATION Installing Cabinet Minimum Width Window Remove filler panels on air conditioner cabinet. Refer to steps 1 through 3 of Window Installation instructions. Close window until it touches behind air conditioner top bar. Fasten top bar to window frame using 5/8"...
- Page 6 OPERATION "] ELECTRONIC CONTROLS Power Control Electronic Control (Cooling Only) The Power Control turns the unit on and off. Temperature/ Timer Display Shows the set temperature when the unit is ill operation and hours when the timer is being set. TEMPERATURE DISPLAY ONLY...
-
Page 7: Operation
OPERATION Air Conditioner Remote Control The functions work the same as your air conditioner's touch controls, and insert the batteries with the poles (+) and (-) Remove the back cover ill the correct position. • Use only AAA or IEC R03 1.5V batteries. •... -
Page 8: Troubleshooting
Service To save tinqe and expense, check the following before calling an authorized service center. Insufficient Cooling Insufficient Heating- Heating Models Only • Turn Master Control to OFF. • Turn Master Control to OFF. • Shut all windows and doors in room. -
Page 9: Warranty & Service
MERCHANTABILITY OR FITNESS FOR A PARTICULAR record be kept for that purpose. PURPOSE, LIMITED DURATION FIVE Visit www.fedders.com for obtaining service parts beyond your YEARS FROM THE DATE OF ORIGINAL PURCHASE. warranty period. EVENT SHALL... - Page 10 Ilamando al siguiente arbustos, recintos u otros edificios. n0mero gratuito: 1-800-332-6658 o por correo electr6nico • No haga funcionar el acondicionador customerservice@fedders.com de aire teniendo instalada la cubierta protectora exterior. Esto podria resultar datio mec4nico dentro acondicionador de aire. "10...
- Page 11 NSTALACION STALACIDN VENTANA Dirnensiones Ventana Este acondicionador de aire ha sido preparado en la f,_brica para instalaci6n ventanas guillotina est,_ndares aberturas 26,875" a 41,625" de ancho y una abertura vertical de por Io menos 15,625" minimo desde la parte inferior de la hoja m6vil hasta el umbral.
- Page 12 NSTALACION -'x1 STALACION VENTANA Instalacion la Ventana • Abra la ventana y marque centro umbral ventana. Coloque cuidadosamente gabinete ventana y alinee el agujero central de la barra inferior la marca central trazada en el umbral de la ventana. Cierre la hoja m6vil inferior de la ventana...
- Page 13 INSTALACION "'] INSTALAClON EMPOTRADO PARED Instalaci6n Gabinete Ventana Ancho Minirno No instale los paneles de relleno en el gabinete. Consulte las instrucciones anteriores desde el paso 1 al 3. Cierre la ventana hasta que toque detr,_s de la barra superior acondicionador de aire.
- Page 14 IfFcUNCIONAMIENTO-" DNTRDLES ELECTRDNICDS Panel Control Electr6nico Control Electronico (Enfriamiento Solamente) Control Alimentaci6n Este bot6n pone en marcha y apaga el acondicionador de aire. Indicador Temperature Ajuste/Temporizador El indicador muestra la temperatura de ajuste cuando el acondicionador de aire est,_ ell Ti °'°...
- Page 15 "-FUNCIONAMIENTO_ REMOTO/ FILTRO AIREJ Control Ternporizador (El temporizador puede ser ajustado ya sea para encender o apagar el acondicionador de aire.) Para PONER EN MARCHA automaticamente el acondicionador de aire usando el modo 'Timer': 1. Oprima el bot6n 'Timer' cuando la alimentaci6n el6ctrica est6 desconectada.
- Page 16 fPMA!NTENANCE "_ AIRFLOW FILTER Control Remoto de Acondicionador de Aire Las funciones trabajan igual que los controles manuales de su acondicionador de aire..• Use solabente pilas AAA o IEC R03 de 1,5V. • Retire las pilas si el control remoto no va a set usado durante un mes o m_s.
- Page 17 LOCALIZACI©N SERVlCI© '"x} SOLUCION AVERIAS Servicio Para ahorrar tiempo y dinero, verifique Io siguiente antes de Ilamar a un centro de servicio autorizado. Localizaci6n y Soluci6n Averias Problema Causa Posible Soluciones El acondicionador de aire no funciona • El enehufe mural est,1desronertado. Inserte bien el enchufe en el tomacorriente mural.
- Page 18 PARTICULAR DURANTE CINCO ANOS A PARTIR DE LA FECHA comprobante de pago adecuado para tal fin. DE COMPRA. BAJO NINGUNA CIRCUNSTANCIA FEDDERS SE HARA RESPONSABLE NINGUN DANO DIRECTO, INDIRECTO O CONSECUENCIAL, SIN IMPORTAR LA CAUSA DE LA ACCION,...
-
Page 19: Installation
• Ne pas faire fonctionner le climatiseur avec le service _ la clientele en composant Iorsque la housse de protection est en num6ro sans frais suivant place. Ceci pourrait faire subir 1-800-332-6658 dommages m6caniques au climatiseur. ou envoyez un courriel customerservice@fedders.com... - Page 20 INSTALLATION "_ DAb,IS FEb, I_TI:::IE Dimensions la fen_tre Ce climatiseur a 6t6 configur6 _ I'usine pour I'installation dans fen6tre _ guillotine standard (double) offrant une largeur libre de 68,3 cm (26,875 po) _ 105,7 cm (41,625 po) et une hauteur libre d'au moins 39,7 (15,625 po)(depuis...
- Page 21 INSTALLATION "") INSTALLATION DANS FENETRE Installation dans frente Ouvrir la fen6tre et marquer la position du centre sur le • seuil de fen6tre. Positionner prudemment la caisse dans la fen6tre; aligner le trou central de la tringle inf6rieure avec la marque de centrage tracde sur le seuil de fen6tre.
- Page 22 INSTALLATION "1 TRAVERS Installation caisse dans fen_tre largeur minimale Ne pas installer les panneaux de remplissage sur la caisse du climatiseur. Voir les 6tapes 1 _ 7 des instructions pr6c6dentes. Abaisser I'ouvrant jusqu'au contact avec caisse, derriere tringle sup6rieure du climatiseur. ilii Assujettir I'ouvrant...
- Page 23 '_co TILISATION "_ MMANDES ELECTRONIQUES,) Tableau commande _lectronique Tableau de commande electronique Commande marche/arr_t (refroidissement seulement) Ce bouton commande la mise ell marche et I'arr6t de I'appareil. Affichage temp6rature/minuterie Cet afficheur pr6sente la temp6rature de r6glage Iorsque le climatiseur fonctionne, et la dur6e Iors du r6glage, de...
- Page 24 '" UTILISATI©N TELECOMMANDE/HLTRE Minuterie (la minuterie peut commander la mise en marche ou I'arr6t de I'appareil) Pour commander automatiquement la MISE EN MARCHE I'appareil a I'aide de la minuterie Appuyer sur le bouton de la minuterie alors que I'appareil N'est PAS ALIMENTE.
- Page 25 (" UTILISATION "_ TELECOMMANDE/FILTRE Tel6commande de Climatiseur Les commades fonctionnent de la m6me facon que les commades touche de votre climatiseur. ® , ..• Utilisez seulement de piles AAA ou IEC R03 de 1,5 volts. • Retirez les piles si la t_l_commande n'est pas utilis_e pendant plus d'un mois.
- Page 26 _f'- DFt:PANNAGE D_pannage Pour gagner du temps et pour 6viter des d6penses, 6tudier ce qui suit avant de contacter un centre de service agr66. Refroidissement insuffisant Chauffage insuffisant - seulement pour un rnodele avec fonction de chauffage • Placer le bouton de s61ection principal ,_ la position OFF/ARRET. •...
-
Page 27: Garantie
Dans le cas o_J tout remplacement de pieces contactez CareCo pour obtenir ce nom. requis clans les limites temps de cette garantie, pieces de rechange de Fedders sont usagees et ne sont Vous pouvez contacter CareCo courriel garanties pour la periode restante la garantie customerservice@fedders.com... - Page 28 Features / Caracterfsticas / Caract_ristiques Top Bar / Barra Superior Adjustable Louvers / Rejillas Filter / Filtro / Filtre Ventilaci6n ajustables / Claires- Tringle sup6rieure voies orientables Decorative Front / Panel Decorativo Delantero Power Cord / Cord6n / Le Panneau de facade d_coratif Cabinet...
Need help?
Do you have a question about the 23-23-0355N-005 and is the answer not in the manual?
Questions and answers