Table of Contents
Advertisement
Available languages
Available languages
Quick Links
Advertisement
Table of Contents

Related Manuals for Fedders 23-23-0275N-009


Summary of Contents for Fedders 23-23-0275N-009
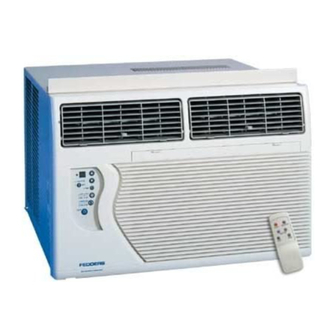
- Page 1 Including Service and Warranty Incluidos mantenimiento y la garantfa Avec service et garantie Room Air Conditioners for Through-The-Wall Installation Acondicionadores de aire para instalaci6n atravesando la pared Climatiseur d'air individuel pour installation murale dans une gaine...
- Page 2 ESPANOL ENGLISH FRAN_AIS Electrical Requirements ..1 Requistos para Exigences _lectrique ..Avertissement Warning el_ctricos ....... Notice Avis Aviso Important Grounding Requirements Importantes exigences de mise ,_ /a terre Aviso Requistos importantes para /a conexidn a tierra Installation ......Montage ......
-
Page 3: Electrical Requirements
1. ELECTRICAL REQUIREMENTS Product Damage: Electrical Shock Hazard Do not cuL aher or renlow! any of the expanded polystyrene Single outlet (whffe foam) inside this air conditioner. Grounded three-prong grounding Plug unit only into grounded ek,ctrkal outleL wall receptacle wall receptacle Do not use an extension cord or plug adaptor wifll... -
Page 4: Sleeve Installation
2. SLEEVE INSTALLATION If You Purchase a New Sleeve Outdoor Back cover side) Remove front and back cover. Save for future use when air conditioner is removed (Fig. 3). Remove the exterior rear grille from the sleeve. Brush out all debris from inside of sleeve,... - Page 5 grille Rear grille grille Baffle contact area Drain holes Label Indoor side Wire Ioo1_ Flange to inside Cabinet Insulating foam Trim frame Trim frame 1/4" insulating foam Trim frame...
- Page 6 2. SLEEVE INSTALLATION 1/4" to 5/16" Metal Unit FRONT Level Deep Filler Panel CAUTION: When installation is complete, the unit must have a rearward slope (Fig. 11). Installation in Existing Wall Sleeve Remove all debris from interior of wall sleeve. It may also be necessary to remove existing...
-
Page 7: Operation
3. CONTROL PANEL Control Functions Heating Operation One of the pictured control panels is similar to your panel. Heating Models Only Vent: Circulates fresh air and helps remove sta]e air when in the open position. 1, Close Vent. Maximum air circu]ation and cooling occur Turn Thermostat... - Page 8 Power Control 4. ELECTRONIC CONTROL PANEL Heat Mode (Heat Models Only)- The unit will circulate and heat the air. The Power Control turns the unit on and off. Cool Only Heater Safety Feature- When heater is powered Temperature/ off, low fan will automatically stay on and run A.
-
Page 9: Front Panel
HEAT Mode Cleaning Filter Built-in three minute timing delay. • 9 ° or more below the set temperature MECHANICAL CONTROL PANEL: Clean the filter will use HI FAN. This electronic controlled unit will not automatically every two weeks resume operation after a power failure. •... - Page 10 Service Unit Fails to Start Air Conditioner Remote Control • Turn Master Control to OFF. To save time and expense, check the following before • Rep]ug line cord plug into outlet to be sure calling an authorized service station. e]ectrica] contact is being made.
-
Page 11: Warranty
TO ONE YEAR FROM THE DATE OF ORIGI- fifth year, and the fan motor during the second PURCHASE. IN NO EVENT .SHALL FEDDERS APPLI- 1-800-332-6658 year, both from the original date of purchase, pro- ANUES BE LIABLE INDIRECT, INCIDENTAL, viding... - Page 12 __iiiiiiii!iii!i!!!!!!!!!!!!!!!iiii!i!!iiii!iii!!!!!!!!!!!!!ii;i 1. REQUISTOS PARA LA ELECTRICOS Dafio al producto: Peligro No code, a[tere ni retire el poliestireno expandido (espunla bJanca) (]tie est4 dentro de[ acondicionador de aire. descarga el6ctrica Recept&culo mural mural Recept&culo con salida de tres espigas puesta a tierra. simple de puesta Para...
- Page 13 2. INSTALACION DEL MANGUITO Y DEL CHASIS Si compra manga nueva Cubierta Lado externo) trasera Retire ]as cubiertas delantera y trasera, Gu_irdelas para uso futuro cuando retire el acondicionador de aire (fig. 3). Retire ]a rejilla exterior trasera de ]a manga, Use un cepi]]o para eliminar toda...
- Page 14 _ejilla trasera Rejilla nueva Gaza de alambre Reborde hacia adentro Area de contacto del tabique Agujeros de drenaje interior Etiqueta Gabinete Espuma aislante Bastidor Bastidor Espuma aislante de 1/4" Bastidor...
- Page 15 2. INSTALACION DEL MANGUITO Y DEL CHASIS 1/4" a 5/16" anga de la pared Leng_eta de metal Unldad FRONTAL Nivel Panel relleno profundo PRECAUCI_)N: Cuando la instalaci6n est_ completa, la unidad debe estar levemente inclinada hacia atr_s (Fig. 11). Instalaci6n en una manga de pared...
- Page 16 3. TABLERO DE CONTROL Uno de los Termostato: Contro]a el termostato horario hasta que ]a calefacci6n se apague tableros de ]a unidad, que regula ]a temperatura de ]a (el ventilador que hace circular el aire control habitaci6n a] encender y apagar autom_itica- seguir_i en movimiento).
-
Page 17: Panel De Control
4. PANEL DE CONTROL ELECTRONICO Control de modo Control de alimentaciOn A. Pantalla El control de alimentaciOn enciende y apaga El control de modo tiene tres posi- ..A configu- unidad, ciones: FAN (ventilaci6n), COOL (enfriamiento), raciOn y ENERCY SAVER (ahorro de energ[a). - Page 18 Control de velocidad Para APAGAR |a unidad usando el temporizador. del venti|ador Presione ]a tecla de] temporizador cuando el suministro de energ[a El control ve|ocidad deJ veatiJador |Jeae cuatm posiciones: est6 prendido, ]a panta]]a ]eer_i 00. Ajuste a] nOmero de horas High (alto), Medium...
-
Page 19: Panel Frontal
Contro/ Remoto de Acondicionador de Aire 4. PANEL FRONTAL Las funciones trabajan igua] que los controles manua]es de su acondicionador de aire, Persianas ajustables Filtro de aire ® © © Orientaci6n del flujo de aire Instalacion de la bater|a_ En ]a parte superior de] frente de ]a unidad se encuentran... - Page 20 ]a fecha de com- • Vue]va a enchufar el enchufe de] cord6n pra original, Fedders Appliances reparar._i o susti- interna y externa del gabinete de ]a unidad. en el tomacorriente para cerciorarse de que...
- Page 21 El servicio para su acondicionador de aire seM lizar piezas de cambio de Fedders Appliances y estas exuluir ni ]imitar los daflos incidentales o emer- provisto por CareCo, una divisi6n de] fabricante...
- Page 22 1. EXIGENCES ELECTRIQUE Endommagement du produit: Ne pas couper, nlodifier ou enlever I'isolant en polystyr_,ne Danger de choc 61ectrique Prise murale expans6 (mousse blanche) se trouvant ;i I'int6rieur Prise trois murale broches unique avec Nimatiseur d'air. N'enficher [e climatiseur que dans une prise Nectrique avec terre nlise _ la terre.
- Page 23 2. INSTALLATION DU GAINE ET DU BOiTIER Si vous achetez un nouveau manchon Protecteur artiste C6t_ ext_rieur) Retirez ]es couvercles avant et arriere. Conservez-les pour ]es r6utiliser ]ors de ]a d6pose du clima- tiseur (Fig. 3). Retirez ]a grille arriere ext_rieure du manchon.
- Page 24 _rllle neuve Autocollant C&t_ int_rleur Bo_tier Encadrement Encadrement Bande de mousse isolante de 6 mm Encadrement...
- Page 25 2. INSTALLATION DU GAINE ET DU BOiTIER M_nchon mural 6 mm _ 8 mm n,,.m,w,u.,,,,m.,,i,m-mom''° 3imatiseuu AVANT Panneau de remplissage ATTENTION: Une lois I'installation termin_e, le climatiseur dolt presenter une inclinaison vers I'arri_re (Fig.11,). Installation dans un manchon mural existant Retirez tous]es d6bris...
- Page 26 3. TABLEAU DE COMMANDE Une des Thermostat: Contr6]e le thermostat automatiquement maintenue au m6me illustrations ]'apparel], qui r_gule ]a temp6rature de ]a niveau. Un nouveau r6giage du thermostat piece en mettant en marche ou en arr6tant peut s'av6rer n6cessaire pour atteindre du panneau VE_T automatiquement...
- Page 27 Commande du mode Commande marche/arr_t PANNEAU DE COMMANDE ELECTRONIQUE La commande mode comporte trois Cette commande permet ]a mise en marche positions: FAN (VENTILATION), COOL et I'arr6t de I'appareil. (REFROIDISSEMENT) et ENERGY SAVER Affichage de la temperature et du A. Affichage (t_CONOMIE D't_NERG]E).
- Page 28 Commande de la vitesse Commande de la minuterie Temporisation int_gr_e de trois minutes Cot appareil _ commando _lecronique se remet de ventilation On pout r6gler la minuterie afin de mettre I'appareil marche automatiquement apr6s une panne de couranL en marche ou de I'arr_ter. Cette commande a quatre...
-
Page 29: Panneau Avant
5. PANNEAU AVANT T616commande Climatiseur Les commades fonctionnent de ]a m6me facon Filtres que ]es commades _ touche de votre c]imatiseur. Orientation de I'air Installation dela pile --_ (ModUle avec ddflecteurs rdglables) Unit6 est dot6 de d6flecteurs r6glab]es qui dirigent ]'air vers ]a droite ou la gauche. -
Page 30: Garantie
]a date de i] peut @re n6cessaire de remp]acer ]a prise). mande principa]e aux r6g]ages ]es plus froids. ]'achat initial, Fedders Appliances, par ]'entremise • Mettre ]a commande principa]e b. ]a position "HI FAN". Si ]e venti]ateur de circulation... - Page 31 DE L 'ACHAT tilisation. Si ensuite vous devez avoir recours au service pi@ces se r6v@]ent d6fectueuses par s uite d evice INITIAL. FEDDERS APPLIAN(_S NE SAURAIT apr_s-vente: demati@re oudefabrication. Les f rais d etrans- AUCUN CAS ETRE TENU RESPONSABLE POUR DOMMAGES INDIRECTS,...
- Page 32 Write down model Model and serial number N_meros de serie y modelo serial numbers Num6ros de module et de s6rie The mode] and serial numbers can be found on the left hand side of the cabinet. Use these numbers in any correspondence or service calls concerning...
Need help?
Do you have a question about the 23-23-0275N-009 and is the answer not in the manual?
Questions and answers