Table of Contents
Advertisement
Available languages
Available languages
Quick Links
Including
Service and Warranty
Incluidos
mantenimiento
y la garantfa
Avec service et garantie
to your
air _ollditio;ler.
foto
es similar
al suyo.
Room Air Conditioners
for Double-Hung
Windows
Acondicionadores
de aire ambiental
para
ventanas
dobles
Climatiseur
d'air individuel
pour fen_tres
_ guillotine
5,000-
15,000 BTU'S
Advertisement
Table of Contents

Subscribe to Our Youtube Channel
Related Manuals for Fedders 23-23-0321N-005


Summary of Contents for Fedders 23-23-0321N-005
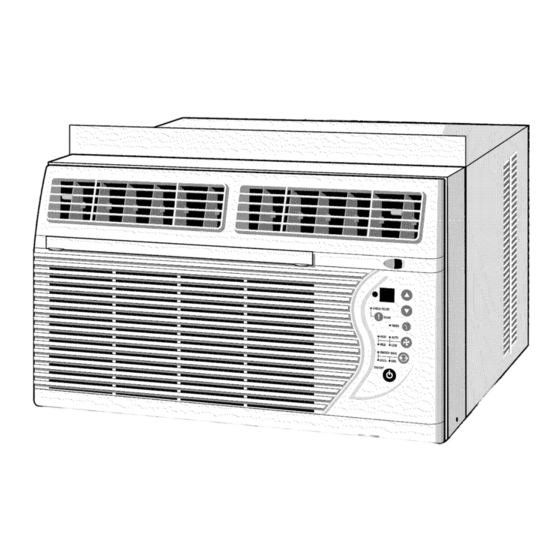
- Page 1 Including Service and Warranty Incluidos mantenimiento y la garantfa Avec service et garantie to your air _ollditio;ler. foto es similar al suyo. Room Air Conditioners for Double-Hung Windows Acondicionadores de aire ambiental para ventanas dobles 5,000- 15,000 BTU'S Climatiseur d'air individuel pour fen_tres _ guillotine...
- Page 2 ESPA_IOL ENGLISH FRAN_AIS Installation ......Instalaci6n ......Montag e ......Aviso (El_( trica) Warning (Ele( tH( al) Avertissement (Electrique) Important Gl_unding Requirements Requistos importantes para la conexidn Importantes exigences de mise b la term Waming (Product Damage & Safety) Aviso (Daho al pmducto y seguridad) Avertissement (Endommagement...
- Page 3 ¸¸¸¸1 1. ELECTRICAL REQUIREMENTS Product Damage: Electrical Shock Hazard Single outlet Do not cub alter or renlove any o{ the expanded Grounded three-prong grounding polystyrene (whffe foanl) inside this air conditioner. Plug unit only into grounded electrka] outleL wall receptacle wall receptacle For Your...
-
Page 4: Installation
2. WINDOW INSTALLATION Unit & Window Size OUTSIDE VIEW If your air conditioner cabinet is 20" wide, it will fit window openings 23 7/8" to 39" in width. 1" long 3/8" threaded hole Minimum opening height is 12 3/4" from bottom of sash to sill. - Page 5 1/4" ill edge Screw I® 1 4" --4, SIDE VIEW space by half a bubble off on a carpenter's level, This outward pitch prevents water from entering the room (Fig. 8). Close window until it touches behind conditioner top bar, Slide filler panels out- ward...
- Page 6 2. WINDOW INSTALLATION Plastic foam seal Cut plastic foam sea] to width of window Upper window sash and instal] between upper and ]ower window sash (Fig. 9). Use sealant to fill any minor openings. Installation Minimum Width Window Lower window sash 1.
-
Page 7: Operation
_iii_1i_1i_1i_1i_1i_1i_1i_1i_1i_1i_1i_1i_1i_1i_1i_1i_1i_1i_1i_1i_1i_1i_1i_1i_1i_1i_1i_H1ii_ ¸ 3. MECHANICAL CONTROL PANEL Ope_ Ve_t Doo_ - When the vent door To turn off unit or in the event of a power The pictured control panel is similar to your panel. open it allows for fresh air to circulate and for interruption, turn the Master... -
Page 8: Power Control
4. ELECTRONIC CONTROL PANEL Power Control The pictured control panel is similar to your panel. Check Filter Light/Reset The Power Control turns the unit on and off. After 250 hours of usage the Check Filter light will turn on. At this time, the filter needs to be PULL... -
Page 9: Fan Speed Control
Timer Control Speed Control Built-in three minute timing delay. This electronic controlled unit will not automatically The timer can be set to either turn the unit Speed Control four resume operation after a power failure. settings: High, Medium, Low and Auto. off. -
Page 10: Front Panel
5. FRONT PANEL Note: Failure to keep air filter clean will result in poor Adjustable louvers air circulation. DO NOT operate without filter. This can render the unit inoperative. Proper use and care of your air conditioner will help ensure longer life of the unit. -
Page 11: Warranty
Note: In the event ot any required part_ replacement within • Turn Thermostat to Warmer and Master period of this wam_nty, Fedders North America replacement Control to HI HEAT. parts shall be used and will be warranted only for the period remaining on the original... - Page 12 DURATION TO ONE YEAR FROM THE DATE OF ORIGI- PURCHASE. IN NO EVENT SHALL FEDDERS of purchase and nature of complaint. Service NORTH AMERICA BE LIABLE INDIRE_T, INCIDEN- will be provided during normal working...
- Page 13 __iiiiiiiiiiiiiiiiiiiiiiiiiiiiiiiiiiiiiiiiiiiiiiiiiiiiiiiiiii 1. REQUISTOS PARA LA ELECTRICOS Dai_o producto: Peligro _orle, altere ni retire el poliestireno expandido (espullla descarga el6ctrica blanca) est{i dentro acondicionador de aire. mural con salida Recept_iculo Recept_iculo mural de tres espigas simple de puesta puesta a tierra Para Su Seguridad: Enchufe...
- Page 14 2. INSTALACION EN LA VENTANA Tama_o de la ventana y de la unidad VISTA EXTERIOR Si el gabinete de su aire acondicionado mide 20" de ancho, entonces se ajustar._i a aberturas de 23 Tornillos de 1" Agujero roscado 7/8" hasta 39" de ancho. La a]tura mfnima de ]a abertura...
- Page 15 Nivel Borde de Tornillo la repisa 1/4 pulgada Bastid°r de la ventana _rr_ _.perior --4, VISTA LATERAL tada detr_is del quicio de [a ventana. CerciOrese de que el gabinete mantenga indinaci6n hacia afuera. El acondicionador de aire deber_i inclinarse [igeramente hacia el exterior usando...
- Page 16 2. INSTALACION EN LA VENTANA Sellante de esponja pl_ de pulgada de ]argo en el quicio de ]a ventana Bastidor superior de la ventana trav6s de ]as presi]]as de] panel de rel]eno (Fig. 9). Cortar el sel]ador de espuma de pkistico de] mismo ancho de ]a ventana...
-
Page 17: Panel De Control
3. PANEL DE CONTROL MEC,_NICO Funcionamiento de la El panel cionar ]a funci6n deseada de la unidad, como de control HI COOL (fifo alto), MED COOL (fifo medio) calefacci6n - Solamente de la ilus- algunos modelos), LO COOL (frfo bajo), HI FAN modelos calefacci6n... - Page 18 4. PANEL DE CONTROL ELECTRONICO Control de alimentaci6n de verificaci6n El panel de control de la ilustracidn es similar al suyo. filtro/reinicializar El control de alimentaci6n enciende y apaga unidad. Despu6s de 250 horas de uso se encender_ la luz PULL VENT OPEN...
- Page 19 Control de velocidad Control de reloj Retraso de sincronizaci6n de ties minutos integrado. del ventilador Este aparato con control electr6nico no volver_ a El reloj puede fijarse para encender o apagar la unidad. funcionar autom_ticamente despu_s de clue haya una El control velocidad ventilador...
-
Page 20: Panel Frontal
5. PANEL FRONTAL Advertencia: El no mantener limpio el filtro podria Persianas ajustables resultar en baja circulaci6n del aire. NUNCA haga funcionar la unidad sin el filtro ya que puede quedar inutilizable. El uso y mantenimiento adecuados del acondicionador de air prolongar_ la vida dtil de la unidad. Se recomienda inspeccionar y limpiar anuahnente el serpenffn y los pasajes para agua de condensacidn. - Page 21 Durante el primer afro a partir de ]a fecha de com- ]a residencia. Bajo ciertas condiciones, los serpentines de enfri- pra original, Fedders North America reparar_i amiento ubicados directamente detr,_is de] fi]tro sustituir_i, a trav6s de talleres de servicio...
- Page 22 ]a fecha de com- NINGL/NA (TRCUNSTAN(TA FEDDERS NORTH AMERI- garanfia [imitada de piezas yson responsabi]idad pra y ]a naturaleza del prob]ema, El servicio SE HARA RESPONSABLE...
- Page 23 __gi!i!i!iiiiiiiiiiiiiiiiiiiiiiiiiiiiiiiiiiiiiiill 1. EXIGENCES ELECTRIQUE Endommagement produit: Danger de choc 61ectrique Prise murale pas couper, nlodifier enlever ['isolant en polysWr_'ne expansE, (mousse blanche) se trouvant _1 I'intd, rieur clima Prise murale trois broches unique avec N'enficher le climafiseur dans prise 61ectrique tiseur d'air.
-
Page 24: Installation
2. INSTALLATION DANS UNE FENETRE Dimensions de I'appareil et de la fen_tre EXTERIEURE Si ]e bo_ter du climatiseur est d'une ]argeur de 20 po, i] convient aux fen6tres dont ]'ouverture d'une ]argeur de 23 7/8 b 39 po. La hauteur d'ouverture minimum est de 12 3/4 po b partir... - Page 25 Fen_tre _ Rebord de 1/4 po Niveau fen_tre int_rieure Barre sup_rieu VUE LATERALE Centrer le climatiseur dans I'ouverture de la fen_tre, le profil_ inf_rieur reposant derriere le rebord de la fen_tre. S'assurer que le bottl- er demeure inclin_ vers I'ext_rieur. Le clima- tiseur dolt...
- Page 26 2. INSTALLATION DANS UNE FENETRE Joint de mousse Fixer ]e bas des panneaux de remplissage enfoncant des vis b bois de 5/8 po de long dans ]e rebord de ]a fen6tre _ travers ]es ]anguettes panneaux de remplissage (Fig. 9). Couper ]e joint de mousse b la largeur...
- Page 27 3. PANNEAU DE COMMANDE MECANIQUE Fonctionnement certains modeles), LO COOL (REFROIDISSEMENT Le panneau de com- FAIBLE), HI FAN (VENTILATION t_LEVt_E), MED chauffage - ModUles mande FAN (VENTILATION MOYENNE) (sur certains chauffants uniquement mode]es) ou LO FAN (VENTILATION FAIBLE). illustr_ est Lorsque ]'une des fonctions de ventilation...
- Page 28 4. PANNEAU DE COMMANDE ELECTRONIQUE Le panneau de commande illustrd Commande marche/arr_t V_rifier le t_moin similaire _ celui de votre appareil. filtre/remise a z_ro Cette commande permet ]a raise en marche et ]'arr6t de ]'apparei]. Apres 250 heures d'utilisation, ]e t6moin ]umineux PULL Affichage...
- Page 29 Mode Energy Saver - Le venti]ateur passera • ,_ 7 degr_s ou plus au-dessus de la temperature Pour mettre rappareil _ I'arr6t util- de ]a vitesse r6gl6e ,_ LO (faible) chaque lois que isant la minuterie: Appuyez sur ]a c]_ de r_gl_e, I'appareil utilisera...
- Page 30 5. PANNEAU AVANT Note: L'omission de garder le filtre _ air propre Lames ajustables causera une mauvaise circulation d'air. NE PAS faire fonctionner I'appareil sans filtre, ce qui peut mettre I'appareil hors service. La dur_e de vie de votre conditionneur d'air est pro- Iong_e par un usage et un entretien ad_quats.
-
Page 31: Garantie
]a date de i] peut @re n6cessaire de remp]acer ]a prise). mande principa]e aux r6g]ages ]es plus froids. ]'achat initial, Fedders North America, par ]'en- • Mettre ]a commande principa]e b. ]a position "HI FAN". Si ]e venti]ateur... - Page 32 LIMITEES A UN AN A PARTIR DE LA DATE DE L _ACHAT de]'achat initial s i c es pieces se r6ve]ent INITIAL. FEDDERS NORTH AMERI(A NE SAURAIT d6fectueuses par s uite d evice dematiere oude Appelez un centre de service...
- Page 33 Write down model Model and serial number serial numbers The model and serial numbers can be found ¢N on the side of the decorative front grill near the control panel. Use these numbers in any corre- ¢N spondence or service calls concerning your conditioner.
Need help?
Do you have a question about the 23-23-0321N-005 and is the answer not in the manual?
Questions and answers