Table of Contents
Advertisement
RATOR'S MANUAL
GASOLINE PRESSURE WASHER
HU80530 / HU80931
Your pressure washer has been engineered and manufactured to Husky's high standard for dependability, ease of operation,
and operator safety. When properly cared for, it will give you years of rugged, trouble-free performance.
_ll
WARNING:
To reduce the risk of injury, the user must read and understand the operator's manual before using /
Thank you for your purchase.
Advertisement
Table of Contents

Related Manuals for Husky HU80931


Summary of Contents for Husky HU80931
- Page 1 GASOLINE PRESSURE WASHER HU80530 / HU80931 Your pressure washer has been engineered and manufactured to Husky's high standard for dependability, ease of operation, and operator safety. When properly cared for, it will give you years of rugged, trouble-free performance. WARNING: To reduce the risk of injury, the user must read and understand the operator's manual before using / Thank you for your purchase.
- Page 2 [] Introduction ................................ [] Important Safety Instructions ..........................[] Specific SafetyRules ............................[] Symbols ................................[] Features ................................[] Assembly ................................8-12 [] Operation ................................12-15 [] Maintenance ............................... 16-18 [] Troubleshooting ..............................[] Warranty ................................[] PartsOrdering / Service ...........................
- Page 3 [] Follow the maintenance instructions specified this manual. WARNING: [] Check damaged parts, Before further use of the Read and understand all instructions. Failure to follow tool, a guard or other part that is damaged should all instructions listed below may result in electric shock, be carefully checked to determine that it will operate...
- Page 4 Never store the machine with fuel in the fuel tank Never direct a water stream toward people or pets, or any electrical device. inside a building where ignition sources are present, such as hot water and space heaters, clothes dryers, [] Before starting any cleaning operation, close doors...
- Page 5 Some ofthefollowing symbols maybeusedonthistool.Please studythemandlearn theirmeaning. Proper i nterpreta- tionofthesesymbols willallowyouto operate thetool better andsafer. SYM BO NAME DESIGNATION/EXPLANATION Wet Conditions Alert Do not expose to rain or use in damp locations. To reduce the risk of injury, user must read and understand Read The Operator's Manual operator's manual before using this product.
- Page 6 Call Husky customer service for assistance. WARNING: The operation of any power tool can result in foreign objects being thrown into your eyes, which can result in severe eye damage.
- Page 7 PRODUCT SPECiFiCATiONS Engine ........................... Briggs and Stratton 500 Series* Fuel Tank Capacity ............................1 quart (.95 liters) Maximum Pounds Per Square Inch Pressure ......................2,200 psi Maximum Gallons Per Minute ........................... 2.0 GPM * No representation is made as to the horsepower of the Briggs & Stratton 500 Series engine. RECOIL NOZZLECLEANING OIL CAP/...
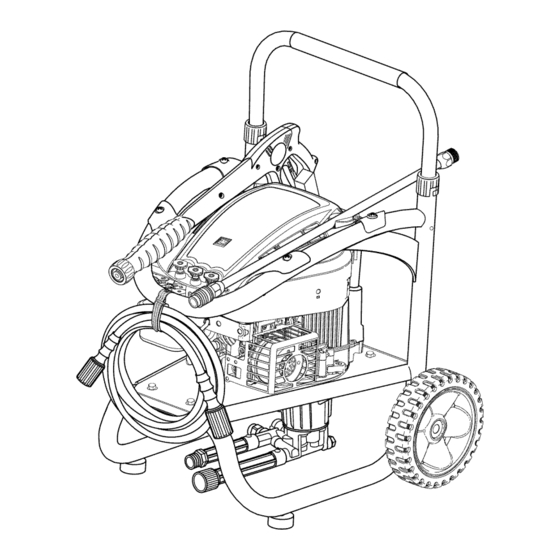
- Page 8 KNOW YOUR PRESSURE WASHER OFF SWITCH See Figure 1. To turn the engine off, press and hold the OFF switch for a full three seconds or until the engine stops. The safe use of this product requires an understanding the information on the tool and in this operator's manual as RECOIL STARTER well as a knowledge of the project you are attempting.
- Page 9 INSTALLING THE TELESCOPING HANDLE WARNING: See Figure 3. To install the telescoping handle: |If any parts are damaged or missing do not operate this | |tool until the parts are replaced. Failure to heed this warn- | • Align the arrows on the U-shaped handle with the arrows on the back of the frame.
- Page 10 ADDING OiL TO THE ENGINE See Figure 4. NOTE: This machine has been shipped with approximately 01L CAP/ 2 oz. of oil in the engine from testing. You must add oil to DIPSTICK the engine before starting it the first time. | Any a!tempt to s!art the engine without adding oil will result in engine failure.
- Page 11 ATTACHING iNJECTiON HOSE See Figure 6. Before detergent can be used with this machine, the injection hose must be attached. • Push the open end of the clear injection hose securely over the fitting as shown in figure 6. • Place the filtered end of the injection hose in the bottle of detergent.
- Page 12 CONNECTING THE HiGH PRESSURE HOSE TO THE PUMP COLLAR See Figure 9. After the high pressure hose has been uncoiled and attached to the spray wand: • Align the collar on the threaded nipple on the pump. • Insert the nozzle on the end of the high pressure hose collar into the threaded nipple.
- Page 13 APPLiCATiONS You may use this tool for the purposes listed below: [] Removing dirt and mold from decks, cement patios, and house siding [] Cleaning cars, boats, motorcycles, outdoor furniture, and grills STARTING STOPPING PRESSURE WASHER See Figures 11 - 12. PRIMER BULB3X CAUTION: Do not run the pump without the water supply connected...
-
Page 14: Using The Spray Wand Trigger
USING THE SPRAY WAND TRIGGER See Figure 13. For greater control and safety, keep both hands on the spray wand at all times. • Pull back and hold the trigger to operate the pressure washer. • Release the trigger to stop the flow of water through the nozzle. - Page 15 MOVING THE PRESSURE WASHER TO MOVETHE MACHINE See Figure 16. NOTE: Never lift or carry this product using the moving handle. [] Turn the pressure washer off. [] Standing at the back of the machine, grasp the handle firmly with both hands and pull the handle up until it locks into place with a "click".
- Page 16 CLEANING THE AiR FILTER See Figure 18. A dirty air filter will cause starting difficulty, loss of performance, and shorten the life span of the engine. Check the air filter monthly. For best performance, replace the air filter at least once a year. NOTE: DO NOT remove the shroud as you could disconnect WARNING: or loosen the wire connecting the OFF switch to the engine...
-
Page 17: Changing The Oil
CHANGING THE OiL See Figure 19. NOTE: Run the engine out of gas to prevent gas spills if 01L DRAIN machine is tilted. Allow 30 minutes of "cool down" time. [] Place a container under the pressure washer. [] Remove the oil drain plug and drain the old oil. CONTAINER NOTE: Drain the oil while the engine is still warm but not hot. - Page 18 STORING THE PRESSURE WASHER [] Inspect the spark plug and clean or replace, as neces- sary. It is important to store this product in a frost-free area. Always [] Reinstall the spark plug, but leave the spark plug wire empty water from all hoses, the pump, and the detergent disconnected.
- Page 19 CAUSE PROBLEM SOLUTION 1. No fuel in tank 1. Fill tank Engine fails to start 2. Spark plug shorted or fouled 2. Replace spark plug 3. Spark plug is broken (cracked 3. Replace spark plug porcelain or electrodes broken) 4. Ignition lead wire shorted, broken, 4.
- Page 21 B. Wear items - Hoses, connector fittings, spray nozzles, wheels, spray wand Techtronic Industries North America, Inc. reserves the right to change or improve the design of any HUSKY :' brand pressure washer without assuming any obligation to modify any product previously manufactured.
- Page 22 RATOR'S MANUAL GASOLINE PRESSURE WASHER HU80530 / HU80931 ,_ WARNING: The engine exhaust from this product contains chemicals known to the State of California to cause cancer, birth defects, or other reproductive harm. CALIFORNIA PROPOSITION • SERVICE Now that you have purchased your tool, should a need ever exist for repair parts or service,...
Need help?
Do you have a question about the HU80931 and is the answer not in the manual?
Questions and answers