Advertisement
Available languages
Available languages
Quick Links
Advertisement

Related Manuals for COMFORT-AIRE RAD-101B


Summary of Contents for COMFORT-AIRE RAD-101B
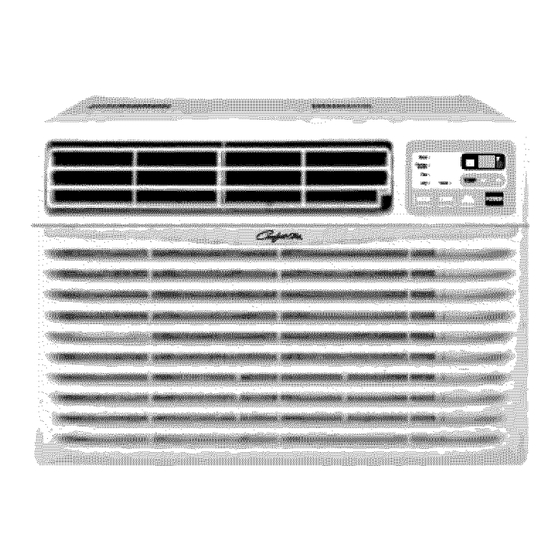
- Page 1 MODEL: RAD-10,1 B...
-
Page 2: For Your Records
FOR YOUR RECORDS _uUo_ ......3 Write _e model and ser_ r_s here: _ore Operat_n ......7 Ser_ # can find the num_ on a I_el on the sid_ o| the Int_uction ........8 pmd_. Sym_ Used in this Manual ..8 Features ........ - Page 3 To prevent inju_ to the u_r or ot_r people and proper damage, the fo{/owing instructions must be followed, m incorrect operat_n due to ignoAng in_ruct_ons w_H_use harm or damage, The seriousness is cJ_sified _ the fol_wing indications. m Because of the weight of _e product, it _s recommended that you have a helper to assist in iiiiiiiiiiiiiiiiiiiiiiiiiiiiiiiiiiiiiiiiiiiiiiiiiiiiiiiiiiiiii ..
-
Page 4: Operation
Safety Precautions m Operation ,, it will _use electric sh_ ,, it wil_cause ele_#c shock or = Otherwise, _t_! cause fire, e_ric shock or fire, fin. "_t will cause etectrie shock or , it: wil_ _use el_t_ shock o[ ,, No grounding may _use fire. - Page 5 Safeby Preca_s Do.ot,o e air .d[ Jo.,er * The air condi_oner must be _erate.d in a * H may _ exp!_, fire, and burn. enc_ area to _ most e_,,e. • k wil! cause electric _k or failure of • Water may enter _e unit and degrade ir_ul=iono litm_ _use an ,el_ric sh_.
- Page 6 P_u_oFm [] Operation ,Wuch sharp edg_ (n_ _ _le)_ _king it _11 n_ _ u_d _ra insUliing' _ri_, • it m_ cause injury. • it: may _u_ ele_ric sh_ ., It v,_l waste power _d da_,. and _ may _use a_dent.
- Page 7 _fore Operation 1. Plug in the power _rd properly: 2. Use a dedicated circuit. Overloading the line could create a fire hazard.. 3, Do not use an extension cord. S_ page i 1 for more details. 4. Do not start/stop operation by plugging/unplugging the power cord.
- Page 8 Introduction This symbol alerts you to the risk _ electric shock. This symbol alerts you to haza_s _ could cause harm to the air conditioner, This sym_l indicates s_cia| notes. WARNING: _is appliance should be installed in accordan_ with the National Ele_tic C_e°...
- Page 9 i15V~ 230V~ Power _ may include a ,cu_nt interrupter ,device, A test and r_t provided on _e p!_l case, me devica should be,tested _ a pa_odio basis by _t, pr_sing _e TEST bu_ and _en _me _SET Ibu_on° if the TEST bu_ does not t_p or ff the RESET blain "_1_not s_y...
- Page 10 Safety WARNING: This app|lance must _ p_pody g_unded, The power cord of _is appliance is equip_d with a three-prong grounding plug. To minimize the dsk of electric shock, use the plug with a standard three-slot grounding wall power outlet, if the power outlet does not include a grounding slot, have a quaLifi_ eiectrician...
- Page 11 We strong_ discourage the use of an adapter due to potent_a_ s h_ards. For temporary connections, on_y a ULolisted adapte5 avaiiable from most local hard#are Mores. Ensure that the large slot in the adapter is. aligned with the _arge slot in the r_eptac_e for a pro_r pofari_ connection.
- Page 12 k: t 1 EA Type B,:5 _ Ty_ C: 1 _ Ty_ D: 3 TNe E: 1 _ Type F: 1 _ Type G: 2 _ Type H: _ (Seal _p) (Sash S_I) IP_e_) (AdP__e _ed) (N_ adh_e backed) ....................Have the following tools avail_le for installation: * Screwdriver...
- Page 13 tion Cieatance Proper clearance enhances the cooling efficien_ of the unit and prevents heat radiation of the condenser. 1+ if a storm window presents interference, n a 2" wide wood strip to the inner window sHi across the fu+l width of the sllL The wood strip should _ th+ck enough to raise the height of the window sill so _at the unit _ be installed...
- Page 14 Instaflation i. In_ the guide panels into the guides of the air conditioner. Fasten the curtains to the unit with screws (Type A). : Use a _ong _rewdriver tnstaillng the screws will be easier. T_ A 2,, Cut the adhesive-ba _a_ strip E) to the window w_h.
- Page 15 Ins_llation Caution: During the following step, ho|d unit: firmly unti| window sash is lowered to top channel behind si_ panel frames. Pe_onal Injury pmper_ damage may _sult if unit faUs from window: i _Install the air conditioner in the window 1ol.
- Page 16 3-4. Fasten the suppo_ bracket (Type H) using a screw removed from the air conditioner cabinet. Attach the suppo_ bracket (Type H) to _e inner window sift with a screw (Type B). 4. Window installation of room air condiUoner is now completed° See ELECTRICAL DATA for a_ching power cod to eie_ticai outieto...
-
Page 17: Fan Speed Selector
Operating lnstm_ons The _ntrols _ook like this: O_ra_on starts men _is button is p_ed stops vv_en_ y ou pm_ the _JttO,nagain. FAN SPEED SELECTOR For increased_r while_oiing, sele_ a higher fan s_ed,. 3 steps:High --Low,-- M_ ONIOFFTIMER me timer can be set to sta_ and stop the unit In hourly incremen_ (up to !2 hours). - Page 18 O_mting CAUTION: The Remote Controller wig not fun_ion properly ff strong light strikes the sensor window of the air conditioner or if there am obstacles between the Remote Controller and 'the air conditioner° Operation sta_ wh_ _k buttonis prosed and sto_ whenyou pressMe button again, Tmperatum Control...
-
Page 19: Vent Control
Ope_ting Instructs Air Di_tlon AJr_ _n _ adjus_d by _anging the dijon of the air condi_onefs ilouve_._s _n aim in=ctea_the _ling _ency of the air _n_d_ner. Adjus_ng Hori_n_l ,Nr Flow Oire_on Adjus_ng _e 've_cal /_uve_ i_ and _ght _ll c_nge _ri_zonta_ ai_. - Page 20 Operating Instructions Drain Pipe in Ihumid weather, excess water may _use the Base Pan to ove_ow. drain the water, remove the Drain Cap and _cure the Drain Pi_ to me rear hole of the Base Pan. Press the d_in pipe into me ho!e by pushing down and avcay from the fins to avoid injury.
- Page 21 Maintenance and Sei_qce Air Filter Check the air filter at least twice a month to see if cleaning is n_essary, Trapped particles in the filter can buiJd up and blo_ the allow, reaucing _oiing capacity and _using an a_umula_on of frost on the eva_mtor. To clean _e air filter: Pull the inlet, grille forward.
- Page 22 Maintenance andService to Remove the Front Grille P'ull the inlet grillie forward 2. Remove the screw secudng the Front Gril!le. 3. Push the grille up from the _om the top of the grille away from me case as the top _bs [lift o,_ o,ftheir Room Air...
- Page 23 Maintenance _ B_o_ Calling for' Servico If you have proteins with your air _nditioner, read the foll_ing information and tR/to solve the problem. If you _nnot find a _lutiion, turn off the air coind_ioner and _ntact your dealer. Air conditioner does not o_m_ 1.
- Page 24 Maintena_ andService iii_i_iiiii iiiiii iiii ii iiii iiiiii iiii ii ii The air _nditioner may _ ope_n,g abno_al!y when: m The air conditioner is Make sure the .air condi_oner plug is pushod compJetely into the outlet. [] The fu_ is blowrJci_it Check the house fuse/circuit breaker box and replace the _se or reset the breaker.
- Page 25 _ner's Man_!
- Page 26 Memo Room Air Conditioner...
- Page 27 PARA SUS ARCHIVOS P_ucio_s de _ut_ad ..28 de p_er en m_a .... Escr(_ aqu! e) _e!o y n_rn_ de set,e: Mo_o n°: |nt_6n ........33 n°; SImbol_ Utilizados e_ Puede en_ntmt I_ n_ros en _ e_u_ de la _ E_(e M_ual ........33 later_ d_ pt_.
- Page 28 Precauciones de Seguridad Para prevenir tanto _esiones a_usuario u o_as pe_onas come daSos mateti_es, es precise s_u_t _nstru_iones, m La in_tre_a operaci6n de! aparato come consecuencia de ignorar I_ instrucciones r_ da_os o le_ones, m A cau_ de_ peso p del producto, se rec_m_enda que usted tenga a un ayudante a pa_icipa en la instalac_n, m El Wgnificado de t_ s{mbolos utiIWa_...
- Page 29 Preca m Funcionamiento • De otto mo_, , Causar_ descarga el_n_ , Causar_ descarga e_ctdca o incendio. in_ndio. a el_f_ o incendio. ,,Cau_ a el , Causar_ de_arga e_@tdca o ,, Si _ hay conex_n a masa, incendio. in_ndio. se puede producit de_a_ el6_rica.
- Page 30 Prec_gu#on_ de Seguridad • Pu_e _u_r _p!osiSn, incendio, , El a_rato de aire acondic_onado debe quemadara& o_rse en un Area ce#ada papa ser m_ r,_ descatga el_tt_._ o in_io. • Puede entrat 8gua en la unidad y disminuir la ais}aci_. Pue_ cau_r una descarga el6_r}ca.
- Page 31 Precauctones Seguridad [] Funcionamlento _dic_n® si _ a _l_ _que _n I_ cue_ (.o_ Cuan® I0 _ue, • Hay nesgo _ le_on_ * Pu_e _r descar_ • Gastar_ ene_graen w_ e_rica y daSo= _drfa pr_ocar un a_ide_. 8harp • _mo _ _la_r 9i_ a al_ •...
- Page 32 ,P_io _ Funcion_iento 1. Coloque el .ench_e correctamente. 2. Use un _nico circuito pare este aparato. Re_rgar e_ circuito podrfa provo_r un riesgo de incendlos. 3. No _ilice un alargador. Consulte la p_gina 36 para m_s detal[es. 4. No arraniqiue/detenga ,el funcionamiento enchufando/deser'_hufando e[ cable...
- Page 33 Este sfmbolo Io advie_e de un peligro de acciden_ pot corriente ei6_rica° E_e sfmbo|o Io adtve_e de un _|tg_ que pu_a causar un da_o de| vent|iador. Este sfmbo|o sign_ica _nd_cciones es_ciai_s_ ADVE_ENCIA : Este aparato deberfa instalarse de acue_o con |as normas de| C6digo E|_rico National Gula Su...
- Page 34 Segu'm_ 1i5,V,~ [El_bile _ alimen_ci6n _Je_ _duir un dis_.it_vo inte_p1[or _ _rd_nte del enchufe cuenta con un bo_bn de y o_ de retn_lo. El di_os_vo ped_i_men|e ptes_nando el bot6a TEST y desp_s RESET. S_ e_ bo_n _ST _ se d_e_ o si el _t_ _SET no p,_n_...
- Page 35 Este equi_ estar puesto a tierra deb_dame_. E_ cable de a_imentaciSn est,. equipado de una toma de tierra con tres pins. Para minimizar et peligro de una _esiSn pot corriente ei_ctdca, utiiice una toma c.on enchufe de tierra est_ndar con tres contactos. Si el enchufe de pared no contiene un _rne de tierm, antes de usar el ventilador...
- Page 36 Debido a eventuates pe_igros de s_uridad no r_omendamos en abso|L_o use de un adaptader. SSIo para una conexiSn transitofia se puede user el adaptader clasificedo come UL que est_ a disposiciSn en [a mayor{a de las tiendas de productos el6ctricos. A_enda que e orificio g_de en el edaptader corresponda...
- Page 37 InstalaciSn A: 1t _p0, 8:5 Tipo C:1 T_ _ 3 (Toml)_ _) _omtl_ M_o) (Tebede Dtenai_+Atandela) (8 Parents F: 1 G: 2 TipoE: l H: i del _) (Panel Guia) (_r_a P_s) _h_o p_tedor) (_h_ivo p_r) Para la instalaci6n de_da tenet a disposici6n los instrumentos siguientes: * DestornilEador (EstreUa y PhiUips)
- Page 38 Instalac/6n Espa¢lo iibre El suficiente espacio tibre aumenta La eflciencia de refdgemci6n de la unidad e impide ra irradiacJ6n deJ calor de_ condensador. 1. Si Lasobre-ventana esto_a co_6quese una tira de madera de 2 pulg de ancho a ro la_o dei descan_ de la _n_na por la parte que de Intemamente cuarto, yen toda su extensi6n°...
- Page 39 1. Introduzca los paneles en _os gules de{ aire acondidonado° Las cosines atorn{Hel_ con los tornillos (T_po A), Use un atornirlador largo. As_ le set& m&s f&cil instalar los tomiUos, 2. Corte la banda adhesive (,_ipo E) y col6quela de{ ancho de {a ven_a. Remueve el p_st{co de ta banda adhesive y col6quela en la pa_e superior de el marco inferior de _ ventana.
- Page 40 tnsta Precau_6n: En las siguient_ instruct|ones, _en_ ia unidad flrmemente haste que ia parte _edi_ de la ventana descanse sobre la parle subtler de! canal y _r detr_s del ma_ _ los pa_ies co_izos_ Puede hair _siones o da_os si |a unidad _ cae de |a ven_na. 1.
- Page 41 34, Amarre la escuadra de so_rte (Tipo H) usando un brnillo que puede sacar del cabinete det aparato de aire acond_lonado, Acople _aescuadra (Ti_ H) a _aparte interior de la repisa de _aventana con un tomiilo (Tipo B). (T_ H), 4, La |nsta_ci6n _l aire acondtcionado _ ve_ana...
- Page 42 !_racciones ft._ncionamien_ Los contro es tiienen este as cto, POWER (en,_nd_) El fun_namlen_o se ini_a cua,ndo _ pu_a esta t_la detien=ecuando se _ presiona n_vamente. SELECTOR [DEVELOClilDAD DEL VEN_OR (FA SPEED) Para ,aumentar _acapacidad mi_tr_ se _esca, s_o_ una mayor _!_d_ de;...
- Page 43 PRECAU_6N: Ei mando a dis_ncia no funcionard co_ctamente una luz fuette contacto con eli sensor dei aim acondicIonado ,o s! hay ,obs_culos ent_ el mando a dis_ncia y e! sin a_ndicionsd!o° POWER (en_ndido) El funcionamiento se inicia cua,n_ se puisa,es_ t_la y _ detiene cuar_o seila pmsiona nuevamente, CONTROL, DE TEMPERATURA...
- Page 44 triP--Jones _nd_am_nto di_ci6=n air,e EJflujo de aire pu_e set ajustado _m_a_o dir_ de las rejiflas ,devenUla_, de_a_ndicionador de, re.. Esto pu_e tambi6n incmm,e_r la efi_ia a_,d_Jona_r de _re. Aju_t la di_ci6n= di_ flujo de aim ho_n_l. _ustar I_ reji!_ ve_les hada {a _quie_a _er_ha _bia_...
- Page 45 Operating de Desag0e En c[imas h_medos, es posib_e que la Bandeja _dora se []enne de agua. Para qui_r et agua acumu_ado, es p_clso _nectar el tube de desagQe. Quite la Tapa de_ Desag0e y conecte e_ Tube a ta Bandeja Evaporadora. Este aparato de aire acond[c[onado equipado an venti_ador de...
- Page 46 _rvicJo Fi|t_ de Aire Revi_ pot {o menos dos veces al rues si no es necesar[o limpiar el fi_ro de a[re. Las partfcu_as detenidad se pueden acumuLar en e{ fHtro impidiendo e[ fluio de1 aire, IJmi_ndo er rendimiento de enfriamiento y causando [a acumu]ac[6n de h[e_o...
- Page 47 Como Remover la Parilla Frontal 1. Tire de la rejilla de entrada hacia de,ante agarrando ambas lengOetas y tire del filtro del aire hasta sacadoo 2. Saque el tomil_o que asegura _a ParrHEa Frontal. 3. Suelte el _ado izquierdo primero. Despu6s cuidadosamente ha_e desde _a parte de arriba y empuje...
- Page 48 Antes de Liamar el _r¢ic|o de Asistencla T_cnica Si tiene problemas con su ventilador, _ea _as informaciones siguientes y trate de resolver el pro_ema. Si no puede encontrar la so_uci6n, desconecte el ventilador y dirrjase a su suministrador° E| ventHadot no funciona 1.
- Page 49 Mantenirnfento y,sie_ClO El acondicionador de a,ire p,u_e estar _ncionando ano_almente cua,ndo= A_g_re_ que ei aire a_ndicionado est_ _ne_do _mpietamente a la _ente de energia. Cheque los fusibles/inte#uptor de _a _sa y r_mplace I_ fusibles o El aire r_st_blez_ e! inter_ptor de energlao Cuando _aenerg a se Uezca, do no...
- Page 50 Nota Aire Acondicionador...
- Page 51 Specifications and performance data subject to change without notice. HEAT CONTROLLER, INC. 1900 WELLWORTH AVENUE • JACKSON, MICHIGAN 49203 THE QUALITY LEADER IN CONDITIONING P/No.: MFL61984501 Printed in China...
Need help?
Do you have a question about the RAD-101B and is the answer not in the manual?
Questions and answers