Nautilus ONE Service Manual
Hide thumbs
Also See for ONE:
- Owner's manual (25 pages) ,
- Owners instructions and assembly (12 pages) ,
- Owner's manual (32 pages)

Related Manuals for Nautilus ONE


Summary of Contents for Nautilus ONE
- Page 1 Nautilus ONE ™ Service Manual Nautilus Bowflex Schwinn Fitness Pearl Izumi StairMaster Universal Nautilus Institute ® ® ® ® ® ® ® 001-7147-120507A...
-
Page 2: Table Of Contents
Table of Contents Safety Warnings ........................... 1 Exploded Views ........................... 2 Service Procedures ........................5 Tower Shroud Removal ....................5 Tower Shroud Installation ..................7 Weight Drive Installation/Removal ................9 Screw Belt Adjustment ..................... 11 Bottom Loading Gas Spring Replacement .............. 12 Knob Removal ...................... -
Page 3: Safety Warnings
Make sure that repair is done in an appropriate work space away from foot traffic and exposure to unauthorized personnel. • Adjustments and repairs to Nautilus equipment must only be performed by a professional service technician trained to service Nautilus equipment. •... -
Page 4: Exploded Views
Exploded Views Assembly Manual Service Manual... - Page 5 Exploded Views Service Manual Service Manual...
- Page 6 Exploded Views Service Manual...
-
Page 7: Service Procedures
Service Procedures Nautilus ONE™ Tower Shroud Removal Tools Required: 9/16” Socket Wrench 9/16" Wrench 5/32" Hex Wrench Remove the Top Cover 1-1 Remove the two mounting screws on the rear of the top cover with a 5/32" Hex wrench (Figure 1). - Page 8 Service Procedures Nautilus ONE™ Tower Shroud Removal (cont.) Remove the Outside Shroud Note: The large round bezel does not need to be removed from the outside shroud. P-Slot 4-1 Lift the shroud up until the tabs stop at the top of the P-slot (Figure 5).
-
Page 9: Tower Shroud Installation
Service Procedures Nautilus ONE™ Tower Shroud Installation Attach the Rear Shroud 1-1 Put Rear Shroud into the Bottom slot and secure with one screw at the top. P-Slot Attach the Inside Shroud 2-1 Put Inside Shroud into P-slots in the Steel Frame and fit... - Page 10 Nautilus ONE™ Tower Shroud Installation (cont.) Attach the Top Cover 6-1 Lower the top cover onto side shrouds making sure that the tops edges of both side shrouds fit securely into the slots on each side of the top cover (Figure 5and 6).
-
Page 11: Weight Drive Installation/Removal
(4) 1/2-13 Lock Nuts with 3/4” socket wrench and adjustable wrench. Discard (1) bolt and (1) nut (Figure 2). Weight Drive Support Figure 1 Seat Frame Weight Drive Seat Frame Plate Return plates to: Nautilus Inc. 709 Powerhouse Rd. Independence, VA 24348 Figure 2 Service Manual... - Page 12 Service Procedures Weight Drive Installation/Removal (cont.) Align the Seat Frame Weight Drive holes to Tower Weight Drive holes and pins. Insert (3) 1/2 x 1 1/4” bolts into weight drive and (3) 1/2 x 3” bolts into seat frame plate. Carefully align Seat Frame to the Tower and tighten all bolts (Figure 3).
-
Page 13: Screw Belt Adjustment
Service Procedures Seat Frame Belt Cam Adjustment Articulating Tools Required: 5/16" Hex Wrench Clamp Mount Sliding Belt 1-1 Use a 5/16" Hex Wrench to tighten or Adjustment Clamp Button Head Belt loosen the Button Head Belt Adjustment Adjustment Bolt Bolt. Note: Turning the screw clockwise increases tension. -
Page 14: Bottom Loading Gas Spring Replacement
Service Procedures Bottom Loading Gas Spring Replacement These procedures apply to the following units: • Nautilus ONE™ Mid Row (S6MR) • Nautilus ONE™ Lat Pull (S6LATP) • Nautilus ONE™ Chest Press (S6CP) • Nautilus ONE™ Shoulder Press (S6SP) • Nautilus ONE™ Bicep Curl (S6BC) •... - Page 15 Service Procedures 1-5 Remove the top 7/32" Hex head screw with a 7/32" Hex Wrench (Figure 3). 1-6 Remove the bottom 7/32" Hex head screw while supporting the seat bracket with your free hand (Figure 4). Figure 3 Figure 4 Service Manual...
- Page 16 Service Procedures Note: It is neccessary to disassemble the seat frame from the weight stack. This will allow the service personnel to access the gas spring assembly. Please refer to pages 9 and 10 of this service manual for the seat frame/tower disassembly and belt timing.
- Page 17 Service Procedures Note: Figure 8 shows a seat disconnected from the weight tower to gain access to the gas spring seat adjustment assembly. 1-8 Remove the (2) plate retaining screws with a 7/32" Hex wrench (Figure 9). 1-9 Pull the gas spring seat adjustment assembly out of the seat frame tube (Figure 10).
- Page 18 Service Procedures 1-10 Finish removing the gas spring seat adjustment assembly (Figure 11). 1-11 Replace the gas spring if neccessary (not pictured). 1-12 Insert the gas spring seat frame assembly into the seat frame tube (Figure 12). 1-13 Confirm the horse shoe shaped bracket is aligned (Figure 13).
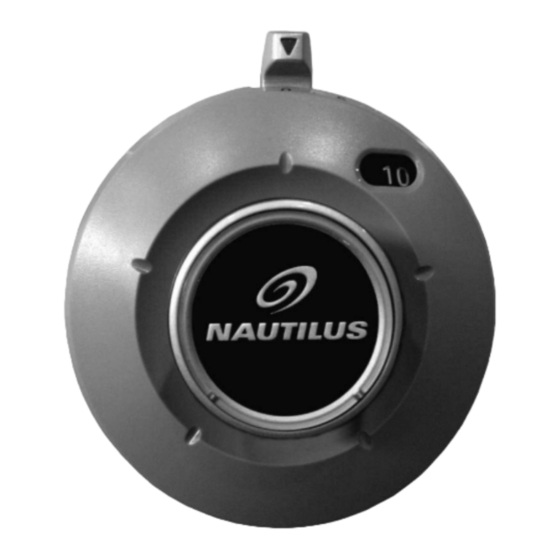
- Page 19 1-3 Remove the center cap by carefully prying between the inside shroud and center cap. Remove the Nautilus ONE™ 3" Decal 2-1 Carefully pry the 3" decal from the knob. 2-2 Remove the plastic decal by slowly working the prying tool between the back of the decal and the front surface of the knob (Figure 2).
-
Page 20: Knob Removal
Service Procedures Knob Removal (cont.) Remove Number Wheel 5-1 Pull the number wheel assembly away from the weight tower (Figure 6). Remove the Add On Weight Lever 6-1 The handle adjustment knob has two index pins that insert into the add on weight cam. Use a small flat head screwdriver to help separate the add on Figure 6 weight lever from the black plastic cam. -
Page 21: Contact Information
Please supply the serial number of your machine and the date of Nautilus UK Ltd purchase when you call Nautilus. Use the space in the boxes below Nautilus UK, 4 Vincent Avenue, to write down this information. To find the serial number on your Crownhill, Milton Wrenchnes, Bucks, MK8 0AB machine, refer to the Safety Warning Label information page. - Page 22 ©2007. Nautilus, Inc. All rights reserved. Nautilus, the Nautilus Logo, Universal, the Universal Logo, Bowflex, StairMaster, Pearl Izumi and Nautilus Institute are either registered trademarks or trademarks of Nautilus, Inc. Schwinn is a registered trademark. All other trademarks are owned by their respective companies. Nautilus, Inc., World Headquarters, 16400 SE Nautilus Drive, Vancouver, WA 98683 1-800-NAUTILUS www.nautilus.com...
Need help?
Do you have a question about the ONE and is the answer not in the manual?
Questions and answers