Table of Contents
Advertisement
Advertisement
Table of Contents

Related Manuals for Nautilus U628


Summary of Contents for Nautilus U628
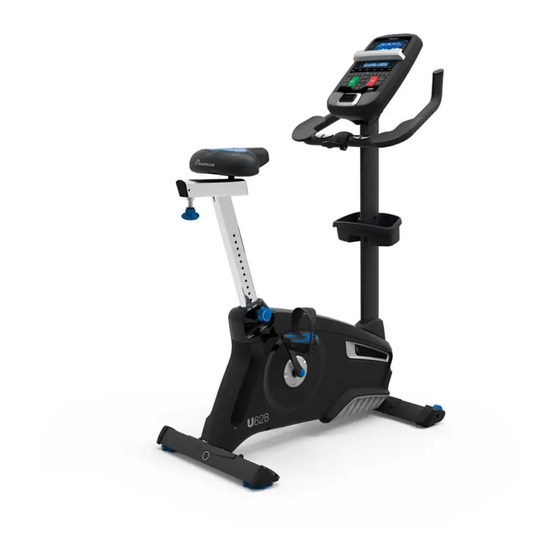
- Page 1 U628 ™ ASSEMBLY MANUAL / OWNER’S MANUAL...
-
Page 2: Table Of Contents
2018 Nautilus, Inc. Nautilus, the Nautilus logo, ualTrack, Nautilus Trainer, Bow e , and Schwinn are trademarks owned by or licensed to Nautilus, Inc., which are registered or otherwise protected by common law in the United States and other countries. Polar ®... -
Page 3: Important Safety Instructions
• If replacement parts are necessary, use only genuine Nautilus replacement parts and hardware. Failure to use genuine replacement parts can cause a risk to users, keep the machine from operating correctly and void the warranty. - Page 4 • Before each use, e amine this machine for damage to power cord, power receptacle, loose parts or signs of wear. Do not use if found in this condition. Monitor the Seat, Pedals, and Crank Arms closely. If purchased in US/Canada, contact Customer Service for repair information.
-
Page 5: Safety Warning Labels / Serial Number
SAFETY WARNING LABELS AND SERIAL NUMBER Serial number Product Earthing Instructions This product must be electrically earthed. If a malfunction occurs, correct earthing decreases the risk of electric shock. The power cord is equipped with an equipment-earthing conductor, and must be connected to an outlet that is properly installed and earthed. -
Page 6: Speci Cations
SPECIFICATIONS 147.4 kg (325 lbs.) Maximum User Weight: Total Surface Area (footprint) of equipment: 5 70 cm2 39.3 kg (8 . lbs.) Machine Weight: Power Requirements: Operating Voltage: 220 - 240V AC, 50/ 0Hz Operating Current: Heart Rate Chest Strap: 1 CR2032 battery 148cm (58.3”) 98cm (38.6”) 61cm (24”) -
Page 7: Parts
PARTS 13 (R) 12 (L) Item Description Item Description Main Frame Adjustment Knob Front Stabilizer Seat Rear Stabilizer Left Pedal (L) Mast Boot Right Pedal (R) Console Mast (with Handlebar Mount) Water Bottle Holder Handlebar Mount Cover Power Cord Handlebars Console Pivot Shroud Console MP3 Cord... -
Page 8: Hardware
HARDWARE / TOOLS Item Description Button Head He Screw M8 Lock Washer M8 Flat Washer M8 T-handle Flat Washer, Narrow M8 Note: Select pieces of Hardware have been provided as spares on the Hardware Card. Be aware that there may be remaining Hardware after the proper assembly of your machine. -
Page 9: Assembly
ASSEMBLY 1. Attach Stabilizers to Main Frame Note: Hardware(*) is pre-installed on the stabilizers and not on Hardware Card. Make sure transport wheels on the front stabilizer point forward. 6 mm 6 mm 2. Install Console Mast and Mast Boot on Main Assembly NOTICE: Make sure the Console Cable connector (a) does not fall into the Console Mast. - Page 10 3. Install Handlebars on Console Mast NOTICE: Do not crimp the cables. Put the Handlebar (7) in the bracket (5a), adjust the Handlebar to the desired angle, and install the T-handle (D) through the holes. Use the pull cable in the Handlebar Mount to route the HR cable (7a) and Resistance cable (7b) through the slot (5b) under the Handlebar Mount to the top of the mast and through the opening in the console mount plate.
- Page 11 4. Install Console on Console Mast Note: Remove the pre-installed screws(*) from the back of the Console before you connect the cables. If desired, apply the French Canadian overlay to the Console face. NOTICE: Do not crimp the cables. Push the e tra wire down into the Console Mast to allow pivot clearance.
- Page 12 5. Attach Console Pivot Shroud 6. Install Seat Post on Frame NOTICE: Make sure the Adjustment Knob engages the Seat Post. Do not set the Seat Post position higher than the stop mark (STOP) on the tube. STOP...
- Page 13 7. Attach Seat to Seat Post NOTICE: Be sure the Seat is straight. Tighten both nuts (11b) on the Seat bracket (11a) to hold the Seat in position. 8. Install Pedals Note: The Left Pedal is reverse-threaded. Be sure to attach Pedals on the proper side of the Bike. Orienta- tion is based from a seated position on the bike.
- Page 14 9. Install Water Bottle Holder Note: The hardware(*) is pre-installed on the Console Mast and not on Hardware Card. 10. Connect Power Cord Connect this machine to a properly earthed outlet only (see Earthing Instructions). 11. Final Inspection Inspect your machine to ensure that all hardware is tight and components are properly assembled. Be sure to record the serial number in the field provided at the front of this manual.
-
Page 15: Leveling The Bike
BEFORE YOU START Leveling Your Bike Levelers are found on each side of the Rear Stabilizer. Turn the stabilizer foot to adjust. Do not adjust the levelers to such a height that they detach or unscrew from the machine. Injury to you or damage to the machine can occur. -
Page 16: Eatures
FEATURES Console MP3 Input Handlebars with Elbow Pads USB Port Adjustable Seat Contact Heart Rate (CHR) Sensors Seat Slider Adjustment Knob Speakers Seat Post Adjustment Knob Pedals Remote Resistance Controls Stabilizers Media Tray Levelers Telemetry Heart Rate (HR) Receiver Fully Shrouded Flywheel Bluetooth Connectivity (not shown) ®... -
Page 17: Console Features
Console Features The Console provides important information about your workout and lets you control the resistance levels while you e ercise. The Console features the Nautilus DualTrack™ display with touch control buttons to navigate you through the e ercise programs. - Page 18 Resistance Level Quick Buttons- Shifts the resistance levels to the setting uickly during a workout Achievement Indicator Lights- when an achievement level is reached or a result is reviewed, the achievement indicator light will activate Nautilus DualTrack™ Display Upper Display Data Program Display...
- Page 19 Achievement Display The Achievement Display activates when a workout goal is reached or a workout milestone is surpassed from past workouts. The Console display will congratulate and inform the User of their achievement, along with a celebratory sound. Lower Display Data The Lower Display shows the Workout Values and can be customized for each User (Consult the “Edit User Pro le section of this manual).
-
Page 20: Bluetooth ® Connectivity
® your results and share with friends and family. 1. Download the free Software App, named Nautilus Trainer™. The software app is available on the App Store and Google Play™. Note: For a complete list of supported devices, review the software app on the App Store or Google Play™. -
Page 21: Remote Heart Rate Monitor
You may need to lightly wet the contact areas. Check that the curve of the transmitter is oriented upward. If no signal appears or you need further assistance, call your Nautilus Representative. -
Page 22: Remote Resistance Controls
Your at-rest heart rate is in uenced by endurance training. The typical adult has an at rest heart rate of appro imately 72 BPM, whereas highly trained runners may have readings of 40 BPM or lower. The Heart Rate table is an estimate of what Heart Rate Zone (HRZ) is e ective to burn fat and improve your cardiovas- cular system. -
Page 23: Operation
OPERATION What to Wear Wear rubber-soled athletic shoes. You will need the appropriate clothes for e ercise that allow you to move freely. How Often Should You Exercise Consult a physician before you start an exercise program. Stop exercising if you feel pain or tightness in your chest, become short of breath, or feel faint. -
Page 24: Initial Setup
Push any button to start (wake up) the Console. If your machine is in Demonstration mode, hold down the PAUSE/END button and Left button together for 3 seconds. Note: The Console does not have an On/Off switch. Initial Setup During the rst power-up, the Console should be setup with the date, time and your preferred measurement units. Date: Push the Increase( )/Decrease( ) buttons to adjust the currently active value ( ashing). - Page 25 • Height • Gender • Preferred Workout Values Select a User Profile Every workout is saved to a User Pro le. Be sure to select the proper User Pro le before starting a workout. The last User that completed a workout will be the default user. User Pro les are assigned the default values until they are customized by editing.
- Page 26 9. The Console will go to the Power-Up Mode screen with the user selected. Reset a User Profile 1. From the Power-Up Mode screen, push the User button to select one of the User Pro les. 2. Push the OK button to select it. 3.
- Page 27 MOUNTAINS Pike’s Peak Mount Hood Pyramids Summit Pass CHALLENGES Uphill Finish Cross-Training Interval Stairs Workout Profile and Goal Program The Console lets you select the Pro le Program and type of Goal for your workout (Distance, Time or Calories), and set the Goal value.
- Page 28 Start to work out and hold the Heart Rate Sensors. When the test starts, the intensity of the workout slowly increases. This means you will work harder, and as a result, your heart rate increases. The intensity continues to increase automatically until your heart rate reaches the “Test Zone .
-
Page 29: Power Training Programs
Note: Be sure to allow time for your heart rate to reach the desired heart rate zone when setting the goal. 5. Push OK to start the workout. A User can set a Heart Rate zone instead of a value by selecting the Heart Rate Control - User program. The Console will adjust the workout to keep the User in the desired Heart Rate zone. -
Page 30: Pausing Or Stopping
1. After the POWER HIIT program is selected, the Console displays SET TARGET WATTS - HIGH. The High watts value refers to the highest power output goal during the work period. Use the Increase( ) or Decrease( ) buttons to adjust the HIGH target watts value for the work period, and push OK. -
Page 31: Results
- WORKOUT PAUSED - PEDAL TO CONTINUE (if a bike) / STRIDE TO CONTINUE (if an elliptical) - PUSH END TO STOP During a paused workout, you can use the Increase/Decrease buttons to move through the result channels manually. 1. Stop pedaling and push the PAUSE/END button to pause your workout. 2. - Page 32 1. From the Power-Up screen, push the User button to select the correct User pro le. 2. Push the GOAL TRACK button. The Console will display the LAST WORKOUT values and activate the corresponding Achievement light. Note: Goal Track statistics can be viewed even during a workout. Push GOAL TRACK and the LAST WORKOUT values will be displayed.
-
Page 33: Console Setup Mode
CONSOLE SETUP MODE Use of this Machine in a Studio (Non-Home) Environment This fitness machine can be configured for use in a studio environment. When in Studio mode, the machine only has one active User profile. All other User profiles are disabled. Any workout values displayed on the Console that reference previous workouts, such as the Goal Track feature, will use a summary of past workouts. -
Page 34: Maintenance
Only use replacement Pedals available from Nautilus. Other brands of Pedals may not be designed for this product, and can cause danger to users and bystanders, and will void the warranty. -
Page 35: Heart Rate Chest Strap Battery Replacement
Heart Rate Chest Strap Battery Replacement The heart rate (HR) chest strap uses a CR2032 battery. Do not perform this procedure outdoors or in moist or wet locations. 1. Using a coin, loosen the slotted cover on the battery bay. Re- CR2032 move the cover and battery. -
Page 36: Maintenance Parts
Maintenance Parts Console CHR Sensors RPM Sensor Console Mast Seat Speed Sensor Magnet (8) Pedals Seat Post w/ Slider Data Cable, Lower Crank Arms Adjustment Knob Drive Belt Left Shroud Power Cord Drive Pulley Power Inlet/Power Switch Water Bottle Holder Handlebar Mount Cover Right Shroud Rear Stabilizer... -
Page 37: Troubleshooting
TROUBLESHOOTING Condition/Problem Things to Check Solution No display/partial display/ Check electrical (wall) Make sure unit is plugged into a functioning wall outlet. unit will not turn on outlet Check connection at front Connection should be secure and undamaged. Replace power of unit cord or connection at unit if either are damaged. - Page 38 Condition/Problem Things to Check Solution Check magnet position Magnets should be in place on pulley. (re uires shroud removal) Check Speed Sensor Speed sensor should be aligned with magnets and connected (re uires shroud removal) to data cable. Realign sensor if necessary. Replace if there is any damage to the sensor or the connecting wire.
- Page 39 Contact appsupport nautilus.com (if inside US/Canada) or your local distributor (if outside US/Canada) for further assis- tance. Workout results not post- Sync accounts From the Menu icon on the Nautilus Trainer™ App, select the ing from Nautilus Trainer Sync to MyFitnessPal or Under Armour Connected Fitness.
- Page 40 ™ ™ Nautilus Bow e Schwinn ™ ™ ™ 8023005.121519.B...
Need help?
Do you have a question about the U628 and is the answer not in the manual?
Questions and answers