Honda HR215SXA Owner's Manual
Hide thumbs
Also See for HR215SXA:
- Owner's manual (96 pages) ,
- Owner's manual (94 pages) ,
- Owner's manual (72 pages)
Table of Contents
Advertisement
Advertisement
Table of Contents

Related Manuals for Honda HR215SXA


Summary of Contents for Honda HR215SXA
- Page 3 If a problem should arise, or if you have any questions about your mower, see an authorized Honda lawn mower dealer. 01990 American Honda Motor Co., Inc - All Rights Reserved...
- Page 4 l.SAFETY ................Safety Label Locations Safety Information ........to Parents ......Important Message 2. COMPONENT IDENTIFICATION ......lO 3.
-
Page 5: Table Of Contents
CONTENTS ......MOWING RECOMMENDATIONS........TRANSPORTING MAINTENANCE ........Maintenance Schedule ..............Engine Oil Change Air Cleaner Service ..............Spark Plug Service ... Spark Arrester Maintenance (optional equipment) ......ROTO-STOP Cable Adjustment ..Drive Clutch Cable Adjustment (HR215SXA & HR215SMA) .... - Page 6 1. SAFETY Read all safety instructions before operating the mower. UNDER NORMAL USAGE, THIS BAG MATERIAL DO NOTSTART UtiLESS REAR DOOR ISSUBJECT TO DETERlORATlON AND WEAR IS CLOSEDOR BAGISIN PLACE. AND SHOULD BE CHECKED FREGUENTLV FOR I READ OWNER’S MANUAL BEFORE OPERATING.
- Page 7 1. SAFETY SAFETY INFORMATION For your safety and the safety of others, pay special attention to these precautions: Operator Responsibility Know how to stop the engine quickly in case of emergency. Understand use of all controls. Be sure that anyone operates lawn mower...
- Page 8 Stored lawn clippings are a fire hazard. Honda HR215 mowers are not factory-equipped with spark arresters. It is illegal in some areas to operate an engine without a USDA qualified spark arrester.
- Page 9 IMPORTANT MESSAGE To PARENTS YOUR CHILDREN’S SAFETY IS VERY IMPORTANT to Honda. That’s why we urge you to read this message before letting your youngster operate this lawn mower. lawn mowers are tools, not toys. As with any equipment, bad judgments can result in serious injuries.
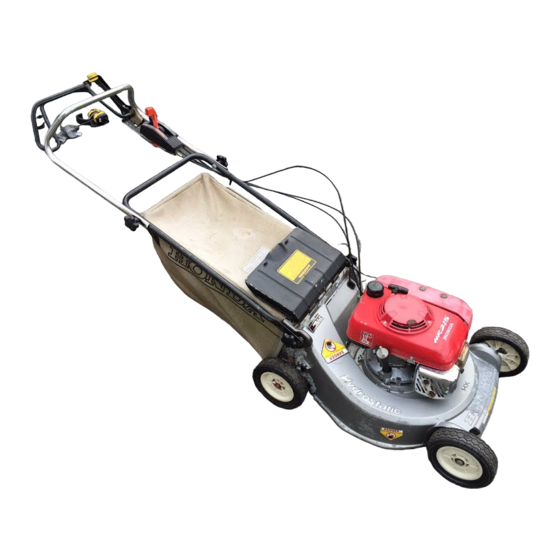
- Page 10 2. COMPONENT IDENTIFICATOON ROTO-STOP ROTO-STOP BUTTON ENGINE SWITCH & BATTERY FOR ELECTRIC STARTER SCHARGE GUARD FUEL TANK CAP CUTTING LOCKING KNOBS CUTTING HEIGHT ADJUSTMENT LEVER DECK ENGINE SERIAL NUMBER (on back of engine) MUFFLER DRAIN BOLT Record the frame and engine serial numbers for your reference.
- Page 11 2. COMPONENT IDENTIFICATION ROTO-STOP ROTO-STOP LEVER \ BUTTON (HR215HXA, TJ&? THROTTLE HR215SXA. HR215SMAI CUTTING HEIGHT ADJUSTMENT LEVER CUTTING HEIGHT ADJUSTMENT F)jGy AIR CLEANER FUEL VALVE SPARK PLUG CARBURETOR HR215PXA: Manual starting, manually propelled; no transmission HR215HXA: Manual starting, self-propelled; hydrostatic transmission HR215SXA: Manual...
- Page 12 3. CONTROLS FUEL VALVE The fuel valve opens and closes the connection between the fuel tank and the carburetor. The fuel valve must be in the ON position for the engine to. run. When the mower is not in use, turn the fuel valve to the OFF position to prevent the possibility of carburetor flooding, and to reduce the possibility...
- Page 13 3. CONTROLS THRUITLE LEVER CHOKE position: For starting FAST position 1: For mowing SLOW position 1: For idling STOP position: Stops the engine NOTE: HR215SMA only - turning the engine switch to the OFF position stops the engine (see page 12). THROTTLE LEVER (HR215PXA) THROTTLE LEVER...
- Page 14 3. CONTROLS ENGINE SWITCH (HR215SMAI START position: Operates the electric starter ON position: Running position NOTE: The engine switch must be in the ON position to use the recoil starter. OFF Position: Stops the engine ENGINE SWITCH...
- Page 15 3. CONTROLS ROTO-STOP LEVER The ROTO-STOP lever operates the blade brake/clutch mechanism. It is used to start and stop the blade To put the blade into operation, press the button on top of the ROTO-STOP lever, then push the lever forward and hold it against the handlebar.
- Page 16 3. CONTROLS DRIVE CLUTCH LEVER (HR215HXA, HR215SXA. HR215SMA) This lever operates the clutch to drive the rear wheels that propel the mower. lb propel the mower, push the drive clutch lever forward. Release the lever to disengage the drive. RDTD-STDP NOTE: LEVER HR215SXA...
- Page 17 3. CONTROLS SHIFT LEVER (HR215SXA & HR215SMA) The shift lever selects the drive speed for the mower. Move the shift lever to select the pace at which you wish to mow. NOTE: The mower will lurch if you shift gears while drive clutch...
- Page 18 3. CONTROLS HANDLEBAR LOCKING KNOBS The handlebar locking knobs must be tightened to secure the handlebar the mowing position. These knobs can be loosened to fold the handlebar for storage or transport convenience \~--+=..--& Remove the grass bag, and place it HANDLEBAR LOCKING KNOBS on top of the engine, with the bag opening...
- Page 19 3. CONTROLS CUTTING HEIGHT ADJUSTMENT LEVERS serious injury. Stop the engine before 314 in. adjusting cutting height. (2.0 cm) l-1/4 There are six cutting height settings: (3.3 cm) 3/4 in (2.0 cm), l-1/4 in (3.3 cm), l-314 (4.5 cm) l-3/4 in (4.5 cm), 2-l/4 in (5.6 cm), 2-5/8...
- Page 20 4. ATTACHMENTS Honda HR215 mowers are provided with a grass bag as standard equipment. You can operate the mower with the grass bag (or optional hard-shell grass catcher) installed to collect the grass clippings, or with the grass bag removed...
- Page 21 4. ATTACHMENTS A hard-shell grass catcher, and a side-discharge chute, are available from authorized Honda lawn mower dealers. They attach to the cutter deck in place of the standard grass bag. HARD-SHELL GRASS CATCHER (optional) GRASS CATCHER SIDE-DISCHARGE CHUTE (optional)
- Page 22 When the blade needs sharpening or replacement, take the lawn mower to an authorized Honda lawn mower dealer. Or, if you have a torque wrench, you can remove and install the blade yourself (see page 54). Blade sharpening:...
- Page 23 5. PRE-OPERATION CHECK GRASS BAG Check that the grass bag is in good condition and not clogged. A clogged grass bag will not collect grass efficiently. When the bag needs cleaning, wash it with a garden hose, and allow it to dry thoroughly before use;...
- Page 24 5. PRE-OPERATION CHECK ENGINE OIL Check the engine oil level with the engine stopped and the mower on a level surface 1. Remove the oil filler cap, and wipe the dipstick clean. 2. Insert the dipstick into the oil filler neck, but do not screw it in.
- Page 25 5. PRE-OPERATION CHECK FUEL Fuel tank capacity: 0.26 US gal (1.0 PI Remove the filler cap and check the fuel level. Refill the tank if the fuel level is low. Refuel carefully to avoid overfilling or spilling fuel. There should be no fuel in the filler neck.
- Page 26 Never use gasoline containing more than 5% methanol, even if it has cosolvents and corrosion inhibitors. Honda does not endorse the use of fuels containing methanol, since evidence of their suitability is as yet incomplete. NOTE: Fuel system damage, or engine performance...
- Page 27 Check that the air filter is clean and in good condition. A dirty air filter will restrict air flow to the carburetor, reducing engine performance A damaged air filter will allow dirt to enter the engine, causing rapid engine wear. 1.
- Page 28 5. PRE-OPERATION CHECK HANDLEBAR HEIGHT LOCKING BOLT Check that handlebar is in a comfortable operating positon. necessary, readjust handlebar height. Loosen both left and right height adjuster locking bolts with a 12 mm wrench. Slightly loosen the lower handlebar locking knobs.
- Page 29 6. OPERATION BTAIVING THE ENGINE If you run the engine in an area that FUEL VALVE is confined, or even partially enclosed, the air can become contaminated with a dangerous amount of exhaust gas. poisonous carbon monoxide, colorless and odorless gas.
- Page 30 6. OPERATION 3. Operate the starter. NOTE: Always release the ROTO-STOP lever before starting the engine. If the blade drive is engaged, extra effort will be required to operate the starter. Self-propelled models: Always release the drive clutch lever before starting the engine.
- Page 31 6. OPERATION When the engine warms up, move the throttle lever away from the CHOKE position. Set the lever in FAST ( * ) position for mowing, or in SLOW 1 position for idling. THR WLE LEVER THROTTLE LEVER (HR215HXA, HR215SXA, (HR215PXAI HR215SMA)
- Page 32 6. OPERATION MOWER OPERAUION To mow, set the throttle lever in the FAST ( 61) position, press the button on top of the ROTO-STOP lever, then move the ROTO-STOP lever forward and hold it against the handlebar. blade will turn while the ROTO-STOP lever is held forward.
- Page 33 6. OPERATION MOWER OPERATION To propel the mower (self-propelled models), push the drive clutch lever forward (see page 14). Release the drive clutch lever to disengage the drive. To select a different drive speed, move the shift lever (see page 15). Hold the ROTO-STOP lever forward with the drive clutch lever for self-propelled mowing...
- Page 34 6. OPERATION If the mower tilts or overturns, the blade will be exposed; that will increase the risk of injury from blade contact and from thrown objects and debris. For your safety, keep all four wheels on the ground, and be careful not to lose your footing and your control of the mower.
- Page 35 6. OPERATION STOPPING THE ENGINE 1. Release the drive clutch lever (self- propelled models) and ROTO-STOP lever (all models). 2. Move the throttle lever to the STOP position. 3. HR215SMA: Turn engine switch to the OFF position. When the mower is not in use, turn the fuel valve to the...
- Page 36 If you always operate the mower at altitudes higher than 6,006 feet above sea level, have an authorized Honda lawn mower dealer perform this carburetor modification. Even with carburetor...
- Page 37 7. MOWING RECOMMENDATIONS A cutting height of l-l /4 in (3.3 cm) to 2-l /4 in (5.6 cm) is appropriate most lawns during cool weather. A higher cut may be needed to protect the lawn during hot summer months. Consult a local nursery or lawn & garden center for advice about specific types of grasses and growing conditions in your area.
- Page 38 For best results, start at the outer edges of the lawn, and work toward center in a clockwise direction. If you use the standard grass bag, or the optional hard-shell grass catcher, a clockwise mowing pattern, starting at the outer edges of the lawn, will give the best bagging performance, leaving the least amount...
-
Page 39: Mowing Recommendations
7. MOWING RECOMMENDATIONS If the grass is not very thick or tall, you can mow a wide swath, and/or you can move the shift lever (self-propelled models) to select a fast drive speed. Keep the wheels close to the swath line for maximum cutting width. -
Page 40: Transporting
8. TRANSPORTING The engine and exhaust system become hot during operation and remain hot for a while after stopping. Contact with hot engine components can cause bums and can ignite some materials. Avoid touching the engine or exhaust system for at least 15 minutes after the engine has stopped. -
Page 41: Maintenance
To avoid serious bums, let the engine cool for at least 15 minutes before performing maintenance. Use genuine Honda parts or their equivalent for maintenance and repair. Parts of lower quality may damage the mower. Maintenance... -
Page 42: Engine Oil Change
ENGINE OIL CHANGE Engine oil capacity: 0.63 US qt (0.6 PI Drain the oil while the engine is warm to assure rapid and complete draining. 1. Place a suitable container under the cutter deck to catch the used oil. NOTE: Check to be sure the drain hole in the cutter deck is not clogged. If necessary, remove grass and debris from the cutter deck. - Page 43 9. MAINTENANCE Install the oil drain bolt and tighten it securely. Fill with the recommended oil (see page 22) to the upper level on the dipstick. Do not overfill. Install the filler cap/dipstick. Wipe the cutter deck drain channel clean to reduce dirt build-up when Oli DRAIN the mower is used.
-
Page 44: Air Cleaner Service
9. MAINTENANCE AIR CLEANER SERVICE A dirty air filter will restrict air flow to the carburetor, reducing engine performance If you operate the mower in very dusty areas, clean the air filter more often than specified in the MAINTENANCE SCHEDULE. r7iEEq Operating the engine with no air filter, or a damaged air filter,... - Page 45 9. MAINTENANCE scmvs~~ COVER AIR FILTER PAPER ELEMENT AIR CLEANER COVER AIR FILTER FOAM ELEMENT AIR CLEANER SING // ‘\...
-
Page 46: Spark Plug Service
9. MAINTENANCE SPARK PLUG SERVICE Recommended spark plugs: NGK BPR5ES ND 16EPR-U CHAMPION RN12Y r--ziEg Spark plugs of the wrong heat range can cause engine damage. For good performance, the spark plug must be properly gapped and free of deposits. 1. -
Page 47: Spark Arrester Maintenance (Optional Equipment)
9. MAINTENANCE SPARK ARRESTER MAINTENANCE (optional equipment) The spark arrester must be serviced every 100 hours to keep it functioning designed. Touching the engine or exhaust system while hot can cause bums. Let the engine cool before servicing. 1. Remove the two nuts from the muffler shield, using a 10 mm wrench. -
Page 48: Roto-Stop Cable Adjustment
ROTO-STOP lever operates properly. the blade does not start or stop as it should, and lever free play is correctly adjusted, take the mower to an authorized Honda lawn mower dealer for repair. HR215SXA 81 HRilBSMA HR215HX.A HR215PXA... -
Page 49: Drive Clutch Cable Adjustment (Hr215Sxa & Hr215Sma)
Check to be sure the drive clutch engages and releases properly. If the drive clutch does not operate properly, and lever free play is correctly adjusted, take the mower to an authorized Honda lawn mower dealer for repair. 3116-318 in (5-10 mm1 DRIVE CLUTCH... - Page 50 9. MAINTENANCE HR215HXA DRIVE CLUTCH CABLE ADJUSTMENT Remove bolt from transmission cover, using an 8 mm socket wrench. Remove transmission cover. TRANSMISSION Move the gear shift lever all the way back to the slowest position. SHIFT LEVER Push the diive clutch lever all the way forward, and hold it against the handlebar.
- Page 51 Check to be sure the drive clutch lever operates properly. If the drive clutch lever does operate properly after the cable is correctly adjusted, take the mower to an authorized Honda lawn mower dealer for repair.
-
Page 52: Throttle Cable Adjustment
9. MAINTENANCE THROrrLE CABLE ADJUSTMENT When the throttle lever is moved to the CHOKE position, the carburetor choke arm should move all the way counterclockwise, as far as it will go. Push the choke arm with your finger to check that it has moved as far as it will go. -
Page 53: Shift Cable Adjustment (Hr215Sxa & Hr215Sma)
3. Start the engine and operate the shift lever. Check to be sure the transmission shifts properly. If the transmission does not shift properly, and the lever is correctly positioned, take the mower to an authorized Honda lawn mower dealer for repair. NOTE: Release the drive clutch lever before moving the shift lever. ‘ER... -
Page 54: Carburetor Adjustment
9. MAINTENANCE CARBUREl0R ADJUSTMENT Start the engine outdoors, and allow it to warm up to normal operating temperature Exhaust contains poisonous carbon monoxide, a colorless and odorless gas. Breathing exhaust can cause loss of consciousness may lead to death. To keep exhaust gas from building up, provide adequate ventilation. -
Page 55: Grass Bag Cleaning And Replacement
Replace a frayed, torn, or deteriorated bag with a Honda replacement bag or its equivalent. SAG REMOVAL 1. Pull off one of the cap nuts, using pliers. -
Page 56: Blade Removal And Installation
When the blade needs sharpening or replacement, take the lawn mower to an authorized Honda lawn mower dealer. Or, if you have a torque wrench, you can remove and install the blade yourself. Wear heavy gloves to protect your hands. Blade sharpening:... - Page 57 3. Tighten the blade bolts with a torque wrench. Use a wooden block to prevent the blade from turning when tightening the bolts. If you do not have a torque wrench, have an authorized Honda lawn mower dealer tighten the blade bolts. Blade bolt torque: 36.2-43.4 ft-lb (5.0-6.0 kg-m)
-
Page 58: Battery Charging (Hr215Sma)
9. MAINTENANCE BATTERY CHARGING (HR215SMA) The engine will automatically recharge battery when mower operated. A plug-in charger is provided for supplemental charging when mower is not operated frequently enough to keep the battery charged. Use the plug-in charger to recharge the battery once a month during seasons when you do not mow the lawn. -
Page 59: Storage
IO. STORAGE Preparation for Storage When the mower will not be used for one month or longer, proper storage preparation will help to prevent rust and corrosion, and will make it easier to start the engine when the mower is removed from storage 1. - Page 60 Limited Warranty does not cover fuel system damage or engine performance problems resulting from neglected storage preparation. Fill the fuel tank with fresh gasoline, and add a gasoline conditioner, such as HONDA FUEL STABILIZER, which is formulated to extend fuel storage life. Run the engine outdoors...
-
Page 61: Storage
10. STORAGE For storage of more than 2 months (continued): d. Disconnect the fuel line from the fuel valve, and drain the fuel tank into an approved gasoline container. Gasoline is extremely flammable, and gasoline vapor can explode, causing serious injury or de&h. Use extreme care when handling gasoline. -
Page 62: Removal From Storage
10. STORAGE handlebar be folded compact storage. Remove the grass bag, and place it on top of the engine, with the bag opening at the front of the mower. Loosen the handlebar locking knobs, spread lower ends (l -‘i handlebar, and fold the handlebar as ’... -
Page 63: Troubleshooting
Use a 1 amp replacement fuse only. If frequent fuse failure occurs, take the mower to an authorized Honda lawn mower dealer for repair. 1. Remove the two bolts from the lower control box cover, using a 10 mm wrench. - Page 64 11. TROUBLESHOOTING ENGINE CORRECTION LOSS OF POWER POSSIBLE CAUSE 1. Check under cutter Cutter deck clogged. Clean out the cutter deck (p. 35). deck. 2. Check air filter. Air filter clogged. Clean or replace air filter (p. 42). 3. Check fuel.
- Page 65 11. TROUBLESHOOTING GRASS CUTTING POOR CUT QUALITY OR POOR CUlTlNG PERFORMANCE POSSIBLE CAUSE CORRECTION 1. Check that throttle Engine speed is too slow to Move throttle lever to FAST lever is in FAST cut well. position (p. 30). 1 position. 2.
-
Page 66: Specifications
12. SPECIFICATIONS MOWER MODELS Manual starting, manually propelled; no transmission HR215PXA: Manual starting, self-propelled; hydrostatic transmission HR215HXA: Manual starting, self-propelled; mechanical transmission HR215SXA: Manual & electric stat-tino, self-propelled; mechanical transmission HR215SMA: Handlebar raised: 63.8 in (162 cm) Maximum Length Handlebar lowered: 68.5 in (174 cm) (handlebar extended) Minimum Length (handlebar folded) 35.0 in (89 cm) -
Page 69: Warranty Service
Your purchase of a Honda product is greatly appreciated by both your dealer and American Honda Motor Co., Inc. We want to assist you in every way possible to assure your complete satisfaction with your purchase. - Page 70 When you write or call, please provide the following information: • Model and serial numbers • Name of the dealer who sold the Honda power equipment to you • Name and address of the dealer who services your equipment •...
Need help?
Do you have a question about the HR215SXA and is the answer not in the manual?
Questions and answers
How to adjust the Choke-Run-Stop cable