Table of Contents
Advertisement
Advertisement
Table of Contents

Related Manuals for Honda HR214


Summary of Contents for Honda HR214
- Page 3 Indicates a possibility of personal injury or equipment damage if instructions are not followed. NOTE: Gives helpful information. If a problem should arise, of if you have any questions about the mower, consult an authorized Honda dealer. HONDA MOTOR CO., LTD. 1983, ALL RIGHTS RESERVED...
- Page 4 * The Honda rotary mower is designed to give safe and dependable service if operated according to instructions grass, and bagging cut grass when equipped with the grass bag. Any other and intended use: mowing (cutting) use could be dangerous.
-
Page 5: Table Of Contents
CONTENTS ............3 CAUTION LABEL LOCATION ........ -
Page 6: Caution Label Location
CAUTION LABEL LOCATIONS... -
Page 8: General Safety
GENERAL SAFETY * Know how to stop the engine quickly and under- * Protect yourself by wearing long trousers and stand operation of all the controls. Never permit appropriate shoes..Don’t wear loose fitting clothing anyone to operate the mower without proper in- or sandals when mowing. -
Page 9: Component Identification
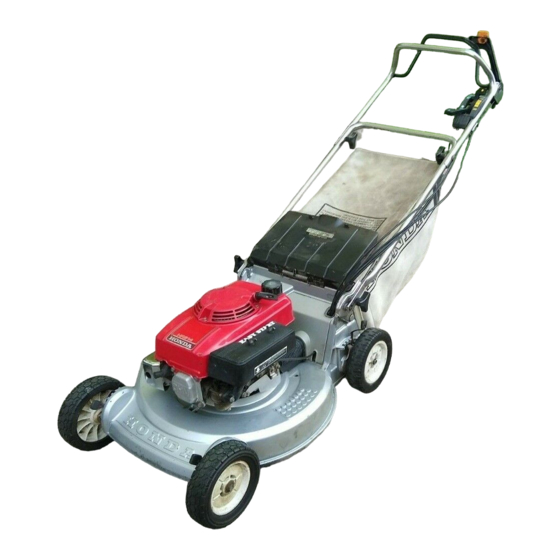
COMPONENT IDENTIFICATION ..- __._ _.. RECOIL STARTER -. ..F,T LEVER rROTO-STOP LEVER SPARK PLUG CAP---l THROTTLE LEVER MUFFLER GRASS BAG HANDLE GRASS BAG Al R CLEANER CUTTING HEIGHT ADJUSTING LEVER typeJ... - Page 10 DRIVE CLUTCH LEVER- CONTROL (SMA type oW HANDLE GRASS BAG GRIP-------- .FUEL TANK DISCHARGE GUARD HANDLE HEIGHT OIL FILLER ENGINE OIL DRAIN PLUG...
-
Page 11: Controls
CONTROLS Throttle Control Lever Throttle positions: CHOKE STOP ROTO-STOP Lever (All types) To put the cutting blade into operation, press the button on top of the ROTO-STOP lever and push the lever forward, holding it against the handlebar. The blade will stop when the ROTO-STOP lever is ROTO-STOP LEVER released. - Page 12 Drive Clutch Lever (Self-propelled type) ROTO-STQP LEVER propel the mower, push the drive clutch lever forward and hold it against the handlebar. Release the lever to disengage the drive. To propel the mower and operate the cutting blade simultaneously, push the button on top of the ROTO-STOP lever and push the ROTO-STOP lever forward, then push the drive lever forward;...
-
Page 13: Operation
Use extra care when mowing around objects to The following suggestions and rules are intended keep the blade from striking them. Never deliber- to help you operate your Honda HR214 under the ately mow over any object. safest conditions possible. Be. alert and exercise the... -
Page 14: Before You Start The Mower
Zstroke engine oil are not recommended. * Running the engine with insufficient oil can cause serious engine damage. lO(PF Use Honda-&troke, or an equivalent high deter- 40-c gent, premium quality motor oil certified to meet or exceed U.S. automobile manufacturers’ requirements... - Page 15 2. Check the fuel level. FILLER HOLE Use any regular grade automotive gasoline (unleaded gasoline is preferred) with a pump octane rating of 86 or higher. Never use an oil/gasoline mixture or dirty gasoline. Avoid getting dirt, dust or water in the fuel tank. * Gasoline is extremely flammable and esplosive under certain conditions.
- Page 16 3. Handle height adjustment HANDLE HOOK BOLT Adjust handle height for convenient m.owing. . Loosen both sides of handle hook bolts. . Swing the handle-up or down as required. . After adjusting, make sure the handle hook bolts are tightened securely. 4.
- Page 17 If you always operate the mower at altitudes higher than 6,000 feet above sea level, have your authorized Honda Rotary Mower dealer perform these carburetor modifications. Even with suitable carburetor jetting, engine horse- THROTTLE power will decrease approximately 3.5 % for each 1,...
- Page 18 3. Place your foot on the STEP of the mower hous- ing. 4. Pull the starter rope lightly until you feel resist- ance, then pull briskly. NOTE: Do not allow the rope to snap back; return it by hand. 5. After the engine warms up, move the throttle lever to HI.
- Page 19 [Electric starting-SMA type only] * Exhaust gas contains poisonous carbon monoxide. Never run the mower in an enclosed area. Be sure to provide adequate ventilation. 1. Move the throttle lever to CHOKE. NOTE: Do not use CHOKE when the engine is warm or the air temperature is high.
- Page 20 3. Turn the engine switch key to START, and hold it until engine starts. CAUTION: Do not use the electric starter for more than 5 seconds. If the engine fails to start, release the key, and wait at least 10 seconds before operat- starter again.
- Page 21 Flooded Engine If the engine won’t start after several pulls on the starter rope, the engine may be flooded. To clear a flooded engine: 1. Move the throttle lever to STOP and turn off the fuel valve. 2. Remove and dry the spark plug. When remstalling the plug, thread it in by hand until it seats.
- Page 22 Cutting Height Adjustment six settings are available: 5/8”, l”, 1 -l/2”, 2”, 2-l /2” I. Stop the engine. 2. Push the front and rear adjusting levers toward the wheels and move them or down to raise or lower cutting height. Adjust all four wheels to the same height.
- Page 23 The bag is subject to wear under normal usage; check ‘frequently for fraying and tears. Replace deteriorated bags only with Honda replacement bags or their equivalent. When the bag needscleaning, wash it with water and make sure it is dry before using it.
-
Page 24: Transporting/Storage
TRANSPORTING/STORAGE Transporting Turn the fuel valve OFF when transporting the mower. * To avoid fuel and oil spillage do not tilt the unit; ’ spilled fuel may ignite. The handle may be folded for convenience. 1. Remove the grass bag (p. 31). 2. - Page 25 Preparation for Storage The following steps should be taken to protect the mower ‘whcncvcr it will be stored for longer than 30 days. 1. Drain the fuel tank and carburetor into a suitable gasoline container: A. Disconnect the fuel tube from the carburetor and drain the fuel tank.
- Page 26 3. Pull the starter rope until resistance is felt. This closes the valves and helps to protect the com- bustion chamber from corrosion. 4. Coat areas that may rust with a light film of oil. Cover the mower and store it on a level surface in dry, dust free area.
-
Page 27: Maintenance
(SMA type only) before per- forming any maintenance. CAUTION * Use only genuine Honda parts or their equivalent for maintenance or repair. Replacement parts which are not of equivalent quality may damage the mower. - Page 28 (2) These items should be serviced by an authorized Hondadealer, unless the owner has the proper tools and is mechanically proficient. See the Honda Shop Manual. (3) For professional commercial use, log hours of operation to determine proper maintenance intervals.
- Page 29 Engine Oil Change Drain the oil while the engine is still warm to assure rapid and complete draining. 1. Remove the filler cap. 2. Remove the drain bolt, drain the oil, and retighten the bolt securely. 3. Refill to the “Upper” level mark with the recom- mended oil (see p.
- Page 30 Air Cleaner Service A dirty air cleaner will restrict air flow to the carbu- retor. To prevent carburetor malfunction, service the air cleaner frequently. 1. Remove the wing bolts and the air cleaner cover. Remove the elements and separate them. Carefully check both elements for holes or tears and replace if damaged.
- Page 31 Spark Plug BPSES, BPRSES (NCK) Standard Plug: SPARK PLUG WRENCH Wl6EP-U, Wl6EPR-U (ND) 1. Disconnect the cap and remove the spark plug. 2. Visually inspect the plug. Discard the plug if it is heavily deposited or if the insulator is cracked or chipped.
- Page 32 File both ends evenly to main- tain blade balance. BLADE NOTE: Use only a genuine HONDA replacement blade or equivalent. 4. Clean away any dirt and grass from around the blade shaft. 5. Install the blade so that the blade bolts are securely tightened to the specified torque.
- Page 33 Throttle Control Cable Adjustment SXA and SMA types PXA type CHOKE 1. With the throttle lever in the position, the carburetor choke arm should move all the way to the right, as far as it will go. Push the choke arm with your finger to check whether it is all the way to the right.
- Page 34 Drive Play (Self-propelled type only) Clutch Free 5-10 (3/16-3/8 I _ Mcasurc free play top of the lever as shown; be bctwecn S-10 mm (3/I&3/8 in). should 2. If adjustment is necessary, .looscn the lock nuts and n~ovc the adjuster or down as required.
- Page 35 ROTO-STOP Lever Free Play (All types) 1. Measure free play at tile of the fever with the 5-10 mm (3/16-3/a button pushed down, it should be between 5 - 10 mm (3/ 16 - 3/8 in). 2. If adjustment is necessary, loosen the lock nuts and move tile adjuster or down as required.
- Page 36 SHIFT Lever Free Play (Self-propelled type only) mm (3/64-l/8 1. Measure free play at the tip of the lever, it should bc I -3 nut (3/64-l/8 in). 2. If adjustment is necessary, loosen the lock nuts HIFT LEVER and turn them to run the adjuster up or down as required.
- Page 37 Spark Arrester Maintenance (Optional Part) MUFFLER (Optional part) been the mower running, the muffler will SPARK ARRESTER very Allow it to cool before proceeding. hot. (Optional part) I. Remove the two 6mm nuts and remove the muffler protector, identification plate, muffler and gasket. 6 mm 2.
- Page 38 Carburetor Adjustment the engine and allow it to warm up to normal 1. Start operating temperature. 2. Place the throttle lever in the LO position. 3. Turn the pilot screw in or out to the setting that produces the highest idle rpm. The correct setting will usually be approximately 3 turns out from the fully closed position.
- Page 39 Grass Bag Assembly Insert the bag frame into the grass bag as shown. 2. Hook the plastic edges of the grass bag onto the frame.
- Page 40 Battery Charging (SMA type only) The battery will automatically recharge while the mower is operated. A plug-in charger is provided for supplemental charging if the mower is not oper- ated frequently enough to keep the battery charged. Use the plug-in charger to recharge the battery after prolonged storage, or whenever you notice a de- crease in starter motor speed.
-
Page 41: Troubleshooting
TROUBLESHOOTING 1. No fuel. Engine will not start 2. Throttle lever in STOP position. 3. Spark plug wire loose or disconnected. 4. Spark plug faulty or improperly gapped (p. 29). 5. Engine flooded (p. 19). 6. Dirty air cleaner (p. 28). 7. -
Page 42: Specifications
SPECIFICATIONS MODEL HR214 ENGINE cxv120 Engine type Overhead valve, single-cylinder, forced air-cooled, four-stroke gasoline Displacemcnt/Borc and stroke 118 cm3 (7.2 CLI in)/60 42 mm (2.4 Ignition timing 25” 5 27” BTDC Ignition system Transistor magneto ignition Engine oil capacity 0.6 P (0.63 US qt, 0.53 Imp qt) --- .- Fuel tank capacity 1 .O P (0.26 US gal, 0.22 Imp gal) -
Page 43: Wiringdiagram
WIRING DIAGRAM SMA TYPE ONLY - ______ -_-------- ALL TYPES ______ ----- ---- _________ -------- I---- ----- ____________ -__---_---- ____________ --------2L-------- BLACK WHITE... - Page 44 WARRANTY SERVICE Owner Satisfaction Your satisfaction and goodwill are important to your dealer and to us. All Honda warranty details are explained in the Distributor’s Limited Warranty.Normally, any problems concerning the product will be handled by your dealer’s service dapartment.
- Page 45 When you write or call, please provide the following information: • Model and serial numbers • Name of the dealer who sold the Honda power equipment to you • Name and address of the dealer who services your equipment •...
- Page 46 MEMO...
- Page 47 MEMO...
Need help?
Do you have a question about the HR214 and is the answer not in the manual?
Questions and answers
Ma tondeuse hr214 consomme de l’huile au départ
Mower HR214 stalls when pushing black leaver up to operate blade
My HR214 mower starts and runs but the blades aren't turning. How do I fix it?