Table of Contents
Advertisement
Available languages
Available languages
Operator's
Manual
CR FT M N o
LAWN TRACTOR
17.5 HP,*30" Mower
Electric Start
Automatic Transmission
Model No.
917.28033
o EspaSol, pg. 35
This product
has a low emission
engine
which
operates
differently
from
previously
built
engine s . Before
you
start
the
engine,
read and understand
this Owner,s
Manual.
IMPORTANT:
............
Read and follow all Safety
Rules and Instructions before
operating this equipment.
For answers
to your questions
about this. product,
Call:
1 = 800 -659 = 5917
Sears Craftsman
Help Line
5 am - 5 pro, Mon- Sat
SEARS,
ROEBUCK
AND CO. HOFFMAN
ESTATES,
IL 60179
U.S.A.
Visit our Craftsman
website:wwwosears,com/craftsman
*Ae rated by the engine manufaclurer
Advertisement
Table of Contents

Related Manuals for Craftsman 917.28033


Summary of Contents for Craftsman 917.28033
- Page 1 1 = 800 -659 = 5917 Rules and Instructions before Sears Craftsman Help Line operating this equipment. 5 am - 5 pro, Mon- Sat SEARS, ROEBUCK AND CO. HOFFMAN ESTATES, IL 60179 U.S.A. Visit our Craftsman website:wwwosears,com/craftsman *Ae rated by the engine manufaclurer...
-
Page 2: Limited Warranty
Storage ..........Assembly/Pre - Operation ....... Troubleshooting ........Operation ..........Sears Service ......Back Cover Maintenance Schedule ......19 CRAFTSMAN LIMITED WARRANTY TWO YEARS ON TRACTOR When operated and maintained according to all supplied instructions, if this tractor fails due to a defect... - Page 3 _DANGER: This cutting machine is capable of ampLItating hands and feet and throwing objects. Failure to observe the fol!owing safety ,instructions could result in serious injury or death. INever dire_tldischaroed material toward _WARNING: In order to prevent accidental !anyone. /_oid discharging material starting when setting up, transporting,...
-
Page 4: Operation
IDENTIFICA Yea la seccil PROBLEI_ !t, SLOPE OPERATION Never carry children, even with blades shut off. They may fall off and be Slopes are a major factor related to loss of P#rdida de seriously injured or interfere with safe continuadc control and tip - over accidents, which can machine... - Page 5 _rvicioSears. Keep maclfine4_ free of grass, leaves, Remove gas- powered equipment from combustible, the truck or trailer and refuel it on the other debris build - up. Clean oit or fue! AREL ground, if this is not possible, then refuel spillage and remove anyfuel- soaked de- ,nde...
-
Page 6: Specifications
1o50 Gallons Congratulations on making a smart purchase. lnmediatame and ]_jpe: Unleaded Regular macenamien Your new Craftsman@ product is designed Oil Type SAE 30 (above 32°F) tractor no se and manufactured for years of dependable API - SG - SL): SAE 5W30 (below 32°F... - Page 7 hufable de 30 :lor del fusible ....i ..O DEL CAPO Steering Wheel Bagger dambre de las arre el cap6 en _cia el motor y asegerese de Jel alambre de (6) 1/4 x 20 x 1,15 (8) t/4 x 20 x 1.25" Shoulder Bolts Carriage Bolts Steering...
- Page 8 CONTROLAI Si el tractor _ pararse a un_ Your new tractor has been assembled at the factory with the exception of those parts left mAs alto en u unassembled for shipping purposes° To ensure safe and proper operation of your tractor seco o pavirn_ al! parts and hardware you assemble...
- Page 9 TO ASSEMBLE BAGGER ransmisi6n y la rdacorreas. Seat Do not operate machine without acionario (A) y switch entire grass catcher, or other safety devices in place and working. tral (C)., • Feed top bagger frame tube (1)through oia la parte de loop (2) atthetop of bagger fabric (leave Slot...
- Page 10 PARA NIVEL • Lay bagger cover upside - down (leave Aseg_rese de protective covering intact),. ta PSI que se i Slide bagger handle insert into inflados o poc depression on inside of bagger cover,. bien cortado, Make sure tabs at the la SEGADOR lock into place with the bagger cover.
- Page 11 Jela piezade INSTALL BAGGER FULL LEVER/ encuentra e n PADD_LE _ra(H),y fijelo " Before installation, tractor engine must ' unresorte de be shut off and parking brake engaged. • Standing behind tractor with bagger removed from backplate (I), identify the bag full switch (2) area.. _.iiI _'L.
- Page 12 CHECK TIRE PRESSURE _#fCHECKLIST The tires on your tractor were overinflated at the factory for shipping purposes. Correct Before you operate your new tractor, tire pressure is important for best cutting wish to assure that you receive the best ADVER'I performance, ClO O D performance...
- Page 13 or corroido y el aquipado) pues dio y!o dafios. These symbols may appear on your tractor or in literature supplied with the product, Learn and understand their meaning. , de cada tem- ada 100 horas tero. El tipo de arecen en "ES- JCTO"...
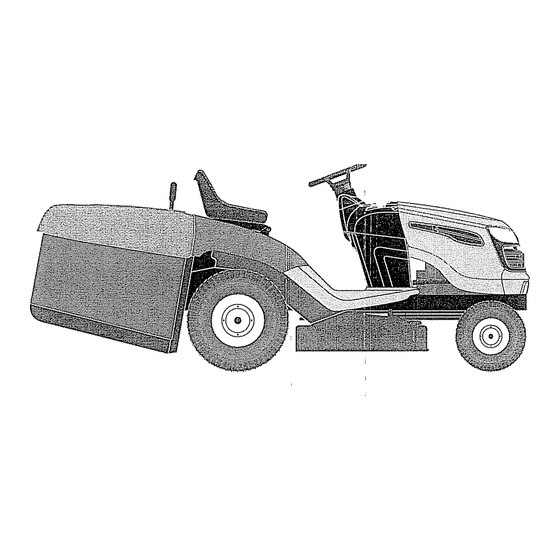
- Page 14 BATERiA KNOW YOUR TRACTOR Su tractor cue READ THIS OWNER'S MANUAL AND SAFETY RULES BEFORE OPERATING YOUR bateria que e_ TRACTOR embargo, si s_ Compare the illustrations with your tractor to familiarize yourself with the locations con un carga( su duraci6n. various controls and adjustments.
- Page 15 ,]IENTO ATR,&,S The operation of any tractor can result in foreign objects thrown into the eyes, which can result in severe eye damage. Always wear safety "ha con et inte- glasses or eye shields while operating your tractor or performing motor "ON"...
- Page 16 TO ADJUST MOWER CUTTING HEIGHT REVERSE OPERATION SYSTEM (ROS) The position of the attachment lift lever (A) Your tractor is equipped with a Reverse determines the cutting height+ Operation System (ROS). Any attempt PRO(;. the operator to travel in the reverse direction MANTI with the attachment clutch engaged will shut...
-
Page 17: Starting The Engine
BEFORE STARTING THE ENGINE TO TRANSPORT When pushing or towing your tractor, CHECK ENGINE OIL LEVEL sure to disengage transmission by placing The engine in your tractor has been shipped, freewheel control in freewheeling position° from the factory, already filled with summer Freewheel control is located atthe of tractor, weight oil. - Page 18 PARA HACI TO START ENGINE NOTE: If at a high altitude (above 3000 AI hacer arran feet) or in cold temperatures (below 32 F) When starting the engine for the first time or se ha acabadc the carburetor fuel mixture may need to be if the engine has run out of fuel, it will take itar&...
-
Page 19: Lubrication Chart
CAR EL MO- DE[. MOTOR tviado desde la MAINTENANCE EVERY EVERY EVERY EVERY BEFORE BEFORE EVERY d para verano,, SEASON STORAGE SCHEDULE EACH HOURS HOURS HOURS HOURS 3n el tractor en Check Brake Operation dora de nivel de Check Tire Pressure ./6/ ,uelva a inserter Check.Operail:)_"... - Page 20 PARA AJUS'f TRACTOR CHECK REVERSE OPERATION (ROS) LA SEGADOI SYSTEM Always observe safety rules when performing La posiciSn de any maintenance,. " Whentheengineis runningwiththe ignition a qu6 altura s, BRAKE OPERATION switch in the engine "ON" position and the attachment clutch engaged, any attempt if tractor...
- Page 21 BATTERY ENGINE tos extrafios 'four tractor has a battery charging system LUBRICATION Siempre use which is sufficient for normal use. However, ._resu tractor Only use high quality detergent oil rated with periodic charging of the battery with an au- : seguridad API service classification SG-SL...
- Page 22 MUFFLER FAMILIARtC Unlock drain valve by pushing inward slightly and turning counterclockwise. LEA ESTE f_tb Inspect and replace corroded muffler To open, pull out on the drain valve. spark arrester (if equipped) as it could create SU TRACTOF After oil has drained completely, close and a fire hazard and/or damage.
- Page 23 n elproducto, WARNING: SERVICE OR ADJUSTMENTS: TO AVOID SERIOUS INJURY, BEFORE PERFORMING 1. Depress brake pedal fully and set parking brake. Place motion control lever in neutral position. Place attachment clutch in "DISENGAGED" position. 4. Turn ignition key to "STOP" and remove key.
- Page 24 3. A'I-FACH MOWER SIDE SUSPENSION Insert end of link (E) into hole in front REVISION ARMS (A) TO CHASSIS - Position hole mower bracket (H) and secure with LLANTAS in arm over pin (B) on outside of tractor washer and retainer spring (J) o Las ]lantas e...
- Page 25 • i; ii i> ;OIVlPLETO TO LEVEL MOWER FRONT-TO-BACK ADJUSTMENT _ i! Make sure tires are properly inflated to the IMPOR'fANT: Deck must be level side - to _ciso detener e l PSI shown on tires° If tires are over or under enodeestacio- inflated, it may affect the appearance...
- Page 26 TO REPLACE MOWER BLADE DRIVE BELT TO REPLACE MOTION DRIVE BELT • Co!oque la (con la cuL The mower blade drive belt may be replaced Park the tractor on level surface. Engage • Deslice la without tools. Park the tractor on level sur- parking brake,...
- Page 27 TO REMOVE WHEEL FOR REPAIRS Block up axle securely. a sin el captador Remove axle cover, retaining ring and lsitivos de segu- Weak or _ Fully ,s condiciones. washers to allow wheel removal (rear Dead [[_] E_]l Charged )r superior de la wheels have a square key - Do not lose).
- Page 28 TO REPLACE HEADLIGHT BULB TRANSMISSION 1_ Raise hoo& R E MOVAL/R EP LACEM ENT Remove bulb hotderfrom the hole in the Su tractor nue_ Should your transmission require removal for backside of the grill tado por razon service or replacement, it should be purged Replace...
- Page 29 Immediately prepare your tractor for storage - Empty the fuel tank by starting the engine at the end of the season or if the tractor will and letting it run until the fuel lines and not be used for 30 days or more. carburetor are empty.
-
Page 30: Troubleshooting
TROUBLESHOOTING CHART: ESPECIFIC_ See appropriate section in manual unless directed to Sears service center Capacidad y" de gasoline: PROBLEM CAUSE CORRECTION Tipo de Aceit_ (APt _ SG - Sl Out of fuel, Will not start Fill fuel tank_ Capacidad dE See "TO START ENGINE"... - Page 31 TROUBLESHOOTING CHART: See appropriate section in manual unlessdirected to. Sears service center d sonafiladas. PROBLEM CORRECTION CAUSE ;uantes y porter e hacen opera- Weak or dead battery, Recharge or replace battery. Engine clicks but will not start Ifreno frecuent- Corroded battery terminals, Clean batter'] terminals.
- Page 32 TROUBLESHOOTING CHART: See appropriate section in manual unless directed to Sears service center • Escoger modo que n, PROBLEM CAUSE CORRECTION estando • No cortar la I Poor cut - uneven Worn, bent or loose blade_ Replace blade, Tighten blade boll perder tracc cutting Mower deck not level.
- Page 33 TROUBLESHOOTING CHART: appropriate section in manual unless directed to Sears service center tes y de lanzar CAUSE CORRECTION ieden producir _ROBLEM Bad battery cell(s). Replace battery, Battery will not sin el captador charge sitivos de segu- Poor cable connections. Check/clean all connections. condiciones.
- Page 34 Garantia ... Reglas de Sec Especificacion Montaje/Pre 0 Operaci6n ..Mantenimientc GARANTJA DOS A_OS Si opera y ma debido a defec compra, comu Durante et pri_ servicio de ga_ disponible lue,( Si usted tran_ cancelar_.n. P_ 90 DJAS PAl Si la bateria qL (nuestras prue la fecha de co_ EslEa garantia ,_...
- Page 35 Si usted transporta el tractor a un lugar de entrega autorizado de Craftsman, estos gastos se cancelar&n. Para Iocatizar el lugar autorizado mb, s cercano, comuniquese al 1-800-4-MY-HOME®.
- Page 36 TROUBLE_ See approl _PELIGRO:Esta Maquina cortadora es capaz de amputar las manosy los pies y de lanzar objetos° si no se observan las instrucciones seguridad siguientes se pueden producir PROBLEM lesiones graves o la muerteo Battery will _ADVERTENClA: Siempre desconecte •...
- Page 37 ;vice center • Seguir las recomendaciones del productor con • Escoger una vefocidad de marcha baja de modo que no sea necesario pararse o cambiar respecto a los limites del equipo por remolcar estando en una pendiente,, y el remolque en pendientes. •...
- Page 38 TROUBLE, € See appro! • Mantener l amb, q uinalibrede hierba,hojas • Las cuchillas del cortac_sped son afiladas, u otros residuesacumulados. L impiar Envolver la cuchilla, ponerse guantes y poner salpicaduras de aceite o carburante y quitar fa m&xima atenci6n cuando se hacen opera- Engine clic clones en e!laso...
-
Page 39: Especificaciones
ACUERDOS DE PROTECCI0N PARA ESPECIFICACIONES DEL PRODUCTO LA REPARACION rvice center Capacidad y Tipo 1.5 Gatones (5,68 L) Congratulacione,_ por su buena compr& de gasotina: Regular Sin Ptomo nuevo productd ,Craftsman_J est#, diseSado y fabricado para funcionar de modo liable pot Tipo de Aceite: SAE 30 (Sobre 32°F/0°C) muchos a6oso Pero como todos los productos,... - Page 40 Immediately at the end of Volante de direcci6n Contenedor not be used _WARNIN( gasoline in t] fumes may r © Allow the en any enclosur TRACTOR (8) 1!f_ X 20 ;<,! _25'I..(6)_.1/_x 20 x I, 15 When tracto Perno cabeza redondo Perno hexagonal lnserto del Volante...
- Page 41 ire removal for Su tractor nuevo ha side montado en la f&brica con la excepci6n de aquellas partes que no se han morn tado per razones de envio. Para asegurarse que su tractor funcione en fornqa adecuada y segura todas uld be purged las partes y los articulos de ferreterfa que se monten tienen que ser apretados en forma segura°...
- Page 42 PARA MONTAR EL CONTENEDOR TO REMOVI Block up No hacer funcionar la mfiquina sin et captador Remove de hierba entera u otros dispositivos de segu- ridad en su lugar yen buenas condiciones. washers wheels h_ lntroduzca el tubo del bastidor superior de la ensacadora (I) porta argolla (2) situada en la Repair tit parle superior det tejido de la ensacadora (deje...
- Page 43 LVE BELT • Coloque ta tapa de la ensacadora del rev_s • Introduzca dos pasadores hexagonales de 1/4 (16) a trav6s de los orificios de la parte (con la cubierta protectora inlacta), _face. E ngage superior del bastidor frontal de la ensacadora 3e, there is a •...
- Page 44 PARA INSTALAR EL BRAZO COMPLETO TO LEVEL CON PALETA Make sure til PSI shown ol • Antes de la instalaci6n es preciso detener el inflated, it ma motor de! tractor y porter el freno de estacio- namiento. lawn and lea •...
- Page 45 , hole in front secure with REVISION DE LA PRESION LISTA DE REVISION LLANTAS g (4. Antes de operar y de disfrutar de su tractor nuevo, Las llantas en su unidad fueron infladas de- le deseamos que reciba el mejor rendimiento y la masiado en la f&brica por razones de envio_ La mayor satisfaccion de este producto de catidad.
- Page 46 Estos sfmbobs pueden aparecer sobre sutractor o enlaliteratura p roporcionada conelproducto_ Aprenda y comprenda sussignificados.. WARI SER'v Io De 2. PI_ 3o PI_ 4. Tu MAROHA NEUTRO ALTO BAJO ESTRANGULAClON R/_PIDO LENTO 1NTERRUPTOR ATR,_,S DE IGNICION 6o Di_ TO REMOVl 1.
- Page 47 FAMILIARICESE CON SU TRACTOR d muffler and LEA ESTE MANUAL DEL DUENO Y LAS REGLAS DE SEGURIDAD ANTES DE OPERAR it could create SU TRACTOR Compare las ilustraciones con su tractor para famitiarizarse con las ubicaciones de los diversos controles y ajuste& Guarde este manual para referencia en el future. _linningofeach / I00 hours of rst, Spark plug...
- Page 48 BATTERY La oPe;aci6nde"c,aiquier tractor puede hacer que saiten objetos extra_os" Your tractor _'-_J_E "_ dentro de sus ojos, Io que puede producir daSos graves en _stos. Siempre use which is suffi anteojos de seguridad o protecciones para los ojos mientras opere su tractor periodic cha_ o cuando haga ajustes o reparaciones.
- Page 49 PARA AJUSTAR LA ALTURA DE CORTE DE PARA PARAR LAS CUCHILLAS DE LA _TION(ROS) SEGADORA LA SEGADORA 1. Desenganche el control del embrague def La posici6n de tapalanca elevadora (A) determina fiththe ignition accesorio° ' a qu6 altura se cortarb, el c#sped. _sition and the 41_PRECAUCl6N: No hacer...
- Page 50 PARA OPERAREN CERROS ANTES DE HACER ARRANCAR EL MO- ,_ADVERTENCIA: No maneje hacia ardba o ha- cia abajo en cerros con pendientes superiores a REVISE EL NIVEL DE ACEITE DEL MOTOR ! 5 ° y no maneje atravesando ninguna pendienteo El motor en su tractor ha side enviado desde la MAIN'_ Utilice la guia de ta pendiente proporcionada en...
- Page 51 CALENTAMIENTO PARA LA TRANSMISION (above 3000 PARA HACER ARRANCAR EL MOTOR AUTOMATtCA (below32 F) AI hacer arrancar el motor por la primera vez o si se ha acabado el combustible del motor, se neces- Antes de conducir la unidad en un tiempo frio, la ._y need to be transmisi6n debe ser catentada como tas instruc- itar&...
- Page 52 PURGARLA TRANSMISION TO TRANSf _PRECAUCl6N:Nuncaenganche o desen- When pushi sure to disel ganchela palanca del controlde ruedalibre cuando elmotor estafuncionando_ freewheel Freewheel Paraasegurar l a operaci6n y ejecuci6n adec- Raise att_ uada, e s recomendado que la transmisi6n sea Pullfreev purgada antes de operar el tractor para Ja prim- era vez..
- Page 53 i ¸ ,l i rEM (ROS) h a Reverse ly attempt ..CA_A _ PROGRAMA D E CAOA C^aA ANTES CADA CADA erse direction AU_ACENAt#IENTO MANTENIMIENTO c,_Da u sa ;2_ r HORAS T_EMPORADA HORA£ HORAS HORAS aged will shut key is placed V6flll_z le cammande de pT_se_c_...
- Page 54 Vl_RIFIISZ SISTEMA F U NC IONAM lENTO ATRAS TRACTOR (ROS) Siempre o bserve l asreglas deseguridad c uando • Cuando el motor est&enmaroha c onelinte- d#mantenimiento.. rruptor d ellave enposici6n d emotor " ON" y el OPERACI6N DELFRENO embrague delaccesorio c onectado, cualquier Si eltractor n ecesita m &sdecinco(5)piespara tentativa d eloperador deviajar marcha atr#,s, detenerse alam&xima velocidad alcambio m &s a lto...
- Page 55 BATERiA MOTOR Su tractor cuenta con un sistema de carga de la LUBRICACION _,TING YOUR bateria que es suficiente para el uso normal_ Sin Use solamente aceite de detergente de alta calidad embargo, si se carga la bateria peri6dicamente, clasificado con la clasificaci6n SG-SL de servicio "ationsof con un cargador de autom6viles, se prolongarA API.
- Page 56 3, Abrafav&lvula d edesagtJe empujando hacia SILENClADOR dentro ydando vueltaa laizquierda, Inspeccione y cambie el silenciador corroido y el 4. Paraabrirse, t ire haciafuerala v&lvufa de amortiguador de chispas (si viene equipado) pues desag_e. pueden crear un petigro de incendio y/o dahoso These syrnb 5.
- Page 57 w tractor, .=ive the best ADVERTENCtA:PARA EVITAR LESIONES SERIAS, ANTES DE DAR CUALQUIER SERVI- CiO O DE HACER AJUSTES: 3n from this 1. Presione el pedal del freno completarnente y aptique el freno de estacionamientoo 24 Ponga la palanca de control de rnovimiento en la posici6n de neutro. qecklist: Ponga el embrague det accesorio en la posiciSn desenganchado (DISENGAGED),, Ponga la Ilave de ignici6n en la posici6n de apagado (STOP) y remu6vala,,...
- Page 58 FIJE LOS BRAZOS DE SUSPENSION Introduzca el otro extremo de la pieza de LATERALES DE LA CORTADORA (A) AL uni6n (E) en el orificio que se encuentra en la barra anterior de la cortadora (H), y fiielo CHAStS - Ubique el orificio del brazo encima de la cIavija (B) que hay en la parte exterior por medio de una arandeta y un resorte de del chasis del tractor;...
- Page 59 PARA NIVELAR LA SEGADORA 5_ Vuelva a verificar las medidas y ajuste nueva- Asegt_rese de que los neumb,tices est6n inflados a imente, en co'so necesario, hasta que ambos lados quedenlmguales,. la PSI que se indica en estos Si est&n demasiado AJUSTE DE DELANTE A ATRAS inflados o poco inflados, el c6sped no le quedar&...
- Page 60 PARA CAMBIAR LA CUCHILLA DEL NOTE: Observe toda la correa de transmisi6n y la SEGADORA posici6n de todas tas gu[as y guardacorreas. La correa de impulsi6n de ta cuchita segadora Retire la correa del pi56n estacionario (A) y se puede cambiar sin herramientas. Estacione el del pi56n de embrague (B)..
-
Page 61: Control D Elfreno
CONTROLAR YAJUSTAR EL FRENO PARA HACER ARRANCAR EL MOTOR CON Si el tractorexigem&sde cinco(5) piespara UNA BATERiA BAJA pararse a unavelocidad m&s alia enetcambio _ADVERTENClA: Las baterias de _.cido - plo- m_saltoenunasuperficie n ivelada d ehormig6n mo generan gases explosivos, Mantenga las secoo pavimentada, entonces s edebe controlar chispas, las llamas y los materiales para fumar... - Page 62 REEMPLAZAR LA BATERIA PARA CAMBIAR EL FUSIBLE C&mbielo por un fusible tipo enchufable de 30 ,4qk ADVERTENClA: No haga cortocircuito con los amps, tipo automotriz, El sujetador del fusible terminales de la bateria al permitir que una Ilave est& ubicado detr&s del tableroo de tuerca o cualquier otro objeto entre en contacto PARA REMOVER EL CONJUNTO DEL CAPO con ambos terminales a ]a misma vez..
-
Page 63: Aceite Del Motor
Inmediatamente prepare su tractorparael al- • Vaciar el dep6s'ito del carburante poniendo en macenamiento at finalde la temporada o si el marcha el motor y dejb.ndolo funcionar hasta tractor n osevaa usarpor30diaso rob.so que el carburante termine el carburador est_ _ADVERTENCIA: N unca aimacene el tractor vacio, congasolina e nelestanque d entro deunedificio... - Page 64 IDENTIFICACION DE PROBLEMAS: Vea la seccibn apropiada en el manual a menos que est6 dirigido a un centre de servicio Sears. PROBLEMA CAUSA CORRECCION No arranca 1, Sin combustible, I_ Llene el estanque de combustible, 2, Yea "PARA ARRANCAR EL 2, Motor sin la MOTOR"...
-
Page 65: Identificacion De Problemas
IDENTIFICACION DE PROBLEMAS: Vea la secci6n apropiada en el manual a menos que est_ dirigido a un centro de servicio Sears, PROBLEMA CAUSA CORRECCt6N 7, camille el filtro de combustible. P6rdtda de fuerza 7,, Filtro de combustible sucio, 8o Combustible rancio o sucioo 8. - Page 66 IDENTIFICACiON DE PROBLEMAS: Vea la secci6n apropiada en el manual a menos que est_ dirigido a un centro de servicio Sears. PROBLEMA CAUSA CORRECCION 1, Velocidad del motor muy lenta, 1, Ponga el control de I_ aceleraci6n Mala descarga del c_sped ..
- Page 67 _-=_ _ _. = i " g_z= ;:_3r" O.r- _m-,n...
-
Page 68: Need More Help
Opera NEED MORE HELP? L _ Z: You'll find the answez and more oil managemyhome.cem - for free! . Find this and afl your other product manuals on[ine, Get answers From our team of home experts. • Get a personalized maintenance plan for your home, •...
Need help?
Do you have a question about the 917.28033 and is the answer not in the manual?
Questions and answers