Table of Contents
Advertisement
Available languages
Available languages
Quick Links
Operator's Manual
IIIIIIIIIII I
(RRFT$1VlRN °
LAWN
TRACTOR
26.0 HP,*54" Mower
Electric Start
Automatic Transmission
Model
No.
917.28867
• EspaAol, p. 37
_
This product has a low emission engine which operates
differently from previously built engines. Before you start the
engine, read and understand this Owner's Manual.
IMPORTANT:
For answers to your questions
Read and follow all Safety
about this
product, Call:
Rules and Instructions
before
1-800-659-5917
Sears Craftsman Help Line
operating
this equipment.
5 am - 5 pro, Mon - Sat
Gasoline
containing
up to 10% ethanol
(El0)
is acceptable
for use in this machine,
The use of any gasoline
exceeding
10% ethanol
(El 0) will void the product
warranty.
Esta maquina
puede
utilizar
gaeolina
con un contenido
de hasta
el t0%
de etanol
(El0).
Et uso de una gasolina
que supere
el 10% de etanoI
(El0)
anular_
la garantia
del producto.
Sears Brands Management
Corporation,
Hoffman Estates, IL 60179 U,S.A,
Visit our Craftsman website:www, sears.comicraftsman
-As rated
bytheengine
m anufacturer
440410 Rev. 1
Advertisement
Table of Contents
Troubleshooting

Subscribe to Our Youtube Channel
Related Manuals for Craftsman 917.288670


Summary of Contents for Craftsman 917.288670
- Page 1 (El0). Et uso de una gasolina que supere el 10% de etanoI (El0) anular_ la garantia del producto. Sears Brands Management Corporation, Hoffman Estates, IL 60179 U,S.A, Visit our Craftsman website:www, sears.comicraftsman bytheengine -As rated m anufacturer 440410 Rev. 1...
- Page 2 AssemblyiP re-Operation ......Troubleshooting ........Operation ..........Sears Service ......Back Cover Maintenance Schedule ......Craftsman Riding Equipment Warranty CRAFTSMAN FULL WARRANTY FOR THREE YEARS from the date of purchase, atl non-expendable parts of this riding equipment are warranted against...
- Page 3 _kDANGER: This cutting machine is capable of amputating hands and feet and throwing objects, Failure to observe the following safety instructions could result in serious injury or death. _WARNING: In orderto preventacciden- Never direct discharged material toward tal starting when setting up, transporting, anyone.
- Page 4 !1, S LOPE OPERATION Never carry children, even with Slopes are a maior factor related toloss of blades shut off. They may fal! off and control andt_p-over accidents, which c an be seriously injured or interfere with safe result insevere Hljury ordeath. O peration machine operation.
-
Page 5: General Service
Keep t henozzle i ncontact with therim If you strike a foreign object, stop and ofthe fuel t ank orcontainer opening at inspect the machine. Repair, if necessary, all t imes u ntil fuehng iscomplete. Do not before restarting. useanozzle l ock-open devrce. - Page 6 PROTECTION AGREEMENTS Gasoline Capacity 4 Gallons Congratulations on maktng a smart purchase. and -_Tpe: Unleaded Regular ','our new Craftsman,_ product is designed Oil Type SAE 10W30(above 32°F) and manufactured for years of dependable API-SG-SL) SAE 5W30(betow 32C"F) operation. But like all products, it may require...
- Page 7 Mower Mower Front Wheel © (2) Rear " (5) 1-3/16 Lift Link (1) Shoulder Bolt (1) 1-t/40,D. O.D. Washers Assemblies Washer (1) Small !_ Retainer Springs (1) Front "-:, Lift Link "',_- (1) 3/8-16 Assembly "_" (1) Wheel Locknut Retainer Springs Slope Sheet (1) Oil Drain Tube...
- Page 8 Your new tractor has been assembled at the factory with exception of those parts left unassembled for shipping purposes, To ensure safe and proper operation of your tractor aN parts and hardware you assemble must be tightened securely. Use the correct tools as necessary to ensure proper tightness.
- Page 9 TO INSTALL MOWER 2. Assemble front gauge wheel ON) to front of mower. 1. Set parking brake lever lower attachment lift lever • Depress clutch/brake pedal all the way down and hold, Pull parking brake lever up and hold, release pressure from clutch/brake pedal, then release parking brake lever.
- Page 10 4. Slide mower under tractor. Pivot the integrated washer end of anti- sway bar (S) towards mower deck bracket Bnng belt forward and check belt for on nght side of mower. Insert integrated proper routing in all mower pulley grooves. washer end of bar into hole in rear mower NOTE.
- Page 11 InstalIBeltOn EngineClutch Pulley (M) Disengage belt tension (K) from locking bracket (L). • Install belt onto engine clutch pulley (M). IMPORTANT: Check belt for proper rout- ing in all mower pulley grooves and under mandrel covers. Rear Lift Link(S) D. R_ght Side Rear Mower Bracket U.
- Page 12 CHECK TIRE PRESSURE I#/CHECKLIST The tires on your tractor were over-_nflated Before you operate your new tractor, we at the factory for sh;pping purposes, Correct wish to assure that you receive the best tire pressure _s _mportant for best cutting performance satisfaction from...
- Page 13 These symbols may appear on your tractor or In literature supplied with the product. Learn and understand their meaning. I',,I REVE.RSE NEUTRAL HIGH CHOKE FAST SLOW [GNIT1ON SWITCH I.II.I E_GINE REVERSE ENGINE ENGINE START PARKING BRAKE MOWER HEIGHT MOWER LIFT OPERATION SYSTEM (ROS)
-
Page 14: Operation
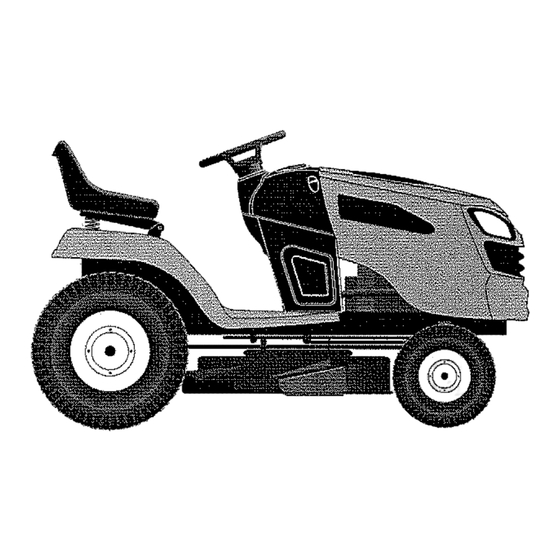
KNOW YOUR TRACTOR READ THIS OWNER'S MANUAL AND SAFETY RULES BEFORE OPERATING YOUR TRACTOR Compare the illustrations with your tractor to fam=lianze yourself with the locations various controls and adjustments. Save th_s manual for future reference. Our tractors conform to the applicable safety standards of the American... - Page 15 The operation ofany tractor canresult inforeign o bjects thrown into the eyes, whtch c anresult insevere eye damage, Always wear s afety g lasses oreye shields while operating your t ractor orperforming any adjustments orrepairs. Werecommend standard safety glasses orawide vision s afety mask w orn over s pectacles.
- Page 16 TO MOVE FORWARD AND BACKWARD The cueing height range is approximately 1" to 4". The heights are measured from the The d_rect{on and speed of movement ground to the blade tip with the engine not run- controlled by the forward and reverse dnve ning.
-
Page 17: Reverse Operation
TO STOP MOWER BLADES TO OPERATE ON HILLS ,_WARNING: Do not drive up or down Disengage attachment clutch control. hills with slopes greater than 15 ° and do not h_CAUTION: Do not operate the mower drive across any slope. Use the slope guide w_thout either the entire grass catcher, provided at the back of this manual. - Page 18 SERVICE REMINDER/HOUR METER CAUTION' Alcohol blended fuels (called Service reminder shows the tota{ number gasohol or using ethanol or methanol) of hours the engine has run and flashes to attract moisture whtch leads to separation indicate that the engine or mower needs ser- and formatlo n of acids d urt ng storage.
- Page 19 PURGE TRANSMISSION 6. Insert key rnto ignition and turn key clockwise to start position and release d_LCAUTION: Never engage or disengage key as soon as engine starts. Do not run freewheel lever while the engtne Is running. starter continuously for more than fifteen seconds per minute.
-
Page 20: Mowing Tips
MOWING TIPS Tire chains cannot be used when mower housing is attached to tractor. • Mower should be properly leveled for best mowing performance. See "TO LEVEL MOWER HOUSING" in the Service Adjustments section of this manual. • The left hand side of mower should used for trimming. -
Page 21: Maintenance Schedule
EVERY EVER"/ E.VERY MAINTENANCE BEFORE EVERY 8_EFORE E3#ERY SEASON STORAGE E_GH SCHEDULE HOURS I'_OURS I-tOURS HOURS Check Brake Ope_at_en Check T_re Pressure V" Presence"&" Check Operator System.-. v" v" Check Loose Fasteners C" CheckJReptace M_wer B_ages Lubf_catlon Cb3rt Check Battery, Level v"... - Page 22 TRACTOR CHECK REVERSE OPERATION (ROS) SYSTEM Always observe safety rules when performing any maintenance. • Whentheengineisrunn_ngwiththelgnlhon BRAKE OPERATION switch in the engine "ON" position and the attachment clutch engaged, any attempt If tractor requires more than five (5) feet to by the operator to shift into reverse should stop at highest speed...
-
Page 23: Maintenance
TOCLEAN B ATTERY AND TERMINALS Change the oil after every 50 hours of op- Corrosion and dirt o nthe battery and termi- eration or at least once a year if the tractor is not used for 50 hours in one year. nals can cause the battery to "leak"... - Page 24 CLEAN AIR SCREEN AIR FILTER Air screen must be kept free of dirt and chaff Your engine will not run properly using a to prevent engine damage from overheating. d_rty a_r filter. Service paper cartridge every Clean w_th a wire brush or compressed a_r to two months or every 25 hours of operation, whichever...
- Page 25 CLEANING • Clean engine, battery, seat, finish, etc. of all foreign matter. Clean debris from steering plate. Debris can restrict clutch/brake pedal shaft movement, causing belt slip and loss of drive. ,i_ CAUTION: Avoid all pinch points and movable parts Clutchlbrake pedal ._-i ;...
- Page 26 WARNING: TO AVOID SERIOUS INJURY, BEFORE PERFORMING ANY SERVICE OR ADJUSTMENTS: 1. Depress clutch/brake pedal fully and set parking brake. 3, Place at[achment clutch in "DISENGAGED" position. 4. Turn ignition key to "STOP" and remove key. 5. Make sure the blades and ali moving parts have completely stopped.
- Page 27 TO LEVEL MOWER 4. If adjustment is necessary, see steps 2 Make sure tires are properiy inflated to the and 3 in Visual Adjustment instructions PSI shown on tires, tf tires are over or under above. inflated, it may affect the appearance of your 5.
- Page 28 TO REPLACE MOWER DRIVE BELT NOTE: Observe entire motion drive belt and position of all belt guides and keepers. MOWER DRIVE BELT REMOVAL 2. Disconnect clutch wtre harness (A). 1. Park tractor on a level surface. Engage 3. Remove anti-rotation hnk (B) on right side parking brake.
- Page 29 TO CHECK BRAKE TO START ENGINE WITH A WEAK BAT- TERY If tractor requires mere than five (5) feet to stop at highest speed in highest gear on a _kWARNING: Lead-ac=d batteries gener- level, dry concrete or paved surface, then ate explosive gases.
- Page 30 REPLACING BA'I-FERY TO REMOVE HOOD AND GRILL ASSEMBLY _WARNING: Do notshort batteryterminats 1. Raise hood, by altow_ng a wrench or any other object to contact both terminals at the same time. 2. Unsnap headlight wire connector. Before connecting battery, remove metal 3, Stand in front of tractor.
- Page 31 Immediately prepare your tractor for storage ENGINE at the end of the season or if the tractor will FUEL SYSTEM not be used for 30 days or more. IMPORTANT: It is important to prevent _WARNING: Never store the tractor with gum deposits from forming in essential...
-
Page 32: Troubleshooting
TROUBLESHOOTING CHART: See appropriate section in manual unless directed to Sears service center I PROBLEM CAUSE CORRECTION Will not start Out of fuel Fill fuel tank Engine not 'CHOKED" properly See "TO START ENGINE" _n Operat;en sectton Wa=t severaJ m_nutes before Engine flooded. - Page 33 TROUBLESHOOTING CHART: See appropriate section in manual unless directed to Sears service center CAUSE PROBLEM CORRECTION ........Engine clicks Weak or dead battery. Recharge or replace battery will not start Corroded battery terminals Clean battery terminals Loose or damaged w_rmg Check all wlrtng Faulty solenotd or starter Check/replace...
-
Page 34: Troubleshooting Chart
TROUBLESHOOTING CHART: See appropriate section in manual unless directed to Sears service center PROBLEM CAUSE CORRECTION Poor cat - uneven Worn, bent or loose blade- Replace blade T_ghten blade bolt cutting Mower deck not Ievel Level mower dec_ Clean underside of mower Bultdup of grass, Ieaves, and trash under mower, housing... -
Page 35: Need More Help
TROUBLESHOOTING CHART: See appropriate section in manual unless directed to Sears service center PROBLEM CAUSE CORRECTION Battery will not Bad battery cell(s} 1 ! Replace bakery. charge Poor cable connections Check/clean all connections Faulty regulator (if so equipped)_ Replace regulator• Faulty allernator. - Page 36 SUGGESTED GUIDE FOR SIGHTING SLOPES FOR SAFE OPERATION ONLY RIDE UP AND DOWN HILL, NOT ACROSS HILL 15 DEGREES MAX. down the face of slopes, never across the face. Do not mow ARNING: To avoid serious Injury, operate your tractor up and slopes greater than 15 degrees.
- Page 37 Ilame al _-800-659-5917 5 v]slte el s_t_oweb: www. craftsman,cam En |odes los cases antenores, s_ el reemplazo es imposlble, eJ equipo tractor sara sustituzdo s_n cargo con el m_smo modelo o una equ_valente...
- Page 38 _PELIGRO: Esta Maquina cortadora es capaz de amputar las manosy los pies y de lanzar objetos, si no se observan instrucciones de seguridad siguientes se pueden producir lesiones graves o [a muerte. • No maneje la m&qu_na s_ no t_ene la trampa _DVERTENCIA: S_empre desconecte et alam-...
- Page 39 • Escoger una veloctdad demarcha baja d e • Nunca permitir que nir_os u o[ras personas mode que n o sea necesario pararse ocamb_ar est6n dentro del equlpo per remoicar. estando enuna p endiente • En pendientes, el peso del equtpo remolcado •...
- Page 40 • Mantener la maqurna libre de hterba, holas • Las cucNlas det cortac6sped son afiladas u otros residues acumulados. L_mp_ar Envo_ver la cuchilla, ponerse guantes y porter salp_caduras de ace_te o carburante y quitar la m&xtma atenc_6n cuando se hacen opera- crones en elias.
-
Page 41: Especificaciones
64 oz. (1.96 L) LA REPARACION Champion RC12YC Congratulaciones por su buena compra. Bujla AbeEura' 030" (0,76 mm) Su nuevo producto Craftsman<_ est& diser_ado y fabricado para funcionar de mode fiable Velocldaa £)elante" 0-7,8/12,5 muchos aries Pero come todos los productos, [mph/kph) Marcha Arras 0-2.9,'4,7... - Page 42 Segadora Rueda Delantera De La Segadora (2) Conjunto '-" de eslabones (1) Perno (5) 1-3/16" de |evantamiento (t) 1-1/4" Arandela traseros Arandela (1) Abrazadera L"" pequeSo de retenci6n (1) 3/8-16" ([..-_" 1"} (t) Eslabones (1) Rueda Tuerca de levantamiento delanteros (5) Abrazadera grande...
- Page 43 Su tractor nuevo ha side montado en la fabrlca con la excepci6n de aquellas partes que no se hen men- tado per razones de envio. Para asegurarse que su tractor funcione en forma adecuada y segura todas )as partes y los artlculos de ferretefia que se monten tienen que ser apretados en forma segura.
- Page 44 PR ECAU CIO NLa palanca de levantam_ento GIRE EL VQLANTE HACIA LA IZQUIERDA estaacclenadapor resorte Sost#ngalaflrmemente Y UBIQUE LA CORTADQRA DE CESPED apretada, bajefa lentamente yenganche{a enla EN SU LUGAR pos_c_6n mas baja, La palanca de levantam_ento • Gire el votante completamente hac_a encuentra...
- Page 45 Haga oscilar el extremo Ja arandela integrada de la barra antibalanceo (S) hacla la escuadra de la plataforma de la cortadora de cesped en el lado derecho de la cortadora. lnserte el extremo con la arandela mtegrada fa barra en el agujero de la escuadra trasera de la cortadora...
- Page 46 Levante la esqulna trasera de ta cortadora Muevase hasta el lado _zqu_erdo de la coda- cesped y ubtque la ranu ra en el conjunto de es- dora e _nsepLe un resorte de retenc{Sn grande i&bones sobre I&chavetaen laescuadratrasera (G) a trav6s del agu]ero del eslab6n deiantero de la cortadora (D};...
- Page 47 REVISION PRESION LLANTAS t/f'LISTA DE REVtS Ilantas en su unidad fueron mfladas Antes de operar y de dlsfrutar de su tractor n uevo, masiado en la f&br[ca per razones de env{o. te deseamos que reciba el meier rendimiento y la presi6n de los ilantas correctas...
- Page 48 Estos simbolos pueden aparecer sobre su tractor o en la hteratura proporcionada con el producto. Aprenda y comprenda sus s_gn_ficados M_RCHA ATRAS r4EUTRO ttLTO B_JC, ESTRAIJGU- R_PIE)O LENTO LACfOt4 MOTOI_ MOTOR FB,ENO DE ALTURA DE LA LEVAttTAMIE[,ITO MOTOR APAG<D© SISTEMA ENCENDIDO t_t_MP.RCNA ESTAC!ON_,MIENTO...
- Page 49 FAMILIARICESE SU TRACTOR LEA ESTE MANUAL DEL DUEI_IO Y LAS REGLAS DE SEGURIDAD ANTES DE OPERAR SU TRACTOR Compare las ilustractones con su tractor para familiarizarse con las ub_cactones de los dwersos controles y aiustes. Guarde este manual para referencta en el future.
- Page 50 La operac_Cn de cualquier tractor puede hacer que soften objetos exlrar_os dentro de sus ojos, Io que puede producer daSos graves en estos_ Siempre use anteoios de segundad o protecc_ones para los ojos m_entras opere su tractor o cuando haga ajustes o reparac_ones Recomendamos gafas de segundad...
- Page 51 MOVERSE HACIA AD ELANTEY HACIA ATRAS La gama de la altura de corte es de aproxima- La direcclSn y ta velocidad de mQvlmlentos estan damente 1 a 4 pulgadas, Las alturas se m_den controlados per los pedates de marcha adelante desde el suelo a la punta de Ia cuchi[la...
-
Page 52: Para P Arar
!, El_ja aque a ltura cortar& elcesped per med=o PARA OPERAR EN CERROS delapalanca elevadora. ,_ADVERTENOIA: No mane]e hac_a arnba o ha- 2 Haga a rrancar lascuchillas detasegadora cia abalO en certes con pendientes superlores enganchando elcontrol del e mbrague 15 °... - Page 53 PRECAUCt6N. Combustibles mezclados MECAN|SMO AVISO SERVIClO CRONOMETRO alcohol (conoctdos come gasahol, o el use de El mecamsmo de awso de serwcio muestra etanoi o metanol) pueden atraer la humedad, la que conduce a Ea separact6n y formaci6n numero total de heros que ha estado en fun- &cldos...
- Page 54 PURGAFI LA TRANSMISION Inserte la Ilave en la igmc{6rl y gtre la llave en et sent_do que g_ran las rnanitlas del reloj a la _kPRECAUCI6N: Nunca enganche o desen- pos_c_6n de arranque start, y suelte la Ilave tan ganche la palanca del control de rueda hbre...
- Page 55 CONSEJOS PARA SEGAR • No se pueden usar las cadenas para las I[antas cuando la caja de la segadora est& adjunta tractor, • La segadora debe estar nivetada en forma adecuada para obtener el mejor rendimiento at segar. Vea "'PARA N{VELAR LA CAJA LA SEGADOR_' en la secci6n...
- Page 56 TABLA DE LUBRlCAClON RECOMENDAClONES GENERALES La garantia de este tractor no cubre los articu- , ?,Perno arhculado del volant los que I_an estado suletos al abuse o a la neg- hgenaa del operador Para recibir todo el vaior .'I) Accesoriu de la garantia, el operador t_ene que mantener...
- Page 57 TRACTOR • Cuando el motor est_ en marcha con el inte- rrupter de llave del sistema de funcionamiento S_empre observe tas reglas de seguridad cuando d@ mantenimlento arras (ROS) en la posmi6n "ON" y el embrague del accesorio conectado, cualquier tentabva del OPERACtON DEL FRENO...
- Page 58 PARA LIMPIAR LA BATERiA Y LOS TERMb Cambie el aceite despoes de 50 horas de oper- NALES acion o per Io menos una vez al abe si el tractor se utdiza menos 50 bores el abe. La corrosion y le mugre de la bateria y de los term_nales...
- Page 59 FILTRO DE ACEITE DEL MOTOR LIMPIEZA DE LA REJILLA DE AIRE La rejd_a de aire debe mantenerse sin mugre y Cambie el fdtro de aceite del motor caga tempo- paja para evitar el daSo aT motor debido al sobre- rada ovez pot medfo que camb_e el aceite, si el tractor se usa m&s de 100 horas en un aSo calentam_ento.
- Page 60 LIMPIEZA Mueva el control del embrague del accesor_o ala poslctSn "DESENGANCHADO", ponga el Ltmp_e todo material extraSo dei motor, freno de estacionamlento y apague el motor. bateria, el astento, el pu{_do, etc. Enrosque el edaptedor de la boqutlla (empa- Limpie los desechos de la place guie.
- Page 61 ADVERTENCtA:PARA EVITAR LESIONES SERIAS, ANTES DE DAR CUALQUIER SERVI- ClO O DE HACER AJUSTES: Pres_one ef pedal del embragueifreno completamente y aplique el freno de estac_onamtento Ponga la palanca de control de movimiento en la posic_6n de neutro. Ponga el embrague det accesono en la poslcl6n desenganchado...
- Page 62 PARA NIVELAR LA SEGADORA En case que sea necesano realfzar un aluste, Asegt3rese de quetos neum#.t_cos esten inflados a _ea los pasos 2 y 3 de las instrucclones Regulaci6n visual que aparecen mas arr_ba. ta PSI que se _nd_caen estos St est#,n demas_ado Vuelva a ver_car {as medidas...
- Page 63 PARA REEMPLAZAR CORREA DE LA NOTE: Observe toda la correa de _mpulsi6n de CUCHILLA DE LA SEGADORA movlmiento y la posicion de todas las gu_as y DESMONTAJE DE LA CORREA DE LA SEGADORA guardacerreas. Desconecte el arn6s delcable delembrague (A). Estac_one el tractor en una superficie...
- Page 64 VERIFIQUE ELFRENO PARA HACER ARRANCAR EL MOTOR SJ eltractor emge m&s d ecinco ( 5) pies p ara UNA BATERiA BAJA pararse auna velocldad mas a lta enelcambto ,_ADVERTENClA Las baterias de &odo-plo- m&s alto en una superf_c_e mvelada de horm_g6n mo generan gases exploswos...
- Page 65 REEMPLAZAR LA BATERIA PARA CAMBIAR EL FUSIBLE C_mb_elo per un fusible tipo enchufable de 30 _.DVERTENCIA" No haga cortoc_rcutto con los amps, tipo automotnz El sujetador del fusible terminales de la bateria al permitir que una Ilave esta ubicado detras del tablero.
- Page 66 lnmed_atamente prepare su tractor para ei aL duce a la separac_Sn y ala formac_6n de acudos macenam_ento al final de la temporada o s_ el durante elaimacenam_ento, La gasoline aCld_ca puede daSar el sBtema de combustible do un tractor no se va a usar per 30 dias omas, motor durante el periodo de afmacenam_ento...
-
Page 67: Identificacion De Problemas
IDENTIFICACION DE PROBLEMAS: Vea |a secci6n apropiada en e! manual a menos que este dirigido a un centro de servicio Sears. PROBLEMA CAUSA CORRECC[ON No arranea Sin cornbust_b[e Llene el estanque de combustible Motor s_n la "ESTRANGULACION" Vea "PARA HACER ARRANCAR EL Me- (CHOKE) - Page 68 IDENTIFICACION DE PROBLEMAS: Men la secci6n apropiada en el manual a menos que est_ dirigido a un centre de servicio Sears, CAUSA CORRECCION PROBLEMA P'erdlda Agua en et cembushble VacJarelestanquedecembushbleyelcarbu- fLlerza fader, vueiva a lienar e_estanque con gaso- [in_ nu_va Y eatable _lfiitro dB cembushble (sigue)
- Page 69 IDENTIFICACION DE PROBLEMAS: Vea la seccion apropiada en el manual a menos que este dirigido a un centro de servlcio Sears. PROBLEMA CAUSA CORRECCION Las luz (cos) El interrupter est& 'APAGADO"(OFF'). "ENCtENDA" (ON) el Interruptor de lantern(s) BombilEa(s) e lampara(s) quemada(s).
- Page 71 GUIA SUGERIDA PARA MEDIR LAS PENDIENTES CON LA VISTA PARA UNA OPERACION SEGURA ,_j_ y abajo de las pendientes, nunca transversalmente con respecto a las pendientes_ NO cortar pendientes mayores de 15 grados. Haga los ADVERTENCIA: virales gradualmente Para evltar danos graves, haga funcionar para evltar v0lcarse o la p6rdida de control, su tractor arnba I Tenga mucho cuidado cuando camble de direccion en las pendlentes.
- Page 72 NEED MORE HELP? • Flnd th_£ ar_d a [[ ]ourathe_ 9roduct m ar_ua[_ o_Lt,_ - Getaluwers fromourteam o£hoi_,e experts. • Gel. a pers0nabzed rnalntenance _[an FOr your home • Ftnd informanon and tooL_to he{p v,i[h home pr0ject_ ,_&_age home Get it fixed, at your home or ours! Your Home For repair - in your...
Need help?
Do you have a question about the 917.288670 and is the answer not in the manual?
Questions and answers