Table of Contents
Advertisement
Quick Links
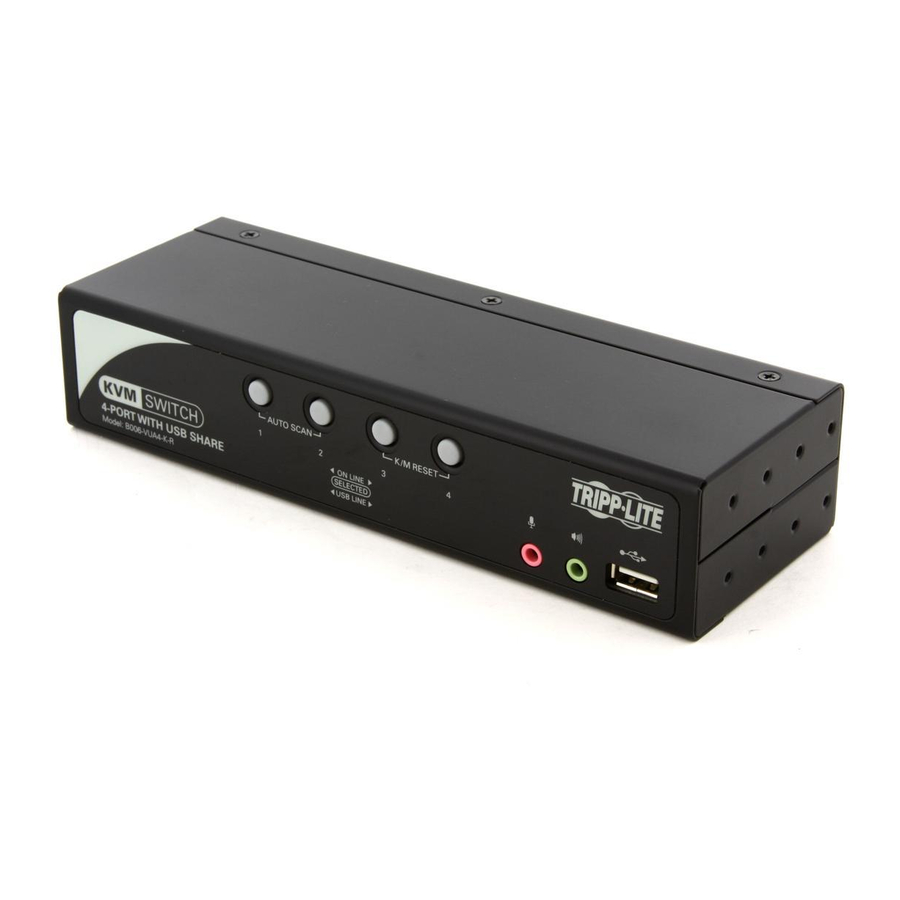
Owner's Manual
4-Port KVM Switch
with Audio, OSD
& Peripheral Sharing
Model: B006-VUA4-K-R
RoHS
This product is RoHS compliant.
FCC Information
This equipment has been tested and found to comply with the limits for a Class B digital
device, pursuant to Part 15 of the FCC Rules. These limits are designed to provide
reasonable protection against harmful interference in a residential installation. This
equipment generates, uses and can radiate radio frequency energy, and if not installed
and used in accordance with the instruction manual, may cause interference to radio
communications. However, there is no guarantee that interference will not occur in a
particular installation. If this equipment does cause harmful interference to radio or
television reception, which can be determined by turning the equipment off and on, the user
is encouraged to try to correct the interference by one or more of the following measures:
• Reorient or relocate the receiving antenna
• Increase the separation between the equipment and receiver
• Connect the equipment into an outlet on a circuit different from that which the receiver is
connected
• Consult the dealer or an experienced radio/television technician for help.
1111 W. 35th Street, Chicago, IL 60609 USA
www.tripplite.com/support
Copyright © 2010 Tripp Lite. All rights reserved.
1
201004198 93-2947.indd 1
4/23/2010 3:26:52 PM
Advertisement
Table of Contents

Related Manuals for Tripp Lite B006-VUA4-K-R


Summary of Contents for Tripp Lite B006-VUA4-K-R
-
Page 1: Fcc Information
• Connect the equipment into an outlet on a circuit different from that which the receiver is connected • Consult the dealer or an experienced radio/television technician for help. 1111 W. 35th Street, Chicago, IL 60609 USA www.tripplite.com/support Copyright © 2010 Tripp Lite. All rights reserved. 201004198 93-2947.indd 1 4/23/2010 3:26:52 PM... -
Page 2: Table Of Contents
Table of Contents Package Contents .........................2 Console Requirements ......................2 Computer Requirements ......................3 Supported Operating Systems ....................3 Features ..........................3 Hardware Setup ........................6 Rackmount Installation ......................7 System Installation .......................7 Basic Operation ........................8 Port Switching ........................9 Manual Push-Buttons ......................9 Mouse Port Switching Functionality .................10 Hotkeys ..........................10 OSD ............................16 OSD Operation ........................16... -
Page 3: Computer Requirements
Computer Requirements • Computer with a VGA, SVGA, or Multisync port • Computer with a USB port or PS/2 keyboard/mouse ports • Computer with (x2) 3.5 mm audio jacks (If using microphone/speaker audio feature) Supported Operating Systems Version Windows 2000 and higher OS 9.0 and higher Linux Kernel 2.6 and higher... -
Page 4: Front Panel
Features continued • Switch between connected computers via front panel push-buttons, OSD (On Screen Display), hotkeys and the mouse switching function** • Auto Scan mode allows you to scan the connected computers without having to manually switch between them • Supports video resolutions up to 2048 x 1536, DDC2B •... -
Page 5: Back Panel
Features continued Front Panel continued Console Audio Connectors: A separate set of console speaker and microphone jacks are located on the front panel of the unit for greater accessibility. Devices plugged into these ports will take priority over devices plugged into the console speaker and microphone jacks on the back panel of the unit. -
Page 6: Hardware Setup
• Position system cables and power cables carefully; be sure that nothing rests on any cables. • To help protect your system from sudden transient increases and decreases in electrical power, it is recommended that you plug your devices into a Tripp Lite Surge Suppressor, Line Conditioner, or Uninterruptible Power Supply (UPS). -
Page 7: Rackmount Installation
Hardware Setup continued • If the following conditions occur, unplug the device from the wall outlet and bring it to qualified service personnel for repair. —The power cord or plug has become damaged or frayed. —Liquid has been spilled into the device. —The device has been exposed to rain or water. -
Page 8: Basic Operation
Tripp Lite Surge Suppressor, Line Conditioner, or Uninterruptible Power Supply (UPS). Connect up to two USB 2.0 peripherals to the USB 2.0 peripheral ports on the front and back of the unit. -
Page 9: Port Switching
Port Switching There are four ways of accessing computers and devices connected to the B006-VUA4-K-R KVM switch: • Manual Push-buttons • Mouse port switching functionality • Hotkeys • OSD (On-Screen Display) Manual Push-Buttons Pressing a push-button will bring the focus of one of the following to the corresponding port;... -
Page 10: Mouse Port Switching Functionality
Mouse Port Switching Functionality When enabled, the Mouse Port Switching Functionality allows users with scroll mice to simultaneously switch the focus of the KVM, Audio and USB between ports by double- clicking the scroll wheel on their mouse. When used, ports will be accessed in sequential order (e.g. - Page 11 Hotkeys continued Simultaneously Switching KVM, Audio and USB Focus to a Desired Port To simultaneously switch the KVM, Audio and USB focus to a desired port, perform the following command: 1. Activate Hotkey Setting Mode using the aforementioned command. 2. Press and release the number key for the desired port (1, 2, 3 or 4). 3.
- Page 12 Hotkeys continued Switching Audio Focus Only to a Desired Port To switch only the Audio focus to a desired port, perform the following command: 1. Activate Hotkey Setting Mode using the aforementioned command. 2. Press and release the number key for the desired port (1, 2, 3 or 4). 3.
-
Page 13: Initiate An Auto Scan
Hotkeys continued Initiate an Auto Scan Auto Scan allows you to switch between ports at regular intervals without having to manually switch between them. This hotkey command initiates an Auto Scan using the Scan Duration entered into the OSD. (See page 20 for details.) By default, the Scan Duration is set at 5 second intervals. - Page 14 Hotkeys continued Skip Mode continued 2. Press and release one of the arrow keys (↓, ↑, →, ←). You will automatically be entered into Skip Mode and sent to either the next port, previous port, port 1 or port 4, depending on which arrow key you pressed.
-
Page 15: Hotkey Command Summary Table
Hotkeys continued Hotkey Command Summary Table Action Hotkey Command Press and hold the [Scroll Lock] key, press and re- Activate Hotkey Setting Mode lease the minus [-] key, release the [Scroll Lock] key. Activate Hotkey Setting Mode, [H] Change Hotkey Setting Mode Activation Command to [Ctrl], [F12] Switch KVM, Audio and USB focus to a Activate Hotkey Setting Mode, n*, [Enter]... -
Page 16: Osd
The OSD (On-Screen Display) can also be used to switch functionality focus from one port to another. The following section discusses OSD operation. OSD Operation The OSD (On-Screen Display) is a menu-based interface that allows you to access con- nected components and change the KVM settings. To open the OSD Menu, hit the [Scroll Lock] key twice. -
Page 17: Osd Main Page Functionality
OSD Main Page Functionality As with Hotkeys or Push-buttons, the OSD Main Page allows you to individually switch functionality to a desired port, or switch all functionality simultaneously. This can be done using your keyboard or mouse. You can also use the OSD Main page to activate Auto Scan mode, access the OSD Settings Page and logout of the KVM switch. -
Page 18: Naming Ports
OSD Main Page Functionality continued Individually Switch KVM, USB and Audio Focus via Mouse 1. When in the OSD Main menu, click on the [F1] text to bring up the highlight bar in the KVM column, [F2] to bring up the highlight bar in the USB column, or [F3] to bring up the highlight bar in the Audio column. -
Page 19: Osd Settings Page Functionality
OSD Main Page Functionality continued F8: Logout Pressing the [F8] key or clicking on the [F8] text at the bottom of the OSD Main Page will bring up a prompt asking you if you wish to logout of the KVM switch. Press [Y] and then press the [Enter] key to logout of the KVM. - Page 20 OSD Settings Page Functionality continued Setting Description Port Display Duration Select this setting to change the amount of time the OSD menu is displayed after switching functionalities between ports via push-button. A highlight bar will appear at the bottom of the OSD Settings Page, allowing you to enter a Port Display Duration between 0 and 255 seconds.
- Page 21 OSD Settings Page Functionality continued Setting Description Firmware Upgrade When this setting is selected, a screen appears that displays the KVM’s current firmware version. At the bottom of the page is a reminder to connect the firmware upgrade cable, and a highlight bar asking if you wish to download.
-
Page 22: Firmware Upgrade Utility
Firmware Upgrade Utility As firmware upgrades become available, they can be found on the internet at www.tripplite. com. To upgrade the firmware of you KVM switch, follow the steps below: 1. From a computer that is not part of your KVM installation, go to www.tripplite.com to obtain the firmware upgrade for your KVM switch, and save it to your computer. - Page 23 Firmware Upgrade Utility continued 7. Highlight the KVM switch in the Device List by clicking on it with the mouse. If you want the Firmware Upgrade Utility to check the KVM’s firmware version to see if it is older/newer than the firmware upgrade file, check the Check Firmware Version box in the lower-left of the screen.
-
Page 24: Appendix
Appendix Mac Keyboard Emulation The PC compatible (101/104 key) keyboard can emulate the functions of the Mac keyboard using the PC keystrokes in the table below. Note: When more than one key is required on the PC Keyboard to emulate the Mac keyboard, press and release the first key, and then press and release the second key. -
Page 25: Factory Default Settings
Appendix continued Factory Default Settings Setting Default Administrator Username Administrator Administrator Password Password OSD Hotkey [Scroll Lock], [Scroll Lock] Hotkey [Scroll Lock], [-] Button Settings [Mode 1] Port Display Duration 3 Seconds Scan Duration 3 Seconds Screen Blanker-Set Timeout 0 (Off) Screen Blanker-Blanker Password “Blank”... - Page 26 Specifications Feature Specification Number of Computer Ports Expandable (Cascade/Daisychain) Form Factor Desktop/Rackmount (Comes with 1U Rackmount Kit) Port Selection OSD, Hotkeys, Push-buttons, Mouse Switching Function* Console Keyboard/Mouse Ports (x2) USB, (x2) PS/2** Console Video Port HD15 Female Console Speaker/Mic Ports (x4) 3.5 mm Female*** Computer Ports (x4) HD17 Female**** (x8) 3.5 mm Female (Each port...
-
Page 27: Warranty & Warranty Registration
Service under this Warranty can only be obtained by your delivering or shipping the product (with all shipping or delivery charges prepaid) to: Tripp Lite; 1111 W. 35th Street; Chicago IL 60609; USA. Seller will pay return shipping charges. Visit www.tripplite. - Page 28 1111 W. 35th Street, Chicago, IL 60609 USA www.tripplite.com/support 201004198 • 932947-EN 201004198 93-2947.indd 28 4/23/2010 3:26:55 PM...
Need help?
Do you have a question about the B006-VUA4-K-R and is the answer not in the manual?
Questions and answers