
Related Manuals for Source Technologies STm.117b


Summary of Contents for Source Technologies STm.117b
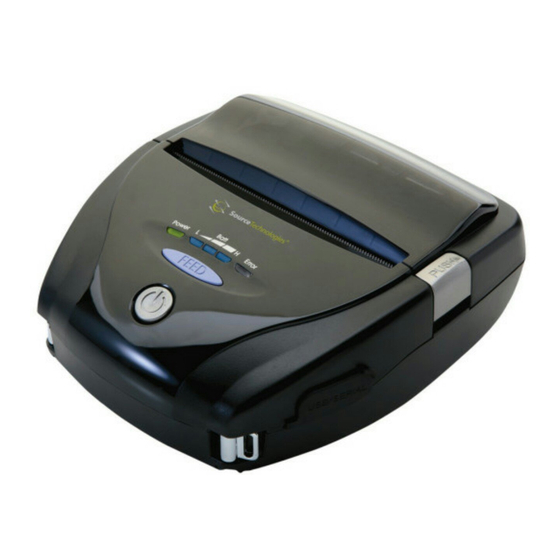
- Page 1 MODEL : STm.117b MOBILE PRINTER All specifications are subject to change without notice Rev. 1.0...
-
Page 2: Table Of Contents
Table of Contents 1. Unpacking 2. Product overview 3. Usage and Installation 3-1. Control panel usage 3-2. Battery Installation 3-3. Battery charging 3-4. Battery charger usage 3-5. Usage of Cigar Jack for charging 3-6. Roll paper installation 3-7. Leather case usage 3-8. -
Page 3: Unpacking
1. Unpacking 2. Product overview Standard Front Open Button Printer Battery Roll paper Paper feed button Power switch SERIAL Charger Serial Cable USB Cable Shielded Rear Quick Manual Optional Battery DC Power Battery Holder (Cradle) Cigar Jack Charger Shoulder strip Leather case... -
Page 4: Usage And Installation
3. Usage and Installation 3-1 Control panel usage 3-2 Battery Installation Hook Button Name function This button is used to turn the printer on and off. Power When the printer is off, press this button for approximately 3 button seconds and it will turn on the power. When you press this button in a state that the printer is on, the printer will turn off. -
Page 5: Battery Charging
3-3 Battery charging 3-4 Battery charger usage Optional Lamp Lamp DC Jack 1. Insert the battery into the battery holder as shown above 1. Be sure that the printer is turned off 2. Connect the DC JACK to the power electrical outlet. 2. -
Page 6: Usage Of Cigar Jack For Charging
3-6 Roll Paper installation 3-5 Usage of Cigar Jack Charger for charging Optional Printer Press the PUSH button to open Insert the paper in the right the paper cover direction Battery holder Connect the car cigar JACK charger into the printer or battery holder. Input 12 ~ 24V Output... -
Page 7: Leather Case Usage
3-7 Leather case usage 3-8 Self Test Optional Turn off the power pressing the While you are pressing the FEED Open the leather case Place the printer into the leather power button for approximately button, press the power button case 3 seconds. -
Page 8: Peripherals Connection
4. Peripherals connection This printer can communicate with Peripherals device via Bluetooth and cables. The sample of self test printout 4-1 Bluetooth Connection 1. Printer can be connected to the PDA and PC which can do wireless communication. 2. By using Bluetooth function supported in PC, printer can be connected. When the printer is installed initially or when you face a problem, you can run the self test and check the information about NOTE... -
Page 9: Interface Cable Connection
5. Printer cleaning 4-2 Interface Cable Connection If the interior of the printer is dusty, printing quality can lowered. In such a case, follow the instructions below to clean up the printer. NOTE 1. Make sure to turn the printer power off prior to cleaning 2. -
Page 10: Specification
6. Pritner Specification 6-1 Specification Li-ion Battery Battery type Printing Method Direct Thermal 7.4V, 2200mAh output Printing Speed 80mm/sec Charging time 3hours 40min Resolution 203 DPI X 203 DPI Size W X D X H(mm) 149 X 161 X 69 Character CPCL 7 Different Font Size (12~48pt) -
Page 11: Cpcl Command Compatibility
7. CPCL Command Compatibility Graphics NOTE Compatibility ○ Compatible with only Partially LINE ○ commanders provided Compatible Compatible Compatible by the manufacturer. INVERSE-LINE ○ PATTERN ○ ○ △ ● GRAPHICS ○ ○ Printer Commands Compatibility Advanced Commands Compatibility PRINT ○ CONTRAST ○... -
Page 12: Certification
8.Certification FCC Information Line Print Mode Compatibility SETLP ○ This device complies with part 15 of the FCC Results. Operation is SETLF ○ subject to the following two conditions: Moving With X and Y Coordinates ○ (1) This Device may not cause harmful interface, and LMARGIN ○... -
Page 13: Setting Up The Software
9. Setting up the software Please refer to the programming manual included in CD. CAUTION Antenna shall be mounted in such a manner to minimize the potential for human contact during normal operation. The antenna should not be contacted during operation to avoid the possibility of exceeding the FCC radio frequency exposure limit.
Need help?
Do you have a question about the STm.117b and is the answer not in the manual?
Questions and answers