Table of Contents
Advertisement
Available languages
Available languages
JCRI FTSMRN 1
Operator's
Manual
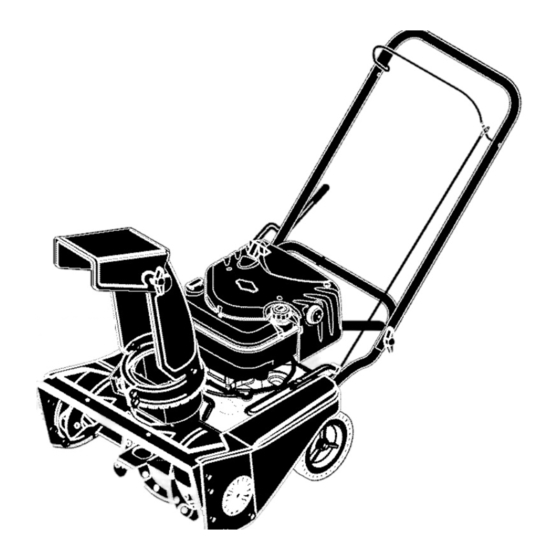
Snow Thrower
4 Horsepower
4-Cycle
Engine
21-inch Single Stage
Auger Propelled
Model 536.881400
CAUTION: Before using this product,
read this manual and follow all of its
Safety Rules and Operating Instructions,
Manual del usario
Quitanieves
de 21 pulgadas
4 caballos
de fuerza
(hp)
Monoetapico
Propulsado
por barrena
Modelo
536.881400
PRECAUCION:
Antes de usar este producto,
lea este manual y siga todas las reglas de
seguridad e instrucciones de operaci6n,
Sears, Roebuck
and Co., Hoffman
Estates,
IL 60179 U.S.A.
F-051009C
www.sears.com/craftsman
Advertisement
Table of Contents

Related Manuals for Craftsman 536.881400


Summary of Contents for Craftsman 536.881400
- Page 1 (hp) Monoetapico Propulsado por barrena Modelo 536.881400 PRECAUCION: Antes de usar este producto, lea este manual y siga todas las reglas de seguridad e instrucciones de operaci6n, Sears, Roebuck and Co., Hoffman Estates, IL 60179 U.S.A. www.sears.com/craftsman F-051009C...
- Page 2 ONE-YEAR WARRANTY ON CRAFTSMAN SNOW THROWER For one year from the date of purchase, when this Craftsman Snow thrower is maintained, lubricated, and tuned up according to the operating and maintenance instructions in the owner's manual, Sears will repair, free of charge, any defect in material or workmanship.
- Page 3 TRAINING OPERATION Read this operating and service instruction Do not operate this snow thrower if you are manual carefully. Be thoroughly familiar taking drugs or other medication which can with the controls and the proper use of the cause drowsiness or affect your ability to snow thrower.
- Page 4 14. Do not over!cad the snow t hrower capacity Store the snowthrower away from ignition byattempting toclear snow attoo fast a sources or appliances that have a pilot rate. light, such as hot water and space heaters, 15. Never operate thesnow thrower athigh clothes dryers, etc..
- Page 5 Drive Clutch Forward Reverse Auger Clutch Auger Collector Engage Push To Engage Fuel Fuel Oil Mixture Electric Starter Discharge DOWN Discharge Discharge LEFT Discharge RIGHT Weight Transfer Weight Transfer Transmission Ignition Key Lift Handle To Depress Pedal Insert To Run, Engage To Disengage Pull Out To Stop.
- Page 6 7. Remove the packing material from Drive Cable handle assembly, Remove the lower Crank Chute insert from the axle. Deflector Upper Handle Figure 1 Knob REMOVE FROM CARTON 1. Locate and remove container of Figure 2 Craftsman 5W30 oil. F-051009C...
- Page 7 _" CHECKLIST thrower, pay extra attention to the fol- lowing important items: Before you operate your new snow thrower, to ensure that you receive the v" Engine oil is at proper level. Use a best performance and satisfaction from high quality detergent oil classified...
- Page 8 [o)_J_P_o)_l KNOW YOUR SNOW THROWER READ THIS OWNER'S MANUAL AND SAFETY RULES BEFORE OPERATING YOUR SNOW THROWER. Compare the illustrations with your SNOW THROWER to familiarize yourself with the location of various controls and adjustments. Save this manual for future reference.
- Page 9 [o)_J_P_o)_l 2. To stop throwing snow, release the Manual before operating auger drive lever. WARNING: Read Owner's machine. Never direct dis- charge toward bystanders. Stop the engine before unclogging discharge any snow thrower can result WARNING: The operation of chute or auger housing and before in foreign objects being leaving the machine.
- Page 10 Craftsman Fuel NOTE: To avoid engine problems, the Stabilizer No. 3550. Make sure that fuel system must be emptied before...
- Page 11 [o)_J_P_o)_l HOW TO START THE ENGINE mable. Always use caution ARNING: Gasoline is flam- (RECOIL STARTER) when handling or storing gasoline. Make sure that the engine oil is at FULL mark on dipstick. The engine is • Turn engine off and let engine equipped with a recoil starter.
- Page 12 [o)_J_P_o)_l As the engine warms up, move Pull starter handle rapidly. choke control to 1/2 choke posi- tion. When engine runs smoothly, move choke lever to OFF Position. NOTE" Allow the engine to warm up for several minutes before blowing snow temperatures below...
- Page 13 [o)_J_P_o)_l HOW TO REMOVE OBJECTS • Release auger drive lever. FROM AUGER • Move the stop switch to the stop position to stop the engine. to remove snow or debris • Disconnect spark plug wire. ARNING: Do not attempt that may become lodged in •...
- Page 14 CUSTOMER RESPONSIBILITIES SERVICERECORDS Fill in dates as you Before Every Every Every Every completeregular Each Each Before service. Often Hours Hours Hours Hours Season Storage Check Engine Oil Level Change Engine Oil Tighten All Screws and Nuts Check and Clean Spark Plug Clean and Inspect Spark Arrestor...
- Page 15 ENGINE SPECIFICATIONS HORSEPOWER 4 HP DISPLACEMENT 190cc BORE 68mm (2.69 in.) STROKE 52mm (2.05 in.) GASOLINE 1.5 quarts CAPACITY (unleaded) OIL CAPACITY (20 oz capacity) 5W30 SPARK PLUG: Champion RJ19LM (Gap .030 in.) or equivalent VALVE Intake: 0.004-0.006 CLEARANCE: Exhaust: 0.009-0.011 ARMATURE AIR GAP:...
- Page 16 Lift the rear of the snowthrower ENGINE tilt the unit forward. In the correct LUBRICATION position, the snowthrower will be Check the crankcase oil level before setting on the front of the auger housing. starting the engine and after each eight (8) hours of continuous use.
- Page 17 [.,,."_o,,_ V_I Z IB]P'_"_ ADJUST AUGERCONTROLCABLE The auger control cable was adjusted 6. Tighten the nut that holds the cable tension spring. at the factory. If the auger will not en- gage or disengage correctly, adjust the auger control cable as follows: 1.
- Page 18 [.,,."_o,,_ F_I Z IB]P'_"_ HOW TO REMOVE THE TOP COVER There are no adjustments under the top cover. To clean the engine cooling sys- tem, follow the steps below to remove Cover Crank the cover. Assembly Remove screws A that attach rod support clamp the the top cov- er.
- Page 19 [.,,."_o,,_ V_I Z IB]P'_"_ HOW TO ADJUST THE AUGER BRAKE Auger The auger brake is adjusted at the fac- Drive Lever Adjuster tory to assure safe operation of the snowthrower. If the auger brake needs an adjustment, follow the steps below: To access the auger brake,...
- Page 20 [.,,."_o,,_ V_I Z IB]P'_"_ HOW TO REMOVE THE AUGER DRIVE BELT The auger drive belt is made of special construction and must be replaced with an original equipment belt available from Sears. Idler Arm If the auger drive belt is damaged, the snowthrower will not discharge snow and will not move forward.
- Page 21 [.,,."_o,,_ V_I Z IB]P'_"_ HOW TO REMOVE THE AUGER 8. Slide the auger out of the right side of the auger housing (See Remove the belt cover. See "How Figure 22). To Remove The Belt Cover". 9. Slide the auger out of the bearing on the left side of the auger hous- Remove the auger drive belt.
- Page 22 If gasoline remains in the tank, or purchase Craftsman Fuel Stabi- fumes may reach an open flame, lizer No. 3550. Add fuel stabilizer spark or pilot light from a furnace, any gasoline...
- Page 23 h_o_U_oIo_ TROUBLE CAUSE CORRECTION Difficult starting Defective spark plug. Replace spark plug. Drain and clean the fuel tank. Water or dirt in fuel system. Refill with fresh fuel. Engine runs erratically Blocked fuel line, empty gas Clean fuel line; check fuel tank, or stale gasoline, supply;...
- Page 24 (This page applicable in the U.S.A. and Canada only.) Sears, Roebuck and Co., U.S.A. (Sears), the California Air Resources Board (CARB) and the United States Environmental Protection Agency (U.S. EPA) Emission Control System Warranty Statement (Owner's Defect Warranty Rights and Obligations) California Resources Board...
- Page 25 Sears, Roebuck and Co. Emission Control Defects Warranty Provisions The following are specific provisions relative to your Emission Control Defects Warranty Coverage. It is in addition to the Sears engine warranty for non-regulated engines found in the Operating and Maintenance Instructions.
- Page 26 Look For Relevant Emissions Durability Period and Air Index Information On Your Engine Emissions Label Engines that are certified to meet the California Air Resources Board (CARB) Tier 2 Emission Standards must display information regarding the Emissions Durability riod and the Air Index. Sears, Roebuck and Co., U.S.A.
- Page 27 CRAFTSMAN 21" 4HP SNOW THROWER 536.881400 DECALS Key No. Part No. Description 48x5550 Decal 4hp / 21" 48x5536 Decal Choke 48x304 Decal Belt Instruction (inside cover) 761150 Decal Auger Control Lever 70141 Decal Danger Auger (Foot) 48x5642 Decal Danger Chute (Hand) 48x5533 Decal Briggs &...
- Page 28 CRAFTSMAN 21" 4HP SNOW THROWER 536.881400 DRIVE COMPONENTS - 26 F-051009C...
- Page 29 CRAFTSMAN 21 " 4HP SNOW THROWER 536.881400 DRIVE COMPONENTS Key No. Part No. Description 1501812 Cover, Top 26x316 Screw 1501814 Base, Chute Rod 26x292 Screw 1501815 Cover, Chute Rod 1501911 Primerbulb, 1501813 Bracket, Engine Chute 1259 Hose 780212 Screw 578408...
- Page 30 CRAFTSMAN 21" 4HP SNOW THROWER 536.881400 AUGER COMPONENTS F-051009C...
- Page 31 CRAFTSMAN 21" 4HP SNOW THROWER 536.881400 AUGER COMPONENTS Key No. Part No, Description 1502011 E549 Frame, Motor Box 15X143 580251 Retainer, Bearing 43846 Bearing 302628 Bolt 338965 Pulley, Auger 26x263 Screw 762277 Cover, Left Belt 1501927 Assembly, Auger Housing 312300...
- Page 32 CRAFTSMAN 21" 4HP SNOW THROWER 536.881400 HANDLE & DISCHARGE COMPONENTS 34 24 32 33 F-051009C...
- Page 33 CRAFTSMAN 21" 4HP SNOW THROWER 536.881400 HANDLE & DISCHARGE COMPONENTS Key No. Part No. Description 762252E701 Handle, Upper 762259 Cable, Auger Drive 337584 Bolt 57171 Knob 71037 311936 Washer 762250E701 Handle, Lower 762251 E701 Lever, Auger Drive 70984 Screw 340715...
- Page 34 BRIGGS & STRATTON ENGINE MODEL 120502-0255-E1 I 1019 LABEL KIT I 718D 524 _b 290 ij 307 _ 24 _' 10_?_ Assemblies include all parts shown in frames. F-051009C...
- Page 35 BRIGGS & STRATTON ENGINE MODEL 120502-0255-E1 PartNo. Description PartNo. Description 697322 Cylinder Assembly 691270 Spring-Valve 399269 Kit-Bushing/Seal (Exhaust) Retainer-Valve (Magneto Side) 692194 *299819 Seal-Oil 691997 Slinger-Governor/Oi! (Magneto Side) 690548 Tappet-Valve Camshaft 493279 Sump-Engine 691449 Manifold-intake 691160 Head-Cylinder 790285 Gasket-intake *692249 Gasket-Cyl.
- Page 36 BRIGGS & STRATTON ENGINE MODEL 120502-0255-E1 I 1058 OPERATOR'S MANUAL I 332 _ ' 1005 121 CARBURETOR OVERHAUL ..334_ 633 _<_ 615_ 104 "--'_:,_, 633A 404 C_ ( a_, 127_ 617,,, ;o;i 497_ S Assemblies include all parts shown in frames.
- Page 37 BRIGGS & STRATTON ENGINE MODEL 120502-0255-E1 PartNo. Description PartNo. Description 790283 Switch-Rocker 790536 Flywheel 691636 Screw 693010 Wire-Stop (Throttle Valve) 19069 Puller-Flywheel 493267 Shaft-Throttle 692524 Screw e691242 Pin-Float Hinge (Carburetor) 691182 Valve-Choke 690272 Washer 496593 Shaft-Choke (Governor Crank) 498975 Jet-Main 690664 Screw (Standard)
- Page 38 BRIGGS & STRATTON ENGINE MODEL 120502-0255-E1 1036 EMISSIONS LABEL I 78 _% 1361 592 _ 689 _:_' 358 ENGINE GASKET 524_ 1330 REPAIR MANUAL 842 _9_ Assemblies include all parts shown in frames. F-051009C...
- Page 39 BRIGGS & STRATTON ENGINE MODEL 120502-0255-E1 PartNo. Description PartNo. Description _299819 Seal-Oil 95162 Clamp-Hose 697743 Starter-Rewind (Magneto Side) 691340 Screw _692249 Gasket-Cylinder Head (Muffler) _699472 Gasket-Breather 617_et270344 SeaI-O Ring _692232 Gasket-Crankcase (intake Manifold) Cover _493823 Spacer _399781 Seal-Oil (includes (PTO Side) 691855 Spring-Friction 694086...
- Page 40 F-051009C...
- Page 41 Si este quitanieves de Craftsman es usado para prop6sitos comerciales o de arrendamiento, esta garantia ser#. v#Jida solamente por 90 dias a partir de la fecha de compra.
- Page 42 CAPACITACION y/o del sol hace que el combustible se expanda. Lea con atenci6n las instrucciones en el manual de operaci6n y servicio. Familiar? Para todos los quitanieves con motores cese completamente con los controles y de arranque el6ctrico, use cables de ex- tensi6n con certificaci6n CSA/UL.
- Page 43 necte e lcable d elabujia y mant6ngalo siempre que tiene b uena estabilidad, alejado delabujia p ara e vitar unarran- sujete con firmeza elmango. Oamine; nunca corra. que accidental. 20.No trate dealcanzar areas d iffciles. Man- 9. Tome todas l as precauciones posibles dejar elquitanieves desatendido.
- Page 44 IMPORTANTE: Muchos de estos simbolos estan colocados en su quitanieves o estAn impresos en los manuales que vienen con el producto, Antes de operar el quitanieves aprenda y comprenda objetivo de cada sfmbolo. Simbolos de control y operacion Despacio Rapido Arranque electrico Arranque de motor Motor en marcha...
- Page 45 Simbolos de control y operaci6n Mezcla de combustible Combustible Aceite y aceite Descarga hacia Descarga hacia Descarga hacia la Dsscarga hacia la ABAJO ARRIBA IZQUIERDA DERECHA Transferencia de peso Transferencia de peso Llave de encendido Levante el mango Presione el pedal Insertar para marcha, para enganchar, para desenganchar.
- Page 46 Remueva el material de empaque del Deflector de Manivela mango superior e inferior. Desmonte el descarga inserto inferior del eje. Mango superior Figura 1 Perilla C6MO SACAR EL QUITANIEVES LA CAJA Localice y retire la botella de aceite de Figura 2 motor Craftsman 5W30. F-051009C...
- Page 47 _" LISTA DE REVISION Antes de operar su nuevo quitanieves, y pa- tanieves, preste mucha atenci6n a los deta- ra asegurar que obtenga el mejor rendimien- lies siguientes: to y la mayor satisfacci6n de este producto de calidad, por favor haga un repaso de la El aceite del motor esta al nivel adecua- siguiente lista de revisi6n: do.Use un aceite detergente...
- Page 48 CONOZCA SU QUlTANIEVES LEA ESTE MANUAL DE INSTRUCCIONES Y LAS REGLAS DE SEGURI- DAD ANTES DE OPERAR SU QUITANIEVES, compare las ilustraciones con su QUITANIEVES para familiarizarse con la ubicaci6n de los diversos controles y ajustes. Guarde este manual para referencia futura. Palanca de propulsi6n de la Deflector del tu-...
- Page 49 del propietario antes de operar de cualquier quitanieves puede ADVERTENCIA: Lea el manual DVERTENCIA: La operaci6n la maquina. Nunca dirija la des- provocar que objatos extra5os carga hacia los transet_ntes. Pare el mo- sean lanzados con fuerza hacia sus tor antes de desobstruir el tubo de des- ojos, Io cual podria rasultar en lesiones carga o el alojamiento...
- Page 50 ANTES DE HACER ARRANCAR NOTA: Se recomienda el uso de aceite sin- EL MOTOR t6tico cuando la temperatura est6 por debajo de los 32 grados. El aceite sint6tico 5W30 es ACEITE DE MOTOR: aceptable para cualquier temperatura. NOTA: Puede que el motor ya tenga algo mezcle aceite con gasolina.
- Page 51 Para parar el motor, empuje el interruptor zador de Combustible No. 3550 de de parada a la posici6n APAGADO. Craftsman. AsegOrese de que el recipien- PRECAUClON: Para parar el motor, no te que contiene la gasolina a utilizar, este limpio y sin 6xido u otros residuos. Nunca...
- Page 52 secongelen elarranque manual yloscon- • Oprima elbot6n cuatro veces sila troles del m otor, proceda delamanera si- temperatura seencuentra por d ebajo guiente despu6s decada t rabajo de delos15 °F(-9 °C). remoci6n denieve. 5. Jale lentamente lamanija dearran- 1. Deje q ue elmotor (apagado) seenfrie quemanual hasta que sienta resis- unos c uantos minutos.
- Page 53 • Mueva lainterruptor de paro a la posi- • No coloque las manos en la barrena o en ci6n stop para parar el motor. el tubo de descarga. Use una barra de • Desconecte el cable de la bujia. apalancamiento. SUGERENClAS PARA EL su experiencia bajo diversas condicio-...
- Page 54 L_-' h, h, u h, o] RESPONSABILIDADES DEL PROPIETARIO REGISTROSDE SERVICIO Anotelas fechas en Antes Cada Cada Cada Cada Cada quese hace manteni- de ca- A me- esta- Antesde mientoregular da uso nudo horas horas horas horas ci6n guardarlo aceite del motor Oambiar et aceite del motor Apretar todos los...
- Page 55 L_-' h, h, u h, o] MOTOR ESPECIFICACIONES CABALLOS DE FUERZA CILINDRADA 190 cc CALIBRE 68mm (2,69 pulg.) CARRERA 56mm (2,05 pulg.) CAPACIDAD DE 1.5 cuartos GASOLINA (sin plomo) CAPACIDAD DE ACEITE 20 onzas, 5W30 BUJiA: Champion RJ19LM (Entrehierro 0,O30plg.) JUEGODE Entrada: 0,004-0,006 VALVULA:...
- Page 56 L_-' h, h, u h, o] LUBRICAClON DEL MOTOR sici6n correcta es con el quitanieves descansando sobre la parte delantera Revise el nivel de aceite en el c&rter del ci- del alojamiento de la barren& gOeBal) antes de hacer arrancar el motor y Ooloque una bandeja para drenar el despues de cada ocho (8) horas de use con- aceite debajo de la boca de aeeite (Vea...
- Page 57 AJUSTAR EL CABLE DE CONTROL DE LA BARRENA El cable de propulsi6n de la barrena fue ajustado en la f&brica. Si la barrena no en- gancha o desengancha correctamente, ajus- te el cable de propulsi6n de la barrena, de la manera siguiente: Afloje la tuerca que sujeta el reeorte de...
- Page 58 COMO QUITARLA CUBIERTASUPERIOR No hay controles de ajuste debajo de la cubierta superior. Para limpiar el sistema de enfriamiento del motor, siga los pasos Vara maniveIa a continuaci6n para quitar la cubierta. de ajuste Quite los tornillos A que sujetan abrazadera de soporte de la varilla...
- Page 59 C6MO AJUSTAR EL FRENO DE LA BARRENA El freno de la barrena es ajustado en la fa- Palanca de propul- Tuerca de si6n de la barrena brica para asegurar la operaci6n segura del ajuste quitanieves. Si el freno de la barrena necesi- tara ajuste, siga los pasos a continuaci6n: Para alcanzar el freno de la barrena, in- Braze del...
- Page 60 COMO SACAR LA CORREA DE PROPULSION DE LA BARRENA La correa de propulsi6n de la barrena est& construida especialmente para la unidad y debe set reemplazada con una correa origi- nal para la unidad, disponible en su tienda Sears m&s oeroana. Si la correa de propulsi6n de la barrena es- tuviera daSada, el quitanieves no descargar&...
- Page 61 Para sacar la correa de propulsi6n de Oorrea de pro- la barrena de la polea del propulsor, pulsi6n de la barrena mueva el braze guia a la posici6n de en- ganche. Esto le darA un espacio libre entre la polea del propulsor y el brazo de freno para sacar la correa de pro- Polea del pulsi6n de la barrena (vea la...
- Page 62 COMO SACAR LA BARRENA Deslice la barrena fuera del soporte de cojinetes en el lade izquierdo del aloja- Retire la cubierta de la correa. Consulte miento. "O6mo quitar la cubierta de la correa". 10. Para instalar la barrena, realice los pa- Saque la correa de propulsi6n de la ba- sos anteriores en orden inverse.
- Page 63 Craftsman N0m. 3550. expuesta, chispa o llama piloto de A[_ada el estabilizador de combustible una caldera, calentador de agua,...
- Page 64 PROBLEMA CAUSA CORRECClON Dificultad para Bujia defectuosa, Reemplace la bujia defectuosa. arrancar Agua o suciedad en el sistema Vade y limpie el tanque de de combustible, combustible; vuelva a Ilenar el tanque con una mezcla fresca de combustible. El motor funoiona Linea de combustible bloqueada, Limpie la linea de combustible;...
- Page 65 (Esta p&gina es aplicable 0nicamente en Estados Unidos de America y CanadA,) Sears, Roebuck and Co., U.S.A. (Sears), Junta de Recursos Ambientales de California (CARB) y Agencia de Proteccion Ambiental de los Estados Unidos (U.S. EPA) Declaracion de la Garantia del Sistema de Control de Emisiones (Derechos y Obligaciones del Propietario de la Garantia de Defectos) La Junta de Recursos Ambientales (CARB), La...
- Page 66 Provisiones de la Garantia de Defectos del Sistema de Control de Emisiones de Sears, Roebuck and Co. Las siguientes son provisiones especificas guno para el propietario, incluyendo la labor lativas a la Cobertura de Garantia de Defectos de diagn6stico la cual conduce a la determi- del Sistema de Control de Emisiones.
- Page 67 Busque el Perlodo de Durabilidad de Emisiones y la Informaci6n del indice de Aire Pertinentes en su Etiqueta de Emisiones del Motor Los motores que son certificados para cumplir con las Normas de Emisiones Etapa 2 de la Junta de Recursos Ambientales de California (CARB) deben mostrar la informaci6n referente al Pedo- do de Durabilidad de Emisiones y al Indice de Aire.
- Page 68 Your Home iiiiiiiiiiiiiiiiU ¸_¸ For repair - in your home - of all major brand appliances, iiiiiiiiiiiiiiii_i_ iiiiiiiiiiiiiiii' lawn and garden equipment, or heating and cooling systems, iiiiiiiiiiiiiiii no matter who made it, no matter who sold it! iiiiiiiiiiiiiiii iiiiiiiiiiiiiiii For the replacement parts, accessories and iiiiiiiiiiiiiiii owner's manuals that you need to do-it-yourself.
Need help?
Do you have a question about the 536.881400 and is the answer not in the manual?
Questions and answers