
Related Manuals for Sharp XV-Z21000


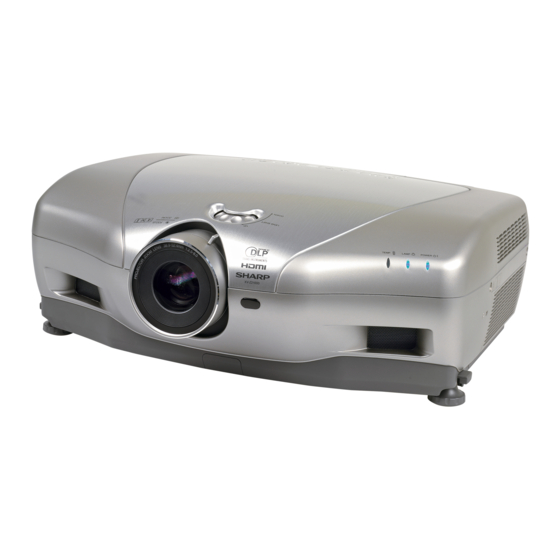
Summary of Contents for Sharp XV-Z21000
- Page 1 XV-Z21000 PROJECTOR OPERATION MANUAL PROJEKTOR BEDIENUNGSANLEITUNG PROJECTEUR MODE D’EMPLOI PROJEKTOR BRUKSANVISNING PROYECTOR MANUAL DE MANEJO PROIETTORE MANUALE DI ISTRUZIONI PROJECTOR GEBRUIKSAANWIJZING...
- Page 2 SPECIAL NOTE FOR USERS IN THE U.K. The mains lead of this product is fi tted with a non-rewireable (moulded) plug incorporating a 10A fuse. Should the fuse need to be replaced, a BSI or ASTA approved BS 1362 fuse marked and of the same rating as above, which is also indicated on the pin face of the plug, must be used.
- Page 3 Introduction IMPORTANT • For your assistance in reporting the loss or theft of your Projector, please record the Serial Number lo- Model No.: XV-Z21000 cated on the bottom of the projector and retain this information. Serial No.: • Before recycling the packag ing, please ensure that you have checked the con tents of the carton thor- oughly against the list of “Supplied accessories”...
-
Page 4: Product Disposal
See “Regarding the Lamp” on page 48. ® This SHARP projector uses a DLP chip. This very sophisticated panel contains 2,073,600 pixels (micromirrors). As with any high technology electronic equipment such as large screen TVs, video systems and video cameras, there are certain acceptable tolerances that the equipment must conform to. -
Page 5: Table Of Contents
Contents Preparing Introduction Setup Contents ............3 Setting Up the Projector .......14 Accessories .............4 Setting Up the Projector ........14 IMPORTANT SAFEGUARDS......5 Standard Setup (Front Projection) ......14 Projection (PRJ) Mode ......... 15 Part Names and Functions ......8 Ceiling-mount Setup ........... 15 Using the Remote Control ......11 Picture (Screen) Size and Projection Distance .. -
Page 6: Accessories
AN-C3DV Note • Some of the optional accessories may not be available depending on the region. Please check with your nearest Sharp Authorized Service Center or Dealer. Marks Used in This Operation Manual Info .... Indicates safeguards when using the projector. -
Page 7: Important Safeguards
IMPORTANT SAFEGUARDS CAUTION : Please read all of these instructions before you operate this product and save these instructions for later use. Electrical energy can perform many useful functions. This product has been engineered and manufactured to as- sure your personal safety. BUT IMPROPER USE CAN RESULT IN POTENTIAL ELECTRICAL SHOCK OR FIRE HAZARDS. - Page 8 ■ Potential hazard of glass particles if lamp ruptures. ■ Continuously watching the screen for long hours will In case of lamp rupture, contact your nearest Sharp cause eye strain. Be sure to occasionally rest your Authorized Service Center or Dealer for replacement.
- Page 9 Temperature monitor function Info • The cooling fan regulates the internal tempera- ture, and its performance is automatically con- trolled. The sound of the fan may change during ■ If the projector starts to overheat due to setup problems projector operation due to changes in the fan or blockage of the air vents, “...
-
Page 10: Part Names And Functions
Part Names and Functions Numbers in refer to the main pages in this operation manual where the topic is explained. Projector MENU button RESIZE button For displaying adjustment For switching the screen and setting screens. size (SIDE BAR, SMART STRETCH, etc.). Adjustment buttons INPUT button (□, ▼, \, ●) - Page 11 Projector (Rear View) Intake vent Intake vent Kensington Security Standard connector Exhaust vent Remote control sensor AC socket Connect the sup- plied power cord. Terminals Terminal Description Page COMPONENT/RGB1, 2 terminals 20, 21 Connecting video equipment with component output terminal (DVD player, etc.) or a com- puter with analog RGB output terminal.
-
Page 12: Remote Control
Part Names and Functions (Continued) Numbers in refer to the main pages in this operation manual where the topic is explained. Remote Control WIRED R/C JACK Remote control signal For controlling the projector by transmitters connecting the remote control to the projector. -
Page 13: Using The Remote Control
Using the Remote Control Inserting the Batteries Pull down the tab on the cover and remove the cover towards the direction of the arrow. Insert the supplied batteries and put back the cover. • Make sure the polarities correctly match marks inside the battery compartment. -
Page 14: Quick Start
Quick Start This section provides an example showing how to connect the projector to video equipment with a brief ex- planation of the steps from connection through to image projection. For details, see the pages suggested in each step. STANDBY button ON button Zoom knob Input Mode... - Page 15 Turn the video equipment on and start playback Playback Page 27 Select the input mode Press the VIDEO button on the remote control to select “VIDEO” for the Input mode. VIDEO • Press on the remote control to switch the Input mode. Pages 27, 28 Adjust the projector angle, focus and zoom 1.
-
Page 16: Setting Up The Projector
Setting Up the Projector Setting Up the Projector For optimal image quality, position the projector perpendicular to the screen with the projector’s feet fl at and level. Note • The projector lens should be centered in the middle of the screen. If the horizontal line passing through the lens center is not perpendicular to the screen, the image will be distorted, making viewing diffi... -
Page 17: Projection (Prj) Mode
Menu item ➞ “Ceiling + Rear” Ceiling-mount Setup ■ It is recommended that you use the optional Sharp ceiling-mount bracket for this installation. Before mounting the projector, contact your nearest Sharp Authorized Service Center or Dealer to obtain the recommended ceiling-mount bracket (sold separately). -
Page 18: Picture (Screen) Size And Projection Distance
Setting Up the Projector (Continued) Picture (Screen) Size and Projection Distance The projection screen size varies according to the distance from the lens of the projector to the screen. Install the projector so that projected images are projected onto the screen at the optimum size by referring to the table below. -
Page 19: Samples Of Cables For Connection
Samples of Cables for Connection • For more details of connection and cables, refer to the operation manual of the connecting equipment. • You may need other cables or connectors not listed below. Terminal on the Equipment Input signal Cable projector Audio-visual HDMI video... -
Page 20: Connecting To Video Equipment
Connecting to Video Equipment Before connecting, be sure to unplug the power cord of the projector from the AC outlet and turn off the devices to be connected. After making all connections, turn on the projector and then the other devices. Connecting Equipment with HDMI Output Terminal to the HDMI Terminal on the Projector HDMI is a new specialized interface capable of delivering a video and audio signal to the terminal using just one cable. - Page 21 Connecting Video Equipment with the DVI Output Terminal to the DVI Terminal on the Projector DVD Player,etc. To DVI terminal To DVI Digital output terminal DVI cable (sold separately: AN-C3DV) Note • When connecting the projector to the video equipment in this way, select “Signal Type” in the “Options” menu.
- Page 22 Connecting to Video Equipment (Continued) Connecting RGB Equipment to the DVI Terminal on the Projector DVD Player,etc. To DVI terminal To RGB output terminal DVI to D-sub cable (supplied accessory) Note • When connecting the projector to the video equipment in this way, select “A. RGB” for “Signal Type” in the “Options”...
- Page 23 Connecting Component Video Equipment to the COMPONENT/RGB Terminals on the Projector DVD Player,etc. To component output terminal To COMPONENT/RGB 1 or 2 terminals Component cable (commercially available)
- Page 24 Connecting to Video Equipment (Continued) Connecting to Equipment with S-video Output Terminal DVD Player,etc. To S-video output terminal To S-VIDEO terminal S-video cable (commercially available) Connecting to Equipment with Video Output Terminal DVD Player,etc. To video output terminal To VIDEO terminal Composite video cable (commercially available)
-
Page 25: Connecting To A Computer
Use with computer signals other than those listed may cause some of the functions not to work. • A Macintosh adaptor may be required for use with some Macintosh computers. Contact your nearest Sharp Authorized Service Center or Dealer. -
Page 26: Controlling The Projector By A Computer
Controlling the Projector by a Computer When the RS-232C terminal on the projector is connected to a computer, the computer can be used to control the projector and check the status of the projector. When connecting to a computer using an RS-232C serial control cable Computer To RS-232C terminal To RS-232C terminal... -
Page 27: Turning The Projector On/Off
Turning the Projector On/Off Supplied Power cord Connecting the Power accessory Cord Plug the supplied power cord into the AC socket on the rear of the projector. • The power indicator illuminates red, and the projector enters standby mode. Turning the Projector On Before performing the steps in this section, Info connect any equipment that you use with the... -
Page 28: Turning The Power Off (Putting The Projector Into Standby Mode)
Turning the Projector On/Off (Continued) Turning the Power Off (Putting the Projector into Standby Mode) Press STANDBY on the pro- □On-screen display jector or STANDBY on the remote control, then press that button again while the confi rma- □ tion message is displayed, to put the projector into standby mode. -
Page 29: Image Projection
Image Projection Adjustment buttons Switching the Input □ ▼ Mode Select the appropriate input mode for the con- nected equipment. ENTER Press Input Mode Select buttons or INPUT on the remote control to select the input mode. Input Mode Select buttons •... -
Page 30: Adjusting The Projector Angle
Image Projection (Continued) 3. Adjusting the Projector Angle Using the Adjustment Feet The inclination of the projector can be adjusted using the adjustment feet when the projector is placed on an uneven surface or when the screen is slanted. Lift the projector to adjust its height while pressing the foot releases. -
Page 31: Operating With The Remote Control
Operating with the Remote Control Switching the Iris Setting Adjustment buttons " This function controls the quantity of the projected light and the contrast of the image. FREEZE ENTER Press IRIS. • Each time the button is pressed while the display IRIS PICTURE MODE is on, the mode changes in the following order:... -
Page 32: Selecting The Screen Size
Selecting the Screen Size RETURN button RESIZE button Resize Mode This function allows you to modify or customize the resize mode to enhance the input image. Press RESIZE on the projector or RESIZE on the remote control. Note • The RESIZE function that can be selected varies depending on the input signal (reso- lution and vertical frequency). - Page 33 RESIZE Output screen image CINEMA ZOOM A CinemaScope image or an image with a 16:9 aspect ratio is displayed at full-screen ZOOM 14:9 An image with a 14:9 aspect ratio and letterboxing is enlarged while maintaining the original aspect ratio. SMART ZOOM An image with a 4:3 aspect ratio is slightly enlarged.
-
Page 34: Menu Bar Items
– 90 White Detail Bright – 90 All Colors –30 Color – 30 Green –30 Tint – 30 Blue –30 Sharp – 30 Black Detail CLR Temp 5500 10500 All Colors –30 Page 36 Green –30 Gamma Position Standard Blue –30... - Page 35 Main menu Sub menu Main menu Sub menu Fine Sync Clock – 150 +150 Options – 30 Image Shift Page 41 Page 42 Page 42 – 60 Phase Subtitle – 30 Page 42 H-Pos – 150 +150 Overscan – 60 V-Pos Page 42 Reset...
-
Page 36: Using The Menu Screen
Using the Menu Screen RETURN button ENTER button Adjustment buttons ('/"/\/|) Adjustment buttons ('/"/\/|) MENU button ENTER MENU RETURN Menu Selections (Adjust- ments) • This operation can also be performed by using Example: “Picture” menu screen when the buttons on the projector. COMPONENT is selected for (Example: Adjusting “Bright”) input mode... -
Page 37: Press Menu
Press ' or " to select the item you want to adjust. (Example: Selecting “Bright”) To adjust the projected image while viewing it Single- adjustment Press ENTER. items • The selected adjustment item (e.g. “Bright”) will be displayed at the bottom of the screen. -
Page 38: Picture Adjustment ("Picture" Menu)
For less color intensity. For more color intensity. Tint For making skin tones purplish. For making skin tones greenish. Sharp For less sharpness. For more sharpness. CLR Temp For making images slightly more reddish For making images slightly more bluish (slightly warmer colors). -
Page 39: Selecting The Gamma Position
Menu operation ⇒ Page 34 3 Selecting the Gamma Position 6 Using the Advanced This function allows you to select the desired gamma “Advanced” allows you to make even fi ner adjustments position. to the image so that it appears just the way you want See page 40 for details. -
Page 40: Adjusting The Brilliantcolor Tm
Picture Adjustment (“Picture” Menu) (Continued) Menu operation ⇒ Page 34 8 Adjusting the BrilliantColor q Reducing Image Noise (DNR) BrilliantColor uses Texas Instruments’ BrilliantColor Video digital noise reduction (DNR) provides high quality technology. The image becomes brighter while the color images with minimal dot crawl and cross color noise. -
Page 41: Adjusting The Unveil Control
Menu operation ⇒ Page 34 e Adjusting the Unveil Control This function uses edge enhancement to give the impression of added depth to images. Selectable items Description The Unveil Control function is not activated. Level 1 Sets the Unveil Control level for viewing Level 2 an image with the impression of added depth. -
Page 42: Gamma Adjustment ("Gamma" Menu)
For more Green and Blue mentioned below. information on the special software, visit For less brightness For more brightness the Sharp website at: http://sharp-world.com/projector/. For less brightness in For more brightness red color in red color... -
Page 43: Computer Image Adjustment ("Fine Sync" Menu)
Computer Image Adjustment (“Fine Sync” Menu) Menu operation ⇒ Page 34 The illustration shown here is for explanation and may be different from the actual on-screen display. 3 Checking the Input Signal This function allows you to check the current input signal information. -
Page 44: Using The "Options" Menu
Using the “Options” Menu Menu operation ⇒ Page 34 When HDMI is selected for the input mode. 2 Adjusting the Vertical Size of the The illustration shown here is for explanation and may Display (Subtitle Setting) be different from the actual on-screen display. With this function, you can adjust the vertical size of the display to allow for subtitles. -
Page 45: Adjusting The White Level/Black Level
Menu operation ⇒ Page 34 4 Adjusting the White Level/Black Note Level • It is recommended that the lamp be changed “White Level” adjusts the white level for variations in when the remaining lamp life becomes 5%. the input signals. •... -
Page 46: Signal Type Setting
D. VIDEO COMP. Set when digital video component signals are received from video equip- Selectable items Description ment. Logo SHARP logo screen A. RGB Set when analog RGB signals are Blue Blue screen received. None — (Black screen) A. -
Page 47: Selecting The Transmission Speed (Rs-232C)
Menu operation ⇒ Page 34 ■ Auto Power Off t Reversing/Inverting Projected This function automatically switches the projector Images to Standby mode if no signals are received for a set period. This function allows the projector to be used in a wider range of projection styles by allowing the image to be Selectable items Description... -
Page 48: Maintenance Indicators/Maintenance
• Cooling fan break- • Take the projector to your nearest Temperature The internal warning down Sharp Authorized Service Center or Red on temperature is • Internal circuit failure indicator Dealer for repair. (Standby) abnormally high. -
Page 49: Cleaning The Projector
Info • If the temperature warning indicator illuminates and the projector enters the standby mode, ensure the exhaust and intake vents are not blocked (page 6) and then try turning the power back on. Wait until the projector has cooled down completely (at least 10 minutes) before plugging in the power cord and turning the power back on. -
Page 50: Regarding The Lamp
■ Carefully change the lamp by following the instructions described in this section. *If you wish, you may have the lamp replaced at your nearest Sharp Authorized Service Center or Dealer. * If the new lamp does not light after replacement, take your projector to the nearest Sharp Authorized Service Center or Dealer for repair. -
Page 51: Removing And Installing The Lamp Unit
Removing and Installing the Lamp Unit • The lamp unit becomes very hot while the projector is operating. Do not remove the lamp Warning! unit from the projector right after use. The lamp and parts around the lamp will be very hot and may cause burns or injury. -
Page 52: Resetting The Lamp Timer
Regarding the Lamp (Continued) Insert the new lamp unit. • Press the lamp unit fi rmly into the lamp unit compartment. Fasten the securing screws. Attach the lamp unit cover. • Close the lamp unit cover in the direc- Securing screws tion of the arrow. -
Page 53: Connecting Pin Assignments
Connecting Pin Assignments DVI-I Terminal: 29-pin connector • DVI Digital Input Pin No. Signal Pin No. Signal T.M.D.S data 2– Hot plug detection T.M.D.S data 2+ T.M.D.S data 0– T.M.D.S data 2 shield T.M.D.S data 0+ Not connected T.M.D.S data 0 shield 24 23 18 17 •... -
Page 54: Rs-232C Specifi Cations And Command Settings
16:Lamp Burnt-out, 32:Lamp Ignition Failure 32:Lamp Ignition Failure, 64:Temp Abnormally High Lamp Power Status 1:On, 2:Cooling 3:Shutting Down 0:Standby Model Name Check XV-Z21000 C1 (COMPONENT1) OK or ERR C2 (COMPONENT2) OK or ERR S-VIDEO OK or ERR VIDEO OK or ERR... - Page 55 Bright (–90 — +90) OK or ERR Color (–30 — +30) OK or ERR Tint (–30 — +30) OK or ERR Sharp (-30 — +30) OK or ERR CLR Temp * OK or ERR BrilliantColor OK or ERR OK or ERR...
- Page 56 Bright (–90 — +90) OK or ERR Color (–30 — +30) OK or ERR Tint (–30 — +30) OK or ERR Sharp (–30 — +30) OK or ERR CLR Temp * OK or ERR BrilliantColor OK or ERR OK or ERR...
- Page 57 Bright (–90 — +90) OK or ERR Color (–30 — +30) OK or ERR Tint (–30 — +30) OK or ERR Sharp (–30 — +30) OK or ERR CLR Temp * OK or ERR BrilliantColor OK or ERR OK or ERR...
- Page 58 PARAMETER Standby mode Power ON (or 30-second startup time) H1 INPUT Tint (–30 — +30) OK or ERR Sharp (–30 — +30) OK or ERR CLR Temp * OK or ERR BrilliantColor OK or ERR OK or ERR Gamma Position...
- Page 59 RETURN CONTROL CONTENTS COMMAND PARAMETER Standby mode Power ON (or 30-second startup time) C.M.S. M-Hue (–30 — +30) OK or ERR C.M.S. Hue Reset OK or ERR C.M.S. R-Saturation (–30 — +30) OK or ERR C.M.S. Y-Saturation (–30 — +30) OK or ERR C.M.S.
- Page 60 OK or ERR OK or ERR OK or ERR Lamp Quantity “1” Model Name Check XV-Z21000 Projector Name Setting Projector Name Setting 1 (First four characters) * OK or ERR Projector Name Setting 2 (Middle four characters) * OK or ERR...
-
Page 61: Wired Remote Control Terminal Specifi Cations
• System codes C1 to C5 are fi xed at “10110”. • Codes C14 and C15 are reverse confi rmation bits, with “10” indicating “Front” and “01” indicating “Rear”. Sharp remote control signal format Transmission format: 15-bit format 67.5 ms 67.5 ms... -
Page 62: Computer Compatibility Chart
Computer Compatibility Chart Computer • Multiple signal support Horizontal Frequency: 15–81 kHz, Vertical Frequency: 43–100 Hz, Pixel Clock: 12–150 MHz • Compatible with sync on green and composite sync signals (TTL level) • AICS (Advanced Intelligent Compression and Expansion System) resizing technology The following is a list of modes that conform to VESA. -
Page 63: Troubleshooting
Troubleshooting Problem Check Page • Projector power cord is not plugged into the wall outlet. • Power to the external connected devices is off. – • The selected input mode is wrong. • Cables incorrectly connected to rear panel of the projector. 18-25 •... - Page 64 Troubleshooting (Continued) Problem Check Page • Make adjustments that result in the best picture quality in the The black levels of the image show banding “Dynamic Range” setting. or appear faded when HDMI1 or 2 is selected. • Picture adjustments are incorrectly set. Picture is too bright and whitish.
-
Page 65: Specifi Cations
DVI to D-sub cable, Lens cap, Terminal cover, Projector operation manual As a part of policy of continuous improvement, SHARP reserves the right to make design and specifi cation changes for product improvement without prior notice. The performance specifi cation fi gures indicated are nominal values of produc-... -
Page 66: Dimensions
Dimensions Units: inch (mm) (223.1) (14.4) (212.5) (212.5) (475) (16.9) (85.1) (77.9) -
Page 67: Index
RS-232C terminal ..........24 DOT BY DOT ............31 DVI terminal ..........18-20, 23 Saturation ............. 37 Dynamic Range ............ 44 Sharp ..............36 SIDE BAR ............. 30 Economy Mode ............ 44 Signal Info ............. 41 ENTER button ............34 Signal Type ............44 Fan Mode ............. - Page 68 Printed in China In China gedruckt Imprimé en Chine Triykt i Kina Impreso en China Stampato in Cina Gedrukt in China TINS-C542WJZZ 06P07-CH_NM...
Need help?
Do you have a question about the XV-Z21000 and is the answer not in the manual?
Questions and answers