Table of Contents
Advertisement
Advertisement
Table of Contents

Related Manuals for Craftsman 172.108510


Summary of Contents for Craftsman 172.108510
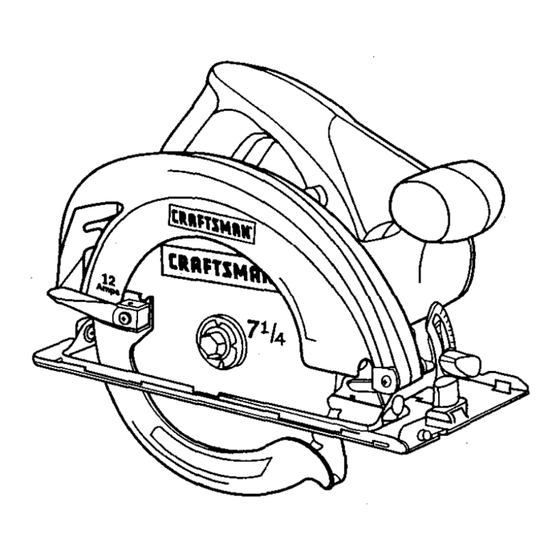
- Page 1 Owner's Manual 71/4-in. CIRCULAR SAWS Model Nos. 172.108510 172.108520 • SAFETY • OPERATION CAUTION: Read, understand and follow • MAINTENANCE all Safety Rules and Operating Instructions • ESPANOL in this manual before using this product. Sears, Roebuck and Co., Hoffman Estates, IL 60179 U.S.A.
- Page 2 Maintenance ..........Pages 23-24 Accessories ..........Page Service Numbers ........Page FULL ONE YEAR WARRANTY ON CRAFTSMAN CIRCULAR SAW If this CRAFTSMAN Circular Saw fails to give complete satisfaction within one year from the date of purchase, RETURN IT TO THE NEAREST SEARS STORE IN THE UNITED STATES, and Sears will replace it, free of charge.
-
Page 3: Electrical Safety
Failure to fellow all instructions listed below may result in electric WARNING: BE SURE to read and understand all instructions. shock, fire and/or serious personal injury. WORK AREA SAFETY 1. ALWAYS keep your work area clean and well lit. Cluttered benches and dark areas invite accidents. -
Page 4: Personal Safety
ELECTRICAL SAFETY cont. 8. When operating a power tool outside, ALWAYS use an outdoor extension cord marked "W-A" or "W". These cords are rated for outdoor use and reduce the risk of electric shock. NOTE: The extension cord must have adequate wire size AWG (American Wire Gauge) for safe, efficient use. -
Page 5: Service Safety
TOOL USE AND CARE SAFETY 1. ALWAYS use clamps or other practical ways to secure and support the workpiece to a stable platform. Holding the work by hand or against your body is unstable and may lead to loss of control. 2. - Page 6 SAFETY RULES FOR CIRCULAR SAWS Keep your second hand on the auxiliary handle or motor housing. DANGER! Keep hands away from cutting area and blade. If both hands are holding the saw, they cannot be cut by the blade. 1. ALWAYS keep your body positioned to either side of the saw blade, but not in line with the saw blade.
- Page 7 SAFETY RULES FOR CIRCULAR SAWS cont. 11. ALWAYS BE SURE that all adjusting screws and the blade holder BEFORE fastened tightly making a cut. Loose adjusting screws and holders can cause the tool or blade to slip and loss of control may result.
- Page 8 Ways to Prevent Kickback cont. 5. DO NOT use a dull or damaged blade. Unsharpened or improperly set blades produce narrow kerr which causes excessive friction, blade binding and KICKBACK. 6. ALWAYS be sure that the blade depth and adjusting locking levers are tight and secure BEFORE making a cut.
- Page 9 ADDITIONAL RULES FOR SAFE OPERATION cont. 6. ALWAYS check for damaged parts. Before further use of the tool, a guard or other part that is damaged should be carefully checked to determine if it will operate properly and perform its intended function. Check for misalignment or binding of moving parts, breakage of parts, and any other condition that may affect the tool's operation.
- Page 10 ADDITIONALRULESFORSAFE OPERATIONcont. z_ WARNING: Some dust particles created by power sanding, sawing, grinding, drilling and other construction jobs contains chemicals known to cause cancer, birth defects or other reproductive harm. Some examples of these chemicals are: • Lead from lead-based paints. •...
- Page 11 Before attempting to use any tool, be sure to familiarize with all the operating features and safety instructions. /_ WARNING: DO NOT let familiarity with your saw make you careless. Remember that a careless fraction of a second is sufficient to cause severe injury.
- Page 12 UNPACKING Your circular saw has been shipped completely assembled, except for the blade, which is packed unassembled. Inspect the saw carefully to make sure that no breakage or damage has occurred during shipping. If any parts are damaged missing, return the saw to your nearest Sears Store to have it replaced.
-
Page 13: Removing The Blade
MOUNTING THE BLADE TO SAW cont. Raise lower blade guard using the blade guard handle and hold it in the raised position for the next steps. 10. Replace the "D" washer (See Fig. 2). 11. Firmly hold down spindle lock button as you replace blade screw and hand tighten it in a clockwise direction (See Fig. -
Page 14: Saw Blades
BLADES All saw blades need to be kept clean, sharp and properly set in order to cut efficiently. Using a dull blade places a heavy load on the saw increases the danger of kickback. Keep extra blades on hand, so sharp blades are always available. - Page 15 KICKBACK Kickback occurs when the blade stalls rapidly and the saw is driven back towards you. Blade stalling is caused by any action which pinches the blade in the wood. IMPORTANT: The best guard against kickback is to avoid dangerous practices. binds or the saw stalls.
-
Page 16: Depth-Of-Cut Adjustment
To Lessen the Chance of Kickback: cont. 2. ALWAYS inspect the workpiece for knots or nails BEFORE beginning to cut. NEVER saw into a knot or nail, 3. Make straight cuts. ALWAYS use a straight edge guide when rip cutting. This will help prevent twisting the blade in the cut. -
Page 17: Starting A Cut
TO ADJUST BLADE DEPTH 1. Unplug the saw. I Z_ WARNING: starting causing possible serious personal injury. Failure to unplug the saw could result in accidental 2. Raise depth adjust lever to loosen. (See Fig. 8). 3. Determine the desired depth of cut. 4. - Page 18 TO HELP MAINTAIN CONTROL cont. z_ DANGER: If the cord hangs up on the workpiece during a cut, release the trigger switch immediately. Unplug the saw and move the cord to prevent it from hanging up again. Z_ DANGER: Using the saw with a damaged cord could result in serious injury or death.
-
Page 19: Making Bevel Cuts
Fig. 12 MAKING CROSS CUTS OR RiP CUTS 1. When making cross or rip cuts, align your line of cut with the outer blade guide notch on the base of the saw (See Fig. 12). 2. Since blade thicknesses vary, ALWAYS make a trial cut in scrap material along the guideline to determine how much, if any the guideline must be offset to... -
Page 20: Bevel Setting
TO ADJUSTTHE BEVEL SETTING 1. Unplug the saw. /_ WARNING: Failure to unplug the saw could result in accidental starting causing possible serious personal injury. 2. Loosen Knob (See Fig. 15). 3. Raise the motor housing end of the saw until you reach the desired angle setting on the bevel scale See Fig. - Page 21 ALWAYS use a guide when making long or wide rip cuts with your saw. You can use either a straight edge or use the Optional Rip/Edge Guide with a 5-inch scale (sold separately at your local Sears store or Craftsman outlet). Using a Straight Edge Fig.
- Page 22 MAKING RIP CUTS cont. Using The Rip/Edge Guide (sold separately) To Attach the Rip/Edge Guide 1. Unplug the saw. WARNING: NEVER Failure to unplug the saw could result in accidental starting causing possible serious personal injury. 2. Place guide through holes in shoe of saw (See Fig.
-
Page 23: Double Insulation
GENERAL Z_ WARNING: To avoid accidents, ALWAYS disconnect the tool from the power source BEFORE cleaning or performing any maintenance. All parts represent an important part of the double insulation system and should be serviced only at a Sears Service Center. Avoid using solvents when cleaning plastic parts. -
Page 24: Extension Cords
EXTENSION CORDS The use of any extension cord will cause some loss of power.To keep the loss at a minimum and to prevent overheating, use an extension cord that is heavy enough to carry the current that the tool will draw. A wire gauge (AWG) of at least 16 is recommended for an extension cord 100 feet or less in length. - Page 25 NOTES...
- Page 26 Get it fixed, at your home or ours! Your Home For repair in your home of all major brand appliances, lawn and garden equipment, or heating and cooling systems, no matter who made it, no matter who sold it! For the replacement parts, accessories and owner's manuals that you need to do-it-yourself.
Need help?
Do you have a question about the 172.108510 and is the answer not in the manual?
Questions and answers