Table of Contents
Advertisement
Quick Links
Advertisement
Table of Contents

Related Manuals for Asus PIKE 2208


Summary of Contents for Asus PIKE 2208
- Page 1 PIKE 2208 LSISAS RAID card User Guide...
- Page 2 Product warranty or service will not be extended if: (1) the product is repaired, modified or altered, unless such repair, modification of alteration is authorized in writing by ASUS; or (2) the serial number of the product is defaced or missing.
-
Page 3: Table Of Contents
Contents Notices ......................v About this guide ..................v PIKE 2208 specifications summary ............vii Chapter 1: Product introduction Welcome! ..................1-2 Package contents ................. 1-2 Card layout ................... 1-3 System requirements ..............1-4 Card installation ................1-5 Chapter 2: RAID configuration Setting up RAID ................ - Page 4 Server 2008 OS installation ....3-9 ® 3.3.2 After Windows Server 2008 OS installation ....3-11 ® Red Hat Enterprise Linux OS 5 Driver Installation ....3-13 ® SUSE Linux OS 11 Driver Installation ........3-15 ® ASUS contact information ................1...
-
Page 5: Notices
You are also entitled to have the goods repaired or replaced if the goods fail to be of acceptable quality and the failure does not amount to a major failure. If you require assistance please call ASUS Customer Service 1300 2787 88 or visit us at http://support.asus.com About this guide This user guide contains the information you need when installing and configuring the server management board. -
Page 6: Conventions Used In This Guide
Conventions used in this guide To make sure that you perform certain tasks properly, take note of the following symbols used throughout this manual. DANGER/WARNING: Information to prevent injury to yourself when trying to complete a task. CAUTION: Information to prevent damage to the components when trying to complete a task. -
Page 7: Pike 2208 Specifications Summary
PIKE 2208 specifications summary Controller LSI 2208 6Gb/s SAS Controller Interface ASUS PIKE interface Ports 8 ports Support Device SAS / SAS II devices SATA / SATA II / SATA III devices Data transfer rate SATA III and SAS II 6Gb/s per PHY RAID level •... - Page 8 viii...
-
Page 9: Chapter 1: Product Introduction
This chapter offers the PIKE 2208 SAS RAID card features and the new technologies it supports. Chapter 1: Product introduction... -
Page 10: Welcome
PIKE 2208 SAS RAID card! ® The ASUS PIKE 2208 allows you to create RAID 0, 1, 10, 5, 50, 6, and 60 sets from SATA/SATA II/SATA III/SAS/SAS II hard disk drives connected to the SAS connectors on the motherboard. -
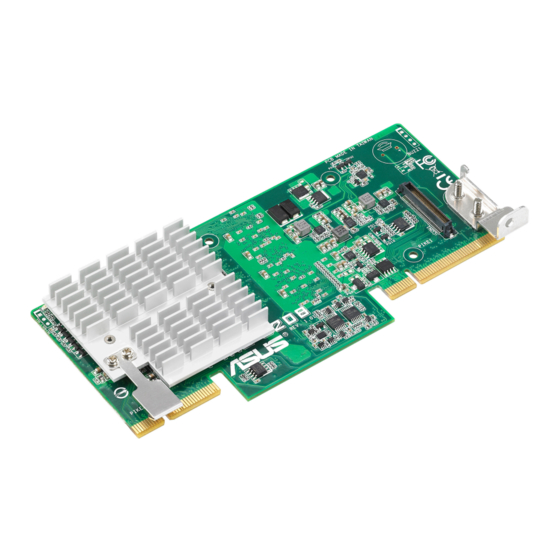
Page 11: Card Layout
CacheVault connector ASUS PIKE interface-1: PCI-E Gen3 x8 ASUS PIKE interface-2: 8-port SAS signal with SGPIO interface* * The SGPIO interface is used for visibility into drive activity, failure and rebuild status, so that users could build high-performance and reliable storage systems. -
Page 12: System Requirements
Rear 1GB DDR3 SDRAM System requirements Before you install the PIKE 2208 SAS RAID card, check if the system meets the following requirements: • Workstation or server motherboard with a PIKE RAID card slot • SAS or SATA hard disk drives •... -
Page 13: Card Installation
Secure the PIKE RAID card with the screw that you removed earlier. DO NOT overtighten the screw, or the motherboard component can be damaged. Connect the hard disk drives to the SAS connectors on the motherboard. ASUS PIKE 2208... - Page 14 Chapter 1: Product introduction...
-
Page 15: Chapter 2: Raid Configuration
This chapter provides instructions on setting up, creating, and configuring RAID sets using the available utilities. Chapter 2: RAID configuration... -
Page 16: Setting Up Raid
Setting up RAID The RAID card supports RAID 0, 1, 10, 5, 50, 6, and 60. 2.1.1 RAID definitions RAID 0 (Data striping) optimizes two identical hard disk drives to read and write data in parallel, interleaved stacks. Two hard disks perform the same work as a single drive but at a sustained data transfer rate, double that of a single disk alone, thus improving data access and storage. -
Page 17: Installing Hard Disk Drives
Connect a SAS signal cable to the signal connector at the back of each drive and to the SAS connector on the motherboard. Connect a power cable to the power connector on each drive. ASUS PIKE 2208... -
Page 18: Lsi Webbios Configuration Utility
LSI WebBIOS Configuration Utility The LSI WebBIOS Configuration Utility (CU) is an integrated RAID solution that allows you to create RAID 0, 1, 10, 5, 50, 6, and 60 sets from SATA/SATA II/SATA III/SAS/SAS II hard disk drives supported by the LSI 2208 6Gb/s SAS controller. You can also use the WebBIOS CU to do the following tasks: •... -
Page 19: Starting The Webbios Cu
0 Virtual Drive(s) handled by BIOS Press <Ctrl><H> for WebBIOS or press <Ctrl><Y> for Preboot CLI The Adapter Selection screen appears. If the system has multiple SAS adapters, select an adapter. Click Start to continue. The main WebBIOS CU screen appears. ASUS PIKE 2208... -
Page 20: Webbios Cu Main Screen Options
2.2.2 WebBIOS CU main screen options This is the Physical View screen which displays the drives that are connected to the controller. To toggle between the physical view and logical view of the storage devices connected to the controller, click Physical View or Logical View in the menu on the left. - Page 21 Logical View: Select this to toggle between the Physical View and Logical • View screens. Events: Select this to view system events in the Event Information screen. • Exit: Select this to exit the WebBIOS CU and continue with system boot. • ASUS PIKE 2208...
-
Page 22: Creating A Storage Configuration
2.2.3 Creating a Storage Configuration This section explains how to use the WebBIOS CU Configuration Wizard to configure RAID arrays and virtual drives to create storage configurations. The default settings of the configuration items mentioned in this section are subject to change without notice, but the functions of the items will not be affected. -
Page 23: Using Automatic Configuration
You use this screen to select drives to create drive groups. Hold <Ctrl> while selecting two or more ready drives in the Drives panel on the left until you have selected all desired drives for the drive group. ASUS PIKE 2208... - Page 24 Click Add To Array to move the drives to a proposed drive group configuration in the Drive Groups panel on the right, as shown in the right figure. Select a preferred power save mode. The power save mode can be Max, Max without cache, Auto, None, and Controller defined.
- Page 25 Configuration panel on the right. You may specify a smaller size if you want to create other virtual drives on the same drive group. Click Accept to accept the changes to the virtual drive definition, or click Reclaim to return to the previous settings. ASUS PIKE 2208 2-11...
- Page 26 Click Yes to confirm the write policy mode you have chosen. 10. Click Next after you finish defining virtual drives. The configuration preview screen appears, as shown in the right figure. 11. Check the information in the configuration preview screen. 12.
- Page 27 This setting is recommended in Standard mode. IO Policy: The IO Policy applies to reads on a specific virtual drive. It • does not affect the read ahead cache. ASUS PIKE 2208 2-13...
- Page 28 ◊ Direct: In direct I/O mode, reads are not buffered in cache memory. Data is transferred to the cache and the host concurrently. If the same data block is read again, it comes from cache memory. This is the default. ◊...
- Page 29 11. Select one of the available drive groups with two drives from the Array With Free Space drop-down list, and then click Add to SPAN. ASUS PIKE 2208 2-15...
- Page 30 12. Select a second drive group from the Array With Free Space drop-down list, and click Add to SPAN. Both drive groups display in the right frame under Span. 13. If there are additional drive groups with two drives each, you can add them to the virtual drive.
- Page 31 WebBIOS main menu, or click Back to return to the previous screens and change the configuration. 21. If you accept the configuration, click Yes at the prompt to save the configuration. 22. Click Yes at the prompt to start initialization. ASUS PIKE 2208 2-17...
- Page 32 23. After the virtual drive is successfully created, the Manage SSD Caching screen appears. Click Cancel to close the sceen. Using Manual Configuration: RAID 5 RAID 5 uses drive striping at the block level and parity. In RAID 5, the parity information is written to all drives.
- Page 33 ◊ Cached: In cached I/O mode, all reads are buffered in cache memory. Drive Cache: Specify the drive cache policy: • ◊ Unchanged: Leave the current drive cache policy unchanged. This is the default. ◊ Enable: Enable the drive cache. ◊ Disable: Disable the drive cache. ASUS PIKE 2208 2-19...
- Page 34 Disable BGI: Specify the background initialization status: • ◊ No: Leave background initialization enabled. This means that a new configuration can be initialized in the background while you use WebBIOS to do other configuration tasks. This is the default. ◊ Yes: Select Yes if you do not want to allow background initializations for configurations on this controller.
- Page 35 Both drive groups display in the right frame under Span. 12. When finish, click Next. The Virtual Drive Definition screen appears. You use this screen to select the RAID level, strip size, read policy, and other attributes for the new virtual drive(s). ASUS PIKE 2208 2-21...
- Page 36 13. If there are additional drive groups with three or more drives each, you can add them to the virtual drive. 14. Change the virtual drive options from the defaults listed on the screen as needed. Here are brief explanations of the virtual drive options: RAID Level: The drop-down menu lists the possible RAID levels for the •...
- Page 37 20. If you accept the configuration, click Yes at the prompt to save the configuration. 21. Click Yes at the prompt to start initialization. 22. After the virtual drive is successfully created, the Manage SSD Caching screen appears. Click Cancel to close the sceen. ASUS PIKE 2208 2-23...
- Page 38 Using Manual Configuration: RAID 6 RAID 6 is similar to RAID 5 (drive striping and distributed parity), except that instead of one parity block per stripe, there are two. With two independent parity blocks, RAID 6 can survive the loss of any two drives in a virtual drive without losing data.
- Page 39 WebBIOS to do other configuration tasks. This is the default. ◊ Yes: Select Yes if you do not want to allow background initializations for configurations on this controller. ASUS PIKE 2208 2-25...
- Page 40 Select Size: Specify the size of the virtual drive in terabytes, gigabytes, • megabytes, or kilobytes. Normally, this would be the full size for RAID 6 shown in the Configuration panel on the right. You may specify a smaller size if you want to create other virtual drives on the same drive group. Click Accept to accept the changes to the virtual drive definition, or click Reclaim to return to the previous settings.
- Page 41 14. Change the virtual drive options from the defaults listed on the screen as needed. Here are brief explanations of the virtual drive options: RAID Level: The drop-down menu lists the possible RAID levels for the • virtual drive. Select RAID 60. ASUS PIKE 2208 2-27...
- Page 42 Strip Size: The strip size specifies the size of the segment written to • each disk in a RAID configuration. You can set the strip size up to 1 MB. A larger strip size produces higher read performance. If your computer regularly performs random read requests, choose a smaller strip size.
- Page 43 20. If you accept the configuration, click Yes at the prompt to save the configuration. 21. Click Yes at the prompt to start initialization. 22. After the virtual drive is successfully created, the Manage SSD Caching screen appears. Click Cancel to close the sceen. ASUS PIKE 2208 2-29...
-
Page 44: Viewing And Changing Device Properties
2.2.4 Viewing and Changing Device Properties This section explains how you can use the WebBIOS CU to view and change the properties for controllers, virtual drives, and drives. WebBIOS allows you to view information for the LSI SAS controller. To view the properties for the controller, click Controller Properties on the main WebBIOS screen. - Page 45 (S.M.A.R.T. error). The default is 300 Polling seconds (5 minutes). Select this option to enable, disable, or silence the onboard alarm tone Alarm Control generator on the controller. The default is Enabled. ASUS PIKE 2208 2-31...
- Page 46 Controller Properties Menu Options (Cont.) Option Description Use this option to select the rate for patrol reads for drives connected to Patrol Read the selected controller. The default is 30 percent. The patrol read rate is Rate the percentage of system resources dedicated to running a patrol read. Cache Flush Use this option to control the interval (in seconds) at which the contents Interval...
-
Page 47: Viewing And Changing Virtual Drive Properties
Before you run an initialization, back up any data on the virtual drive that you want to save. All data on the virtual drive is lost when you initialize the drive. ASUS PIKE 2208 2-33... - Page 48 Select CC to run a consistency check on this virtual drive. • Before you change a virtual drive configuration, back up any data on the virtual drive that you want to keep. Select Adv Opers to set the advanced operations on this virtual drive. •...
-
Page 49: Viewing Drive Properties
Unconfigured Good state. Select Locate to make the LED flash on the drive. This works only if the drive • is installed in a drive enclosure. Select Stop Locate to disable the LED flash on the drive. • ASUS PIKE 2208 2-35... - Page 50 If the drive state is Unconfigured Good, four additional operations appear on this screen: Select Make Global HSP to make a global hot spare, available to all of the • virtual drives. Select Enclosure Affinity so if there are drive failures present on a split •...
-
Page 51: Viewing System Event Information
If you want, select different event criteria in the left panel, and click Go again to view a different sequence of events. Each event entry includes a time stamp and a description to help you determine when the event occurred and what it was. ASUS PIKE 2208 2-37... -
Page 52: Managing Configurations
2.2.6 Managing Configurations This section includes information about maintaining and managing storage configurations. Running a Consistency Check You should periodically run a consistency check on fault-tolerant virtual drives. A consistency check verifies that the redundancy data is correct and available for RAID 1, RAID 5, RAID 6, RAID 10, RAID 50, and RAID 60 arrays. -
Page 53: Importing Or Clearing A Foreign Configuration
Follow these steps to import or clear a foreign configuration: Click the drop-down list to show the configurations. The GUID (Global Unique Identifier) entries on the drop-down list are OEM names and will vary from one installation to another. ASUS PIKE 2208 2-39... - Page 54 Select a configuration or All Configurations. Perform one of the following steps: Click Preview to preview • the foreign configurations. The Foreign Configuration Preview screen appears, as shown in the right figure. Click Clear to clear the foreign • configurations and reuse the drives for another virtual drive.
- Page 55 Scenario #4: If the drives in a non-redundant virtual drive are removed, the controller considers the drives to have foreign configurations. Import or clear the foreign configuration. No rebuilds will occur after the import operation because there is no redundant data to rebuild the drives with. ASUS PIKE 2208 2-41...
-
Page 56: Megaraid Storage Manager
Follow these steps if you need to install MegaRAID Storage Manager software on a system running Microsoft Windows OS: Insert the ASUS PIKE 2208 Support CD in the optical disc drive. The CD automatically displays the Utilities menu if Autorun is enabled in your computer. - Page 57 Click Next to continue. On the next screen, accept the default Destination Folder, or click Change to select a different destination folder. Click Next to continue. The Setup Type screen appears, as shown in the following figure. ASUS PIKE 2208 2-43...
- Page 58 Select one of the Setup options. The options are fully explained in the screen text. Normally, you would select Complete if you are installing MegaRAID – Storage Manager software on a server. Select Custom Installation if you want to select individual program –...
- Page 59 (that is, servers with a complete installation of MegaRAID Storage Manager software), the server screen appears, as shown in the following figure. The server screen will not list any servers. You can use this screen to manage systems remotely. ASUS PIKE 2208 2-45...
-
Page 60: Installing Megaraid Storage Manager Software For Linux
2.3.3 Installing MegaRAID Storage Manager Software for Linux Follow these steps if you need to install MegaRAID Storage Manager software on a system running Red Hat Linux or SUSE Linux: Copy the MSM_linux_installer...tar.gz file to a temporary folder. Untar the MSM_linux_installer...tar.gz file using the following command: tar -zxvf MSM_linux_installer...tar.gz A new disk directory is created. -
Page 61: Linux Error Messages
Exiting installation. This is the message that appears when the installation is complete. • RPM installation failed. This message indicates that the installation failed for some reason. Additional message text explains the cause of the failure. ASUS PIKE 2208 2-47... -
Page 62: Starting The Megaraid Storage Manager Software
2.3.5 Starting the MegaRAID Storage Manager Software Follow these steps to start the MegaRAID Storage Manager software and view the main window: Start the program using the method required for your operating system environment: – To start MegaRAID Storage Manager software on a Microsoft Windows system, select Start >... - Page 63 You must enter the root/administrator user name and password to use Full Access mode. If your user name and password are correct for the Login mode you have chosen, the main MegaRAID Storage Manager window appears. ASUS PIKE 2208 2-49...
-
Page 64: Megaraid Storage Manager Window
2.3.6 MegaRAID Storage Manager Window After you log in, the dashboard view provides an overview of the system and covers the properties of the virtual drives and the physical drives, total capacity, configured capacity, unconfigured capacity, background operations in progress, MegaRAID Storage Manager features and their status (enabled or disabled), and actions you can perform, such as creating a virtual drive and updating the firmware, as shown in the following figure. - Page 65 A yellow circle to the right of an icon indicates that a device is running in a degraded state. For example, this icon indicates that a virtual drive is running in a degraded state because a drive has failed: ASUS PIKE 2208 2-51...
-
Page 66: Event Log Panel
Properties View Panel The right panel of the MegaRAID Storage Manager window has the Properties tab that displays information about the selected device. For example, if a controller icon is selected in the left panel, the Properties tab lists information such as the controller name, NVRAM size, and device port count. - Page 67 If this warning appears, click on the active content warning bar and enable the active content. • If you are using the Linux operating system, you must install Firefox ® Mozilla for the MegaRAID Storage Manager online help to display. ® ASUS PIKE 2208 2-53...
- Page 68 2-54 Chapter 2: RAID configuration...
-
Page 69: Chapter 3: Driver Installation
This chapter provides instructions for installing the RAID drivers on different operating systems. Chapter 3: Driver installation... -
Page 70: Raid Driver Installation
Select the optical drive as the first boot priority to boot from the support CD. Save your changes, then exit the BIOS Setup. Restart the computer. The Make Disk menu appears. Select PIKE 2208 SAS2 card Driver, and press The Make Disk menu appears. Select <Enter> to enter the sub-menu. - Page 71 Use the arrow keys to select the type of RAID driver disk you want to create. PIKE 2208 SAS2 card Driver Windows XP 32 bit Windows XP 64 bit Windows Server 2003 32 bit Windows Server 2003 64 bit Windows Vista 32 bit...
-
Page 72: Windows ® Server 2003 Os Driver Installation
Windows Server 2003 OS Driver ® Installation 3.2.1 During Windows Server 2003 OS installation ® To install the RAID card driver when installing Windows Server 2003 OS: ® Boot the computer using the Windows Server 2003 OS installation CD. The ®... - Page 73 ENTER=Select F3=Exit The Windows Setup loads the RAID card drivers from the RAID driver disk. ® When next screen appears, press <Enter> to continue installation. Setup then proceeds with the OS installation. Follow screen instructions to continue. ASUS PIKE 2208...
-
Page 74: After Windows ® Server 2003 Os Installation
3.2.2 After Windows Server 2003 OS installation ® To update the RAID card driver after installing Windows Server 2003 OS: ® Click Start, right-click My Computer and select Manage from the menu. In the Computer Management window, click the Device Manager item. Double-click RAID Controller under the Other Devices item. - Page 75 Toggle No, Not this time to cancel searching driver from Windows Update, and then click Next to continue. Toggle Install from a list or specific location (Advanced), then click Next to continue. Select the Include this location in the search: check box, and then click Browse. ASUS PIKE 2208...
- Page 76 Insert the SAS RAID card Support CD into the optical drive. Locate the driver in the corresponding folder of the Support CD, and then click OK to continue. The system automatically updates the driver. After completing driver update, click Finish to close the wizard. Chapter 3: Driver installation...
-
Page 77: Windows ® Server 2008 Os Driver Installation
SAS RAID card. If you have only one optical drive installed in your system, eject the Windows OS installation disc and replace with the PIKE SAS RAID card Support CD into the optical drive. Click Browse to continue. ASUS PIKE 2208... - Page 78 Locate the driver in the corresponding folder of the Support CD, and then click OK to continue. Select LSI MegaRAID SAS PCI Express ROMB and click Next. When the system finishes loading the RAID driver, replace the SAS RAID card Support CD with the Windows Server installation disc. Select the drive to install Windows and click Next.
-
Page 79: After Windows ® Server 2008 Os Installation
“+” sign before Diagnostics and click Device Manager. Click the “+” sign before Storage controllers, and double-click LSI MegaRAID SAS Adapter. The controller name differs according to the installed SAS RAID card. Click the Driver tab on the top, then click Update Driver. ASUS PIKE 2208 3-11... - Page 80 Click Browse my computer for driver software. Insert the SAS RAID card Support CD into the optical drive. Click Browse. In the Browse for Folder window, locate the driver in the corresponding folder of the Support CD, and then click OK to continue. In the Update Driver Software window, click Next to continue.
-
Page 81: Red Hat ® Enterprise Linux Os 5 Driver Installation
Enterprise RAID driver disk to the USB floppy disk drive, ® select OK, then press <Enter>. Insert Driver Disk Insert your driver disk into /dev/sda and press “OK” to continue. Back The drivers for the RAID card are installed to the system. ASUS PIKE 2208 3-13... - Page 82 When asked if you will load additional RAID controller drivers, select No, then press <Enter>. More Driver Disks? Do you wish to load any more driver disks? Select Skip and press <Enter> to continue. CD Found To begin testing the CD media before installation press OK.
-
Page 83: Suse ® Linux Os 11 Driver Installation
When below screen appears, select the USB floppy disk drive (sdx) as the driver update medium. Select OK, then press <Enter>. Please choose the Driver Update medium. sda: USB Floppy sr0: CD-ROM, ASUS DRW-2014S1T Other device Back The drivers for the RAID controller are installed to the system. - Page 84 3-16 Chapter 3: Driver installation...
-
Page 85: Asus Contact Information
+1-510-739-3777 +1-510-608-4555 Web site usa.asus.com Technical Support Telephone +1-812-282-2787 Support fax +1-812-284-0883 Online support support.asus.com ASUS COMPUTER GmbH (Germany and Austria) Address Harkort Str. 21-23, D-40880 Ratingen, Germany +49-2102-959911 Web site www.asus.de Online contact www.asus.de/sales Technical Support Telephone (Component) +49-1805-010923*...
Need help?
Do you have a question about the PIKE 2208 and is the answer not in the manual?
Questions and answers