
Related Manuals for Ariens 911410-WAW 34


Summary of Contents for Ariens 911410-WAW 34
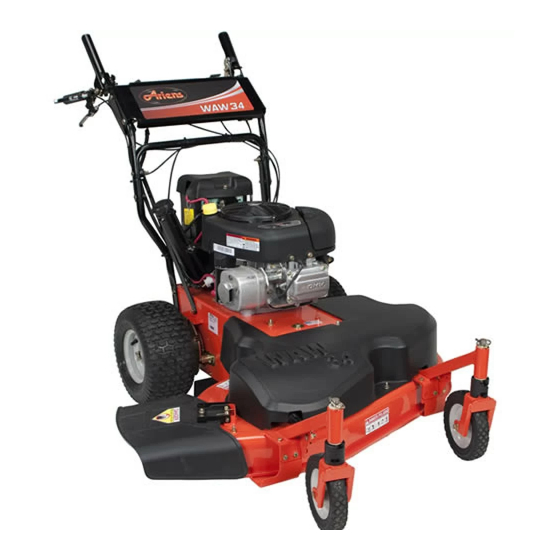
- Page 1 Wide Area Walk Mower Owner/Operator Manual Manuel du Proprietaire/Utilisateur Models 911410 - WAW 34 01325600 12/09 ENG',SH Printed in USA FRENCH...
-
Page 2: Table Of Contents
They are also printed on a serial distribuidor. Visite a su distribuidor number label, located on the frame of your o vaya a w_v.ariens.com para unit (Figure 1). obtener una lista de idiomas disponibles para su equipo. - Page 3 • Record Engine Model & Serial numbers 2. Fill out Original Purchaser Registration here: Card and return the card to Ariens. 3. Explain Ariens Limited Warranty Policy. 4. Explain recommended lubrication and maintenance. Advise customer on PRODUCT REGISTRATION adjustments.
- Page 4 [,,"/-'I = 1 =l i'l CAUTION: POTENTIALLY WARNING: This cutting machine ,& HAZARDOUS SITUATION! If not is capable of amputating hands avoided, MAY RESULT in minor or and feet and throwing objects. moderate injury. It may also be Failure to observe the safety used to alert against unsafe instructions in the manuals and...
- Page 5 SAFETY DECALS AND LOCATIONS ALWAYS replace missing or damaged safety decals. Refer to Figure 2 for safety decal locations. Figure 2 1. DANGER! TO AVOIDSERIOUS INJURY OR DEATH guards are in operating position o not operate mower unless or entire bagger is attached. Read the operator's manual.
- Page 6 2. WARNING! 4. DANGER! KEEP HANDS AND FEET AWAY Do not operate mower unless guards are in Read the operator's manual. operating position or bagger is attached. 5. WARNING! OL180I Keep children and others away ¢_ AIwaySarea. stand clearofdischarge from unit while operating. ©L1814 ©L4370 ÷...
-
Page 7: Safety
Check grass bag forwear, damage, and/or wearing open s andals orcanvas shoes. deterioration. Replace only w ith Ariens NEVER wear loose c lothes, long h air o r original equipment replacement parts for jewelry that m ay g et c aught inrotating parts. - Page 8 NO flames, NO sparks, NO smoking, near by the operator. See your Ariens Dealer or battery. engine manufacturer's service center. Poisonous battery fluid contains sulfuric acid. Contact with skin, eyes o rclothing can cause...
- Page 9 Ensure all w heel blocks, jack stands and tie Use only accessories which have been downs will s upport unit d uring maintenance. approved by Ariens and are properly Replace worn-out mufflers immediately. installed. Continued...
-
Page 10: Assembly
ASSEMBLY 5. Check engine crankcase oil level. See engine manual. 1. Remove all packing materials and straps 6. Connect the battery ground cable (-) to from unit. the negative battery terminal. 2. Remove one pair of nuts and bolts from 7. - Page 11 Figure 6 1. PTO Clutch Lever 2. Parking Brake Release Lever 3. Forward Drive Control 4. Reverse Drive Control 5. Handlebars 6. Fuel Tank and Cap 7. Height Adjustment Spacers 8. Muffler 9. Oil Fill/Dipstick 10. Air Filter 11. Fuel Filter 12.
-
Page 12: Controls And Features
CONTROLS AND FEATURES PTO Disengaged: Mower blades See Figure 6 for locations. stop rotating. WARNING: Improper operation can lead to injury. Learn what the controls do and how they work. Thoroughly read and understand entire Operator Manual. PTO Engaged: lever and then hold clutch lever CAUTION: AVOID INJURY. - Page 13 Lock P in Remove spacers from the stack. Spacers Secure spacers above the Figure 7 caster arm with the lock p in. Align t he open e nds o fthe spacers with the flats o nthe caster spindle and remove the spacers one atatime u ntil enough are left a t the bottom f orthe desired cutting height.
- Page 14 Forward Drive Control To stop: (Lower Right Hand Control) Release reverse drive control. CAUTION: Unit will move at Reverse Drive engine start if the wheel drive Control controls are engaged. ALWAYS release the wheel drive controls before starting unit. NOTE: Engine must be running for wheel drive to propel unit.
- Page 15 IMPORTANT: Excessively oxygenated Electric Start reformulated fuels ( fuels blended with 1. Check each item under Before Each alcohols orethers) can damage the fuel Use in the MAINTENANCE SCHEDULE system o rcause performance problems. on page 16. any undesirable operating problems occur, use agasoline...
- Page 16 5 seconds after releasing the control. If the blade continues to run, adjust or repair Ariens Dealers will provide any service, parts control immediately. or adjustments which may be required to keep your unit operating at peak efficiency.
- Page 17 To install blade: 1.Install mower blades onmower deck DO NOT Sharpen to This Pattern with mounting hardware. 2.Torque 5/8-inch nut t o92to130 Ibf-ft (125 t o176 N°m). 3.Connect spark plug w ire. ::::::::::::::::::::::::::::::::::: DISCARD If More Than 1/2 in. (1.27 cm) OT0792 Sharpen to This Pattern 1.
- Page 18 CHECK DRIVE BELTS CHECK SPARK PLUG Check drive belts and replace if worn or Spark plug should be replaced every 100 damaged. See Wheel Drive Belts on page 20. hours of operation or each year. NOTE: Loose spark plug wire terminals can CHECK FASTENERS cause sparking.
- Page 19 4. Tighten the lock nut to hold the adjustment. IMPORTANT: If you cannot adjust the PTO clutch or if it fails to operate properly, immediately take the unit to your Ariens dealer for repair. 1. Cable 2. Lock Nut Adjuster Figure 13 1.
-
Page 20: Maintenance
BELT REPLACEMENT NOTE: Check the wheel drive control adjustment after the first 25 hours of use to compensate for belt wear. WARNING: AVOID INJURY. ALWAYS block wheels, engage Rear of Unit - Forward Drive Belt Routing parking brake and know all jack stands are strong, secure and will hold weight of unit during maintenance. - Page 21 PTO Belt Deck Belt 1. Stop engine, remove key, wait for all 1. Stop engine, remove key, wait for all moving parts to stop and hot parts to moving parts to stop and hot parts to cool. cool. 2. Remove the two drive belts from engine 2.
- Page 22 SERVICING THE BATTERY NOTE: Unit comes equipped with a maintenance-free battery that requires no regular maintenance except cleaning the terminals. WARNING: Battery posts, ,& terminals and related accessories contain lead and lead compounds, chemicals known to the State of California to cause cancer and reproductive harm.
-
Page 23: Storage
Follow the to prevent rust. Matching touch-up paint is recommended mix ratio found on the fuel available from your Ariens Dealer. Do not use stabilizer container. abrasives, solvents, or harsh cleaners. To treat the fuel system for storage: Inspection 1. - Page 24 / | _Toll]_'_[oIo)_ PROBLEM PROBABLE CAUSE CORRECTION 1. Safety switch not held down. Engine will not Hold down safety switch while turning the ignition key. start Ignition switch is faulty. Replace ignition switch. Wiring harness fuse is blown. Replace fuse. Loose or corroded battery Clean and tighten battery cables.
- Page 25 P_'T__o];_[_,,,,_ Always use genuine Ariens parts to keep See your authorized Ariens Dealer to add tour mower running like new. these optional accessories. Part Description 71106100 Bagger Kit Number 71510800 Mulch Kit 03746500 Blade 03797300 Mulching Blade 07200529 Forward Traction Belt...
- Page 26 ___o_,,,_ Model Number 911410 WAW 34 Description Length - in. (cm) 68.5 (174) Height - in. (cm) 38 (96.5) Width - in. (cm) 36 (91.4) Actual Weight - Ibs (kg) 276 (125.2) Cutting Width- in. (cm) 34 (86.3) Cutting Height- in.
- Page 27 AMP series electric mowers is/are warranted to the original purchaser for two years from the date of purchase. Ariens will replace, free of charge to the original purchaser, any battery pack and/or battery subassembly that fails due to defect in material or workmanship for one year after the date of purchase.
-
Page 28: Warranty
If the applicable warranty period is more than 90 days, Ariens will cover the prorated cost of any defective battery, for up to 12 months after the date of purchase. This battery limited warranty does not apply to the battery packs on AMP series products. - Page 29 Ariens Company 655 West Ryan Street Brillion, WI 54110-1072 920-756-2141 Fax 920-756-2407 www.ariens.com A WARNING The engine exhaust from this product contains chemicals known to the State of California to cause cancer, birth defects or other reproductive harm.
- Page 30 Wide Area Walk Mower Manual del propietario/operador Models 911410 - WAW 34 01325602 2/10 Printedin ESPA_OL...
- Page 31 Los nQmeros estan situados en el formulario en idiomas diferentes del ingles en su distribuidor. Visite a su de registro del producto del paquete distribuidor o vaya a www.ariens.com de documentaci6n de la unidad. Tambien se hallan impresos en una etiqueta de nQmero...
- Page 32 Nota para el cliente: Si el Concesionario registra el producto, rellene, firme y devuelva CL.&.USULA DE EXENCION la tarjeta de registro del producto a Ariens DE RESPONSABILIDAD o vaya a www.ariens.com en Intemet. Ariens se reserva el derecho de abandonar la...
- Page 33 iADVERTENCIA7 iSITUACION iADVERTENClA7 Esta m aquina POTENCIALMENTE PELIGROSA! decorte p uede amputar manos y Si no se evita, PUEDE RESULTAR pies y lanzar objetos. Si n o observa en lesiones graves o la muerte. las instrucciones deseguridad los manuales ylas calcomanias podrian producirse lesiones PRECAUCION:...
- Page 34 ETIQUETAS DE SEGURIDAD Y EMPLAZAMIENTO DE LAS MISMAS Sustituya SIEMPRE las etiquetas adhesivas de seguridad daSadas o que se hayan perdido. Consulte en Figura 2 los emplazamientos de las etiquetas adhesivas de seguridad. Figura 2 1. iPELIGRO! No dirija nunca la descarga hacia PARA EVITAR UNA LESION GRAVE otras personas, ya que los objetos O FATAL...
- Page 35 Mire h acia a bajo y detras antes ydurante lamarcha atras. Apagar el motor, quitar la Ilave No estacione enuna pendiente y leer el manual antes de amenos que coloque bloques ocalzos. ajustar o reparar la unidad. OL1812 No permita que lamaquina utilizada por p ersonal nocapacitado para hacerlo.
- Page 36 Realice una inspecci6n general del a rea Protejase SlEMPRE los ojos, la cara y el cuerpo detrabajo ydelaunidad para e ntender: con el equipo de seguridad adecuado y ropa elarea d etrabajo protectora. Lleve calzado, guantes, un gorro launidad duro y, en los ojos, mascara o gafas de todas las calcomanias deseguridad.
- Page 37 EPA y/o CARB. P6ngase en limpio decesped, hojas, residuos oexceso contacto con su concesionario de equipos delubricante. Ariens para cualquier asunto relacionado con Tenga cuidado especial alaproximarse los controles de emisiones y componentes. aesquinas sin visibilidad, arbustos, arboles El combustible es altamente inflamable yotros o bjetos que puedan impedir lavisi6n.
- Page 38 Utilice solamente laspiezas derepuesto elestado deCalifornia sesabe q ue causan diseSadas para l aunidad. Consulte cancer ydaSos alsistema reproductor. concesionario Ariens. Lavese las manos despues demanejarlos. Deje q ue seenfrie e lmotor antes de almacenarlo encualquier recinto cerrado.
- Page 39 Limpie SIEMPRE launidad antes de Use s olamente equipos auxiliares oaccesorios almacenarla durante unlargo p eriodo de que esten disefiados para l aunidad ypuedan tiempo. Consulte elmanual del m otor para ser usados con seguridad enelterreno encuesti6n. las instrucciones correctas dealmacenaje.
- Page 40 NOTA: Despues de las veinticinco primeras horas de funcionamiento, el desgaste de la correa puede requerir ajustar el cable del embrague de la TDF y los cables del control de la transmisiSn. Vease Controles de transmisi6n de avance/marcha atras en la pagina 21 y Correas de la transmisi6n de las ruedas en la pagina 22.
- Page 41 Figura 6 1 . Palanca de embrague de la TDF 9 . Varilla medidora para el Ilenado de aceite 2 . Palanca de desconexi6n del freno de estacionamiento 10. Filtro de aire Control de transmisi6n de avance 11. Filtro de combustible Control de transmisi6n de marcha atras 12.
- Page 42 CONTROLES Y FUNCIONES NOTA: La palanca de bloqueo evita que la palanca del embrague de la TDF se apriete Consulte Figura 6 para las ubicaciones. accidentalmente. Se conecta cada vez que se suelta la palanca del embrague. iADVERTENCIA7 TDF desconectada: las cuchillas Un funcionamiento incorrecto...
- Page 43 Para m odificar laaltura decorte, retire e l pasador delaparte s uperior delahorquilla Retire los del c onjunto rodante. Levante elbrazo del espaciadores conjunto rodante Iosuficiente para e xponer delahorquilla los perfiles yelagujero inferior del pasador eneleje delahorquilla del c onjunto rodante.
- Page 44 Control transmision de avance Control de transmision de marcha atras (palanca de control inferior derecha) (Palanca de control derecha) PRECAUCION: La unidad PRECAUClON: La unidad avanzara al arrancar el motor avanzara al arrancar el motor si si estan conectados los controles estan conectados los controles de la transmisi6n de las ruedas.
- Page 45 GASOLINA Para parar el cortacesped en una emergencia: 1. Suelte la palanca de embrague IMPORTANTE: Utilice SIEMPRE gasolina de la TDF y la palanca del freno que cumpla las siguientes especificaciones: de estacionamiento. Gasolina limpia y nueva. 2. Gire la Ilave de contacto hasta De un minimo de 87 octanos/87 AKI la posici6n apagado.
- Page 46 NOTA: Si la cuchilla hace un ruido de roce cuando se suelta la palanca de la TDF, significa que el freno de la cuchilla presenta un fallo. P6ngase en contacto inmediatamente con un Distribuidor de Ariens para su reparaci6n. E-17...
- Page 47 NOTA: Las cuchillas deben ser afiladas y equilibradas pot un profesional. P6ngase en contacto con su distribuidor Ariens. 1. Retire la cuchilla del cortacesped de la unidad. Para extraer la cuchilla: Deseche la cuchilla del cortacesped 1.
- Page 48 2.Afile l acuchilla del c ortacesped quitando una cantidad dematerial igual decada extremo de lamisma. NO cambie elangulo Revisi6n del filo ni r edondee laesquina dela cuchilla de la cuchilla del c ortacesped. del cortacesped NO afilar deacuerdo aeste e squema Perno_ 3 _[_i_i_i_i_i_i_i_i_i_i_i_i_ Figura 11...
- Page 49 LUBRICACION GENERAL REVISION DE LA REFRIGERACION DEL MOTOR La unidad incorpora ejes y transmisiones sellados que no precisan mantenimiento y no necesita lubricaci6n, excepto un ligero toque iADVERTENCIA7 de aceite o grasa en los puntos de giro. Las SUPERFICIES CALIENTES REVISION DE LA BUJiA pueden provocar la muerte o lesiones graves.
- Page 50 TDF o no funciona a su distribuidor autorizado para correctamente, Ileve la unidad a su realizar una reparaci6n. distribuidor Ariens para su reparaci6n. Cuando se gastan las correas nuevas o la transmisi6n parece perder potencia, es posible que tenga que ajustar el cable de control de la transmisi6n.
- Page 51 Desconecte los resortes de retorno de punto muerto de los anclajes del resorte. 1.Graduador 2. Contratuerca del c able Figura 14 Figura 13 4. Quite el brazo de la polea tensora de la REEMPLAZO DE LA CORREA placa de transmisi6n. Vease Figura 15. 5.
- Page 52 Correa de la TDF Parte t rasera delaunidad - Instalaci6n delacorrea detransmisiSn demarcha 1. Detenga el motor, quite la Ilave y espere adelante a que todas las piezas en movimiento se paren y se enfrien las piezas calientes. 2. Quite las dos correas de transmisi6n de la polea del motor.
- Page 53 Correa de la plataforma Parte trasera delaunidad 1. Detenga el motor, quite la Ilave y espere a que todas las piezas en movimiento se paren y se enfrien las piezas calientes. 2. Quite las dos correas de transmisi6n de la polea del motor. Vease Correas de la transmisi6n de las ruedas en la pagina 22 3.
- Page 54 4.Perno 1.Vastago 2.Cuchilla hexagonal cortacesped 5/8 pulg. 3.Arandela Figura 17 MANTENIMIENTO DE LA BATERiA NOTA: La unidad viene equipada con una bateria que no requiere mantenimiento, excepto la limpieza de los bornes. iADVERTENCIA7 Los bomes de la bateria, terminales y accesorios relacionados contienen plomo y compuestos de plomo, sustancias...
- Page 55 Arranque por puente la muerte o lesiones graves. Ariens no recomienda el arranque pot puente NO cambie baterias congeladas. de la unidad ya que se pueden dafiar los Deje que se descongelen antes componentes del motor y del sistema electrico.
- Page 56 Puede conseguir pintura del fabricante. para retoques en su distribuidor Ariens. 2. Ponga el motor en marcha durante al No utilice abrasivos, disolventes ni menos 10 minutos despues de haber limpiadores agresivos.
- Page 57 5. La bateria esta descargada. 5. Cargar la bateria. 6. Motor de arranque 6. Consultar al concesionario defectuoso. Ariens. 7. El dep6sito del combustible 7. Llene el dep6sito esta vacio. de combustible. El motor 1. No hay combustible.
- Page 58 3. Transmisi6n o componentes Solicite una reparaci6n de la transmisi6n dafiados. a su distribuidor. Utilice siempre piezas originales de Ariens Consulte con su distribuidor autorizado para mantener el cortacesped operando Ariens para instalar estos accesorios como nuevo. opcionales.
- Page 59 I_,,,,___o,][o_]_,,,,_ NOmero de modelo 911410 WAW 34 Descripci6n Longitud - pulg. (cm) 68,5 (174) Altura - pulg. (cm) 38 (96,5) Anchura- pulg. (cm) 36 (91,4) Peso real- Ib (kg) 276 (125,2) Anchura de corte - pulg. (cm) 34 (86,3) Altura de corte - pulg. (cm) 1,75 - 3,5 (4,4 - 8,9) Motor, 4 ciclos Briggs &...
- Page 60 Ariens sustituira, sin cargo alguno para el comprador original, cualquier bloque de baterias y/o subconjunto que presente algtJn fallo pot defectos en materiales o fabricaci6n durante un afio a contar desde la fecha de compra.
- Page 61 Durante los primeros 90 dias del periodo de garantia, se sustituira una bateria defectuosa sin cargo alguno. Si el periodo aplicable de garantia supera los 90 dias, Ariens asumira el coste prorrateado de cualquier bateria defectuosa, hasta Ilegar a los 12 meses a partir de la fecha de la compra.
- Page 62 Ariens Company 655 West Ryan Street Brillion, WI 54110-1072 920-756-2141 Fax 920-756-2407 www.ariens.com A WARNING The engine exhaust from this product contains chemicals known to the State of California to cause cancer, birth defects or other reproductive harm.
Need help?
Do you have a question about the 911410-WAW 34 and is the answer not in the manual?
Questions and answers