
Related Manuals for Ariens 911403-WAW 1034


Summary of Contents for Ariens 911403-WAW 1034
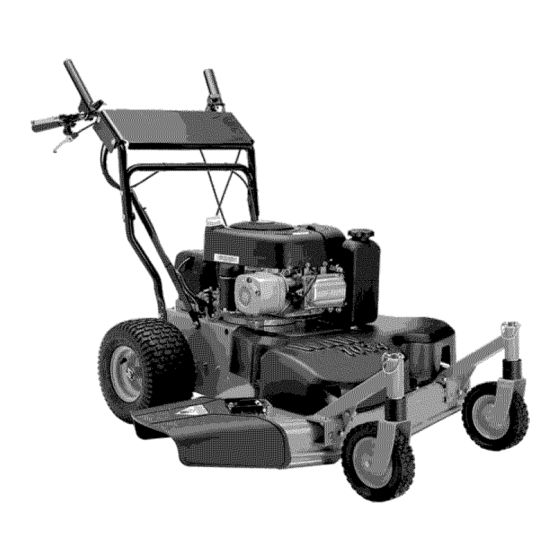
- Page 1 Wide Area Walk Mower Owner/Operator Manual Manuel du Proprietaire/Utilisateur Models 911403 - WAW 1034 911407 - WAW 1034 CARB 01290700A 8/09 ENGLISH Printed in USA FRENCH...
-
Page 2: Table Of Contents
They are also printed on a serial distribuidor. Visite a su distribuidor number label, located on the frame of your o vaya a w_v.ariens.com para unit (Figure 1). obtener una lista de idiomas disponibles para su equipo. - Page 3 • Record Engine Model & Serial numbers 2. Fill out Original Purchaser Registration here: Card and return the card to Ariens. 3. Explain Ariens Limited Warranty Policy. 4. Explain recommended lubrication and maintenance. Advise customer on PRODUCT REGISTRATION adjustments.
- Page 4 [,:'Y-,1 _1 =1i'i CAUTION: POTENTIALLY WARNING: This cutting machine ,& HAZARDOUS SITUATION! If not is capable of amputating hands avoided, MAY RESULT in minor or and feet and throwing objects. moderate injury. It may also be Failure to observe the safety used to alert against unsafe instructions in the manuals and...
- Page 5 SAFETY DECALS AND LOCATIONS ALWAYS replace missing or damaged safety decals. Refer to Figure 2 for safety decal locations. Figure 2 1. DANGER! TO AVOIDSERIOUS INJURY OR DEATH guards are in operating position o not operate mower unless or entire bagger is attached. Read the operator's manual.
- Page 6 2. WARNING! 4. DANGER! KEEP HANDS AND FEET AWAY Do not operate mower unless guards are in Read the operator's manual. operating position or bagger is attached. 5. WARNING! OL180I Keep children and others away ¢_ AIwaySarea. stand clearofdischarge from unit while operating. ©L1814 ©L4370 ÷...
-
Page 7: Safety
Check grass bag forwear, damage, and/or NEVER wear loose c lothes, long h air o r deterioration. Replace only w ith Ariens jewelry that m ay g et c aught inrotating parts. original equipment replacement parts for safety. - Page 8 NO flames, NO sparks, NO smoking, near must bemaintained ineffective working order battery. by the operator. See your Ariens Dealer or Poisonous battery fluid contains sulfuric acid. engine manufacturer's service center. Contact with skin, eyes o rclothing can cause severe chemical burns.
-
Page 9: Assembly
Use o nly r eplacement parts designed for y our An extension spring, when e xtended, stores unit. See your Ariens Dealer. energy and can bedangerous. Always use Allow e ngine tocool before storing inany tools s pecifically designed forinstalling enclosure. - Page 10 5.Check engine crankcase oillevel. See engine manual. 6.Connect the battery ground cable ( -)to the negative battery terminal. 7.Fill f uel tank. See FILLING THE FUEL TANKon page 14. NOTE: After the first twenty-five hours of operation, belt wear may require the pro clutch cable and the drive control cables to be adjusted.
- Page 11 [o_o_o_,,._ r±_ _ln]l_::W±_uttl_t_ Figure 6 1. PTO Clutch Lever 2. Parking Brake Release Lever 3. Forward Drive Control 4. Reverse Drive Control 5. Handlebars 6. Fuel Tank and Cap 7. Height Adjustment Spacers 8. Muffler 9. Oil Fill/Dipstick 10. Air Filter 11.
-
Page 12: Controls And Features
CONTROLS AND FEATURES PTO Disengaged: Mower blades See Figure 6 for locations. stop rotating. WARNING: Improper operation can lead to injury. Learn what the controls do and how they work. Thoroughly read and understand entire Operator Manual. PTO Engaged: lever and then hold clutch lever CAUTION: AVOID INJURY. - Page 13 Lock P in Remove spacers from the stack. Flats Spacers Figure 7 Secure spacers above the Align t he open e nds o fthe spacers with the caster arm flats o nthe caster spindle and remove the with the spacers one atatime u ntil enough are left a t lock p in.
- Page 14 FILLING THE FUEL TANK / __ Parking Brake To add fuel to fuel tank: 1. Put unit in open or well-ventilated area. 2. Stop engine and allow to cool. 3. Clean fuel cap and surrounding area. 4. Remove cap. IMPORTANT: See engine manual for correct type and grade of fuel.
- Page 15 EMERGENCY STOPPING Shut 1. Release the pto clutch lever, the parking NOTE: The engine will run after the clutch brake lever, and the wheel drive controls and parking brake levers are released. and allow unit to stop completely. ALWAYS shut off the engine with the ignition key and remove the key before leaving the 2.
- Page 16 If the blade continues to run, adjust or repair Ariens Dealers will provide any service, parts control immediately. or adjustments which may be required to keep your unit operating at peak efficiency.
- Page 17 To install blade: 1.Install mower blades onmower deck DO NOT Sharpen to This Pattern with mounting hardware. 2.Torque bolt t o80- 120 Ibf-ft (108.4 - 162.7 N°m) (bolt should fully compress lock w asher). 3.Connect spark plug w ire. DISCARD If More Than 1/2 in.
- Page 18 CHECK DRIVE BELTS CHECK SPARK PLUG Check drive belts and replace if worn or Spark plug should be replaced every 100 damaged. See Wheel Drive Belts on page 20. hours of operation or each year. NOTE: Loose spark plug wire terminals can CHECK FASTENERS cause sparking.
- Page 19 4. Tighten the lock nut to hold the adjustment. IMPORTANT: If you cannot adjust the pto clutch or if it fails to operate properly, immediately take the unit to your Ariens dealer for repair. 1. Cable 2. Lock Nut Adjuster Figure 13 1.
-
Page 20: Maintenance
BELT REPLACEMENT NOTE: Check the wheel drive control adjustment after the first 25 hours of use to compensate for belt wear. WARNING: AVOID INJURY. ALWAYS block wheels, engage Rear of Unit - Forward Drive Belt Routing parking brake and know all jack stands are strong, secure and will hold weight of unit during maintenance. - Page 21 PTO Belt Deck Belt 1. Stop engine, remove key, wait for all 1. Stop engine, remove key, wait for all moving parts to stop and hot parts to moving parts to stop and hot parts to cool. cool. 2. Remove the two drive belts from engine 2.
- Page 22 1.Flat Washer 3.5/8-inch 2. Bellville Hex Bolt Washer 4.Mower Blade Figure 17 SERVICING THE BATTERY NOTE: Unit comes equipped with a maintenance-free battery that requires no regular maintenance except cleaning the terminals. 1. Battery Cover 4. Battery WARNING: Battery posts, 2.
- Page 23 Follow the to prevent rust. Matching touch-up paint is recommended mix ratio found on the fuel available from your Ariens Dealer. Do not use stabilizer container. abrasives, solvents, or harsh cleaners. To treat the fuel system for storage: Inspection 1.
- Page 24 u|;TolU__oIo_@ PROBLEM PROBABLE CAUSE CORRECTION 1. Safety switch not held down. Engine will not Hold down safety switch while turning the ignition key. start Ignition switch is faulty. Replace ignition switch. Wiring harness fuse is blown. Replace fuse. Loose or corroded battery Clean and tighten battery cables.
- Page 25 [,.__] =11 t ]_,_ ;_ _ Always use genuine Ariens parts to keep See your authorized Ariens Dealer to add tour mower running like new. these optional accessories. Description Part Number 71106100 Bagger Kit Blade 00651800 71508000 Mulch Kit Drive Belt...
-
Page 26: Warranty
Model Number 911403 911407 Description WAW 1034 WAW 1034 CARB Length -in.(cm) 68.5 (174) Height -in. ( cm) 38 (96.5) Width - in.(cm) 36 (91.4) Actual Weight -Ibs (kg) 285 (129.3) Cutting Width- in.(cm) 34 (86.3) Cutting Height- in.(cm) 1.75 - 3.5 (4.4 - 8.9) Engine, 4cycle Briggs &... - Page 27 31, 2007 will be free from defects in material and workmanship for a period of two years after the date of purchase. An authorized Ariens dealer (Ariens brand products) or Gravely dealer (Gravely brand products) will repair any defect in material or workmanship, repair or replace any defective part, subject to the conditions, limitations and exclusions set forth herein.
- Page 28 Parts that are not genuine Ariens or Gravely service parts are not covered by this warranty. The following maintenance, service and replacement items are not covered by this warranty unless...
- Page 29 Ariens Company 655 West Ryan Street Brillion, WI 54110-1072 920-756-2141 Fax 920-756-2407 www.ariens.com A WARNING The engine exhaust from this product contains chemicals known to the State of California to cause cancer, birth defects or other reproductive harm.
- Page 30 Wide Area Walk Mower Manual del propietario/operador Models 911403 - WAW 1034 911407 - WAW 1034 CARB 01290702A 8/09 Printed in USA ESPA_OL...
- Page 31 Los nQmeros estan situados en el formulario distribuidor. Visite a su distribuidor de registro del producto del paquete o vaya a w_v.ariens.com para de documentaci6n de la unidad. Tambien obtener una lista de idiomas se hallan impresos en una etiqueta de nQmero disponibles para su equipo.
- Page 32 Nota para el cliente: Si el Concesionario registra el producto, rellene, firme y devuelva CLAUSULA DE EXENClON la tarjeta de registro del producto a Ariens DE RESPONSABILIDAD o vaya a www.ariens.com en Internet. Ariens se reserva el derecho de abandonar la...
- Page 33 _.'_€"llJ :t I_7_,I _] iADVERTENClA! iSITUACION iADVERTENClA! Esta maquina POTENCIALMENTE PELIGROSA! de corte puede amputar manos y Si no se evita, PUEDE RESULTAR pies y lanzar objetos. Si no observa en lesiones graves o la muerte. las instrucciones de seguridad de los manuales y las calcomanias podrian producirse lesiones PRECAUCION:...
- Page 34 ETIQUETAS DE SEGURIDAD Y EMPLAZAMIENTO DE LAS MISMAS Sustituya SIEMPRE las etiquetas adhesivas de seguridad daSadas o que se hayan perdido. Consulte en Figura 2 los emplazamientos de las etiquetas adhesivas de seguridad. Figura 2 1. iPELIGRO! No dirija nunca la descarga hacia PARA EVITAR UNA LESION GRAVE otras personas, ya que los objetos O FATAL...
- Page 35 Mire hacia a bajo y detras antes ydurante lamarcha atras. Apagar el motor, quitar la Ilave No estacione enuna pendiente y leer el manual antes de amenos que c oloque bloques ocalzos. ajustar o reparar la unidad. ©L1812 Nopermita que lamaquina utilizada por p ersonal nocapacitado para h acerlo.
- Page 36 Realice una inspecci6n general del a rea Protejase SlEMPRE los ojos, la cara y el cuerpo detrabajo ydelaunidad para e ntender: con el equipo de seguridad adecuado y ropa elarea d etrabajo protectora. Lleve calzado, guantes, un gorro launidad duro y, en los ojos, mascara o gafas de todas las calcomanias deseguridad.
- Page 37 Los controles Ariens para s u seguridad. deemisiones ycomponentes pueden ser Para r educir elpeligro deincendio ajustados Qnicamente por c entros deservicio osobrecalentamiento, mantenga...
- Page 38 Utilice solamente laspiezas derepuesto elestado deCalifornia sesabe q ue causan diseSadas para l aunidad. Consulte cancer ydaSos alsistema reproductor. concesionario Ariens. Lavese las manos despues demanejarlos. Deje q ue seenfrie e lmotor antes de almacenarlo encualquier recinto cerrado.
- Page 39 Limpie SIEMPRE launidad antes de Use s olamente equipos auxiliares oaccesorios almacenarla durante unlargo p eriodo de que esten d isefiados para l aunidad ypuedan tiempo. Consulte elmanual del m otor para ser usados con seguridad enelterreno encuesti6n. las instrucciones correctas dealmacenaje.
- Page 40 5.Revise elnivel deaceite del c arter del motor. Consulte elmanual del m otor. 6.Conecte elcable d etoma a tierra ( +) delabateria alterminal negativo delabateria. 7.Llene e ldep6sito decombustible. Vease LLENADO DEL DEPOSITO DE COMBUSTIBLE en la pagina 16. NOTA: Despues de las veinticinco primeras horas de funcionamiento, el desgaste de la correa puede requerir ajustar el cable...
- Page 41 L"d Figura 6 1 . Palanca de embrague de la TDF 2 . Palanca de desconexi6n del freno de estacionamiento Control de transmisi6n de avance Control de transmisi6n de marcha atras Manillares Dep6sito de combustible y tap6n Espaciadores de ajuste de la altura Silenciador 9 .
- Page 42 CONTROLES Y FUNCIONES NOTA: La palanca de bloqueo evita que la palanca del embrague de la TDF se apriete Consulte Figura 6 para las ubicaciones. accidentalmente. Se conecta cada vez que se suelta la palanca del embrague. iADVERTENClA! ,& TDF desconectada: las cuchillas Un funcionamiento incorrecto...
- Page 43 Para m odificar laaltura d ecorte, retire e l pasador delaparte s uperior delahorquilla del c onjunto rodante. Levante elbrazo del conjunto rodante Iosuficiente para e xponer Retire los los perfiles yelagujero inferior del p asador espaciadores eneleje delahorquilla del c onjunto rodante. de la horquilla Introduzca elpasador...
- Page 44 Control transmision de avance Control de transmisibn de marcha atras (palanca de control inferior derecha) (Palanca de control derecha) PRECAUCION: La unidad PRECAUClON: La unidad ,& avanzara al arrancar el motor avanzara al arrancar el motor si si estan conectados los controles estan conectados los controles de la transmisi6n de las ruedas.
- Page 45 LLENADO DEL DEPOSITO Estabilizador de combustible DE COMBUSTIBLE La gasolina que permanezca en el sistema de combustible durante largas temporadas Para aSadir combustible al dep6sito: sin un estabilizador se deteriorara y generara 1. Coloque la unidad en un area abierta dep6sitos de goma en el sistema.
- Page 46 LESIONES. Antes de proceder, lea y comprenda toda la secci6n Mantenimiento de Seguridad. realizado Los distribuidores de Ariens suministraran Revisar el embrague de la TDF cualquier reparaci6n, pieza de recambio Revisi6n del control o ajuste que su unidad necesite para seguir de transmisi6n funcionando con la maxima eficacia.
- Page 47 P6ngase Si la cuchilla sigue funcionando, ajuste en contacto con su distribuidor Ariens. o repare el control inmediatamente. Para extraer la cuchilla: NOTA: Si la cuchilla hace un ruido de roce 1. Pare la unidad, espere a que todas...
- Page 48 3. Revise el equilibrio de la cuchilla Afile las cuchillas del cortac_sped del cortacesped. Deslice la cuchilla en un perno sin rosca. PRECAUCION: NO afile las Si la cuchilla esta equilibrada, deberia cuchillas cuando esten en la mantenerse en posici6n horizontal. unidad.
- Page 49 IMPORTANTE: Debe m antenerse REVISION DE LA REFRIGERACION todo momento unnivel correcto deaceite; DEL MOTOR deIocontrario se daSaria elmotor. NO IoIlene e nexceso. AsegQrese deque elmotor este nivelado alaSadir aceite. iADVERTENCIA! Las SUPERFICIES CALIENTES LUBRICAClON GENERAL pueden provocar la muerte o lesiones graves.
- Page 50 TDF o no funciona realizar una reparaci6n. correctamente, Ileve la unidad a su distribuidor Ariens para su reparaci6n. Cuando se gastan las correas nuevas o la transmisi6n parece perder potencia, es posible que tenga que ajustar el cable de control de la transmisi6n.
- Page 51 Desconecte los resortes de retomo de punto muerto de los anclajes del resorte. 1.Graduador 2.Contratuerca Figura 14 del c able Figura 13 4. Quite el brazo de la polea tensora de la placa de transmisi6n. Vease Figura 15. REEMPLAZO DE LA CORREA 5.
- Page 52 Correa de la TDF Parte t rasera delaunidad - Instalaci6n delacorrea detransmisiSn demarcha 1. Detenga el motor, quite la Ilave y espere adelante a que todas las piezas en movimiento se paren y se enfrien las piezas calientes. 2. Quite las dos correas de transmisi6n de la polea del motor.
- Page 53 Correa de la plataforma 1. Detenga el motor, quite la Nave y espere a que todas las piezas en movimiento se paren y se enfrien las piezas calientes. 2. Quite las dos correas de transmisi6n de la polea del motor. Vease Correas de la transmisi6n de las ruedas en la pagina 22 3.
- Page 54 Arranque pot puente 3. Limpie los extremos del cable de la bateria, Ariens no recomienda el arranque por puente el borne negativo (-), y el borne positivo (+) con una escobilla de alambre y de la unidad ya que se pueden dafiar los enjuaguelos con una soluci6n muy componentes del motor y del sistema electrico.
- Page 55 Puede conseguir pintura del fabricante. para retoques en su distribuidor Ariens. 2. Ponga el motor en marcha durante al No utilice abrasivos, disolventes ni menos 10 minutos despues de haber limpiadores agresivos.
- Page 56 5. La bateria esta descargada. 5. Cargar la bateria. 6. Motor de arranque 6. Consultar al concesionario defectuoso. Ariens. 7. El dep6sito del combustible 7. Llene el dep6sito esta vacio. de combustible. El motor 1. No hay combustible.
- Page 57 Solicite una reparaci6n de la transmisi6n dafiados. a su distribuidor. I_ I_4;%"] _]=11-'t =1 811]_"_e] Utilice siempre piezas originales de Ariens Consulte con su distribuidor autorizado para mantener el cortacesped operando Ariens para instalar estos accesorios como nuevo.
- Page 58 NOmero demodelo 911403 911407 Descripci6n WAW 1034 WAW 1034 CARB Longitud -pulg. (cm) 68,5 (174) Altura - pulg. (cm) 38 (96,5) Anchura- pulg. (cm) 36 (91,4) Peso r eal -Ib(kg) 285 (129,3) Anchura decorte - pulg. (cm) 34 (86,3) Altura decorte - pulg. (cm) 1,75 - 3,5 (4,4 - 8,9) Motor, 4ciclos Briggs &...
- Page 59 Si el distribuidor no registra el producto, el cliente debe rellenar la tarjeta de registro que se incluye con el aparato y enviarla a Ariens Company, o debera registrar el producto online en www.ariens.com o www.gravely.com. Para conseguir...
- Page 60 LIMITA ClON DE REMEDIOS Y DAIVOS La responsabilidad de Ariens Company bajo esta garantia y bajo cualquier garantia implicita que pueda existir se limita a la reparaci6n o sustituci6n de cualquier defecto de fabricaci6n, y a la reparaci6n o sustituci6n de cualquier pieza defectuosa.
- Page 61 Ariens Company 655 West Ryan Street Brillion, WI 54110-1072 920-756-2141 Fax 920-756-2407 www.ariens.com A WARNING The engine exhaust from this product contains chemicals known to the State of California to cause cancer, birth defects or other reproductive harm.
Need help?
Do you have a question about the 911403-WAW 1034 and is the answer not in the manual?
Questions and answers