Table of Contents
Advertisement
Advertisement
Table of Contents

Subscribe to Our Youtube Channel
Related Manuals for Electrolux EOB 68713


Summary of Contents for Electrolux EOB 68713
- Page 1 user manual Built-in Electric Oven EOB 68713...
-
Page 2: Table Of Contents
2 electrolux Electrolux. Thinking of you. Share more of our thinking at www.electrolux.com Contents Important safety information................3 Description of the oven ..................5 The electronic oven controls ................7 Before the first use of the oven................9 Using the oven ....................12 The menu Assisted Cooking................ -
Page 3: Important Safety Information
3 Important safety information These warnings are provided for the safety of the users and those living with them. So read them carefully before installing and using the appliance. This will allow you to obtain best performance, avoid improper actions, use the appliance in complete safety and also respect the environment. -
Page 4: Environmental Information
4 electrolux • Do not use abrasive cleaners or sharp Environmental Information metal scrapers. These can scratch the glass in the oven door, which may re- • After installation, please dispose of sult in the shattering of the glass. the packaging with due regard to safety and the environment. -
Page 5: Description Of The Oven
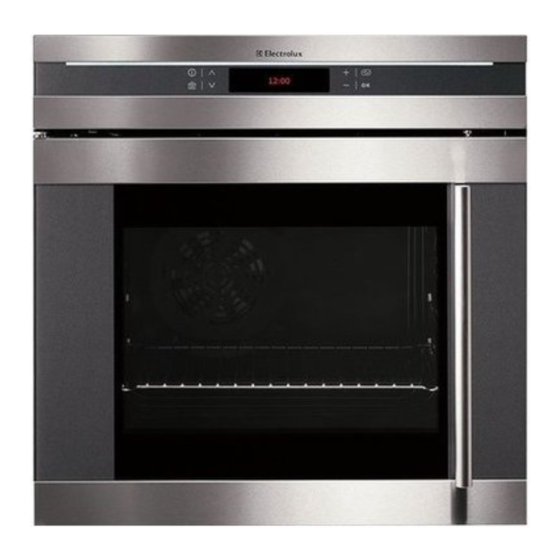
5 Description of the oven Light bar Oven light Control panel Telescopic shelf supports Air vents for cooling fan Oven fan Grill Rating plate Oven accessories Baking tray Dripping pan Shelf... -
Page 6: Cooling Fan
6 electrolux How the electronic Touch Con- Safety Thermostat trols on the oven work To prevent dangerous overheating (through incorrect use of the appliance All the oven functions are controlled or defective components), the oven is electronically. You can select any com-... -
Page 7: The Electronic Oven Controls
7 The electronic oven controls Indicators Menu option symbol Clock Heat (with oven shelf level) indicator Time functions Temperature Weight Symbols Various symbols will now be shown in the display depending on the selected function. Symbol Display Function (examples) - Page 8 8 electrolux Touch Control sensor fields Set values Select On/Off values options Scroll Main menu Confirm Sensor Function Comment field To move down and up in the When a function is active: menu. • Press once: Change to the higher menu (function remains active), after 5 seconds move again into the active menu option.
-
Page 9: Before The First Use Of The Oven
9 Before the first use of the oven If you would like to change one of these base settings at a later date, please refer to the chapter Basic Settings. Setting the language 1. When the appliance has been connected to the electrical supply, the following is shown in the display. -
Page 10: Setting The Clock
10 electrolux Setting the clock After you have set the contrast and the brightness, the message ”Set Time of Day” is displayed. 4. Using set the hour of the current time. 5. Confirm with 6. Using set the minutes of the current time. - Page 11 11 3. Set the temperature to 250°C. 4. Allow the oven to run empty for approximately 45 minutes. 5. open a window for ventilation. This procedure should be repeated with the "Fan Cooking" and "Full Grill" function for approximately 5-10 minutes.
-
Page 12: Using The Oven
12 electrolux Using the oven The menus in overview Main menu Sub-menu Assisted Cooking Pork/Veal Beef/Game/Lamb Poultry Fish Cake Pizza/Pie/Bread Casseroles/Gratins Convenience Specials Heating Functions Light Fan Cooking Conventional Cooking Pizza Setting Turbo Grill Economy Grill Dual Grill Bottom Heat... - Page 13 13 Main menu Sub-menu Basic Settings Set Time of Day Time Indication Set+Go Heat+Hold Extra Time Menu Display Contrast Display Brightness Set Language Buzzer Volume Key Tones Alarm/Error Tones Service Factory Settings Operation of the menus Example 1. Switch the appliance on with You will find yourself in the main menu.
-
Page 14: Heat Indicator
14 electrolux You can cancel a procedure by pressing Then you will find yourself back in the main menu. Heat indicator Heating up indicator 4. When an oven function has been switched on the bar that keeps getting longer indicates how far the oven has heated up. -
Page 15: The Menu Assisted Cooking
15 The menu Assisted Cooking The Assisted Cooking in overview The dishes in the Kitchen Assistant (except for Specials) are prepared with automatic systems. The automatic systems offer the optimum settings (oven functions, tem- perature, cook time) for the respective dish. - Page 16 16 electrolux Category Dish Cake Lemon Sponge Cake Ring Cake Swedish Cake Savarin Cake Biscuit Brownies Cheese Cake Muffins Fruit Cake Sweet Tart Streusel Cake Carrot Cake Rich Yeast Plait Almond Cake Yeast Plait Fruit Tart Pizza/Pie/Bread Pizza Cheese Pastry...
- Page 17 17 Operation of the Assisted Cooking Assisted Cooking with Weight Automatic The roasting time is automatically determined by inputting the weight. Example 1. Using select the menu option Assisted Cooking, the desired category and the dish. 2. Confirm each one with 3.
- Page 18 18 electrolux Assisted Cooking with Recipe Automatic All settings are fixed and cannot be changed. Example 1. Using select the menu option Assisted Cooking, the desired category and the dish. 2. Confirm each one with 3. Using select Recipe Automatic.
-
Page 19: The Oven Functions Menu
19 The Oven Functions menu The oven functions in overview Using the oven functions you can set baking and roasting sessions to suit your requirements. Oven function Application Heating element/fan The oven light is on when a function Light is selected, the oven light function included. - Page 20 20 electrolux Operating the oven functions Example 1. Switch the appliance on with 2. Using select the menu option oven function. 3. Confirm with 4. Using select oven function Fan Cooking. 5. Confirm with 6. Using set the desired tempe- rature.
-
Page 21: The Menu My Programmes
21 The menu My Programmes My Programmes in overview Sub menu Description 1- My Program To save optimum settings for your own recipes. 2- My Program Edit Programme Name To rename stored programmes. You can store 20 programmes. Operation of My Programmes Storing a programme 1. - Page 22 22 electrolux 8. Confirm with when you have written your programme name. Your programme is stored. Memory positions that are already filled overwritten at any time. Instead of the suggested free memory position, with select the programme that you would like to overwrite.
-
Page 23: The Menu Basic Settings
23 The menu Basic Settings The Basic Settings in overview You can change certain basic settings regardless of the task the oven is performing. Setting Display Description Set Time of Day 12:15 Set the current time on the clock. - Page 24 24 electrolux Between 22:00 and 6:00 the display reduces its brightness when appliance switched off to save energy. Operation of the Basic Settings Example 1. Using select the menu option Basic Settings. 2. Confirm with 3. Using go to the setting that you want to adjust.
-
Page 25: Minute Minder
25 Minute Minder To set a countdown. When it has counted down, an audible signal sounds. This function has no effect on the operation of the oven. 1. Press key repeatedly until the ”Minute Minder” window appears. Using key, set the desired countdown (max. - Page 26 26 electrolux Duration or End Time Duration For setting how long the oven is to operate. End Time For setting when the oven is to switch itself off again. 1. Select oven function. 2. Press key repeatedly until the ”Duration/End Time”...
- Page 27 27 Using residual heat with the Duration and End Time clock functions When the Duration and End Time clock functions are used, the oven switches the heating elements off, when 90% of the time set or calculated has elapsed. The residual heat present is...
- Page 28 28 electrolux Extra Time Allows the last oven function to con- tinue after a certain time has elapsed. Precondition: • All oven functions with Duration or Weight Automatic. The Extra Time can be switched on and off in the Basic Settings menu.
- Page 29 29 Heat+Hold The function Heat+Hold keeps your prepared dish warm for 30 minutes, after the baking or roasting has ended. This is helpful, for example, when your guests are late. Condition for Heat+Hold: • Fixed temperatur is above 80°C To switch on Heat+Hold 1.
- Page 30 30 electrolux Set+Go The function Set+Go means you can set all settings for an oven function and then start it later. Example application: You prepare a dish in the morning and enter all necessary settings in the oven. Your child comes home at lunchtime,...
-
Page 31: Key Lock
31 Key Lock The key lock protects all functions set from accidental changes. To switch on Key Lock 1. Select oven function. 2. Press key repeatedly until the ”Key Lock” window appears. 3. Confirm with The Key Lock is now activated. - Page 32 32 electrolux Oven automatic shut-off If the oven is not switched off after a certain time, or if the heat setting is not modified, oven switches automatically. The oven switches off at an oven temperature of: 30 - 115°C after 12.5 hours...
-
Page 33: Telescopic Shelf Supports
33 The oven has four shelf levels. The shelf positions are counted from the bottom of the oven as shown in the diagram. Inside of door On the inside of the oven door you will find the numbers of the different oven shelves. -
Page 34: Hints And Tips
34 electrolux Hints and tips Always keep the oven door closed while cooking. This oven is equipped with an exclusive cooking system that creates a natural air stream and keeps the cooking vapours circulating. Food is therefore cooked in a constantly... -
Page 35: Cleaning And Maintenance
35 Cleaning and maintenance Before cleaning always allow Cleaning materials the cooling fan to cool the oven Before using any cleaning materials on down before switching off at your oven, check that they are suitable the electricity supply. and that their use is recommended by This appliance cannot be the manufacturer. -
Page 36: Cleaning The Oven Door
36 electrolux Cleaning the oven door The following instructions explain how to disassemble the oven door as it is supplied by the Manufacturer. If your oven door has been reversed, please note that the references to the right or left side have to be switched. - Page 37 37 After cleaning, place the inner glasses back in their original position by inserting them in the rubber distance holders D. To correctly mount the Fig. 4: inner glass C (without side decors) the dot visible in the glass should appear in the top left angle of the glass itself.
- Page 38 38 electrolux Appliances in stainless steel or alu- minium We recommend you only clean the oven door with a wet sponge and then dry it afterwards with a soft cloth. Never use scourers, acids or harsh abrasives, as these can damage the surface. Clean the panel with the same care.
- Page 39 39 Oven Shelf Support Rails The shelf support rails on the left and right hand sides of the oven can be removed for cleaning the side walls. Removing the shelf support rails First pull the front of the rail away from the oven wall and then unhitch at the back (1, 2).
-
Page 40: Cleaning The Hinged Grill
40 electrolux Cleaning the hinged grill This model has been fitted with a hinged grill element to make the roof of the oven especially easy to clean. Make sure that the appliance is completely cooled before carrying out this operation. -
Page 41: Replacing The Oven Light
41 Replacing the Oven Light If the oven bulb needs replacing, the new bulb must have the following specifications: - Electric power: 25 W, - Voltage: 230 V (50 Hz), - Resistant to temperatures of 300 °C, - Connection type: E14. -
Page 42: If Something Goes Wrong
The oven light does not come Select a cooking function. Buy a new oven light bulb; if necessary, order from the Electrolux Service Centre and install according to the instructions in this user manual. Steam and condensation When the cooking process is completed,... -
Page 43: Technical Data
43 Technical data Heating element ratings Bottom Heat 1000 W Coventional cooking (Top+Bottom)1800 W Economy Grill 1650 W Dual Grill 2450 W Fan Cooking 2000 W Pizza Setting 2075 W Turbo Grill 2475 W Slow Cook 2025 W Defrost... -
Page 44: Instructions For The Installer
44 electrolux Instructions for the Installer The instructions given below are designed specifically for a qualified installer and should aid him or her to perform all installation, adjustment, and maintenance operations with absolute precision and in compliance with all current legislation and regulations. -
Page 45: Building In
45 load and in compliance with rules in force. The green & yellow ground wire must not be interrupted by the switch and it should be 2-3 cm longer than the other cables. The supply cable must in all cases be laid out in such a way as to ensure that it does not reach at any given point a temperature 50 °C higher than... -
Page 46: Securing The Oven To The Cabinet
46 electrolux This appliance can be placed with its back and with one side close to ap- pliances or walls of higher height. The other side, instead, must be placed close to furniture or appliances, having the same height. Undertop recess dimensions... -
Page 47: Guarantee/Customer Service
47 Guarantee/Customer service Belgium Our appliances are produced with the greatest of care. However, a defect may still occur. Our consumer services department will repair this upon request, either during or after the guarantee period. The service life of the appliance will not, however, be reduced as a result. - Page 48 Our consumer services department is always at your disposal, even after the guarantee period has expired. Address for our consumer services department: BELGIUM Tel: Fax: Electrolux Home Products Belgium Consumer services 02/363.04.44 02/363.04.00 ELECTROLUX SERVICE 02/363.04.60 Bergensesteenweg 719 1502 Lembeek E-mail: consumer.services@electrolux.be...
-
Page 49: Service And Spare Parts
49 Service and spare parts If after the checks listed in the chapter "If something goes wrong", the appliance still does not work correctly, contact your local Service Centre, specifying the type of malfunctioning, the appliance model (Mod.), the product number (Prod. No.) and the serial number (Ser. -
Page 50: European Guarantee
• The appliance is installed and used in accordance with instructions issued by Electrolux and is only used within the home, i.e. is not used for commercial pur- poses. • The appliance is installed in accordance with all relevant regulations in force within your new country of residence. - Page 51 51...
- Page 52 52 electrolux www.electrolux.be 35697-0006 02/09 R.A...
Need help?
Do you have a question about the EOB 68713 and is the answer not in the manual?
Questions and answers