
Related Manuals for Electrolux EOB6640


Summary of Contents for Electrolux EOB6640
- Page 1 I n s t r u c t i o n s f o r u s e EOB6640 822 923 197 -A- 24.04.02-02...
-
Page 2: Dear Customer
Dear customer, Please read these operating instructions carefully. Pay particular attention to the section “Safety infor- mation” on the first few pages. Please retain these operating instructions for later reference. Pass them on to possible new owners of the appliance. The following symbols are used in the text: Safety instructions... -
Page 3: Table Of Contents
Contents Operating Instructions ............. Safety . -
Page 4: Operating Instructions
Operating Instructions ating Instructions Safety Electrical Safety To Avoid Damaging Your Appliance • The appliance may only be connected by a regis- • Do not line your oven with aluminium foil and do tered specialist. not place a baking tray or dish on the oven floor, otherwise the oven enamel will be damaged by •... -
Page 5: Disposal
Disposal posal Disposing of the packaging material All materials used can be fully recycled. Plastics are marked as follows: • >PE< for polyethylene, as used for the outer wrapping and the bags inside. • >PS< for polystyrene foam, e.g., as used for the padding materials. -
Page 6: Description Of The Appliance
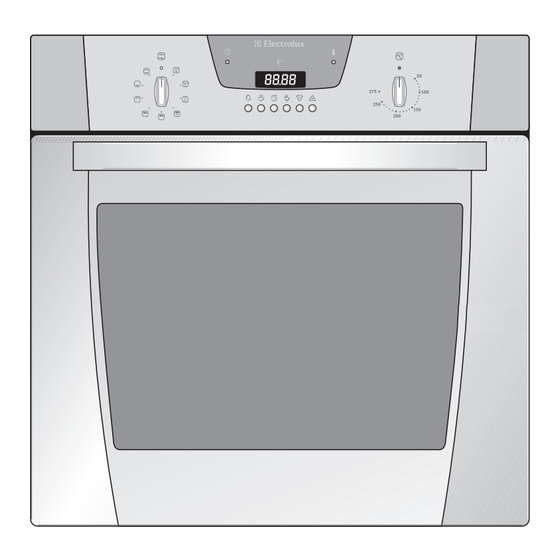
Description of the Appliance n of the Appliance ance General Overview Control Panel... -
Page 7: Oven Features
Oven Features... -
Page 8: Oven Accessories
Oven accessories Combination shelf For dishes, cake tins, items for roasting and grilling. Baking tray For cakes and biscuits General purpose pan For roasting, or as a receptacle for grease Meat probe For determining exactly how far joints of meat are cooked. -
Page 9: Before Using For The First Time
Before Using for the First Time sing for the First Time First Time Setting the Clock The oven only operates when the clock has been set. The clock display flashes when the appliance is first connected, or after a power failure. 4. -
Page 10: Initial Cleaning
Initial Cleaning Before the oven is used for the first time, it should be cleaned thoroughly. Important: do not use caustic or abrasive cleaning agents! Thesecan damage the oven surface. For the metal surfaces, use commercially available cleaning agents. 1. Set the Oven Function selector to Oven Light 2. -
Page 11: Using The Oven
Using the Oven ng the Oven Switching the Oven On and Off 1. Turn the “oven functions” switch to the required function. 2. Turn the “temperature selection” switch to the required temperature. The red oven power indicator is illuminated while the oven is in use. -
Page 12: Oven Functions
Oven Functions The oven has the following functions: Oven Lighting Top Heat With this function you can illuminate the oven inte- For browning foods topped with breadcrumbs rior, e.g., for cleaning. and foods cooked au gratin. The heating element is not in use. The top heating element is in use. -
Page 13: Inserting The General Purpose Pan, Grill, And Tray
Inserting the general purpose pan, grill, and tray y Inserting the general purpose pan and tray: The trays have a little bulge on the left and right edges. These are provided as positioning guides and must always be located towards the rear when inserting the tray. -
Page 14: Clock Functions
Clock Functions Clock Functions: Display Symbols: C Countdown AUTO â For setting a countdown period. When the period The "AUTO" sign lights up when an automatic pro- has elapsed, an audible signal is sounded. gram has been set, and flashes when the program is This function has no effect on oven operation. - Page 15 Countdown C 1. Press the Countdown C button. 2. Set the desired time using the + or - buttons. While Countdown is running, the remaining time can be checked by pressing the Countdown C button again. A few seconds after a Countdown time has been set, the normal clock display re-appears, showing the current time.
- Page 16 Cook Time m 1. Press the m button. 2. Set the desired cooking time by pressing the + or - buttons (10 hours maximum). The normal clock display returns after around 5 seconds. The “AUTO” symbol appears, indicating that the oven is in Automatic mode. When the set time has elapsed, an audible signal sounds for 7 minutes, and the oven switches itself off.
- Page 17 Cook Time m and End p Functions Combined Cook Time m and End p functions can be used together, if the oven is to be switched on or off automatically at a later time. 1. Select the desired oven functions and tempera- ture.
- Page 18 The “Auto” symbol appears, and the clock time is shown on the display. For example, 12:05. The oven switches on automatically when the clock reaches the set time. For example, at 13:05. After the set Cook Time has elapsed, the oven is switched off.
-
Page 19: Adjusting The Clock
Adjusting the clock The clock time cannot be changed if any of the Automatic functions (Cook Time m or End p) has been set. 1. Press the M buttons briefly. 2. Set the current time using the + or - buttons. The clock shows the set time after 5 seconds. -
Page 20: Meat Probe
Meat Probe For switching off the oven when the temperature inside the meat has reached the desired level. The meat probe can be used with Top/Bottom heat and Fan-assisted circulation. There are two temperatures to remem- ber: – Oven temperature: see Roasting Table –... - Page 21 The current core temperature appears on the left. The core temperature indicator begins at 20°C. 5. When the probe temperature reaches the set temperature, an audible signal sounds and the oven switches itself off automatically. To stop the audible signal, press the M button. If the temperature detected at the centre of the roast falls below the set core tempera- ture, the oven switches on again automati-...
-
Page 22: Mechanical Door Lock
Mechanical Door Lock When the appliance is delivered, the door lock is deactivated. Activating the door lock Pull the sliding safety catch forwards until it clicks into place. Opening the oven door 1. Push the door inwards. 2. Press the catch, and hold it in. 3. -
Page 23: Uses, Tables And Tips
Uses, Tables and Tips ses, Tables and Tips Baking For baking use the hot air U oven function or con- When baking, remove the fat filter, as oth- ventional O. erwise the baking time will be longer and the surface will be browned unevenly. Baking tins Shelf positions •... - Page 24 General Information • Always count the shelf positions from the bottom upwards. • Insert baking trays with the sloped edge to the front! • Always place cake tins in the middle of the shelf. • Using hot air U or conventional O you can also bake with two cake tins simultaneously by plac- ing them side by side on the shelf.
-
Page 25: Baking Table
Baking Table The stated baking times are for guidance only Recommended cooking methods, shelf positions and temperatures are printed in bold type Hot Air Conventional Type of pastry or cake Tempera- Shelf position Baking Tempera- Shelf posi- ture in °C from bottom time in ture in °C... - Page 26 Hot Air Conventional Type of pastry or cake Tempera- Shelf position Baking Tempera- Shelf posi- ture in °C from bottom time in ture in °C tion minutes from bot- Level Levels Levels Level Apple crumble (DIN) 150-170 35-50 170-190 Cheesecake (tray) 150-170 45-50 170-190...
-
Page 27: Frozen Foods
Frozen Foods Hot Air + Conventional Type of pastry or cake Temperature in °C Shelf position from bottom Baking time in minutes Lay on the grill tray, Follow the manufac- insert baking tray below Follow the manufacturer’s turer’s instructions (shelf position in accordance instructions Pizza (frozen) as stated on the... -
Page 28: Pizza Setting
Pizza Setting The stated baking times are for guidance only Pizza Setting Shelf position Baking time Type of pastry or cake Temperature in °C from bottom in minutes Shortcrust pastry 60-90 + Large cheesecake (750 g soft cheese, 150-160 10 mins. standing loose-bottomed tin, 26 cm) time Covered fruit pie... -
Page 29: Roasting
Roasting For roasting use the hot air Ü oven function. Notes on the roasting table Information is given in the table on suitable Ovenware for roasting oven functions, temperature settings, cook- • Any heat-resistant dish is suitable for roasting ing times and shelf positions for various (Refer to the manufacturer's instructions!). -
Page 30: Roasting Table
Roasting Table Insert either the tray or universal tray into the 1st shelf support rail. Hot Air Shelf position Roasting time Food to be roasted Temperature in °C from bottom in minutes 1 Level 2 Levels Pork 1 kg Pork joint (spare rib/ham joint, roasting joint), 150-160 14-20... -
Page 31: Meat Probe Table
Hot Air Shelf position Roasting time Food to be roasted Temperature in °C from bottom in minutes 1 Level 2 Levels Poultry Chicken 150-160 55-60 Duck (2000-2500 g) 150-160 90-120 Goose (4500 g) 150-160 150-180 Meat Probe Table be Table Food to be Cooked Meat Core Temperature Beef... -
Page 32: Grilling
Grilling For grilling use the infrared grill \ oven function or Notes on the grilling table infrared wide-area grill Z with temperature setting. The grilling times are only for guidance and will vary depending on the type and quality of meat or fish. Warning: Always close the oven door when •... -
Page 33: Infrared Grilling
Infrared Grilling always pre-heat for 5 minutes Food for grilling Function Tempera- Universal Grill tray Grilling time ture in °C tray in minutes Shelf support rail from 1. Page 2. Page bottom Infrared 4-8 Pork chops wide-area grill 2-4 Pork chops Infrared grill Infrared marinated pork steaks... -
Page 34: Preserving
Preserving When preserving use the bottom heat oven function. Notes on preserving • Use the baking tray for preserving. There is room Preserving jars for up to six jars, each with a capacity of 1 litre. • When preserving use only commercially available •... -
Page 35: Drying With Hot Air
Drying with Hot Air Use shelves lined with greaseproof paper or baking paper. You will achieve a better result if you switch the oven off half way through the drying time. Open and leave to cool, preferably overnight. Then finish drying the dried food. Time in hours Temperature in °C (approximate guide) -
Page 36: Cleaning And Care
Cleaning and Care Warning: For safety reasons cleaning the appliance with a steam jet cleaner or high- pressure water cleaner is not permissible! Exterior of the Appliance Wipe the front of the appliance with a soft cloth dipped in warm soapy water. •... -
Page 37: Shelf Support Rails
Shelf Support Rails The shelf support rails on the left and right hand sides of the oven can be removed for cleaning the side walls. Removing the shelf support rails First pull the front of the rail away from the oven wall (1) and then unhitch at the back (2). -
Page 38: Oven Lighting
Oven Lighting Warning: There is a danger of electric shock! Prior to changing the oven light bulb: – Switch off the oven! – Remove the fuses in the fuse box or switch off the circuit breaker. Place a cloth on the oven floor to protect the oven light and glass cover. -
Page 39: Cleaning The Oven Ceiling
Cleaning the Oven Ceiling The upper heating element can be folded down to make it easier to clean the oven ceiling. Folding down the heating element Warning: Only fold down the heating ele- ment when the oven is switched off and there is no risk of being burnt! 1. -
Page 40: Oven Door
Oven Door The oven door of your appliance may be removed for cleaning. Removing the oven door 1. Open the oven door completely. 2. Completely fold back the brass-coloured clamping lever on both door hinges. 3. Grip the oven door with both hands on the sides and close it to about 3/4 going past the point of resistance. -
Page 41: Oven Door Glass
Oven door glass The oven door is fitted with four sheets of glass set next to one another. The inner sheets can be removed for cleaning. Caution: The following steps are to be per- formed only when the oven door has been removed. - Page 42 Replacing the centre glass plates 1. From above, insert the centre plates obliquely into the retaining frame at the handle, one after another. 2. Lower the centre plates down and push them towards the lower edge of the door as far under the retaining frame as they will go.
-
Page 43: What To Do If
What to do if ... Symptom Possible cause Remedy The oven has not been switched The oven does not heat up. Switch on the oven. The time has not been set. Set the time. The necessary settings have not Check the settings. been made. -
Page 44: Technical Data
Technical Data Oven Interior Dimensions mensions Height x Width x Depth 31 cm x 41 cm x 41 cm Capacity (usable capacity) 52 l Regulations, Standards, Directives This appliance meets the following standards: • EN 60 335-1 and EN 60 335-2-6 relating to the safety of electric appliances for household use and similar purposes and •... -
Page 46: Index
Index Accessories ......8 Using the oven ......11 Baking tray . -
Page 47: Service
Service The section "What do I do if...“ lists some faults that you can remedy yourself. Look there first if a fault occurs. Is it a technical fault? Then contact your nearest customer service centre. Always prepare in advance for the discussion. By doing so you will make it easier to diagnose the fault and decide whether customer service is necessary.
Need help?
Do you have a question about the EOB6640 and is the answer not in the manual?
Questions and answers