Table of Contents
Advertisement
Quick Links
Advertisement
Table of Contents
Troubleshooting

Subscribe to Our Youtube Channel
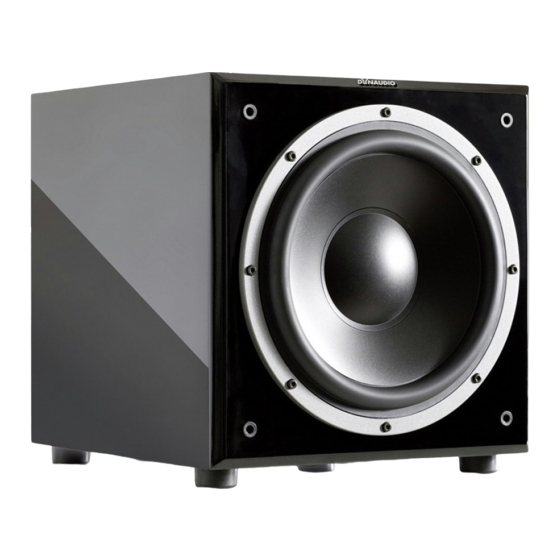
Related Manuals for Dynaudio SUB 600


Summary of Contents for Dynaudio SUB 600
- Page 1 Owners Manual Sub 600...
-
Page 2: Table Of Contents
Contents Contents Introduction ............1 SAFETY Important Safety Instructions . -
Page 4: Introduction
Dynaudio's enduring passion for musical truth. Dynaudio is one of very few companies who can realize such loudspeaker concepts through it's own in-house development and production facilities. These facilities are so advanced and the quality control is so strict that Dynaudio is TS16949 certified. -
Page 5: Safety
Dynaudio Sub 600... - Page 6 Important Safety Instructions 15. WARNING: To reduce the risk of fire or electric shock, this apparatus should not be exposed to rain or moisture and objects filled with liquids, such as vases, should not be placed on this apparatus. 16. To completely disconnect this equipment from the mains, disconnect the power supply cord plug from the receptacle.
-
Page 7: Before Operation
Indicates in combination with a safety sign a potentially hazardous situation which, if not avoided, could result in death or serious injury. DANGER Indicates in combination with a safety sign a hazardous situation which, if not avoided, will result in death or serious injury. Dynaudio Sub 600... - Page 8 How this operating manual is structured This operating manual is divided in three main chapters, in which you can find all the information needed to operate the Dynaudio Sub 600 successfully: • Before operation: Learn all about unpacking and connecting the subwoofer. The controls and connections on the rear panel are also described here.
-
Page 9: Unpacking
Refer also to chapter “Important Safety Instructions” on page 2. • Front baffle grille • AC mains lead. The supplied lead should be suitable for the region where the subwoofer was purchased. • Owners Manual Dynaudio Sub 600... - Page 10 Unpacking Grille The subwoofer can be operated without the grille. However, it is recommended that the grille is mounted during normal use to help prevent accidental damage or dirt settling on the cone of the loudspeaker. With subwoofers, the influence of the grille on the sound is virtually negligible.
-
Page 11: Controls And Connections
SAT Highpass setting and provided at the SAT Output connection for satellite speakers to be connected. ➒ ➓ • SAT Output: Output for satellite speakers to be connected. This signal is processed according to the SAT Highpass setting. FUSE T3.15A L 250V Dynaudio Sub 600... - Page 12 Controls and connections ➐ SUB I/O, To Slave ➋ • LFE/Slave IN: input for LFE signal from processor/receiver. Note that the signal must be a true LFE signal or already have been filtered by the processor/receiver, POWER GAIN PHASE as SUB Lowpass does not have an effect in combination with the LFE input. ➊...
-
Page 13: Operation
Only switch the subwoofer on (mains power switch to ON) after all connections and set up steps have been properly completed. Note: The Dynaudio Sub 600 can be controlled by any source provided with a LFE or preamplifier output. In the operating manual the expression “processor/receiver” will be used for all these sources. - Page 14 SUB I/O LFE/Slave In SAT/SUB Input The Dynaudio Sub 600 provides two different signal inputs: SUB I/O - LFE/Slave In This input allows the LFE (Low Frequency Effect) channel to be connected, which is used in Home Cinema systems to reproduce low frequency effects.
-
Page 15: Connecting A Single Subwoofer
You also can use both connection types. Both signals will be combined in the Sub 600 and routed accordingly. This allows the Sub 600 to reproduce both the LFE channel information as well as the bass range of the connected satellite speakers Dynaudio Sub 600... - Page 16 Connecting the subwoofer Multiple subwoofer connections The Dynaudio Sub 600 can be used stand-alone or together with multiple subwoofer POWER GAIN PHASE POWER GAIN PHASE units. Using multiple units may be helpful if the listening room is quite large or has difficult ON AUTO 0°...
- Page 17 (Front Out/Pre Out) with the subwoofer. The signals connected to the SAT/SUB Input are provided at the OUT - To Slave output for connecting another subwoofer. See page 13 to learn more about connecting multiple subwoofers. Dynaudio Sub 600...
-
Page 18: Switching The Subwoofer On/Off
Switching the subwoofer on/off Switching the subwoofer on/off Once you have ensured yourself that all necessary connections have been made, the 100-120V/220-240V subwoofer and the connected components can be switched on. ~ 50/60Hz 3.15A Switch the subwoofer ON with the main POWER switch on the rear panel. The status LED on the rear of the subwoofer will light up red. -
Page 19: Adjusting The Volume (Gain)
The correct volume setting is an important aspect in achieving a well balanced speaker POWER GAIN PHASE combination. Please also refer to “Specific tips” on page 28 for further information or ask your local Dynaudio dealer for assistance. ON AUTO 0° 180° Adjust the GAIN control, until correct setting is reached. Note: You can not adjust the volume, when subwoofer is in slave mode. -
Page 20: Selecting The Subwoofer Cut-Off Frequency (Sub Lowpass)
Selecting the subwoofer cut-off frequency (SUB Lowpass) Selecting the subwoofer cut-off frequency (SUB Lowpass) The SUB Lowpass control allows the frequency range of the subwoofer to be defined. SAT Highpass SUB Lowpass Above the selected frequency the sound level decreases rapidly. The correct setting of this cut-off frequency is important for a well balanced combination of subwoofer and Flat 60 Hz 80 Hz speakers. -
Page 21: Setting The Phase (Phase)
Choose the setting for which you experience the most bass. ON AUTO 0° 180° Note: You can not set the phase if the subwoofer is in slave mode. In this case the phase is controlled by the setting of the master subwoofer. Dynaudio Sub 600... -
Page 22: Setting The Satellite Cut-Off Frequency (Sat Highpass)
Therefore it makes sense to limit the bass range of the connected speakers (called “satellites” in this case) by a highpass filter. The Dynaudio Sub 600 provides three settings to achieve this: •... -
Page 23: Positioning The Subwoofer
Using non-music (such as action movies) material to position and adjust the subwoofer with, may lead to spectacular results with such material but almost always it will result in overblown and excessive bass when playing music with the same setting. Dynaudio Sub 600... - Page 24 Positioning the subwoofer Impact of room-modes Every listening environment will have specific “room-modes”, whereby in some specific locations in the room and at particular frequencies, the bass may be too much or too lean. This effect will be stronger in square and “shoe-box” shaped rooms. With a single subwoofer, the better position for the subwoofer relative to the listening position will be the one where bass is perceived to be neither too much nor too lean at any given frequency.
- Page 25 Avoid placing the subwoofer exactly half-way or at a quarter’s length of either sidewall. Particularly in smaller square or “shoe-box” shaped rooms the free standing position is recommended. Dynaudio Sub 600...
-
Page 26: Using Multiple Subwoofers
Positioning the subwoofer Using multiple subwoofers By using carefully positioned multiple subwoofers it is possible to even out the different room-modes and thus create a more coherent overall bass response in the room. It is worth experimenting with different locations around the room for the additional subwoofers, even using the rear of the room. -
Page 27: Optimizing Settings/Troubleshooting
It is recommended that you double-check the previous settings before moving on to the next one. Obtaining the best integration of the subwoofers generally involves a considerable amount of repeated fine-tuning. Dynaudio Sub 600... -
Page 28: Volume (Gain)
Volume (GAIN) Volume (GAIN) With the GAIN control you can adjust the relative volume level of the subwoofer to the POWER GAIN PHASE main speakers of the system: Play the same track a couple of times, adjusting the level so that the instrument sounds ON AUTO 0°... - Page 29 In the other case you will experience unnatural and bloated bass sound, if the overlapping area is too large. The combined frequency response shows a bump, as the sound pressure levels in this area are increased. Frequency Dynaudio Sub 600...
- Page 30 Cut-off frequencies Control possibilities The Dynaudio Sub 600 provides two controls to match the frequency response of the SAT Highpass SUB Lowpass subwoofer and the main speakers perfectly: • SUB Lowpass: The upper cut-off frequency of the subwoofer, which can be Flat 60 Hz 80 Hz continuously adjusted between 50 and 150 Hz.
- Page 31 Increase volume (GAIN), Increase SUB Lowpass step wise Large speaker, 50 Hz 60 Hz bass too bloated Decrease volume (GAIN), weaker amplifier SAT Highpass = 80 Hz bass too weak Increase volume (GAIN), Increase SUB Lowpass step wise Dynaudio Sub 600...
- Page 32 Cut-off frequencies Speaker/amplifier Recommended first setting If you experience ...try this this problem after first setting... SUB Lowpass SAT Highpass Medium sized speaker, 60 Hz Flat bass too bloated Decrease volume (GAIN), powerful amplifier SAT Highpass = 60 Hz, 80 Hz bass too weak Increase volume (GAIN), Increase SUB Lowpass step wise...
-
Page 33: Troubleshooting
There may be various reasons why the subwoofer doesn’t function properly in a system without it being faulty. The checklist below will help solve problems you may encounter. Before consulting your Dynaudio dealer, check this list first. Check this first: ... - Page 34 Troubleshooting Problem Cause Solution The subwoofer switches itself off There is hardly any low-frequency signal available. This can The subwoofer will switch on automatically as soon although music is being played. happen if the music or movie itself does not contain very low as low frequent signals are detected.
-
Page 35: Technical Information/Warranty
Touching the drive units may damage them. Do not touch the drive units by hand when cleaning the cabinet. To clean the cabinet: Use a moistened cloth or a mild detergent. Do not use aggressive cleaning solutions. Dynaudio Sub 600... -
Page 36: Changing The Fuse
Care and Maintenance Changing the fuse Risk of Fire WARNING For continued protection against risk of fire, replace only with same type fuse and rating. The fuse is placed on the rear of the subwoofer below the mains power input. It can be 100-120V/220-240V changed without removing the amplifier module. -
Page 37: Warranty
Should warranty service be required, it must be arranged for in the country of purchase by an authorized Dynaudio dealer. For additional information about the Dynaudio warranty conditions please visit the Dynaudio website www.dynaudio.com. Dynaudio Sub 600... -
Page 38: Technical Specifications
Technical specifications Technical specifications Parameter Sub 600 System Active subwoofer Bass principle Closed box Frequency response 18 – 250 Hz (± 3 dB) Low frequency limit (-3 dB) 18 Hz High frequency limit 50 – 250 Hz • SUB input 150 Hz •... - Page 42 Sales & Marketing: Dynaudio International GmbH, Ohepark 2, 21224 Rosengarten, Germany, Phone: +49 4108 - 41 80 - 0 www.dynaudio.com © Dynaudio International GmbH, Sub 600 Owners Manual 0611, Item No. 4552168. All text and image copyrights reserved. Subject to change without notice.
Need help?
Do you have a question about the SUB 600 and is the answer not in the manual?
Questions and answers